Skip to content
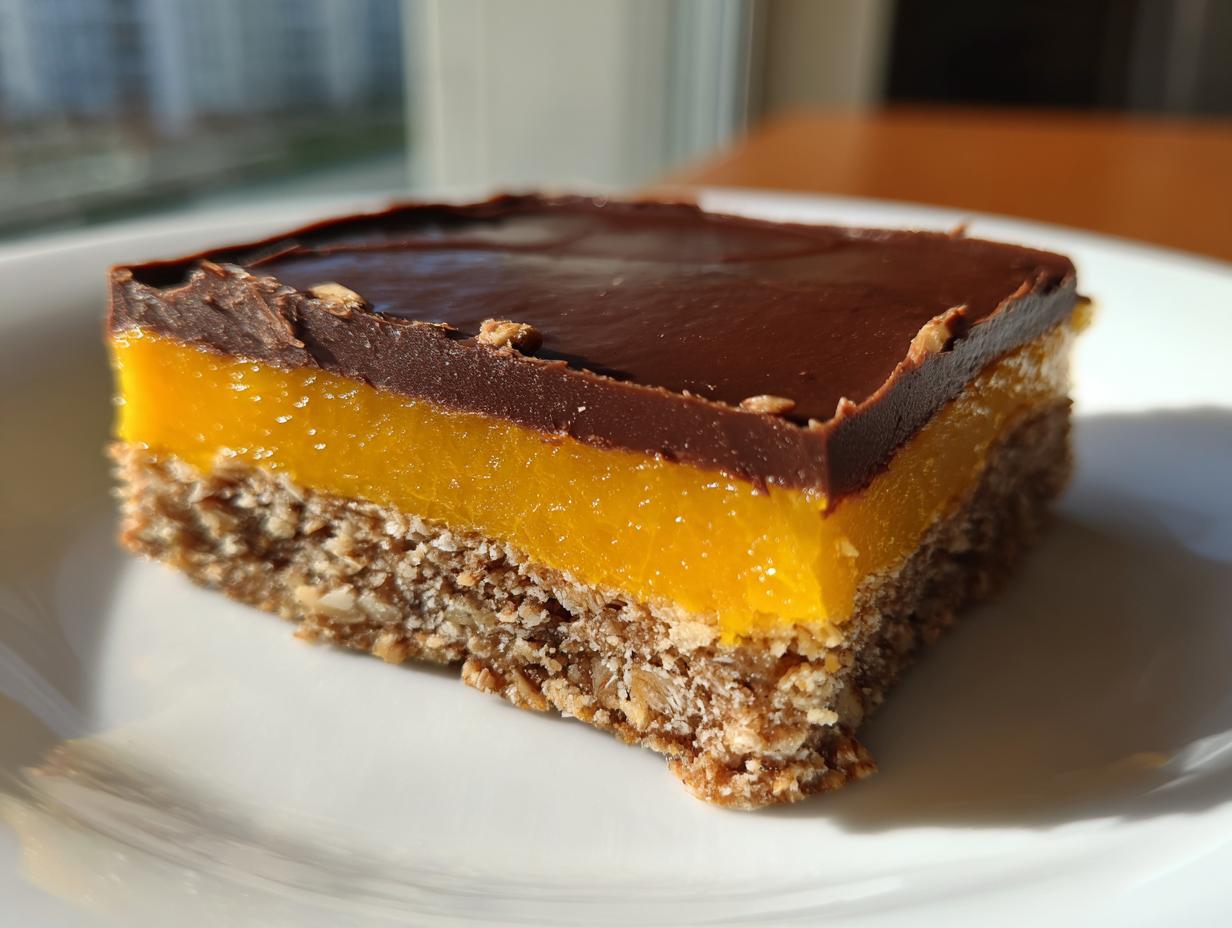
If you’re anything like me, you crave a treat that hits that perfect spot between bright and rich. So let me tell you about my absolute favorite easy dessert right now: these decadent Chocolate Orange Bars. Honestly, they are a game-changer for quick sweets!
I’m Anna Kowalska, and here I share tried-and-true homemade recipes that you and your family will love. Everything I post here is made with heart and flavor, and I only share things that actually work perfectly the first time around. We’ve all been there with tricky desserts, right? Well, these layered bars are practically foolproof because they are no-bake!
Why You Need These Chocolate Orange Bars Today
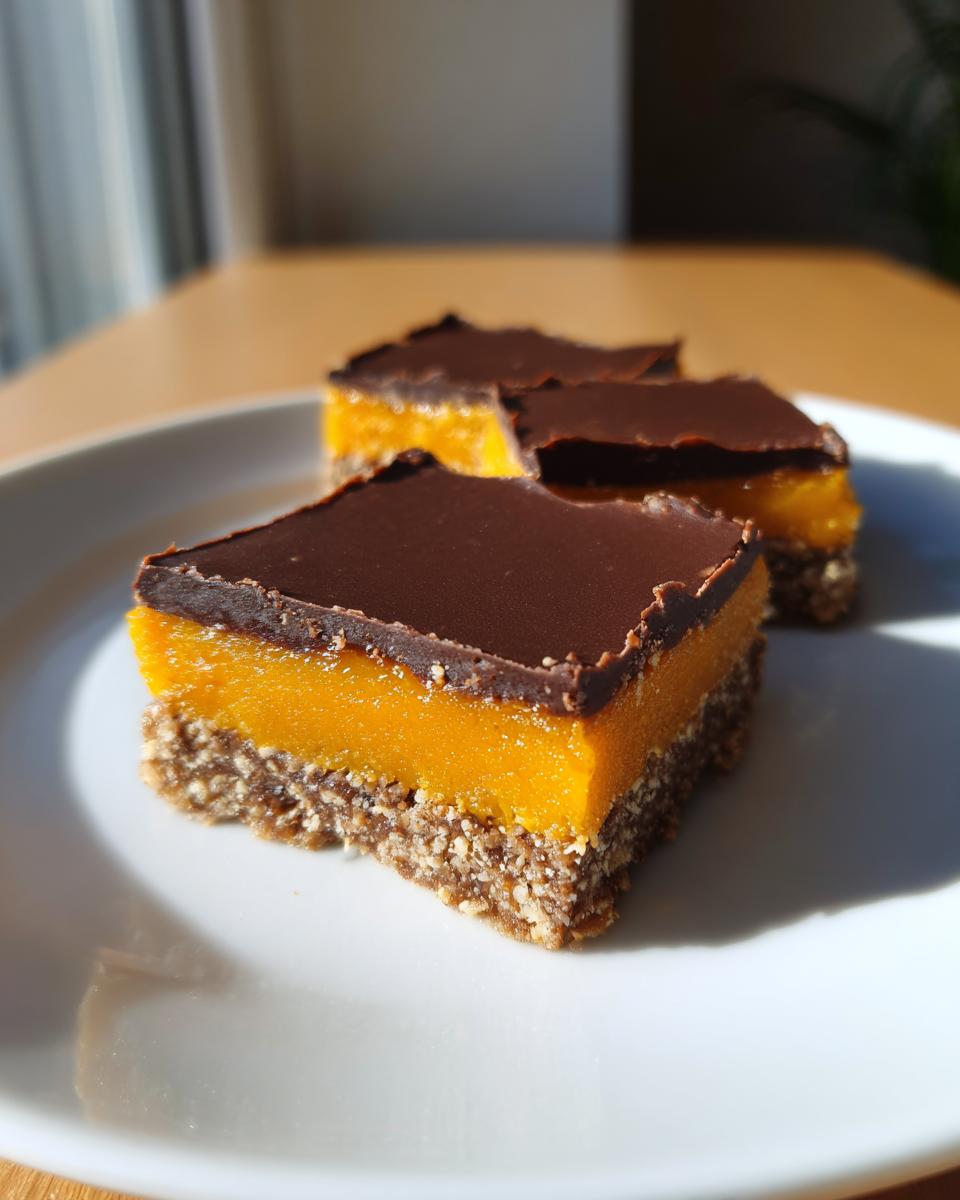
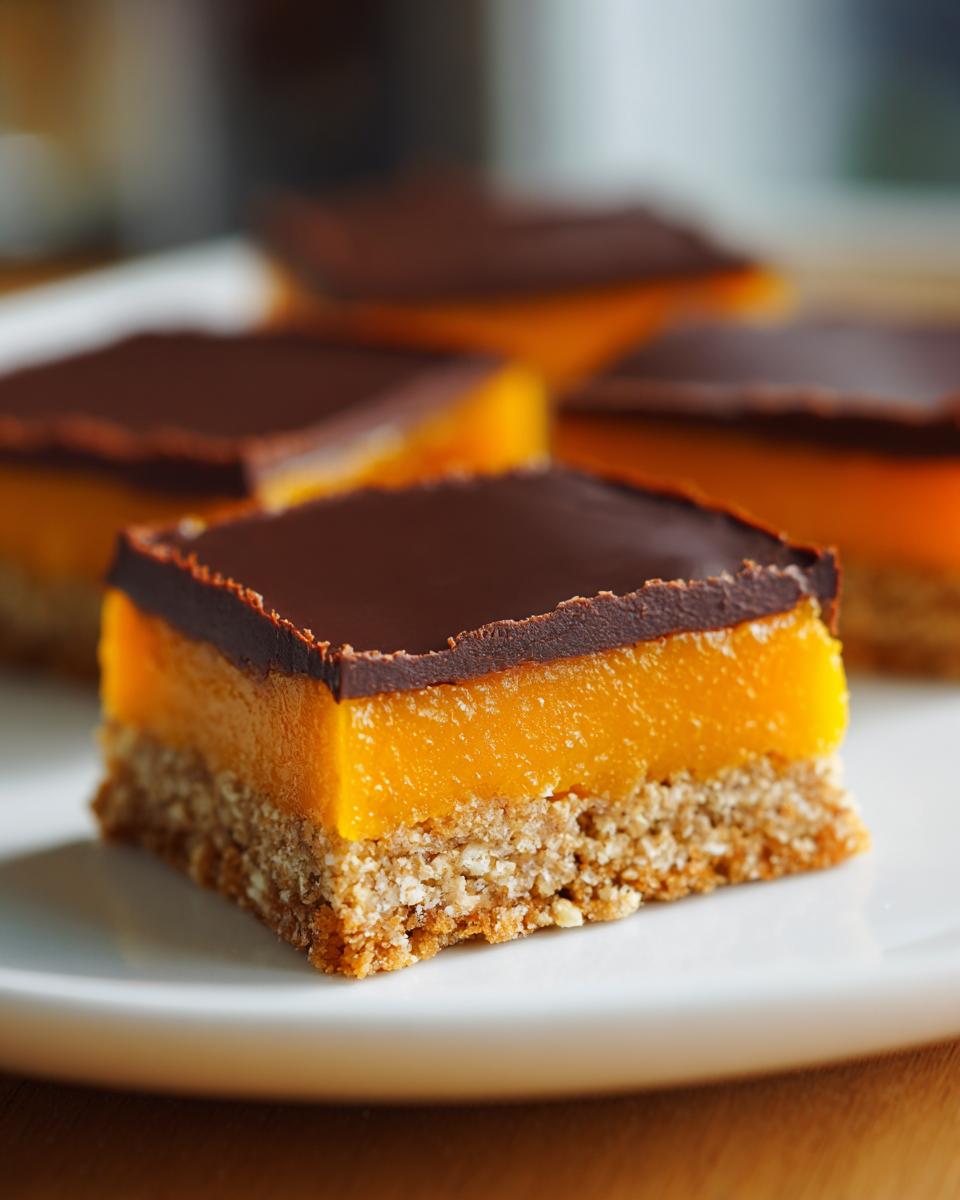
What I love most about these Chocolate Orange Bars is that incredible pop of citrus cutting through that deep, dark chocolate layer. It just screams “special occasion” even though they take almost no time at all. Trust me, you don’t need to turn on the oven for this one. As Anna Kowalska, my goal is always to give you reliable recipes that deliver huge flavor without hours of fuss. These bars are proof of that philosophy—they come together with simple ingredients and deliver that perfect balance of bright citrus flavor and rich chocolate topping over a sturdy, oaty base. They are the kind of treat that disappears the moment you set them out!
Jump to:
Gathering Your Supplies for Chocolate Orange Bars
Before we dive into the fun part—layering all that deliciousness—we need to make sure our kitchen is set up. This is a no-fuss recipe, but having the right equipment makes assembling these Chocolate Orange Bars even smoother. You don’t need fancy gadgets, just the basics!
Essential Tools for Perfect Chocolate Orange Bars
- An 8×8 inch square pan. This size keeps the layers nice and thick!
- Parchment paper. You absolutely need this for easy lifting later.
- Two medium mixing bowls. One for the base, one for the orange filling.
- A small saucepan or microwave-safe bowl for melting the chocolate topping.
- A rubber spatula for pressing and spreading.
Ingredients for the Ultimate Chocolate Orange Bars
Gathering your ingredients is half the battle won, especially for a no-bake recipe where every component needs to shine through. Don’t try to substitute the coconut oil here; it’s what helps everything set up perfectly in the fridge. I’ve listed everything out below so you can check your pantry. Remember, these measurements are important for getting those clean layers in your final Chocolate Orange Bars!
| Component | Ingredient | Amount |
|---|---|---|
| Base Layer | Crushed Oat Biscuits | 1\u00bd cups |
| Base Layer | Coconut Oil | \u2153 cup |
| Orange Layer | Coconut Cream | \u00bd cup |
| Orange Layer | Orange Juice (freshly squeezed is best!) | \u00bc cup |
| Orange Layer | Maple Syrup | 2 tbsp |
| Chocolate Layer | Dairy Free Chocolate Chips | 1\u00bd cups |
| Chocolate Layer | Coconut Oil | 2 tbsp |
Base Layer Components
For the base, you need a good cup and a half of crushed oat biscuits—make sure they’re crushed fine, almost like coarse sand! Mix that with the \u2153 cup of coconut oil. When you press this into the pan, really use the bottom of a flat glass or your knuckles to pack it down. A firm base stops the whole thing from crumbling later!
Bright Orange Filling Ingredients
This is where the magic happens! You’ll need \u00bd cup of coconut cream, which should be nice and thick, not watery. Stir that together with the \u00bc cup of orange juice and 2 tablespoons of maple syrup. Just whisk it until it looks totally uniform. Don’t worry about over-mixing this part; you just want everything incorporated smoothly before it hits the base.
Rich Chocolate Topping Mix
For the decadent top, we just need 1\u00bd cups of dairy-free chocolate chips and 2 tablespoons of coconut oil. We’re melting these gently, so make sure your chocolate is good quality—it makes a difference in the final snap of the bar. Keep the oil handy; it helps the chocolate stay silky smooth when it melts.
Step-by-Step Instructions for No-Bake Chocolate Orange Bars
Okay, time to assemble these beauties! Since these are no-bake, our main tool is the freezer, not the oven. Don’t rush the setting times, or you’ll end up with a gooey mess instead of perfect Chocolate Orange Bars. Seriously, patience during the freeze time is the secret weapon here.
Creating the Oat Biscuit Base
First things first: grab that 8×8 inch pan and line it completely with parchment paper. Make sure the paper hangs over the sides a little bit—that’s your handle for lifting the whole slab out later! In a bowl, mix your crushed oat biscuits with the coconut oil until everything looks wet and crumbly. Now, dump that mixture into your lined pan. You need to press this base down *really* firmly. I use the bottom of a measuring cup for this; you want it packed tight so it doesn’t break apart when you slice it.
Setting the Vibrant Orange Layer
While your base is chilling, mix up that bright orange filling. Just stir the coconut cream, orange juice, and maple syrup together until they are looking uniform—no streaks of white cream allowed! Pour this mixture right over your pressed oat base. Use your spatula to gently spread it out so it’s an even layer across the entire surface. Now, this is important: get this pan into the freezer for a full hour. It needs to be rock solid before we put the chocolate on top, or they will just bleed together!
Melting and Pouring the Chocolate Topping
Once that orange layer is beautifully firm, it’s time for the chocolate! You can do this over a double boiler, but honestly, I just microwave mine. Put the dairy-free chocolate chips and the 2 tablespoons of coconut oil in a bowl. Microwave in 30-second bursts, stirring really well between each burst. Stop microwaving the second you see just a tiny bit of unmelted chip left, and keep stirring until it’s all smooth and glossy. Carefully pour this melted chocolate over the set orange layer. Work quickly but gently, spreading it to the edges. Back into the freezer it goes—this time for just 20 minutes until the top is completely set.
Slicing and Finishing Your Chocolate Orange Bars
After that final freeze, you can pull the whole thing out using those parchment handles! Place the slab on a cutting board. Here’s a little trick: run a sharp knife under hot water, wipe it dry quickly, and then slice. The heat helps the knife glide through the hard chocolate and firm orange layer without cracking them. Slice it into 12 nice bars. These Chocolate Orange Bars hold their shape best when kept cold, so pop them right back into the fridge until you’re ready to serve!
Tips for Making Perfect Chocolate Orange Bars
Listen, I love that these are no-bake, but that also means we have to be a little careful with the temperature, or we end up with a sticky mess instead of beautiful Chocolate Orange Bars. These tips are things I learned the hard way—like trying to cut them straight out of the freezer when they were rock solid!
Achieving a Clean Slice
The biggest challenge with any layered bar like this is getting those clean edges. If you try to cut them when they are fridge-cold, the chocolate layer might chip, or the base might squish. My secret is the warm knife trick I mentioned! Wipe your knife under hot water, dry it fast, and then slice through. You might need to rinse and wipe a couple of times as you go, but it makes the difference between a professional-looking bar and something that looks like a toddler attacked it! It ensures that beautiful separation between the layers.
Ensuring Layer Separation
The most critical step for keeping your layers distinct is patience during the first freeze. You absolutely cannot rush that orange layer! If it’s even slightly soft when you pour the warm chocolate over it, they will merge, and you won’t get that lovely visual contrast. I always stick my hand near the pan after the first hour—if you feel any softness or give, put it back in for another 15 minutes. It’s better to wait a bit longer than to have a flavor swirl instead of distinct layers in your Chocolate Orange Bars!
Ingredient Notes and Substitutions for Chocolate Orange Bars
I get asked all the time if you can swap out the coconut products here, and honestly, for these Chocolate Orange Bars to set up right without baking, we have to be a little strict! The coconut oil and cream are doing the heavy lifting that butter and eggs usually do in a baked good. They solidify beautifully in the cold, giving us that perfect sliceable texture.
Handling Coconut Products
You must use full-fat coconut cream, not the light stuff from a carton. The light cream is mostly water and won’t firm up enough to hold the orange layer. If you chill your can of full-fat coconut cream overnight, the thick cream separates at the top—scoop that thick part out for the recipe! The coconut oil is also non-negotiable; it’s what makes the base and the topping snap when cold. Stick to the specified amounts for the best results!
Sweetener Choices
I love maple syrup because it adds a lovely earthy note that balances the bright orange zestiness, but if you absolutely must substitute it in the orange layer, agave nectar is the closest runner-up. Since this is a no-bake recipe, we need liquid sweeteners that dissolve easily. Please avoid using granulated sugar in the orange layer—it won’t dissolve properly and will leave your beautiful Chocolate Orange Bars feeling gritty.
Storing and Serving Your Chocolate Orange Bars
Because these are no-bake and rely on coconut oil to hold their shape, storage is super important! If you leave these lovely Chocolate Orange Bars on the counter, especially on a warm day, they turn into a puddle of deliciousness—but not the kind you can pick up! They need the cold to stay solid and keep those layers looking sharp.
Best Practices for Storing Layered Chocolate Bars
The golden rule here is refrigeration. As soon as you slice them, move them into an airtight container. If you stack them, put a small piece of parchment paper between each bar so the chocolate topping doesn’t stick to the layer below it. I find they taste best if they chill for at least an hour after slicing, which lets the chocolate firm up one last time. They won’t last long once people find out you made them, but if you need to save them for later, the fridge is your best friend!
| Storage Method | Duration | Notes |
|---|---|---|
| Refrigerator (Airtight) | Up to 1 week | Best texture; keeps layers firm. |
| Freezer (Wrapped) | Up to 1 month | Thaw in the fridge for 30 minutes before serving. |
Frequently Asked Questions About Chocolate Orange Bars
I always get questions when I post these, because they look so fancy, but they are actually so easy! People often ask about changing the method or how long they stay good. Here are the answers to the most common things I hear about my favorite Chocolate Orange Bars.
Can I Bake These Citrus Dessert Bars?
Nope! That’s the beauty of this recipe—it’s completely no-bake. If you try to bake these, the coconut oil will melt out immediately, the orange layer will turn into a weird soup, and the oat base won’t hold together. The structure relies entirely on the cold temperature of the fridge or freezer to solidify the coconut fat. Trying to bake these citrus dessert bars would just be a sticky disaster!
How Long Do These Orange Chocolate Bars Last?
Because we aren’t using eggs or heavy dairy, they keep pretty well, but you must keep them cold. Honestly, they are at their absolute peak in texture for the first three days. In the refrigerator, tightly sealed, they should last up to a week. If you need to keep them longer, the freezer works great, but remember to let them thaw slightly before slicing or eating so the chocolate isn’t too hard!
Do I Have to Use Dairy Free Chocolate Chips?
You certainly don’t *have* to, but I developed this recipe using dairy-free chips because my sister is sensitive to dairy, and they melt so beautifully and cleanly with the coconut oil! If you use regular semi-sweet chips, they will work, but they might set up a little harder than the dairy-free varieties. Either way, make sure you melt them slowly!
Sharing Your Recipe Experience
I put my heart into making sure these Chocolate Orange Bars turn out perfectly for you, just like they do for my family. Now it’s your turn! When you make this recipe, I want to hear all about it. Did the citrus pop the way you hoped? Let me know in the comments below!
Please, give it a star rating if you loved it, and don’t forget to snap a picture and share it with me on social media. Seeing your beautiful layered bars makes my day!
Estimated Nutrition for Chocolate Orange Bars
I always put these numbers together just as a guideline, because let’s be real, when you make something this delicious, you tend to eat a slightly bigger piece! The nutrition estimates for these Chocolate Orange Bars are based on splitting the recipe into 12 equal servings. Since we used coconut oil and maple syrup, the fat content is a bit high, but wow, is it worth it!
Nutritional Data Table
| Nutrient | Amount (Per Bar) |
|---|---|
| Calories | 250 |
| Fat | 18g |
| Carbohydrates | 22g |
| Protein | 3g |
| Sugar | 18g |
Remember, this is an estimate! If you use a different type of chocolate or sweetener, the final numbers will shift slightly. Enjoy them, and don’t sweat the details too much!
Print
Amazing 12 No-Bake Chocolate Orange Bars
- Total Time: 1 hour 20 minutes
- Yield: 12 bars
- Diet: Vegetarian
Description
Make these decadent Chocolate Orange Bars. This recipe delivers a bright citrus flavor layered with a rich chocolate topping and a simple oat biscuit base. You will love this easy, no-bake treat.
Ingredients
- Base Layer: 1½ cups crushed oat biscuits
- Base Layer: ⅓ cup coconut oil
- Orange Layer: ½ cup coconut cream
- Orange Layer: ¼ cup orange juice
- Orange Layer: 2 tbsp maple syrup
- Chocolate Layer: 1½ cups dairy free chocolate chips
- Chocolate Layer: 2 tbsp coconut oil
Instructions
- Line a pan with parchment paper.
- Combine the crushed oat biscuits and coconut oil. Press this mixture firmly into the bottom of the prepared pan to form the base layer.
- In a separate bowl, stir together the coconut cream, orange juice, and maple syrup until well combined. Spread this orange mixture evenly over the base layer.
- Freeze the pan for 1 hour until the orange layer is firm.
- Gently melt the dairy free chocolate chips and coconut oil together until smooth.
- Pour the melted chocolate mixture over the set orange layer.
- Freeze for an additional 20 minutes until the chocolate sets.
- Remove the slab from the pan and slice it into individual bars.
Notes
- Keep refrigerated for best texture.
- Prep Time: 15 minutes
- Cook Time: 5 minutes
- Category: Dessert
- Method: No-Bake
- Cuisine: American
Nutrition
- Serving Size: 1 bar
- Calories: 250
- Sugar: 18g
- Sodium: 45mg
- Fat: 18g
- Saturated Fat: 14g
- Unsaturated Fat: 4g
- Trans Fat: 0g
- Carbohydrates: 22g
- Fiber: 2g
- Protein: 3g
- Cholesterol: 0mg