Skip to content
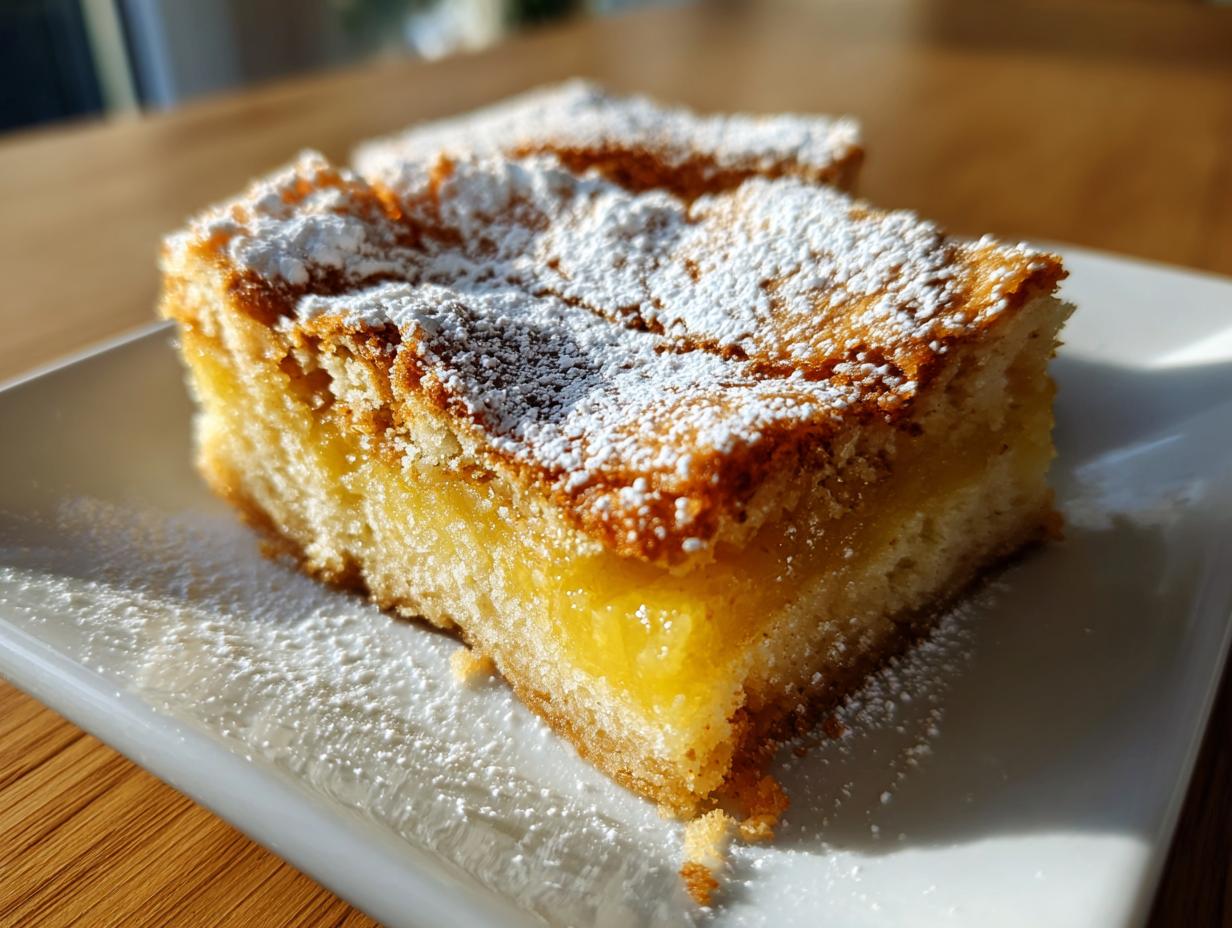
When I think about baking that instantly brightens up a dreary afternoon, my mind goes straight to the magic lemon cobbler. Trust me, this isn’t your heavy, biscuit-topped cobbler; this is sunshine baked into a dish! My name is Anna Kowalska, and here I share tried-and-true homemade recipes that you and your family will love. Everything I put on this site is made with heart and flavor, the kind of baking that makes people ask for the recipe before they even finish their first bite.
I discovered this particular recipe years ago when I was trying to capture the sharp, clean taste of early spring lemons in a dessert that didn’t require fussy layers or complicated chilling times. I wanted something that felt like a hug but tasted like a zingy vacation. This cobbler delivers that perfectly: a soft, fluffy top layer sitting right above a bubbling, luscious lemon filling. It’s truly baking magic! It’s so simple, you’ll be amazed by the transformation that happens in the oven. 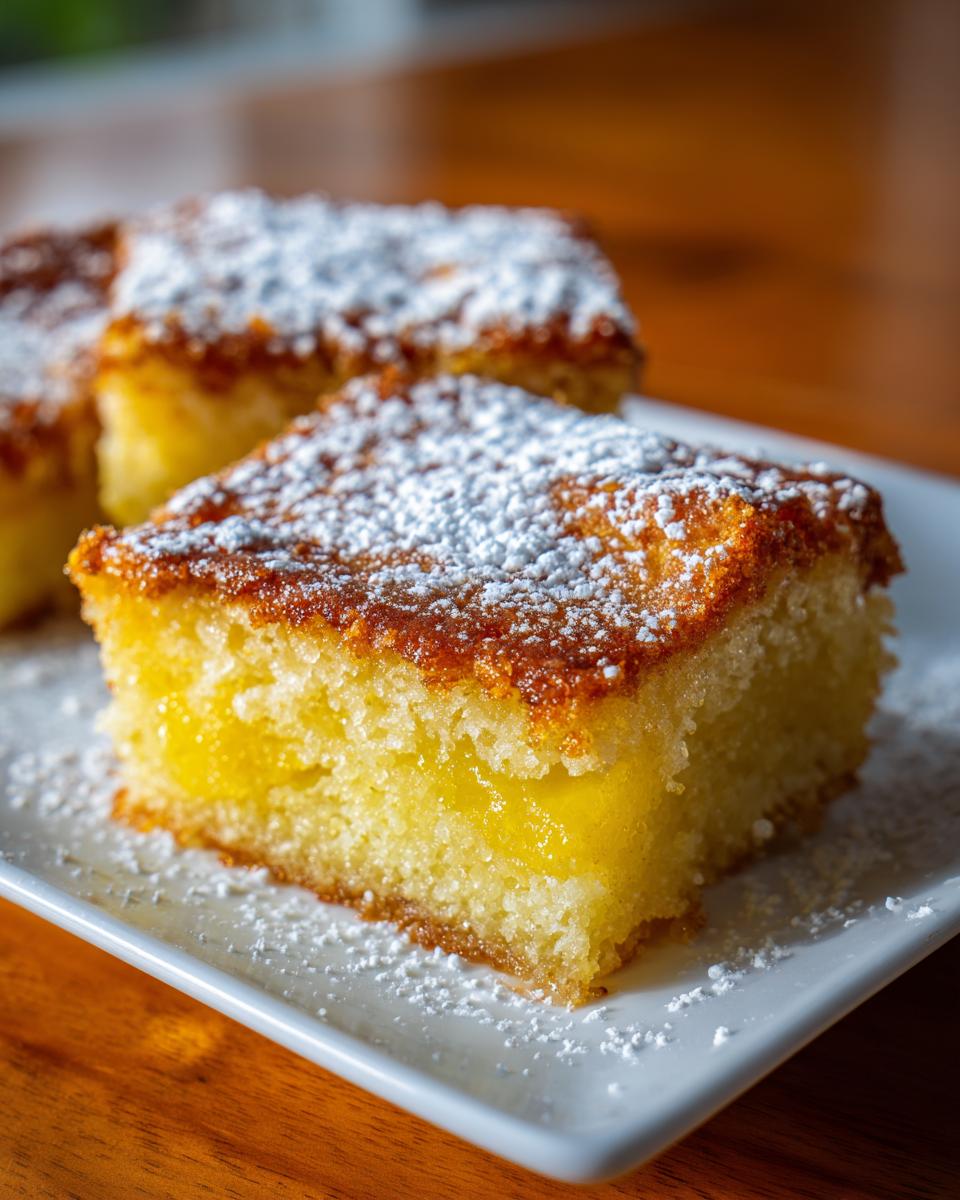
No heading needs to be written for the introduction. This magic lemon cobbler is a staple in my house now, and I just know it’s going to become one in yours too. Let’s get baking!
Jump to:
Why You’ll Love This magic lemon cobbler Recipe
This dessert is my go-to when I need something impressive without spending half the day in the kitchen. It’s one of those recipes that seems almost too easy for the incredible result it produces. Seriously, the transformation is unbelievable! It’s bright, it’s comforting, and it hits that sweet spot between dessert and tangy treat.
If you’re looking for an easy cobbler that guarantees smiles, look no further. Here are the main reasons this recipe sings:
Key Features of This magic lemon cobbler
- It comes together in less than 15 minutes of active prep time—you just mix and pour!
- The texture is unique: a light, almost cake-like topping floats over a gooey, sweet-and-sour lemon sauce.
- It uses simple pantry staples, so there’s rarely a need for a special grocery run.
- The flavor is intensely bright and citrusy, perfect for cutting through rich meals.
Equipment Needed for Your magic lemon cobbler
You don’t need a whole arsenal of fancy gadgets for this dessert. Honestly, if you can whisk and pour, you’re halfway there! Having the right size dish makes sure the separation happens just right, which is the whole trick to this dish. Don’t stress if you don’t have a whisk; a sturdy fork works in a pinch, but do try to use the right size pan.
Essential Baking Tools
- A 9×9 inch square baking dish (this size is important for the layers!).
- One medium mixing bowl for the batter.
- A whisk or a sturdy fork.
- Measuring cups and spoons.
- A rubber spatula for scraping down the bowl.
Gathering Ingredients for the magic lemon cobbler
Okay, let’s talk about what goes into this sunny dessert. The ingredient list looks simple, right? And that’s part of the beauty! And that’s part of the beauty! But just because there aren’t a mile-long list of items doesn’t mean we can skip on quality here. In fact, because there are so few ingredients, each one really needs to pull its weight. If you take away just one piece of advice from me, Anna, it’s this: use real lemons. You simply won’t get that bright, zesty punch from anything else.
When you gather these items, make sure your butter is measured after melting, and have your milk and extracts ready to go. This recipe moves fast once you start combining things, so having everything laid out on the counter—my favorite practice, mise en place!—is a lifesaver.
| Ingredient | Amount | Preparation Note |
|---|---|---|
| Granulated Sugar | 1 cup | Standard measurement |
| All-Purpose Flour | ½ cup | Measure carefully |
| Baking Powder | ¼ teaspoon | For the lift |
| Salt | ¼ teaspoon | Balances the sweetness |
| Milk | 1 cup | Room temperature is fine |
| Unsalted Butter | ½ cup | Must be melted |
| Lemon Zest | 1 tablespoon | From fresh lemons |
| Fresh Lemon Juice | ½ cup | Freshly squeezed only! |
| Vanilla Extract | ¼ teaspoon | Just a touch of warmth |
| Powdered Sugar | As needed | For dusting after baking |
Ingredient Notes and Quality Tips
I really can’t stress this enough: the flavor of this magic lemon cobbler hinges on using fresh lemon juice and zest. Bottled juice just tastes dull and often has preservatives that interfere with the subtle chemical reaction that creates the fluffy top layer. When you zest the lemon, try to get just the bright yellow part, avoiding the bitter white pith underneath. That zest is where all the intense, sunny aroma lives! If you use fresh lemons, you’ll notice the batter smells incredible even before it hits the oven. It’s worth the extra five minutes of squeezing juice; trust me on this one!
Step-by-Step Instructions for Your magic lemon cobbler
This is where the fun starts! The process is so straightforward, but the order of operations is everything here. You need to get your oven hot and your dish ready before you even start mixing, because once the milk hits the dry ingredients, the baking powder gets activated and we want that reaction to happen in the oven, not sitting on the counter.
Preparing the Batter for the magic lemon cobbler
First things first: crank that oven up to 350 degrees Fahrenheit. While it’s heating up, take a moment to grease your 9×9 inch baking dish. A little butter or cooking spray works just fine. Now for the mixing! Grab your medium bowl and whisk together all your dry goods: the sugar, the flour, the baking powder, and that pinch of salt. Make sure you whisk them well so the leavening agent is evenly distributed—we don’t want any clumps of baking powder hiding in there!
Next, we add the wet ingredients right into that dry mix. Pour in your cup of milk, your melted butter (make sure it’s not piping hot, just melted!), the lemon zest, the fresh lemon juice, and that dash of vanilla. Now, stir gently. I mean it—gently! You just want to combine everything until it’s smooth. The batter will look surprisingly thin, almost like watery pancake batter. That is exactly what you want! Don’t panic when it’s thin; that’s the secret sauce. Once it’s combined, pour it straight into your prepared dish. Do not stir it after it’s in the pan! Just pour it evenly across the bottom. Resist the urge to smooth the top or mess with it!
Baking and Cooling the magic lemon cobbler
Slide that dish right into your preheated oven. It needs to bake for about 40 to 45 minutes. Keep an eye on it after the 35-minute mark. You’re looking for that beautiful golden-brown color on top. To check for doneness, use the toothpick test—insert one right into the center. If it comes out clean, you’re good to go; if you see wet batter clinging to it, give it another five minutes.
When it’s done, pull it out carefully because that lemon filling is scorching hot! Let the magic lemon cobbler rest on the counter for a solid 10 minutes. This resting time allows the filling to set up just a little bit before you serve it. After that short wait, dust it generously with powdered sugar while it’s still warm, and dig in! 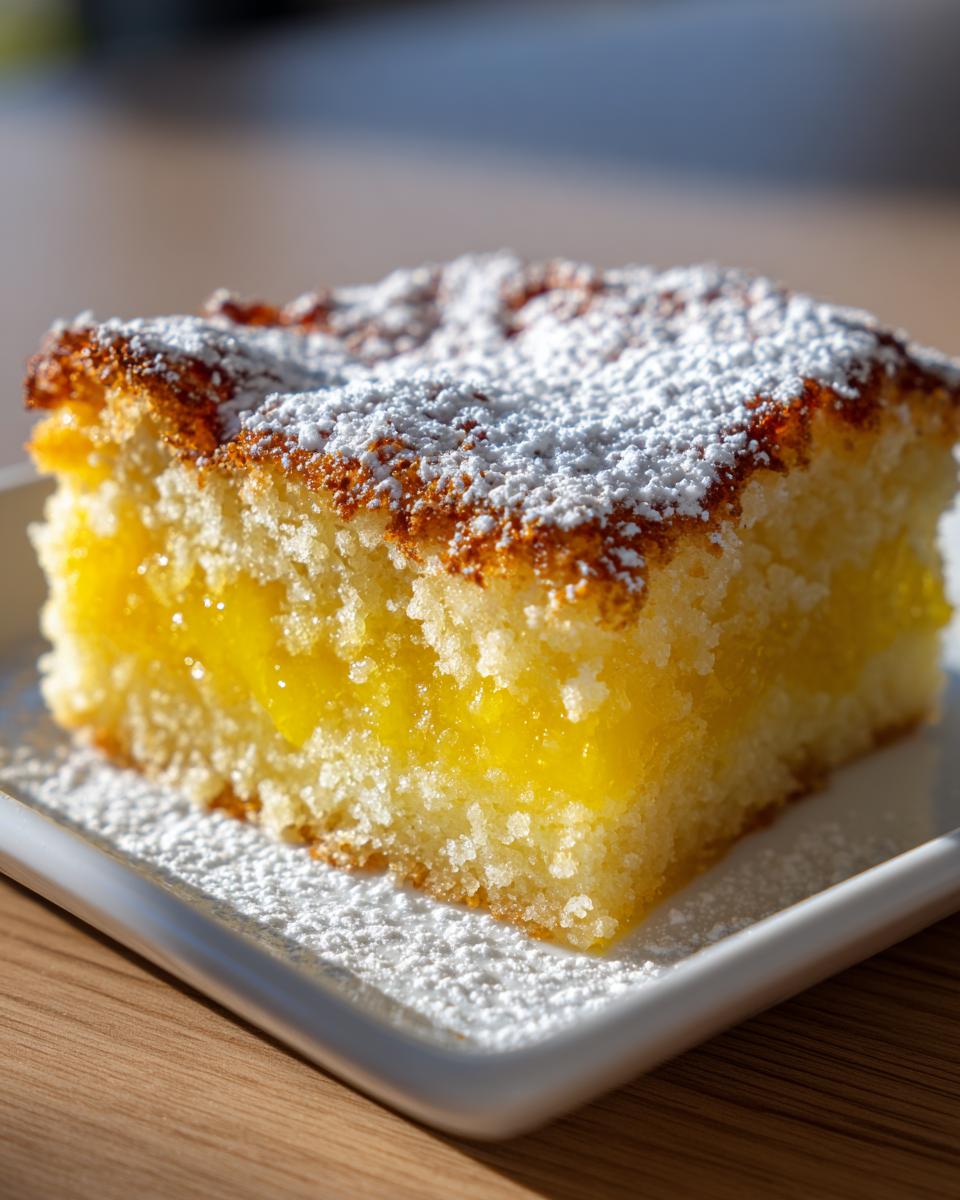
Tips for Perfecting Your magic lemon cobbler
This recipe relies on a bit of kitchen chemistry, and if you rush a step or use the wrong pan, you might end up with a lemon cake instead of a cobbler. Don’t worry, I’ve made all the rookie mistakes so you don’t have to! The trick to this dessert isn’t just the ingredients; it’s how you treat them. Remember, this is the recipe that I, Anna, rely on when I need guaranteed success, so follow these pointers closely, especially regarding temperature and mixing.
The biggest mistake people make is stirring the batter after it’s in the dish. Once that thin batter hits the heat, the separation process begins, and you absolutely must let the oven do its job undisturbed. Don’t even peek for the first 30 minutes!
Achieving the Fluffy Topping
The reason this is called a “magic” lemon cobbler is because the batter divides itself while baking. It’s wild! When you mix the thin batter, the heavier ingredients—like the flour and sugar—sink to the bottom, forming that luscious, tangy lemon filling. Meanwhile, the lighter components, mixed with the milk and heat, rise to the top, creating that beautiful, airy, cake-like topping.
If your topping isn’t fluffing up, it usually means one of two things happened: either your oven wasn’t hot enough when you put it in, or you over-mixed the batter initially, preventing the ingredients from settling properly. Make sure your baking powder is fresh, and don’t stir it once it’s poured into the dish. That undisturbed baking time is what lets the layers form perfectly!
Serving Suggestions and Variations
This magic lemon cobbler is fantastic on its own—it’s got the tang and the sweetness all bundled up—but sometimes you just need a little something extra on the side to round out the experience. When I serve this warm, it truly feels like the perfect ending to any meal. It’s bright enough for a summer evening but comforting enough for a chilly night, too.
Since the flavor is so intensely lemony, you don’t want to overpower it with heavy sauces. Keep the additions light and fresh so that bright citrus note still shines through. It’s all about balance, just like with anything else I bake! If you are interested in other citrus desserts, you might enjoy this lemon raspberry cookies recipe.
Simple Serving Pairings
- A dollop of unsweetened whipped cream cuts the tartness just enough without adding too much extra sugar.
- A scoop of good quality vanilla bean ice cream is heavenly when the cobbler is still warm.
- Fresh raspberries or sliced strawberries add a beautiful color contrast and extra freshness.
- For a richer touch, a drizzle of good quality lemon curd right before serving works wonders.
Storage and Reheating Instructions for Leftover magic lemon cobbler
Don’t worry if you have leftovers, because honestly, this magic lemon cobbler tastes great the next day too! The texture might change slightly—the topping can soften up a bit when refrigerated—but it’s still delicious. You want to keep the air out so it doesn’t dry out or absorb any weird fridge smells. Just make sure it cools down completely before you cover it up. Nobody likes soggy topping!
Reheating is simple, but you have to be gentle with it, especially if you want to bring back a little bit of that warm, fluffy texture.
| Storage Aspect | Guideline |
|---|---|
| Storage Container | Airtight container or covered tightly with plastic wrap |
| Refrigerator Life | Up to 3 days |
| Reheating Method | Warm gently in the microwave for 20-30 seconds, or in a 300°F oven for 10 minutes |
Frequently Asked Questions About This magic lemon cobbler
I always get so many questions when people first try this recipe because they can’t believe how simple it is for such a stunning lemon dessert! It’s natural to have a few worries when you’re dealing with a batter that looks so thin, but I promise, these answers will put your mind at ease. I’ve tried to cover all the common sticking points so your first attempt at this easy cobbler is a huge success. If you are curious about the science behind baking, you can read more about the science of baking.
Can I make this magic lemon cobbler ahead of time?
You certainly can prepare this ahead, but I highly recommend baking it the same day you plan to serve it for the best texture. If you must prep early, you can mix the dry ingredients and keep them separate from the wet ingredients for up to 24 hours. When you’re ready to bake, just combine them quickly and pour into the pan. If you have leftovers, store them covered tightly in the fridge. It’s best served warm, so a quick zap in the microwave or a short time in a low oven will refresh it nicely.
What is the secret behind the ‘magic’ texture?
The real magic of this lemon cobbler lies in the density difference between the ingredients. When you pour the thin batter into the hot dish, the heavier sugar and flour sink down to the bottom as the dish heats up. This creates that thick, luscious lemon filling layer. The lighter milk and butter mixture rises to the top, cooks into that wonderful fluffy topping, and voilà—you get two textures in one dish without stirring! It’s pure science making your dessert better!
Can I use bottled lemon juice in this recipe?
Oh, I really advise against it if you want that true, vibrant flavor that makes this dish special. Bottled lemon juice often tastes flat or metallic, and it just doesn’t have the bright acidity needed to help the batter separate correctly. If you absolutely cannot get fresh lemons—and I mean *cannot*—you can use bottled, but know that the flavor won’t be as sharp or tangy. For the best result, always opt for real, freshly squeezed juice and zest! If you are looking for other great lemon recipes, check out my lemon blueberry sheet cake.
Share Your Thoughts on This Recipe
I truly hope this easy cobbler brings a little bit of sunshine to your table! I put my heart into making sure this recipe works perfectly for you. If you whipped up this magic lemon cobbler, please let me know how it turned out! Drop a comment below telling me your favorite part, and don’t forget to give it a star rating so other bakers know it’s a winner! If you are looking for more baking inspiration, you can browse all my desserts here.
Print
magic lemon cobbler: 1 amazing result
- Total Time: 1 hour
- Yield: 6 servings 1x
- Diet: Vegetarian
Description
This magic lemon cobbler is bright, tangy, and easy to make. It creates a sunny dessert with a soft, fluffy top and luscious lemon filling—pure baking magic!
Ingredients
- 1 cup granulated sugar
- ½ cup all-purpose flour
- ¼ teaspoon baking powder
- ¼ teaspoon salt
- 1 cup milk
- ½ cup unsalted butter, melted
- 1 tablespoon lemon zest
- ½ cup fresh lemon juice
- ¼ teaspoon vanilla extract
- Powdered sugar for dusting
Instructions
- Preheat oven to 350°F. Lightly grease a 9×9-inch baking dish with butter or cooking spray.
- In a medium bowl, whisk together sugar, flour, baking powder, and salt until well combined.
- Add milk, melted butter, lemon zest, lemon juice, and vanilla extract. Stir gently until smooth; the batter will be thin.
- Pour the batter into the prepared baking dish. Do not stir after pouring.
- Bake 40 to 45 minutes, until the top is golden brown and a toothpick inserted in the center comes out clean.
- Remove from oven and let cool 10 minutes before serving.
- Dust with powdered sugar and serve warm.
Notes
- For best flavor, use freshly squeezed lemon juice and zest from real lemons.
- Prep Time: 15 minutes
- Cook Time: 45 minutes
- Category: Dessert
- Method: Baking
- Cuisine: American
Nutrition
- Serving Size: 1 serving
- Calories: 180
- Sugar: Unknown
- Sodium: Unknown
- Fat: 6g
- Saturated Fat: Unknown
- Unsaturated Fat: Unknown
- Trans Fat: Unknown
- Carbohydrates: 30g
- Fiber: Unknown
- Protein: 3g
- Cholesterol: Unknown