Skip to content
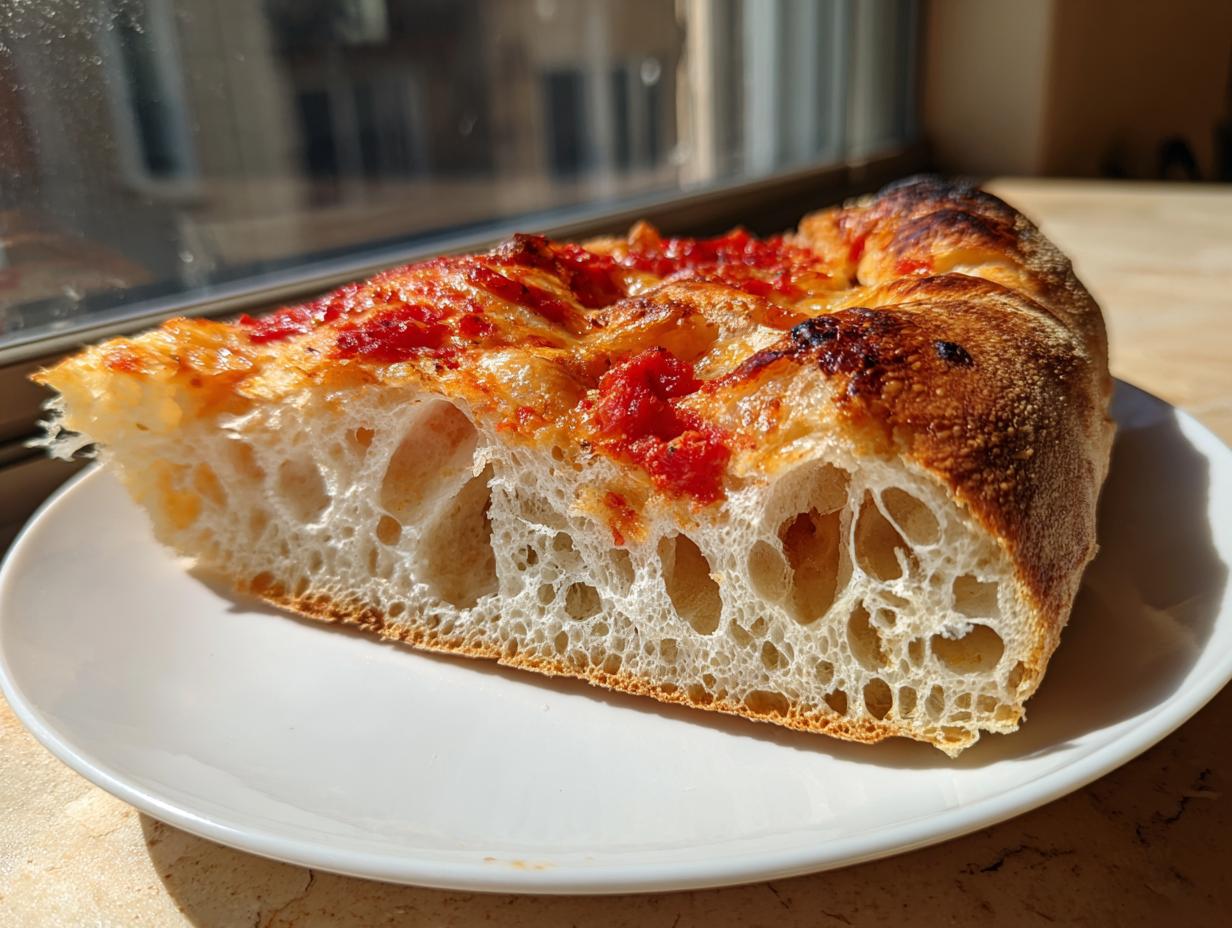
If you’ve ever dreamed of making a truly fantastic pizza crust right in your own oven, then the Step-by-Step Homemade Sourdough Pizza Crust Recipe is where you start. I’m Anna Kowalska, and I share tried-and-true homemade recipes that you and your family will absolutely love. For me, it’s not just about following steps; everything here is made with heart and flavor. This recipe nails that perfect balance of chewiness and crispness, thanks to the natural tang of the starter, and I promise, once you try this, you won’t go back to the store-bought stuff. We’re going deep into the technique here!
Jump to:
Why You’ll Love This Step-by-Step Homemade Sourdough Pizza Crust Recipe
I know what you’re thinking: sourdough pizza crust sounds complicated or maybe a little intimidating. Trust me, it’s not! I developed this method specifically so that even if you’re new to sourdough baking, you can achieve incredible results. This Step-by-Step Homemade Sourdough Pizza Crust Recipe is the one I use every Friday night, and it always gets rave reviews.
When you bake with your own starter, you’re unlocking a whole new layer of flavor that commercial yeast just can’t touch. It’s worth every minute of the rise time!
Flavor and Texture Benefits
- That unmistakable sourdough tang hits just right, cutting through rich cheese and savory toppings beautifully.
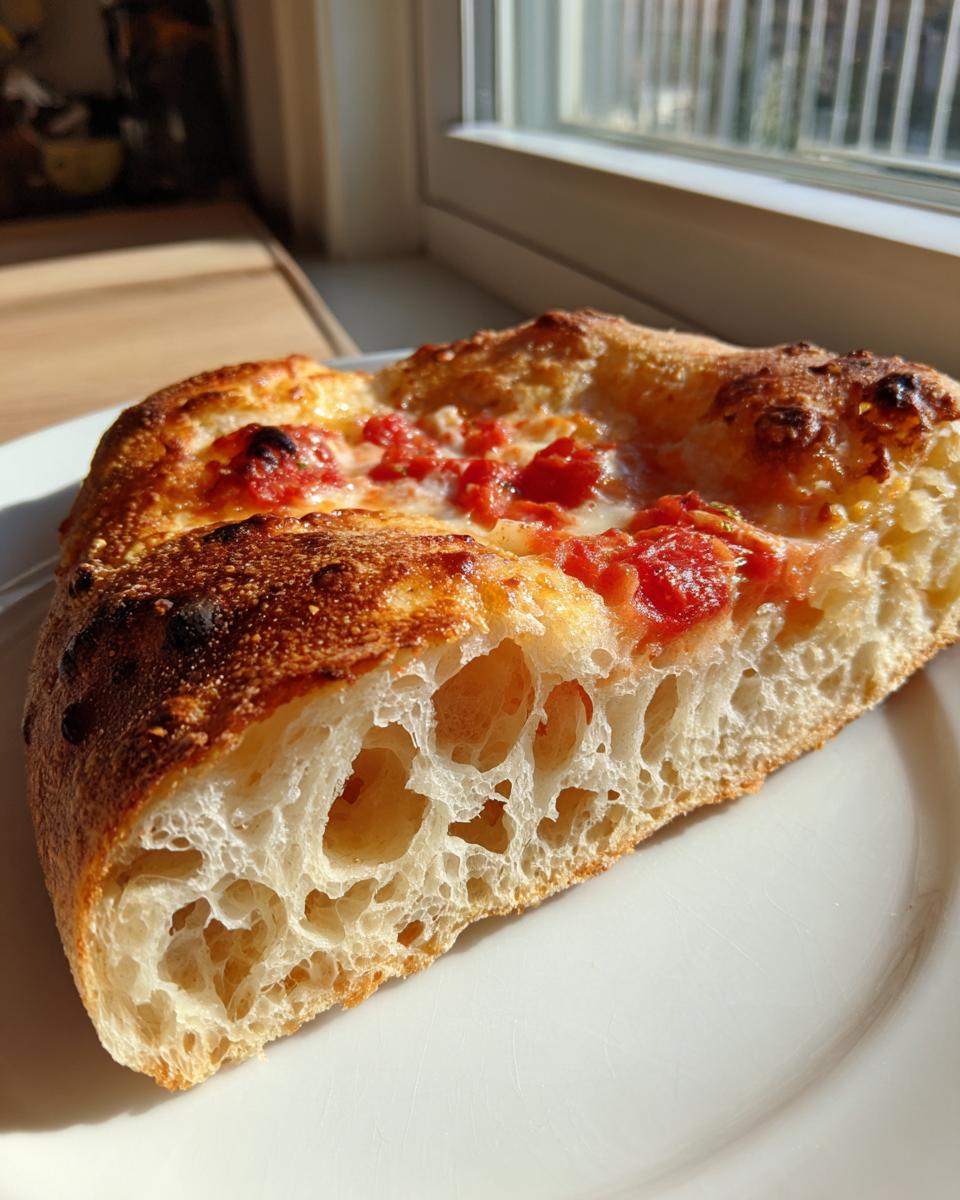
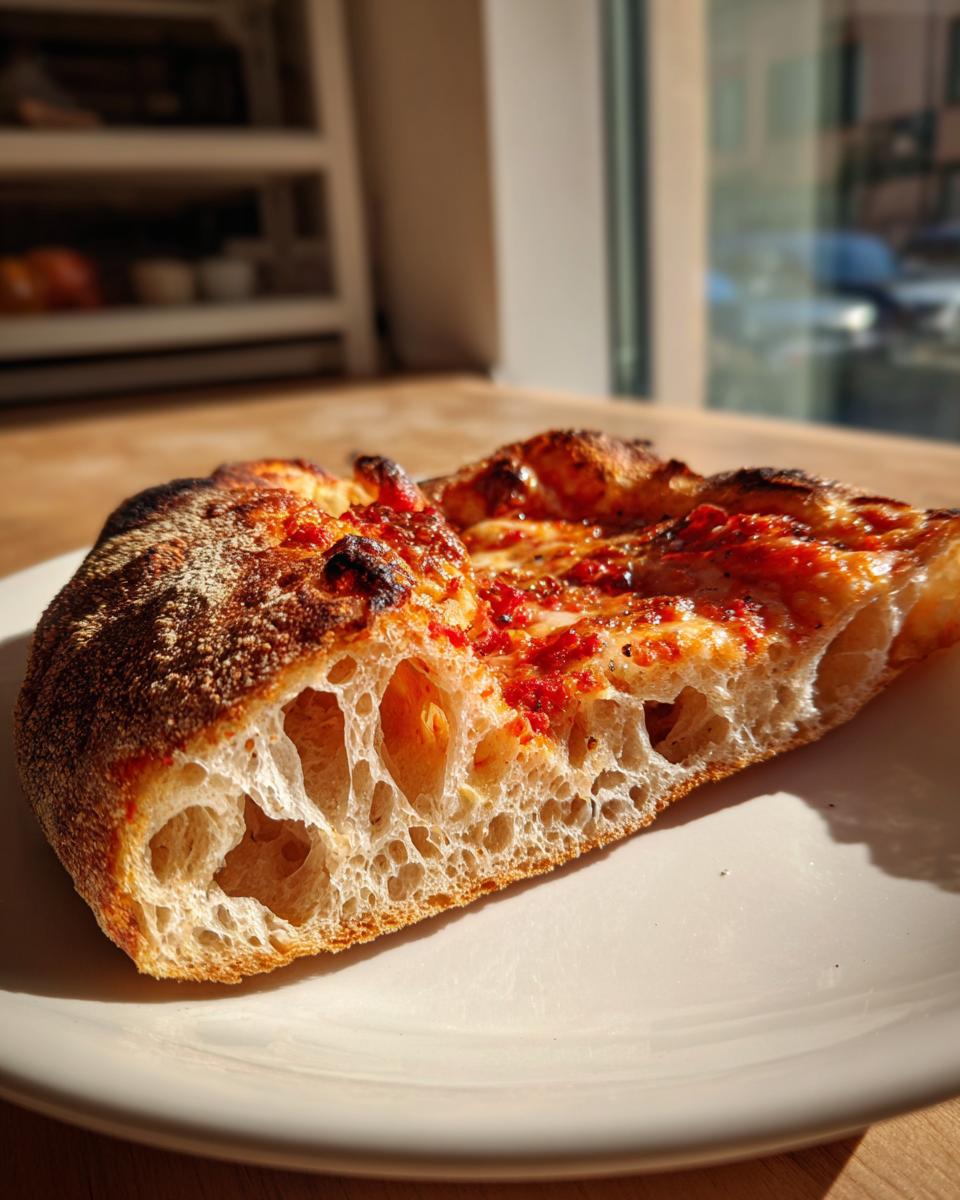
- You get the magical combination of a slightly crispy bottom crust that snaps, paired with an airy, chewy interior structure.
- The slow fermentation process breaks down the flour, making the crust easier to digest than standard white flour dough.
Ease of Preparation
- We use simple, straightforward mixing instructions—no fancy machinery required for the initial stages.
- The recipe provides two rise options, letting you choose between a quick afternoon bake or a slow, deep-flavored overnight proof.
- Once you see how simple it is to handle the dough after the bulk fermentation, you’ll realize making homemade pizza dough is actually relaxing!
Equipment List for Your Step-by-Step Homemade Sourdough Pizza Crust Recipe
You don’t need a professional kitchen to make this Step-by-Step Homemade Sourdough Pizza Crust Recipe shine! I keep my equipment list pretty simple, focusing on what actually makes a difference in the final bake. Having these items ready makes the process so much smoother.
- Large mixing bowl (big enough for the dough to double in size!)
- Damp cloth or plastic wrap for covering the dough
- Pizza stone or heavy-duty baking sheet
- Dough scraper or bench knife (super handy for dividing)
Gathering Your Ingredients for the Step-by-Step Homemade Sourdough Pizza Crust Recipe
The quality of your ingredients really shows when you’re making something simple like pizza dough. With this Step-by-Step Homemade Sourdough Pizza Crust Recipe, we are relying on just a handful of components, so we need to make sure they’re spot on. Precision matters here, especially when we’re talking about the starter and the water temperature. A great pizza starts long before the oven gets hot!
Don’t skimp on the olive oil either; that little bit of fat really helps with the texture and flavor development during the bake. I always measure my flour by weight because the density of flour changes so much depending on how you scoop it. Trust me on this one—it makes all the difference in consistency!
Ingredient Specifications and Notes
Your starter needs to be active, meaning it should have been fed recently and be bubbly and ready to work. I find that using water that feels just warm to the touch, around 100 to 105 degrees Fahrenheit, helps wake up the yeast beautifully. If you use water that’s too hot, you’ll accidentally kill your starter, and that’s a disaster we want to avoid!
- Active Sourdough Starter: Must be bubbly and recently fed (about 100g).
- Warm Water: Aim for that comfortable warm temperature.
- Flour: Weighing is best here for consistency.
Substitutions for Common Ingredients
If you’re out of bread flour, don’t panic! You can absolutely use all-purpose flour, but I highly recommend blending them if you can. I often use three cups of all-purpose and one cup of bread flour for a nice balance of chewiness without making it too tough.
If you only have salted butter on hand, you can skip adding the salt to the dough, but you’ll need to taste the dough later to be sure. I always prefer the flavor boost you get from using good quality extra virgin olive oil, but a neutral oil like canola will work in a pinch if you don’t have any EVOO handy.
Here is everything you need laid out clearly:
| Ingredient | Amount | My Note |
|---|---|---|
| Active Sourdough Starter | ½ cup (100g) | Must be active and bubbly! |
| All-Purpose Flour (or mix) | 4 ¼ cups (500g) | Weighing is better than scooping. |
| Salt | 2 ¼ teaspoons (14g) | Essential for flavor development. |
| Extra Virgin Olive Oil | 1 tablespoon (13.5g) | Adds richness and helps the crust brown. |
| Warm Water | 1 ¼ cups (300g) | Use warm, not hot, water. |
Mastering the Step-by-Step Homemade Sourdough Pizza Crust Recipe Instructions
Alright, this is where the magic happens! Following the Step-by-Step Homemade Sourdough Pizza Crust Recipe feels like a dance, but once you know the steps, you’ll do it without even thinking. We need to treat this dough gently, especially after the rise, to keep all those lovely air bubbles intact.
Mixing and Initial Dough Formation
First things first: grab your big bowl. We start by combining that active sourdough starter with your warm water. Give it a good stir until the starter looks like it’s dissolved right into the water. It shouldn’t look chunky anymore. Next, add everything else—the flour, the salt, and that gorgeous olive oil. You’re just mixing this until you have a shaggy, messy dough ball. Don’t try to make it smooth yet; we just want everything incorporated into one big mass.
The Kneading Process for Elasticity
Now, it’s time to work that dough! Turn it out onto a lightly floured surface, or if you’re lucky enough to have a stand mixer, use that dough hook. I usually knead by hand for about 8 to 10 minutes. You’re looking for a real transformation here. It starts sticky and rough, but keep pushing and folding until it becomes smooth, almost silky, and definitely elastic. When you stretch a tiny piece, it shouldn’t tear right away; it should stretch thin.
Bulk Fermentation Options: Room Temperature vs. Cold Proofing
This is the crucial flavor-building step! You have two paths here. For a quicker pizza night, cover the bowl and let it sit in a warm spot for 4 to 6 hours until it’s puffy and doubled. That’s great flavor. But, if you want that *deep*, complex, slightly sour flavor that makes sourdough famous, transfer that covered bowl to the fridge for 12 to 18 hours. That slow, cold rest is my secret weapon for incredible flavor depth in my Step-by-Step Homemade Sourdough Pizza Crust Recipe.
Dividing, Shaping, and Resting the Dough
Once your dough has risen beautifully, gently tip it out onto your counter—no heavy punching down! We want to degas it lightly, just pressing the air out gently, not smashing it flat. Divide the dough into two equal pieces if you’re making two pizzas. Shape each piece into a tight little ball. This step is important: let those balls rest for 15 to 20 minutes. This lets the gluten relax, making the stretching phase much easier!
Oven Preparation and Shaping the Pizza Base
While your dough balls are resting, crank that oven up! You need it screaming hot—475°F (245°C) is my go-to. Make sure your pizza stone or baking sheet is in there while it preheats; this takes at least 30 minutes. We need that surface scorching hot for a good oven spring. When it’s time to shape, work gently. Stretch the dough by hand if you can—it preserves those interior bubbles best—into a 10 to 12-inch round. If you must use a rolling pin, use it lightly!
Topping and Baking the Final Step-by-Step Homemade Sourdough Pizza Crust Recipe
Now, quickly add your sauce, cheese, and toppings. Don’t overload it, or the center will get soggy! Carefully slide your topped pizza onto that hot stone or sheet. Bake it for 10 to 15 minutes. You’ll know it’s done when the edges are beautifully golden brown and maybe even have some dark, blistered spots—that’s flavor! The cheese should be bubbly. Once it’s out, a tiny drizzle of good olive oil right on the crust edge and you’re ready to slice up this amazing Step-by-Step Homemade Sourdough Pizza Crust Recipe.
Expert Tips for Perfect Step-by-Step Homemade Sourdough Pizza Crust Recipe Results
Baking sourdough pizza dough is always a little different depending on the day, your kitchen humidity, and how active your starter was. Don’t stress if your first attempt isn’t perfect! I’ve learned a few tricks over the years to save any dough crisis while making my Step-by-Step Homemade Sourdough Pizza Crust Recipe.
The key is to treat the dough gently once it’s fully risen. Remember, you’ve built all that gorgeous air structure, so we want to preserve it all the way to the oven!
Managing Dough Hydration
If your dough feels overly sticky during the kneading—like it’s gluing itself to your counter—don’t panic and dump in tons of flour! That just makes a tough crust. Instead, just wet your hands slightly with water before kneading more. If the dough is too stiff, add water, just a teaspoon at a time, while kneading until it feels manageable but still slightly tacky. Flour absorbs moisture differently every day, so you have to feel it out.
Achieving Restaurant-Quality Crust
The biggest game-changer for my Step-by-Step Homemade Sourdough Pizza Crust Recipe was investing in a proper pizza stone. You absolutely must preheat that stone for at least 30 minutes, if not a full hour, at your maximum oven temperature. When you slide the raw dough onto that screaming hot surface, you get instant steam and oven spring, which gives you that beautiful, airy, blistered edge. If you don’t have a stone, use the heaviest baking sheet you own and preheat it the same way!
Storing and Reheating Your Homemade Sourdough Pizza Crust
We rarely have leftovers because this pizza crust is too good, but sometimes life happens, or maybe you made a double batch of dough! Storing leftover baked pizza is simple, but storing the unbaked dough is where the real advantage of this recipe comes in. You can keep that dough resting in the fridge for up to three days, letting the flavor deepen even more!
If you’re reheating a baked slice, I find the best way is directly on the stovetop in a dry cast iron skillet over medium heat for a few minutes per side. It brings back that crispy bottom texture perfectly.
Here is how I handle storage for the dough:
| Storage Method | Duration | Best For |
|---|---|---|
| Airtight Container (Unbaked Dough) | Up to 3 days in the refrigerator | Slow flavor development |
| Airtight Container (Baked Crust) | Up to 2 days at room temperature | Quick reheating |
| Freezer (Baked Crust) | Up to 1 month | Long-term storage |
Frequently Asked Questions About Your Step-by-Step Homemade Sourdough Pizza Crust Recipe
I get so many questions about this recipe because everyone wants that perfect homemade pizza dough! It’s normal to have questions when you start working with sourdough. Don’t worry, we can troubleshoot anything to make sure your Step-by-Step Homemade Sourdough Pizza Crust Recipe turns out perfectly cheffy and delicious!
Can I use sourdough discard instead of active starter?
You absolutely can use discard, but you must understand the trade-off. Discard won’t have the same lifting power as an active, bubbly starter because it hasn’t been fed recently. If you use discard, your dough will rely heavily on the natural yeast activity already present, meaning it will need a much, much longer bulk fermentation time—maybe even 24 hours in the fridge—to get adequate rise. The flavor will be milder too. For the best rise, always try to use an active starter!
My dough did not rise; what went wrong?
This is almost always a starter issue or a temperature issue. If your dough didn’t rise during the bulk fermentation, your starter probably wasn’t active enough to begin with. Did it float in water before you started? If it was sluggish, it won’t have the strength to lift 500 grams of flour. Also, check your kitchen temperature. If your kitchen is cold, the yeast will slow way down. Try putting the bowl in the oven with just the light on—that little bit of warmth helps immensely!
What is the best flour combination for this recipe?
The base calls for all-purpose flour, which is fantastic for a soft, easy-to-handle dough. However, the best results I get for that chewy, slightly crisp edge come from mixing flours. If you can, use about 75% all-purpose flour and 25% high-protein bread flour. The bread flour has more gluten-forming potential, which gives the crust that beautiful structure and elasticity when you stretch it out for your Step-by-Step Homemade Sourdough Pizza Crust Recipe.
Disclaimer Regarding Nutritional Information
Because I focus on flavor and technique when I share my recipes, and since everyone uses slightly different brands of flour, oil, and toppings, I haven’t calculated precise nutritional data for this Step-by-Step Homemade Sourdough Pizza Crust Recipe. The calorie, fat, and carbohydrate counts will change dramatically based on what toppings you pile on top of that gorgeous crust!
If you need exact numbers for dietary tracking, I highly recommend plugging the base ingredients—flour, water, starter, salt, and oil—into your favorite online recipe calculator. That way, you can tailor the final nutritional info to match your specific pizza creation!
Print
Amazing Step-by-Step Homemade Sourdough Pizza Crust Recipe
- Total Time: 5 hours 35 minutes
- Yield: 2 individual pizzas 1x
- Diet: Vegetarian
Description
Step-by-Step Homemade Sourdough Pizza Crust Recipe. Anna Kowalska shares this tried-and-true recipe for a delicious homemade pizza crust you and your family will love. Everything here is made with heart and flavor.
Ingredients
- ½ cup active sourdough starter (100g)
- 4 ¼ cups all-purpose flour (500g) (or a mix of white flour and bread flour)
- 2 ¼ teaspoons salt (14g)
- 1 tablespoon extra virgin olive oil (13.5g)
- 1 ¼ cups warm water (300g)
Instructions
- Combine the active sourdough starter and warm water in a large mixing bowl. Stir until the starter dissolves.
- Add the flour, salt, and extra virgin olive oil. Mix until a rough dough forms.
- Knead the dough for 8–10 minutes by hand or with a dough hook until smooth and elastic.
- Cover the bowl with a damp cloth or plastic wrap. Let the dough rise at room temperature for 4–6 hours until puffy and expanded.
- Alternatively, transfer the dough to the refrigerator for a slow rise overnight (12–18 hours).
- Gently turn the risen dough onto a lightly floured surface and lightly degas it.
- Divide the dough into 2 equal portions or keep it whole.
- Shape each portion into a ball and let it rest for 15–20 minutes.
- Preheat your oven to 475°F (245°C) with a pizza stone or baking sheet inside to heat fully.
- Gently stretch each dough ball by hand or use a rolling pin to form a 10–12 inch round shape.
- Add your pizza sauce, cheese, and toppings.
- Carefully transfer the pizza onto the preheated stone or sheet.
- Bake for 10–15 minutes until the crust is golden and the cheese is melted.
- Remove from the oven, add an optional olive oil drizzle, slice, and serve.
Notes
- The longer the dough ferments, the deeper the flavor. Overnight refrigeration yields the best results.
- Adjust water amount based on your flour and desired dough feel. Add a little more flour if sticky, or a small amount of water if dry.
- For an extra crispy crust, pre-bake the dough for 5 minutes before adding toppings.
- Unbaked dough keeps in an airtight container in the refrigerator for up to 3 days.
- Prep Time: 20 minutes
- Cook Time: 15 minutes
- Category: Bread/Pizza
- Method: Mixing, Kneading, Bulk Fermentation, Baking
- Cuisine: Italian-American
Nutrition
- Serving Size: 1/8th of crust
- Calories: Estimate Needed
- Sugar: Estimate Needed
- Sodium: Estimate Needed
- Fat: Estimate Needed
- Saturated Fat: Estimate Needed
- Unsaturated Fat: Estimate Needed
- Trans Fat: Estimate Needed
- Carbohydrates: Estimate Needed
- Fiber: Estimate Needed
- Protein: Estimate Needed
- Cholesterol: Estimate Needed