Skip to content
Tired of dry, brittle boxed noodles? Imagine serving up silky, tender ribbons of homemade pasta tonight, even if you think you’re terrible at baking. That’s exactly what we’re going to achieve right here. Forget complicated machines or hours of kneading; I’m showing you the foolproof method that gets incredible results with just two things: flour and eggs.
I’m Anna Kowalska, and here I share tried-and-true homemade recipes that you and your family will love. Everything I post is made with heart and flavor, built on years of kitchen trial and error so you don’t have to repeat my mistakes! This recipe for homemade pasta is my absolute staple. It proves that the best things in life—like truly fresh egg pasta—are often the simplest.
We’re going from raw ingredients to dinner on the table faster than you think. Get ready to impress everyone with this incredibly simple pasta dough!
Jump to:
Essential Ingredients for Perfect Homemade Pasta
When you strip a recipe down to its bare bones, like we are doing for this fantastic homemade pasta, the quality of those few items matters so much. You don’t need fancy additions, just the right amounts of the staples. Trust me, these proportions are what give you that perfect elasticity and bite.
We only need two main players here, plus a little extra flour for dusting later on so everything stays happy and separate.
What You Need for Your Homemade Pasta
| Ingredient | Amount | Prep Note |
|---|---|---|
| All-Purpose Flour | 3 1/4 cups | Measure precisely for the best texture. |
| Large Eggs | 4 | Make sure they are at room temperature if possible! |
| Dusting Flour | As needed | Keep this handy for rolling and shaping. |
Preparing the Simple Pasta Dough for Homemade Pasta
Alright, let’s get our hands dusty! This is where the magic of homemade pasta truly begins. Step one is simple: pile your measured flour right onto a clean surface or, if you’re feeling lazy like I often am, right into your stand mixer bowl. I prefer the mixer because it saves my arms, but either way works!
Next, crack those four large eggs right into the middle of your flour mountain. Now, if you’re using a mixer, attach that dough hook—it’s your best friend here. Start mixing on the absolute lowest speed. We aren’t trying to blast flour everywhere! You want it to just start clumping together into what looks like rough, shaggy crumbs. That’s progress!
Here’s the crucial part where you need to pay attention. Sometimes, depending on the humidity that day or the size of your eggs, this dough can be temperamental. If it looks like it’s just refusing to come together and there’s still too much dry flour floating around the bottom, add just a splash—and I mean a tiny splash—of cold water. Don’t overdo it, or you’ll regret it later!
Conversely, if your dough feels overly sticky or wet when you try to gather it, sprinkle in a little extra flour, maybe a tablespoon at a time. Once it’s a rough ball, crank that mixer up to medium speed. Let the dough hook work hard for about five solid minutes. You’ll know it’s ready for the next step when the ball looks smooth, firm, and feels elastic when you poke it. That smooth texture is the hallmark of perfectly developed gluten for your homemade pasta!
Resting and Portioning Your Homemade Pasta Dough
Once you have that gorgeous, smooth ball of dough, you absolutely cannot skip the rest period. This is non-negotiable for great homemade pasta! Wrap that dough up tightly—I mean really tight—in plastic wrap. It needs time to relax, and that rest lets the gluten settle down after all that kneading we just put it through. Pop it in the fridge for at least 30 minutes. Seriously, 30 minutes minimum!
When the timer goes off, unwrap your dough; it will feel slightly firmer. Now, slice that ball into four equal pieces. Don’t try to roll the whole thing at once; you’ll just end up fighting it. Lightly flour your countertop now, because we’re moving straight into rolling out those four manageable sections of homemade pasta dough.
Shaping Your Fresh Pasta From Scratch
Now for the fun part—turning that rested dough into actual noodles! Take one of your four dough pieces and gently flatten it a bit with your hand. Lightly flour your work surface—this is key for beautiful homemade pasta that doesn’t become one big sticky mess. Start rolling it out. If you have a pasta machine, that’s great, but I’ve done this hundreds of times just using a sturdy rolling pin.
You need to roll it as thin as you possibly can get it. My personal trick, especially when using a pin, is to roll it out until I can almost—but not quite—see the faint outline of my hand through the dough. That’s the sweet spot for texture! Once it’s paper thin, you can cut whatever shape your heart desires.
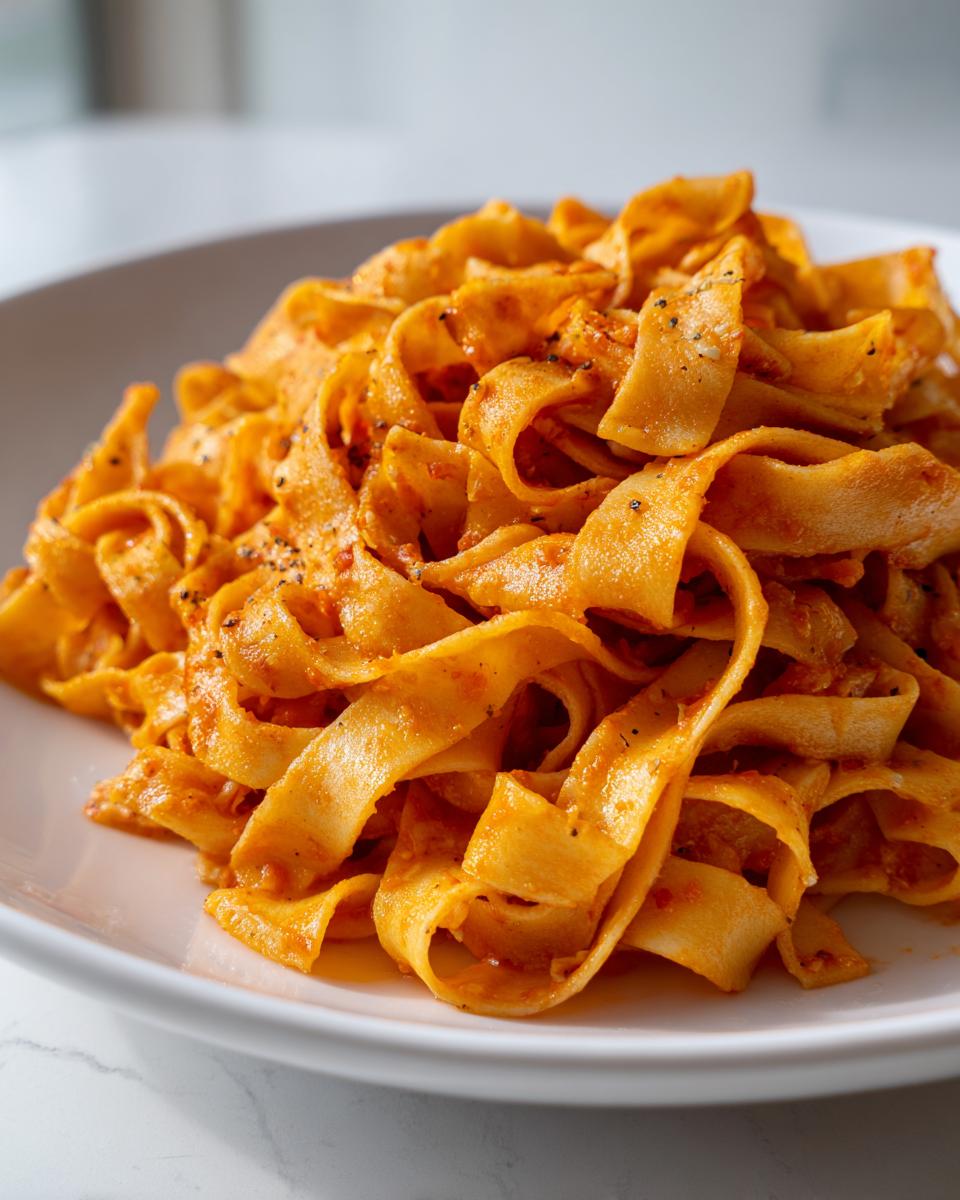
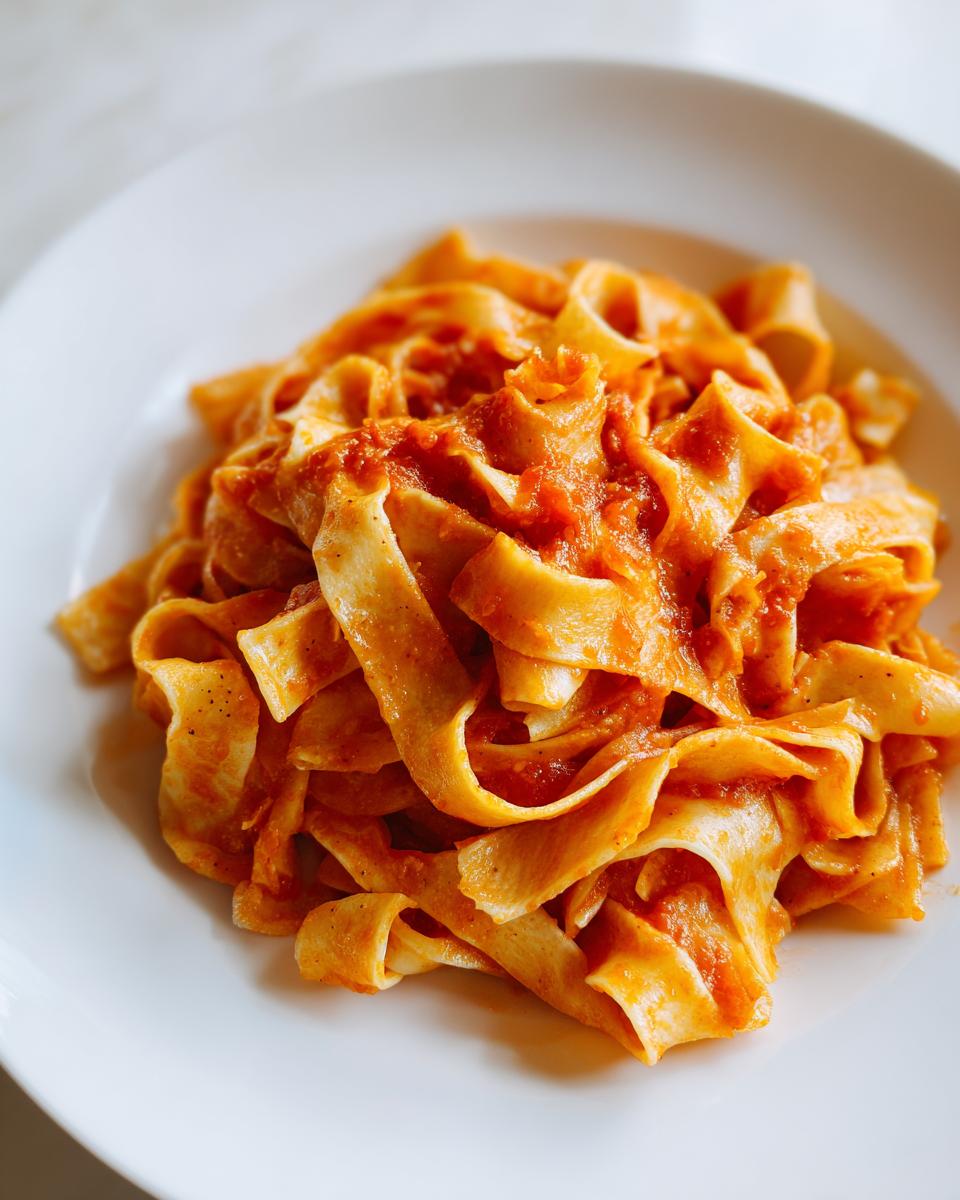
For example, if you’re making tagliatelle, which is my favorite to eat, gently roll the thin sheet loosely into a log shape. Don’t press it tight! Then, take a sharp knife and slice across the log into strips, about half an inch wide. Gently unroll those strips right away and toss them lightly with a little extra flour. This dusting prevents your gorgeous homemade pasta from welding itself back together while you finish the rest of the dough.
If you are aiming for ravioli squares or lasagna rectangles, just cut the thin sheet into the appropriate shapes now. Remember to keep everything lightly floured. The dough behaves differently depending on the shape, but the goal is always the same: thin, distinct pieces ready for the boiling water. You’ll be amazed how quickly you get through this once you get into a rhythm!
Tips for Success Making Homemade Pasta
The biggest enemy when working with fresh dough is stickiness, so always keep that dusting flour nearby! If your pasta sheets start clinging to your work surface while rolling, lift them up, give them a quick, light flour dusting underneath, and keep going. When cutting your homemade pasta, make sure those strands separate immediately after slicing. If they stick together now, they’ll stick together in the pot, and nobody wants that clump of noodles!
Cooking and Serving Your Fresh Homemade Pasta
Okay, the shaping is done, and your kitchen probably smells amazing already! Now we cook this beautiful homemade pasta. Bring a really big pot of water to a roaring boil. And I mean big! Pasta needs room to swim so it doesn’t clump up. Don’t forget to salt that water generously—it should taste like the sea, because that’s the only chance you get to season the noodle itself. Salting pasta water correctly is crucial for flavor development.
Once it’s bubbling hard, gently drop in your fresh noodles. Because this is fresh egg pasta, it cooks lightning fast. You only need about three minutes. Seriously, watch it closely! The second the pasta floats up to the surface, it’s pretty much done. That floating is your cue that it’s tender and ready to eat.
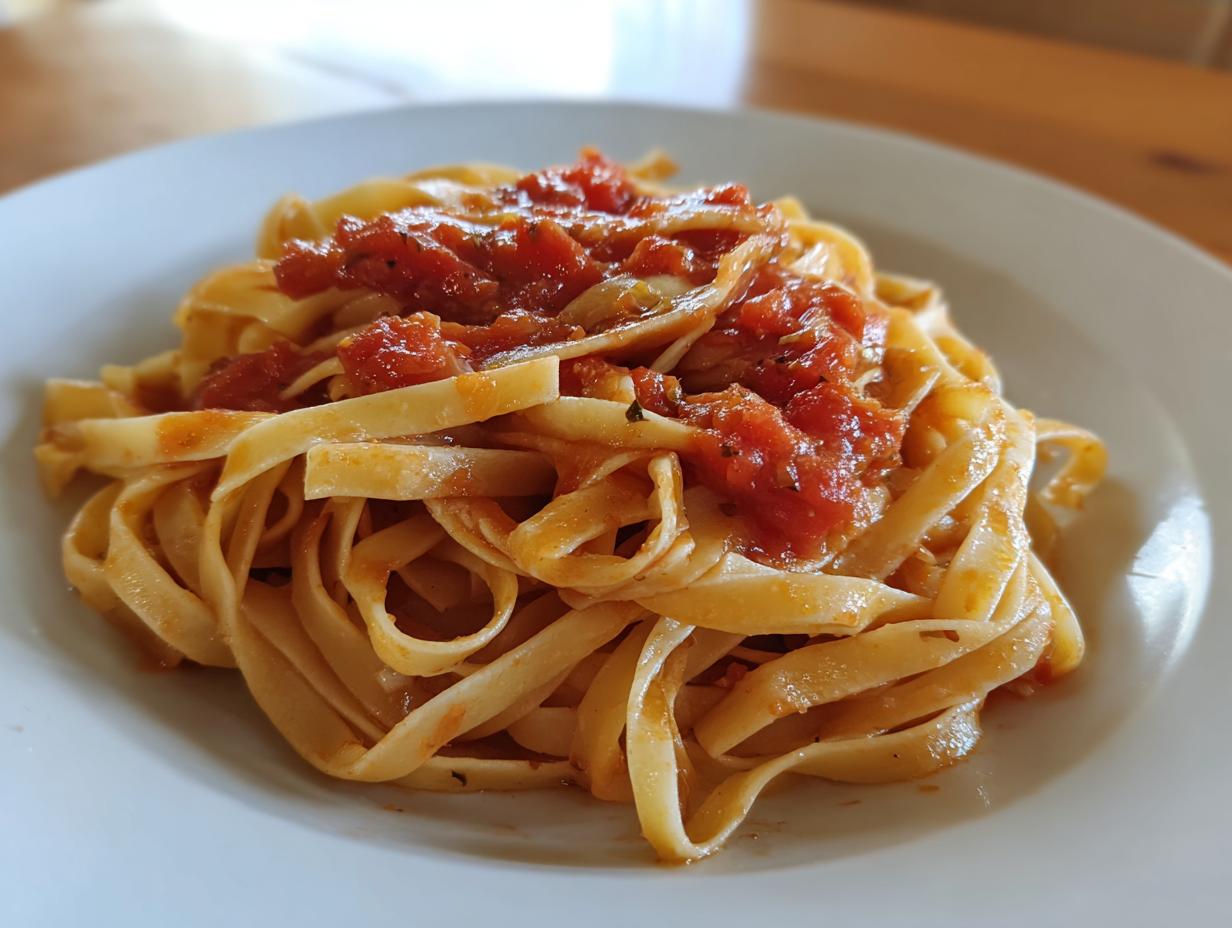
Quickly drain the pasta—I usually skip rinsing unless I’m making a cold salad, which isn’t happening here! Serve it immediately. Since this recipe is vegetarian by nature, it pairs perfectly with bright, simple sauces. A little brown butter and sage, or even just good quality olive oil, garlic, and fresh Parmesan, lets that fresh noodle flavor really shine through. You made this from scratch—enjoy every perfect bite of your homemade pasta! If you are looking for sauce inspiration, check out my recipe for Caramelized Onion Pasta.
Storage and Reheating Instructions for Homemade Pasta
You’ve made beautiful homemade pasta, but maybe you made too much! Don’t worry, this dough stores surprisingly well, though you have to treat it right. The most important rule for storage is making sure every piece is dusted heavily with flour before you try to put it anywhere. This prevents that dreaded sticking catastrophe!
For short-term storage, you can keep fresh noodles refrigerated for two or three days. But if you want to save them for a rainy day, freezing is the way to go. For long-term storage, you can even dry them completely, which is how pasta used to be preserved for months! Understanding the science behind pasta drying can help you master long-term storage.
Here’s the breakdown on how to keep your hard work fresh:
| Storage Method | Duration | Key Step |
|---|---|---|
| Refrigerate | 2–3 days | Ensure pasta is well-floured and covered tightly. |
| Freeze | Up to 1 month | Freeze immediately after cutting and dusting with flour. |
| Dry Completely | Up to 1 month | Lay strands out in a single layer in a cool, dry place. |
Frequently Asked Questions About Homemade Pasta
I get so many questions when I share this recipe because people think making homemade pasta is way harder than it actually is! Here are the common hurdles I hear about, and my quick fixes to make sure your dough turns out perfectly every time.
Can I make Homemade Pasta without a stand mixer?
Absolutely, you can! That mixer just saves your wrists. If you are kneading by hand, you’ll need to be a bit more patient. After you mix the flour and eggs into that rough mass, just turn it out onto a lightly floured counter and start kneading with the heel of your hand. It will take you closer to 8 to 10 minutes of solid work, but you are looking for the exact same result: a smooth, elastic ball. Don’t give up if your arms get tired; that means the gluten is developing beautifully!
How long does fresh Homemade Pasta last?
Freshly made pasta doesn’t have the preservatives of the boxed stuff, so it definitely has a shorter shelf life. If you plan to use your homemade pasta within a couple of days, just keep it well-floured, covered, and refrigerated. If you need longer storage, I highly recommend freezing it right after you cut the shapes—it freezes perfectly!
Why is my fresh pasta dough so stiff?
Stiffness usually means you added too much flour or your eggs were very small. If you are trying to roll out dough that feels like leather, it needs a little moisture boost. Wrap it back up, let it rest for another 15 minutes, and then try working it again. If it’s still too stiff after resting, wet your hands slightly and work a tiny bit of moisture back into the dough with gentle kneading before you try rolling it for your homemade pasta again.
What to Pair with Your Homemade Pasta
Since this is a simple, rich egg pasta, you don’t want to drown out that beautiful flavor! Keep the sauces light and fresh. A fantastic vegetarian option is brown butter infused heavily with fresh sage leaves—the nutty aroma is heavenly. Another favorite is a quick sauce made from sautéed cherry tomatoes, garlic, a splash of white wine, and plenty of fresh basil stirred in right at the end. It lets the texture of the noodles really shine through! For another simple, flavorful pairing, try my recipe for Easy Sautéed Zucchini.
Print
Amazing Homemade Pasta in 3 Easy Steps
- Total Time: 50 minutes
- Yield: 6 servings 1x
- Diet: Vegetarian
Description
Learn how to make fresh homemade pasta from scratch with just flour and eggs. Quick, simple, and perfect for weeknight dinners or meal prep.
Ingredients
- 3 1/4 cups all-purpose flour
- 4 large eggs
- Additional flour for dusting
Instructions
- Put the flour into a large mixing bowl or the bowl of a stand mixer.
- Add the eggs to the flour. Mix on low speed with a dough hook until a rough dough forms. Add a splash of water if the dough is too dry or a sprinkle of flour if it is too sticky.
- Increase the speed to medium. Knead for 5 minutes until the dough becomes smooth and elastic.
- Wrap the dough tightly in plastic wrap. Refrigerate for at least 30 minutes.
- Divide the dough into four equal pieces. Lightly flour your work surface. Roll each piece as thin as possible.
- Cut the dough into the shapes you want: rectangles for lasagna, squares for ravioli, or 1/2 inch strips for tagliatelle. Dust the cut pasta with flour to stop it from sticking.
- For tagliatelle, loosely roll the dough before slicing, then gently separate the strands.
- Bring a large pot of salted water to a boil. Add the pasta and cook for 3 minutes until it floats to the top and is tender.
- Drain the pasta. Serve immediately with your favorite sauce.
Notes
- Make sure every piece of pasta is well-floured to prevent sticking during storage or cooking.
- To store, refrigerate for 2-3 days, freeze with a dusting of flour, or dry completely for up to a month.
- Prep Time: 20 minutes
- Cook Time: 30 minutes
- Category: Main Dish
- Method: Dough mixing, Rolling, Boiling
- Cuisine: Italian
Nutrition
- Serving Size: 1 serving
- Calories: 288
- Sugar: N/A
- Sodium: N/A
- Fat: 3g
- Saturated Fat: N/A
- Unsaturated Fat: N/A
- Trans Fat: N/A
- Carbohydrates: 52g
- Fiber: N/A
- Protein: 11g
- Cholesterol: N/A