Skip to content
When I think about bringing people together over something sweet, nothing beats the satisfaction of pulling a tray of homemade candy out of the fridge. Forget those overly fussy desserts that take all day! I’m Anna Kowalska, and here I share tried-and-true homemade recipes that you and your family will love—everything is made with heart and flavor, trust me. Sometimes you just need that perfect, sweet-and-salty hit that only comes from scratch.
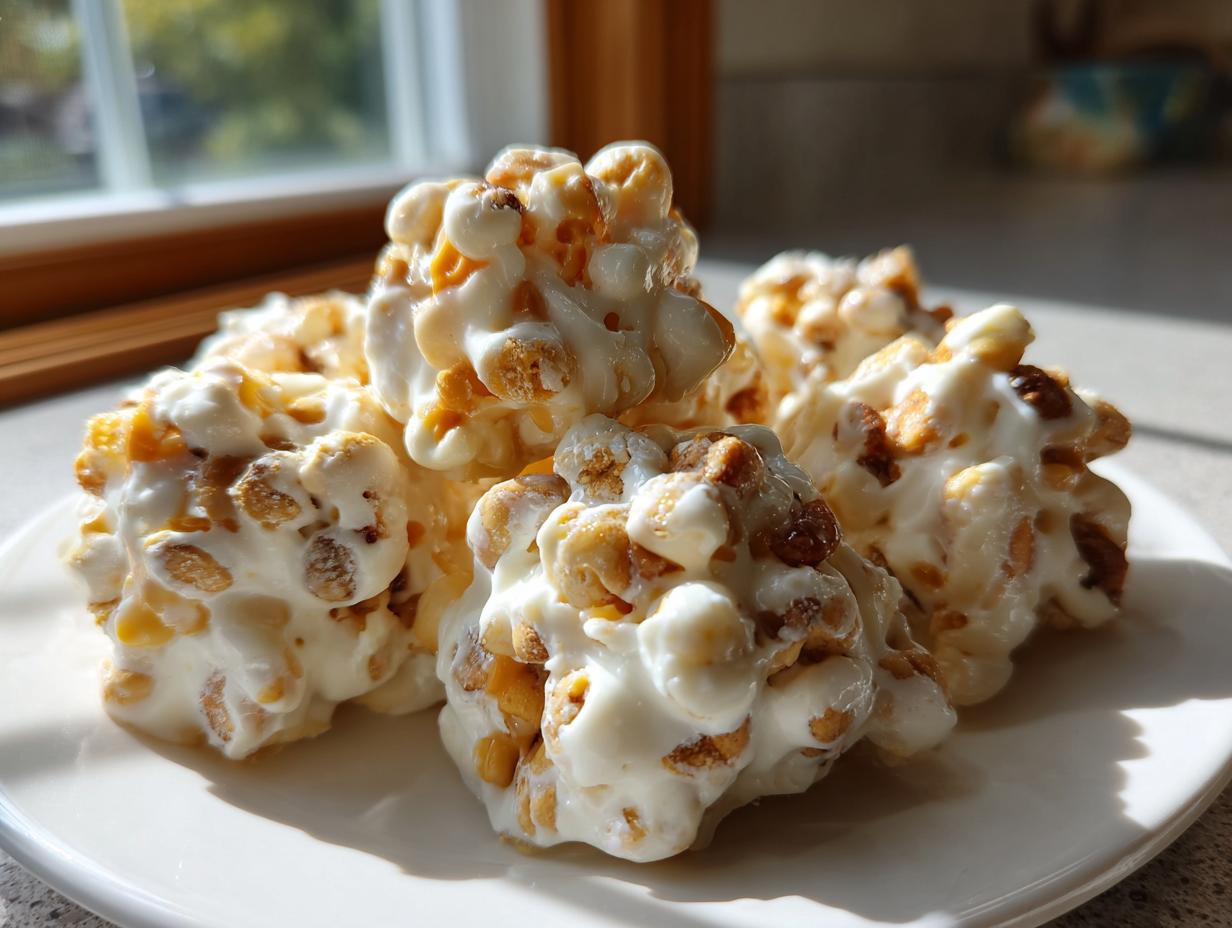
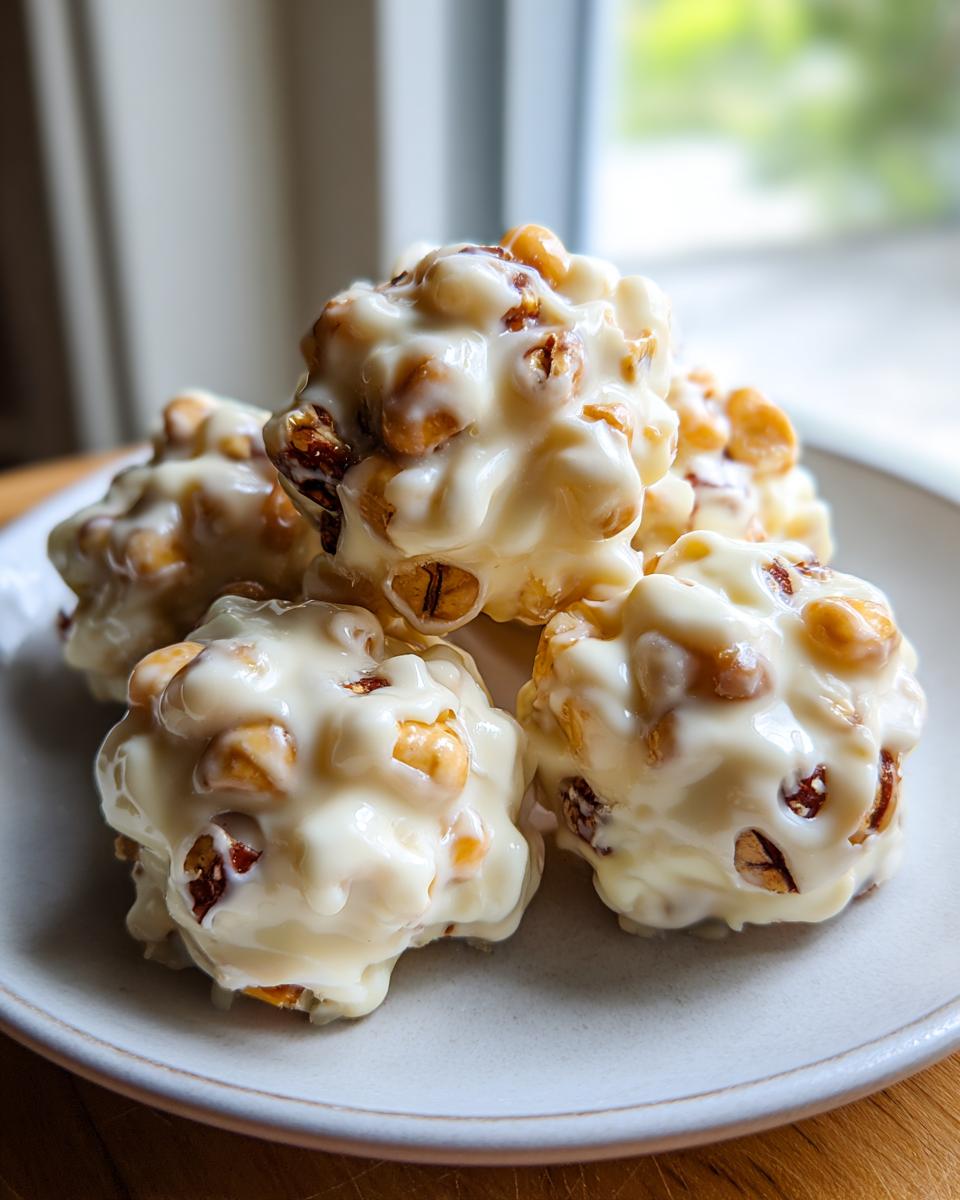
That’s why I’m obsessed with these Polar Bear Paws Candy treats. They look fancy, right? Like something you’d buy at a specialty shop, but honestly, they are shockingly simple to put together, even if you’re not a candy-making expert. The combination of creamy caramel, crunchy roasted peanuts, and that smooth white chocolate shell is just heavenly.
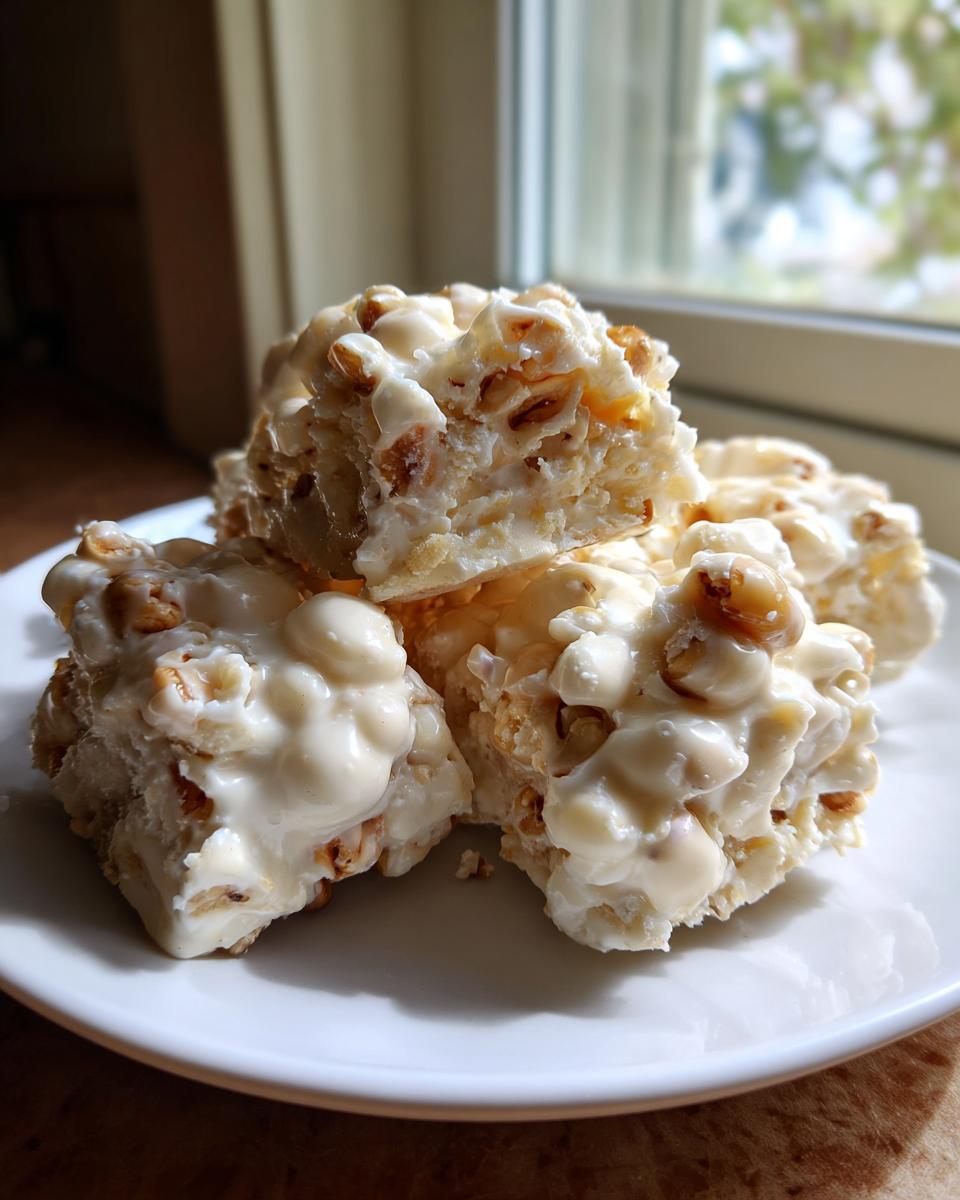
This recipe for Polar Bear Paws Candy lets you control every layer of flavor. You get the salty crunch exactly where you want it, and the best part? There’s no complicated stovetop tempering involved. We’re making easy, delicious magic here!
Jump to:
Why You Will Love Making Polar Bear Paws Candy
I really think everyone needs a go-to, no-fail candy recipe in their back pocket, and these treats are mine! They truly deliver maximum flavor for minimal effort. You won’t believe how fast these come together, especially since most of the time is just waiting for them to chill. Seriously, if you need a last-minute gift or a party addition, these Polar Bear Paws Candy treats are the answer.
- They hit that perfect sweet and salty spot every single time.
- The texture contrast between the gooey center and the firm chocolate shell is just divine.
- You only need simple pantry staples to pull off this amazing confection.
Quick Preparation Time for Polar Bear Paws Candy
The active time you spend stirring and scooping is barely 30 minutes total. We combine the caramel, mix in the nuts, and scoop them out—that’s it for the messy part! Then you just let the fridge do the heavy lifting. It’s one of those recipes where you can be watching TV while you melt the chocolate, which is my favorite kind of baking.
Essential Ingredients for Perfect Polar Bear Paws Candy
When making Polar Bear Paws Candy, the quality of your ingredients really shines through, especially since there are so few steps to mask anything subpar. We aren’t dealing with flour or eggs here, so what you put in is what you get out! Luckily, these items are easy to find, but pay attention to the details, like making sure your caramel squares are soft enough to melt easily. Trust me, having everything measured out before you start melting things is crucial here.
Caramel Base Components
The heart of this candy is that wonderful sweet and salty center. You need exactly 11 ounces of caramel squares—use the soft, individually wrapped kind, they melt down beautifully. To make the caramel smooth and dippable, we stir in 3 tablespoons of heavy whipping cream and 1 tablespoon of unsalted butter. Don’t skip the butter; it keeps the caramel from getting too stiff once it cools. And for that classic flavor pop, a full teaspoon of vanilla extract is non-negotiable! Of course, the crunch comes from 1 cup of roasted salted peanuts. The salt in the peanuts really balances out the sweetness of the caramel and chocolate coating.
White Chocolate Coating for Polar Bear Paws Candy
For the coating, I strongly recommend using 1 pound of white almond bark. Almond bark is formulated to melt smoothly and set up firm without any fuss, which is exactly what we need when dipping these peanut mounds. If you use regular white chocolate chips, they often contain stabilizers that make them seize up or become grainy when melted, and we definitely don’t want that for our beautiful Polar Bear Paws Candy coating! If you feel fancy, grab some bright sprinkles to toss on top right after dipping, but honestly, they are fantastic with just the plain white chocolate shell.
Necessary Equipment to Create Polar Bear Paws Candy
You don’t need any fancy candy-making gadgets for these Polar Bear Paws Candy treats! We’re sticking to basics, which is so refreshing. Mostly, you just need sturdy tools to handle the sticky caramel and a few things to help with shaping and chilling. Make sure your pot is medium-sized so you have room to stir everything without making a huge mess.
- A medium saucepan for melting the caramel base.
- Parchment paper—this is essential for non-stick chilling!
- A baking sheet that fits easily into your refrigerator.
- A tablespoon or small cookie scoop for shaping the mounds neatly.
- A microwave-safe bowl for melting the white almond bark.
Step-by-Step Instructions for Polar Bear Paws Candy
Okay, this is where the fun really starts! Making Polar Bear Paws Candy is all about layering textures, and we start with that gooey, sweet layer. Don’t rush the melting process, though; we want smooth sailing, not burnt caramel on the bottom of the pan. Don’t worry about getting the shapes perfect right now; we’ll tidy them up later once they’ve chilled a bit.
Melting the Caramel Mixture
First things first, grab your medium saucepan. Toss in the 11 ounces of caramel squares, the 3 tablespoons of heavy whipping cream, the 1 tablespoon of butter, and that teaspoon of vanilla extract. Set your heat to medium—not high! We want a gentle melt here. Keep stirring constantly with a wooden spoon or spatula. You’re looking for a completely uniform, glossy mixture where you can’t see any lumps of caramel left. This usually takes about 5 to 7 minutes. As soon as it’s smooth, take it right off the heat!
Incorporating Peanuts and Shaping the Paws
Now for the crunch! Dump your 1 cup of roasted salted peanuts right into that hot caramel mixture. Stir it really well. You need to make sure every single peanut gets coated in that delicious caramel goo. It’s going to get thick fast, so work quickly! Grab your tablespoon or your small cookie scoop—I use a small scoop because it makes my paws look more uniform, like little snowballs. Drop spoonfuls onto the parchment-lined baking sheet we set up earlier. If they look messy, that’s fine for now; they’ll firm up.
Setting the Caramel Base
Once all your candy mounds are scooped out, they need a good, solid rest. Slide that baking sheet into the refrigerator. You need to let these chill for a full hour. This step is non-negotiable! If the caramel isn’t completely firm, it will just ooze out when you try to dip it in the chocolate, and that makes a huge mess. Be patient here; good things come to those who wait for their caramel to set!
Melting and Dipping the Polar Bear Paws Candy
While the caramel chills, melt your white almond bark. Put the pound of bark in a microwave-safe bowl. Microwave it in short bursts—30 seconds at a time—and stir well after every 30 seconds. It’s crucial not to overheat white chocolate, or it gets grainy and stiff. Once it’s smooth and runny, take one chilled caramel mound at a time. Use two forks—or one fork and a toothpick—to gently dunk the mound into the chocolate. Lift it out, let the extra coating drip off by tapping the fork gently against the side of the bowl. You want a nice, thin shell, not a giant chocolate blob!
Final Chill and Setting
Place the dipped Polar Bear Paws Candy right back onto that parchment paper. If you’re using sprinkles, toss them on immediately while the chocolate is still wet. After you’ve dipped them all, pop the tray back into the fridge. They only need a short time this second time around, maybe 15 to 20 minutes, just until that white chocolate shell is totally firm and won’t smudge when you touch it. That’s it—you’re done making candy!
Tips for Achieving Expert Polar Bear Paws Candy Results
Even though this recipe is wonderfully simple, a few little tricks can take your Polar Bear Paws Candy from good to absolutely unforgettable. Candy making is all about temperature control, especially when you’re dealing with sticky caramel and chocolate coating. If you follow these two main tips, you’ll avoid the most common pitfalls that ruin a batch of homemade treats.
Controlling Caramel Consistency
When you’re melting those caramel squares with the cream and butter, remember what I said: medium heat only! If you crank the heat too high, the sugar in the caramel will burn quickly on the bottom of the pan, giving your candy a bitter taste. Also, keep stirring until it’s perfectly smooth before you add the peanuts. If you stop stirring too soon and the caramel isn’t fully incorporated with the cream, it might separate later, leaving you with greasy patches instead of that chewy texture we love in our Polar Bear Paws Candy centers.
Achieving a Smooth White Chocolate Dip
The biggest issue people have with almond bark or white chocolate is that it gets thick and clumpy way too fast. When you’re melting it in the microwave, never let it get scorching hot. Use those short 30-second intervals and stir thoroughly between each one, even if it looks mostly melted. If it starts getting too thick while you are dipping, add just a tiny drizzle—maybe half a teaspoon—of a neutral oil, like vegetable oil, not water! Oil helps loosen the coating just enough so you can get a thin, pretty shell around your paw. A thin shell is key to a great bite!
Storing and Serving Your Homemade Polar Bear Paws Candy
Once you’ve managed to make a batch of these gorgeous Polar Bear Paws Candy, you’ll want to make sure they last! Since they have that rich caramel center, they really do best when kept cool. They are so tempting to eat right away, but letting them sit for a little while actually lets the flavors meld together nicely. We don’t want them getting soft on the counter, especially if your kitchen runs warm!
Storage Guidelines for Polar Bear Paws Candy
To keep these treats tasting fresh and prevent the white chocolate from getting sticky, always store your Polar Bear Paws Candy in a truly airtight container. I usually layer them between sheets of wax paper just in case, though the parchment you used for dipping works fine too. They absolutely need to stay in the refrigerator. If you need to keep them longer than a week—maybe you made too many for the holidays—you can definitely freeze them. They freeze remarkably well! For more general tips on preserving homemade sweets, check out this guide on desserts.
Here is the simple breakdown for keeping your candy perfect:
| Storage Location | Maximum Duration | Serving Instruction |
|---|---|---|
| Refrigerator | Up to one week | Let sit out for 10 minutes before serving. |
| Freezer | Up to two months | Allow candy to come to room temperature (about 30 minutes) before enjoying. |
Frequently Asked Questions About Polar Bear Paws Candy
I always get so many questions when I post pictures of these! They are just so easy to customize, but people worry about changing key parts of the recipe. Don’t stress too much, but remember that the balance of salty and sweet is what makes Polar Bear Paws Candy so addictive. Here are the top things people ask me when they try this recipe for the first time.
Can I Substitute the Peanuts in Polar Bear Paws Candy
Yes, you absolutely can swap out the peanuts if you have a nut allergy or just prefer something different! The key is to use something roasted and salted to keep that crucial sweet-and-salty contrast. Try using salted sunflower seeds or chopped pretzels! If you use pretzels, though, be careful when mixing them into the hot caramel, as they can break down faster than nuts. If you use a different nut, like pecans or almonds, make sure they are roughly chopped so you get good coverage when mixing them into the caramel base for your Polar Bear Paws Candy.
What is the Best Chocolate to Use for Polar Bear Paws Candy Coating
Hands down, I stick to white almond bark for the coating, and here’s why: it sets up hard and smooth almost instantly, and it melts beautifully without needing any extra oil or shortening. If you try to use standard white chocolate chips, they often contain stabilizers that prevent them from flowing nicely, and you end up with a thick, lumpy coating that cracks when you bite into it. You want that clean, crisp shell on your Polar Bear Paws Candy, so stick with the bark or a good quality candy coating compound if you can find it. Learning about the science behind chocolate stabilization can be helpful for future candy making, so check out this resource on chocolate science.
Estimated Nutritional Information for Polar Bear Paws Candy
Now, I always want to emphasize that because we’re making these by hand and using ingredients like caramel squares whose exact composition shifts slightly depending on the brand, these numbers are just an estimate! Think of this as a guideline for your Polar Bear Paws Candy servings. They are certainly a treat, packed with energy from the nuts and caramel! For more information on general nutrition facts, you can always consult the FDA website.
| Nutrient | Estimate Per Piece |
|---|---|
| Calories | 204 |
| Fat | 11g |
| Carbohydrates | 25g |
| Protein | 2g |

Amazing 11-Step Polar Bear Paws Candy Magic
- Total Time: 1 hour 30 minutes
- Yield: 20 servings 1x
- Diet: Vegetarian
Description
Make creamy caramel and nut Polar Bear Paws Candy with a white chocolate coating. This sweet and salty treat is perfect for parties, gifts, or a simple homemade indulgence.
Ingredients
- 11 ounces caramel squares
- 3 tablespoons heavy whipping cream
- 1 tablespoon unsalted butter
- 1 teaspoon vanilla extract
- 1 cup roasted salted peanuts
- 1 pound white almond bark
- Sprinkles, optional
Instructions
- Line a baking sheet with parchment paper and set it aside.
- Combine caramel squares, heavy cream, butter, and vanilla in a medium pot. Stir over medium heat until melted and smooth.
- Add peanuts to the melted caramel. Mix until everything coats evenly.
- Use a tablespoon or small cookie scoop to place the caramel-peanut mixture onto the prepared baking sheet in mound shapes.
- Chill the mounds in the refrigerator for 1 hour until they set.
- Melt the white almond bark in a microwave-safe bowl using 30-second intervals, stirring between each interval until smooth.
- Dip each caramel-peanut mound into the melted white chocolate. Tap off any excess coating.
- Place the dipped candies back onto the parchment-lined baking sheet.
- Top with sprinkles if you want.
- Chill briefly until the chocolate sets completely.
Notes
- Store the candy in an airtight container in the refrigerator for up to one week.
- You can freeze the candy for up to two months.
- Let the candy reach room temperature before you serve it.
- Prep Time: 15 minutes
- Cook Time: 15 minutes
- Category: Candy/Confectionery
- Method: No-Bake/Chilling
- Cuisine: American
Nutrition
- Serving Size: 1 piece
- Calories: 204
- Sugar: N/A
- Sodium: N/A
- Fat: 11g
- Saturated Fat: N/A
- Unsaturated Fat: N/A
- Trans Fat: N/A
- Carbohydrates: 25g
- Fiber: N/A
- Protein: 2g
- Cholesterol: N/A