Skip to content
When the week gets totally hectic and you need dinner on the table without fuss, this Chicken Bubble Up Bake is my absolute lifeline. Seriously, it’s the kind of meal that hugs you back! I’m Anna Kowalska, and here at my little corner of the internet, I share tried-and-true homemade recipes that you and your family will absolutely love. Everything I post here is made with heart and flavor, and this gooey, cheesy biscuit bake is pure comfort food perfection. I developed this recipe out of sheer necessity one Tuesday night when I needed something hearty, fast, and kid-approved. The way those soft biscuits soak up the creamy chicken filling until it’s golden and bubbly? It’s just magic, plain and simple. Trust me, once you try this, it’s going straight into your regular rotation!
Jump to:
Essential Components for Your Chicken Bubble Up Bake
Look, this recipe is simple, but that doesn’t mean we can skip out on quality! When you’re making something this comforting, the ingredients really shine through. I always lay out everything on the counter so I can see it all before I start mixing. It keeps me organized, which, let’s be honest, is half the battle in the kitchen!
When you look at the ingredient list below, you’ll notice I’m pretty specific—that’s because these details make the difference between a good casserole and the best comfort food ever. We want that perfect ratio of creamy sauce to fluffy biscuit, and we need the right kind of chicken texture, too. Don’t substitute blindly; these components are chosen for maximum flavor!
Biscuit Base Preparation
Okay, the biscuits are the ‘bubble up’ part, so they need special treatment. You absolutely must use refrigerated buttermilk biscuits—none of that drop biscuit nonsense here! Open that can and snip them up. I use kitchen shears because they are way easier than a knife for this job. You need to cut each biscuit into about four small, uneven pieces. They don’t need to be perfect; the unevenness helps them create those lovely little pockets of air when they bake up around the creamy filling.
The Creamy Chicken Filling
For the chicken, please make sure it’s already cooked and shredded. I usually use leftover rotisserie chicken because it’s already seasoned, but if you’re poaching breasts, make sure they are cooked through to 165 degrees first! We need the chicken to be shredded, not diced, because shredded meat holds onto that creamy sauce better. When you mix that soup, sour cream, and ranch seasoning in, blend it until it’s as smooth as silk. You don’t want any dry pockets of seasoning mix hiding in there!
Why You Will Enjoy Making This Chicken Bubble Up Bake
Honestly, this recipe is a weeknight hero, which is why I keep it in heavy rotation. It doesn’t demand a lot of attention once it’s in the oven, leaving you free to help with homework or just sit down for two minutes! It’s the kind of meal where everyone cleans their plate, and cleanup is shockingly easy.
- It comes together faster than ordering takeout—prep time is barely 15 minutes!
- It uses simple pantry staples mixed with easy-to-find ingredients.
- The “bubble up” factor means the kids get excited about dinner again.
- Minimal dishes! You only dirty one bowl for the filling and the baking dish itself.
- It reheats beautifully for lunch the next day, if you even have leftovers, which is doubtful.
Step-by-Step Guide to the Perfect Chicken Bubble Up Bake
Now for the fun part—putting it all together! I promise you, this process is so smooth, you’ll wonder why you haven’t been making this Chicken Bubble Up Bake every week. The key here is not rushing the two-stage baking process. It gives the biscuits time to puff up before we melt that glorious cheesy topping on top.
Preparing the Baking Dish and Oven
First things first, we need heat! Set your oven rack to the middle position and get that temperature to 350 degrees Fahrenheit. While the oven is warming up—which takes a few minutes—grab your 9×13 inch baking dish. Give it a good spray down with cooking spray. I find that even though this casserole is creamy, if you don’t grease the edges well, those little biscuit corners can stick, and nobody wants to fight their dinner!
Mixing the Flavor Base for the Chicken Bubble Up Bake
Grab your medium mixing bowl—this is where all the creamy magic happens for our Chicken Bubble Up Bake. Dump in the cream of chicken soup, the nonfat sour cream, and that ranch seasoning mix. I also add half of my chopped green onions right here. Now, mix this aggressively until it’s totally smooth and uniform. You want a thick, pale sauce that coats everything evenly. Then, gently fold in your pre-shredded, cooked chicken. You want the chicken coated, not mashed, so be gentle with your spatula!
Assembly Before the First Bake
Time to layer! Take those little pieces of biscuit we cut up earlier and spread them out across the bottom of your greased dish. Try to make the layer as even as possible so everything bakes at the same rate—it’s like laying down a fluffy, doughy carpet. Once the biscuits are down, carefully spoon that creamy chicken mixture right over the top. Use your spatula to spread it gently so you don’t squish all the air out of the biscuit pieces underneath. It should cover every single biscuit piece you laid down.
Layering the Cheese Topping and Final Baking
Pop that dish into the preheated 350°F oven for 20 minutes, uncovered. This first bake is crucial because it steams the biscuits and sets the filling. When the timer goes off, pull it out—be careful, it’s hot! Now, sprinkle that reserved topping mixture evenly over the top. This mixture has the cheese, the bacon bits, and the rest of those vibrant green onions. Return the dish to the oven for one final blast of 15 minutes. You are looking for that cheese to be completely melted, golden brown in spots, and bubbling happily around the edges.
Resting and Serving Your Chicken Bubble Up Bake
This is the hardest part, I know! When you pull that beautiful, cheesy creation out, you MUST let it rest for 5 minutes. If you cut into the Chicken Bubble Up Bake right away, it will just ooze everywhere and fall apart. Those five minutes allow the filling to firm up just enough so you can actually scoop out nice, hearty portions. Serve it warm, straight from the pan!
Tips for an Expert Level Chicken Bubble Up Bake
Even though this is a super easy recipe, a couple of tiny tricks can elevate your Chicken Bubble Up Bake from good to legendary. I learned these lessons through trial and error, usually involving a slightly undercooked biscuit bottom!
First, let’s talk about the soup. While I list cream of chicken, if you want a richer, deeper flavor, try using half cream of chicken and half cream of mushroom. It adds this earthy undertone that plays so nicely with the bacon. Don’t tell anyone I suggested it, though; it’s my little secret!
Second, don’t skip the ranch seasoning! It’s not just for flavor; that packet has stabilizers that help keep the sour cream and soup mixture from separating too much during the longer bake time. If you run out, use a teaspoon of dried dill and garlic powder, but the ranch is better, trust me. For more ideas on using pantry staples in creative ways, check out this quick easy chicken spaghetti recipe.
Finally, for the ultimate texture, make sure your biscuit pieces aren’t touching too much when you lay them in the pan for the first layer. They need space to puff up and absorb that creamy sauce. If they are clumped together, you end up with a doughy spot instead of a fluffy bubble!
Answering Common Questions About Your Chicken Bubble Up Bake
I get so many notes about substitutions, which is great because it means you’re all eager to get this amazing Chicken Bubble Up Bake on your tables! I’ve tried a few swaps over the years when I was missing an ingredient, so I’m happy to share what works and what might just fall flat. Remember, this recipe thrives on those fluffy biscuits, so tread lightly when changing them!
If you have dietary needs, you can certainly try using canned crescent rolls instead of the buttermilk biscuits, but you’ll need to adjust the baking time slightly. Crescent rolls often bake faster and might become too brown during that initial 20 minutes. Just keep a close eye on them! Understanding food safety guidelines, like the safe internal temperature for poultry, is always important when making substitutions like this. You can find reliable information on food safety from official sources like the USDA Food Safety and Inspection Service.
Can I use a different type of biscuit for the Chicken Bubble Up Bake?
While the refrigerated buttermilk biscuits are my absolute favorite for that classic texture, I know they aren’t always available. You can certainly try refrigerated flaky biscuits, but they tend to spread out more than puff up in the middle. If you use those, make sure you cut them into smaller pieces than you think you need. If you’re feeling ambitious, you could even make homemade drop biscuits, but honestly, that defeats the quick-and-easy purpose of this casserole!
What is the best way to shred the chicken?
For the best results in your cheesy chicken bake, I highly recommend using pre-cooked chicken—rotisserie chicken is a lifesaver here! To shred it easily, wait until the chicken is cool enough to handle but still warm. Use two forks and pull the meat apart lengthwise along the grain. If you want it super fine, you can give it a few quick pulses in a stand mixer fitted with the paddle attachment, but only a few pulses! You want shreds that can soak up the sauce, not chicken paste. If you are using rotisserie chicken often, you might enjoy this easy roasted chicken recipe for a homemade alternative.
Storing Leftovers of This Cheesy Chicken Bake
Oh, the dreaded leftovers! If you manage to have any of this amazing casserole left over—which is a feat in itself—storing it is super easy. You want to keep that creamy texture intact, so airtight containers are your best friend here. Don’t let it sit on the counter for more than two hours, especially since it has that creamy soup base in it.
When you reheat it, the edges might dry out a tiny bit, so I always add a splash of milk or chicken broth right before microwaving, or cover it tightly with foil if using the oven. That little bit of extra moisture brings back that fresh-out-of-the-oven taste. It honestly tastes almost as good the next day!
| Storage Method | Duration | Reheating Tip |
|---|---|---|
| Airtight Container (Refrigerator) | 3 to 4 days | Microwave covered with a damp paper towel, or bake at 350°F until heated through. |
| Freezer Safe Container | Up to 2 months | Thaw overnight in the fridge first, then reheat gently. |
Sharing Your Delicious Chicken Bubble Up Bake Experience
I just love hearing when one of my tried-and-true recipes makes it onto your family table! If this cheesy chicken bake was a hit at your house, please don’t keep it a secret. Let me know what you thought in the comments below. A quick rating helps other busy cooks find their next favorite easy dinner, too! For another easy dinner idea, check out my recipe for easy creamy lasagna soup.
Print
Amazing Chicken Bubble Up Bake 1 secret made easy
- Total Time: 50 minutes
- Yield: 6 servings 1x
- Diet: Vegetarian
Description
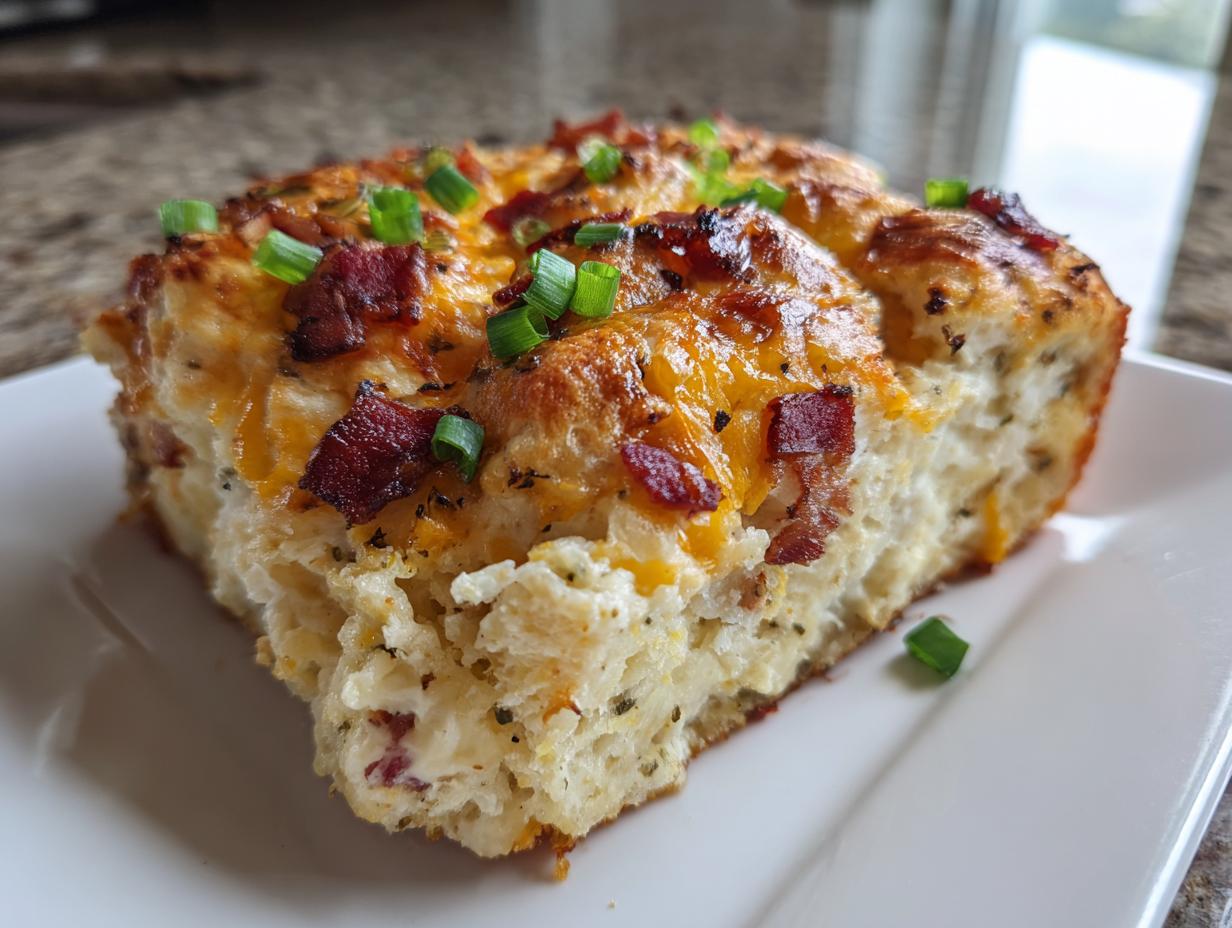
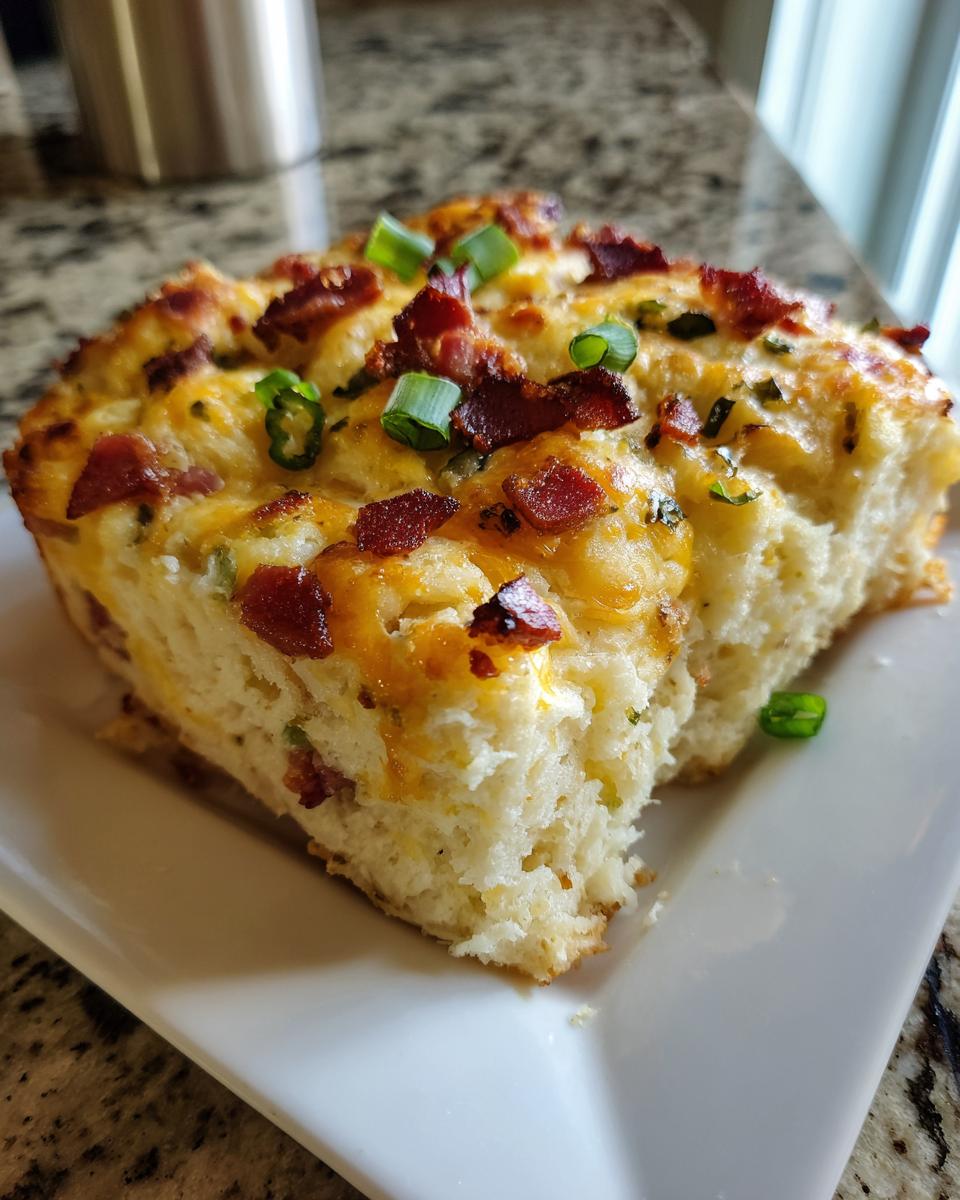
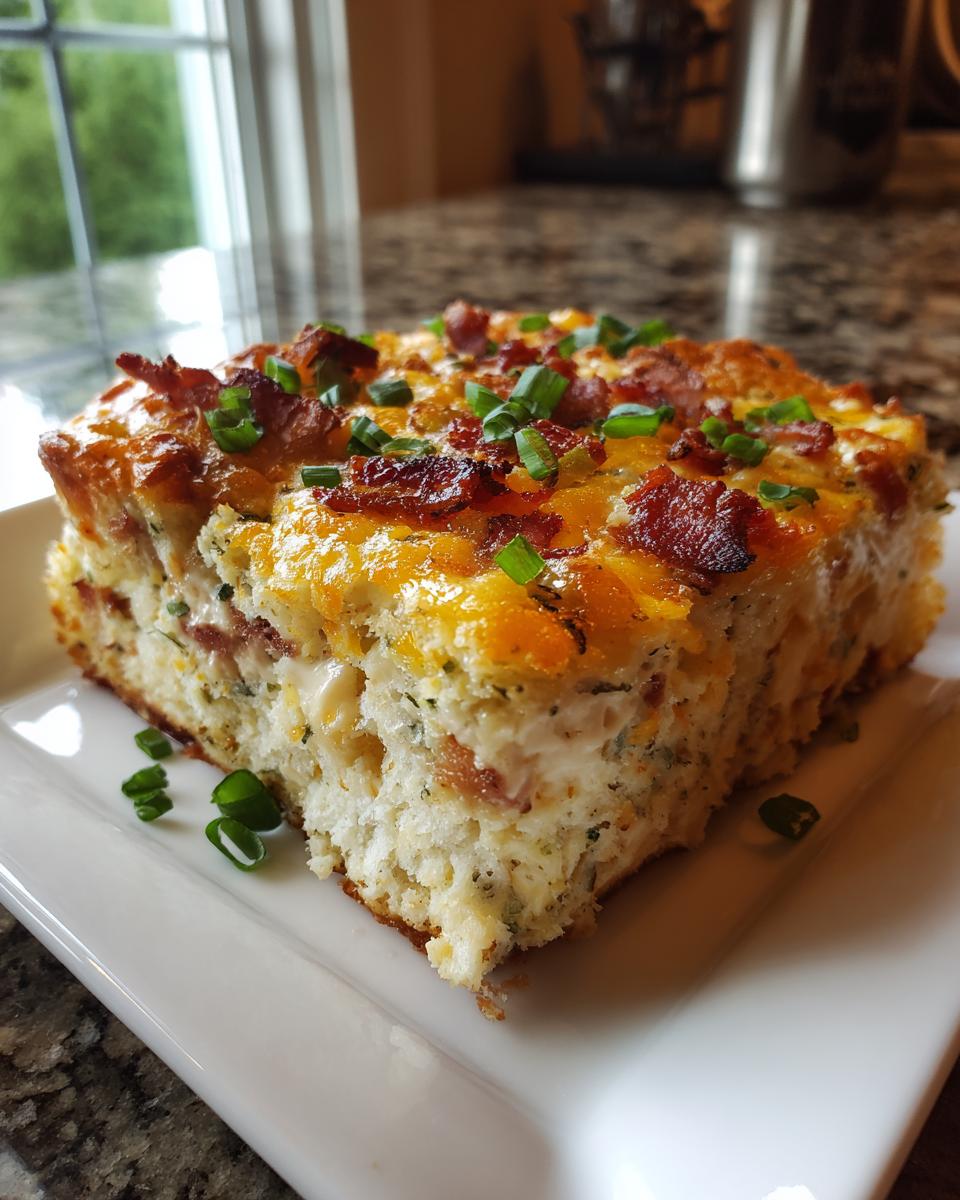
A creamy, cheesy chicken bubble up bake loaded with green onions and bacon bits, perfect for an easy family dinner.
Ingredients
- 2 cups cooked, shredded chicken breast
- 1/2 cup nonfat sour cream
- 1 can 10.5 oz cream of chicken soup
- 1 tbsp ranch seasoning mix
- 2 green onions, finely chopped (half for mixture, half for topping)
- 3/4 cup shredded cheddar or Colby Jack cheese
- 1/2 cup real bacon bits
- 1 can 7.5 oz refrigerated buttermilk biscuits, cut into small pieces
Instructions
- Preheat oven to 350°F and lightly spray a 9×13 inch baking dish with cooking spray.
- In a medium bowl, combine shredded chicken, cream of chicken soup, sour cream, ranch seasoning, and 1/2 of the chopped green onions. Mix until smooth.
- In a small bowl, combine cheese, bacon bits, and remaining green onions. Set aside.
- Spread biscuit pieces evenly across the bottom of the prepared baking dish.
- Pour the chicken mixture evenly over the biscuits, spreading to cover completely.
- Bake uncovered for 20 minutes.
- Remove from oven and evenly sprinkle the cheese, bacon, and green onion topping over the chicken mixture.
- Return to oven and bake uncovered for an additional 15 minutes until cheese is melted and bubbly.
- Remove from oven and let sit for 5 minutes before slicing.
- Serve warm and enjoy.
Notes
- Ensure the chicken is fully cooked to an internal temperature of 165°F before assembling the bake.
- Prep Time: 15 minutes
- Cook Time: 35 minutes
- Category: Dinner
- Method: Bake
- Cuisine: American
Nutrition
- Serving Size: 1 serving
- Calories: 315
- Sugar: Unknown
- Sodium: Unknown
- Fat: 10g
- Saturated Fat: Unknown
- Unsaturated Fat: Unknown
- Trans Fat: Unknown
- Carbohydrates: 25g
- Fiber: Unknown
- Protein: 28g
- Cholesterol: Unknown