Skip to content
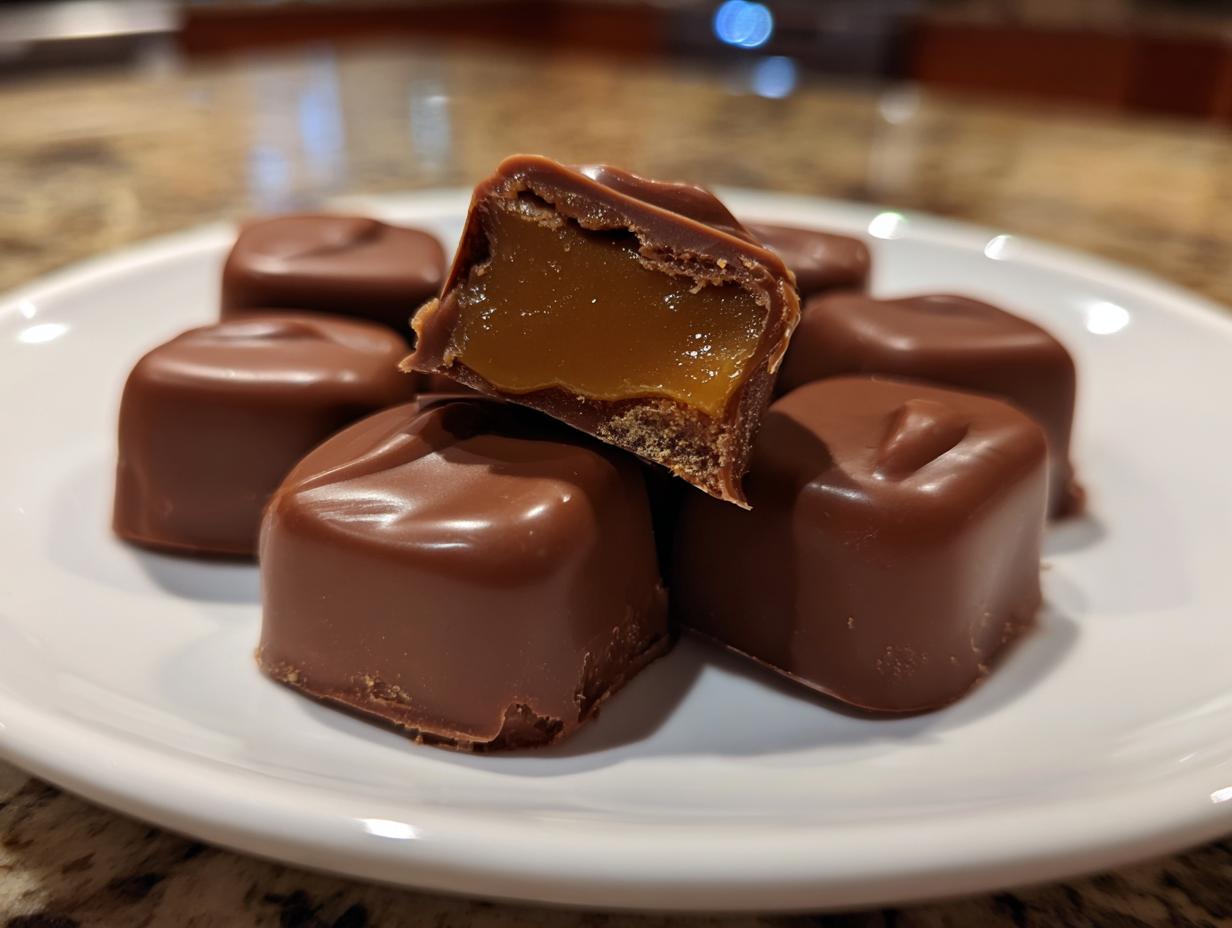
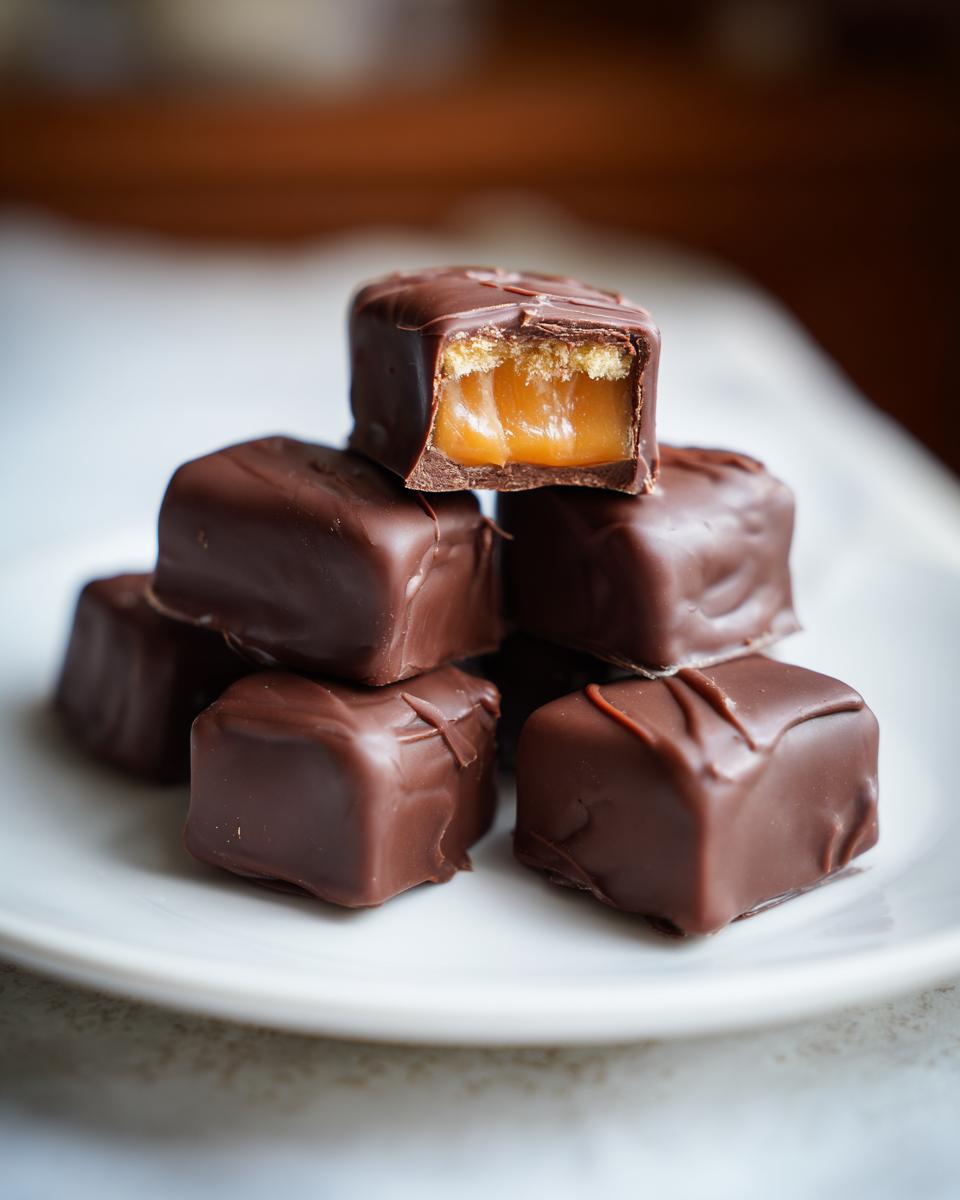
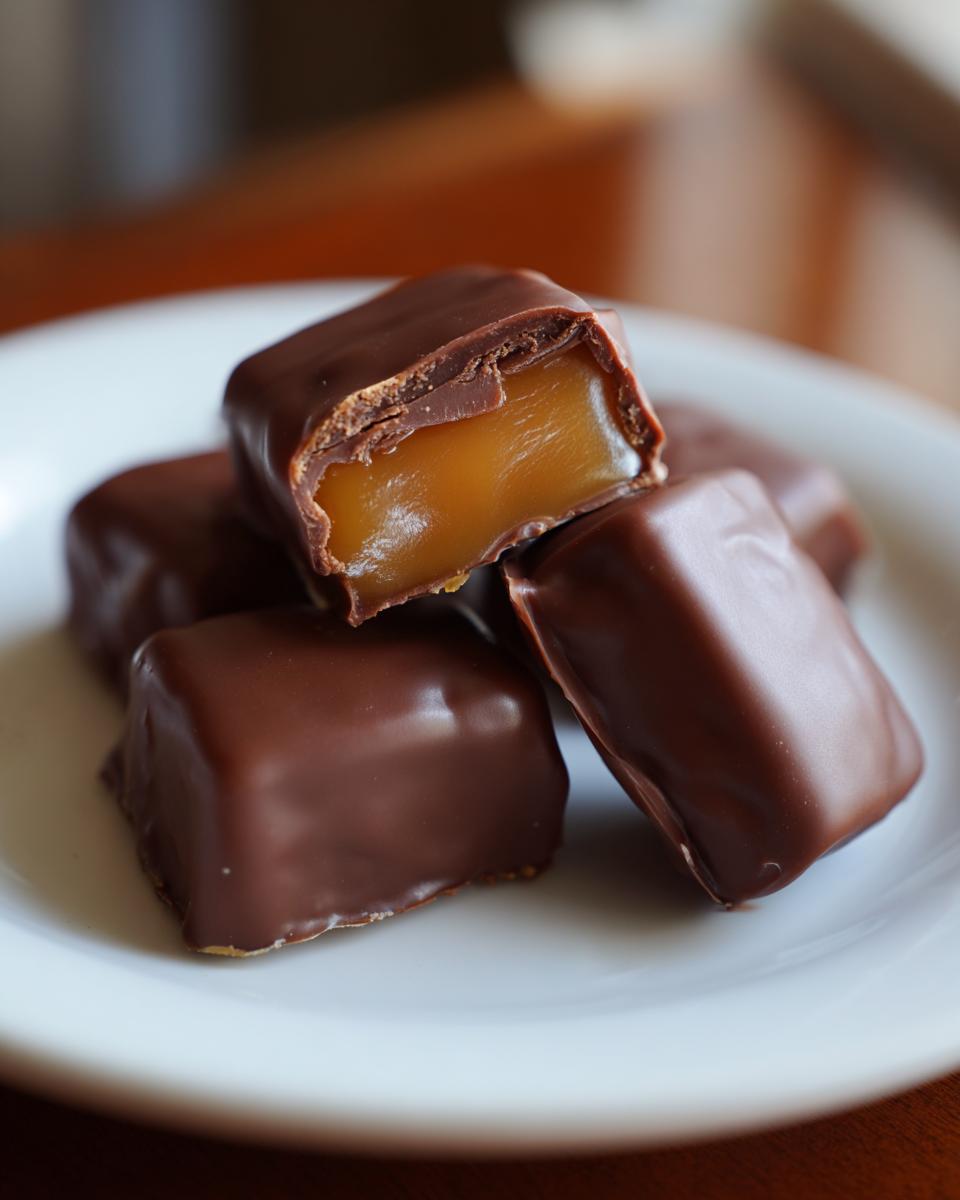
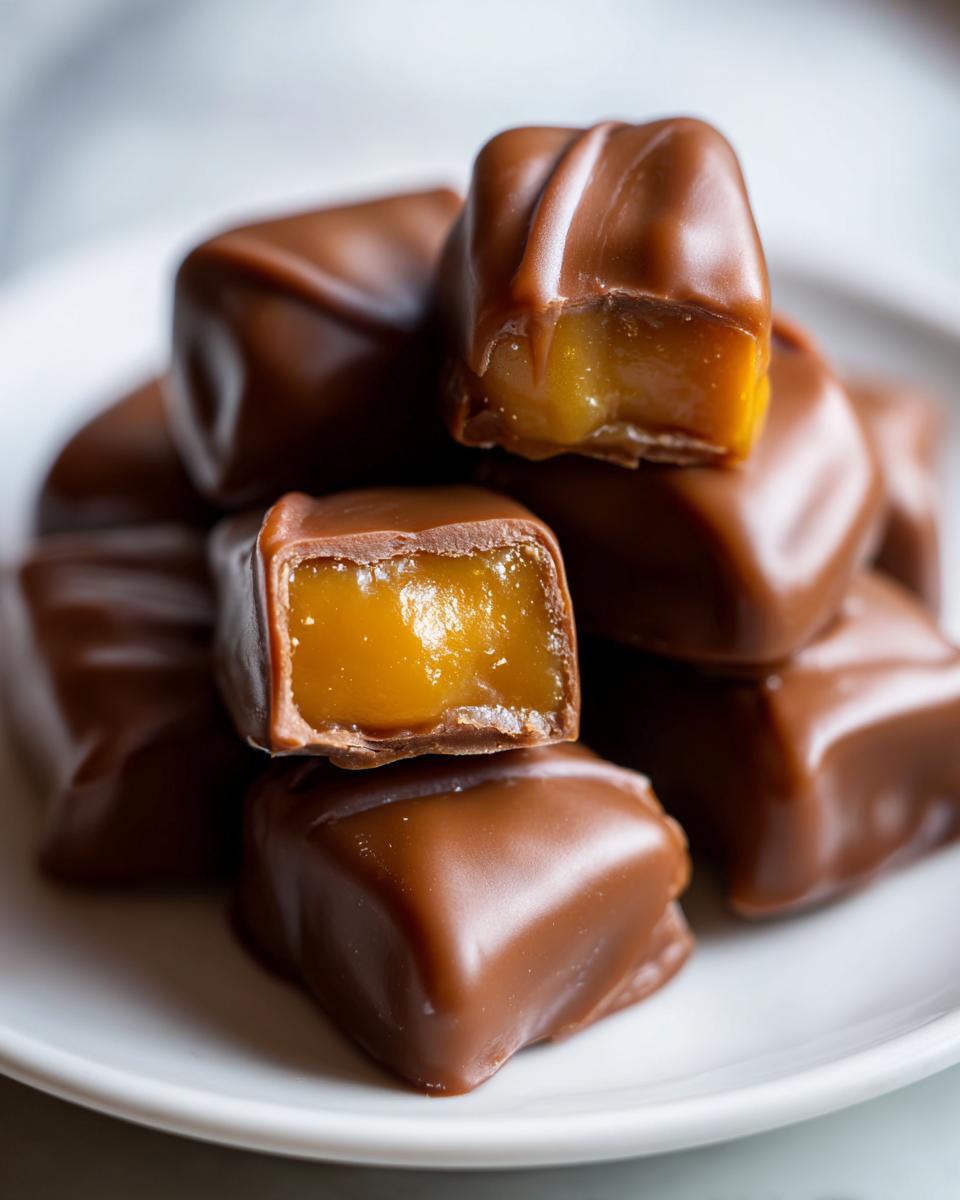
Oh, I just *adore* making homemade Chocolate Covered Caramels! There’s something so special about taking simple ingredients and transforming them into these little bites of pure joy. I’m Anna Kowalska, and here in my kitchen, we’re all about creating tried-and-true homemade recipes that you and your family will absolutely love. Everything we make is done with heart and tons of flavor, and these caramels are no exception. They always bring a smile to my face, and I just know they’ll do the same for you. Forget the store-bought stuff; making your own Chocolate Covered Caramels is so rewarding!
Jump to:
Why You’ll Love These Chocolate Covered Caramels
Seriously, these Chocolate Covered Caramels are a game-changer! They’re ridiculously easy to whip up, which is perfect for when you need a quick sweet fix or want to impress someone. You get that amazing homemade taste that just can’t be beat. Plus, they’re just begging to be shared – imagine gifting these beautiful little treasures! Or, you know, keeping them all to yourself. No judgment here!
- So incredibly easy to make – you won’t believe it!
- That melt-in-your-mouth, rich caramel flavor is pure heaven.
- Perfect for holidays, birthdays, or just because you deserve a treat.
- They look so fancy, but they’re totally approachable to make.
Simple Ingredients for Perfect Chocolate Covered Caramels
The beauty of these Chocolate Covered Caramels is how they come together with just a few pantry staples. You don’t need anything fancy, just good quality ingredients to make them shine. Trust me, the effort is minimal, but the payoff is HUGE!
Caramel Ingredients
| 1 cup butter | Melted |
| 2 ¼ cups brown sugar | Packed |
| 1 cup light corn syrup | |
| 1 (14 ounce) can sweetened condensed milk | |
| 1 teaspoon vanilla extract |
Chocolate Coating Ingredients
| 1 pound milk chocolate | Chips or chopped bar |
| 1 tablespoon butter |
How to Prepare Delicious Chocolate Covered Caramels
Alright, let’s get these amazing Chocolate Covered Caramels made! It’s a two-part magic show: first, we make the gooey caramel, and then we give it that gorgeous chocolate hug. Don’t worry if it sounds a little intimidating; I’ll walk you through every step. Just follow along, and you’ll have a batch of homemade candy that’ll make everyone swoon!
Crafting the Perfect Caramel Base
First things first, grab a 4-quart heavy-bottomed saucepan. This is important for even heating, trust me! Grease up an 8×8 inch pan with a little butter or cooking spray – this will be the cozy bed for our caramel later. Now, in that saucepan, melt your butter over medium heat. Once it’s all liquid gold, add in the brown sugar, corn syrup, and that can of sweetened condensed milk. Stir, stir, stir! Keep it moving constantly because we don’t want anything to stick or burn. You’re going to heat this mixture, stirring all the while, until it reaches a temperature between 242 and 248 degrees Fahrenheit (that’s 116 to 120 Celsius). If you don’t have a candy thermometer, no worries! Just drop a tiny bit of the syrup into a glass of cold water. If it forms a firm but still pliable ball, you’re golden. Once it hits that sweet spot, take it off the heat right away. Stir in the vanilla extract – oh, that smell! – and then carefully pour the whole glorious mixture into your prepared pan. Let it spread out nice and even.
Preparing the Caramels for Dipping
Now, this is where patience really pays off! You need to let that caramel cool and set completely. It might take a couple of hours, or even longer depending on your kitchen. Once it’s cooled and feels firm to the touch, you can cut it into bite-sized squares, about 1 inch each. Honestly, I just eyeball it! After cutting, pop those squares into the refrigerator. Chilling them until they’re really firm is key. This makes them so much easier to dip without them falling apart. If they’re too soft, the chocolate will melt right off them, and that’s just sad.
Achieving a Smooth Chocolate Coating
While your caramels are chilling, let’s get the chocolate ready. You can do this in a double boiler on the stove, or if you’re like me sometimes, you can zap it in the microwave. In the top of your double boiler (or a microwave-safe bowl), combine the milk chocolate with that tablespoon of butter. If you’re microwaving, heat it in 30-second intervals, stirring really well after each one. You want it to melt smoothly and become wonderfully glossy. Don’t overheat it, or the chocolate can seize up! Once it’s all melted and smooth, it’s dipping time! Take one chilled caramel at a time, dip it into the warm chocolate using a fork or a dipping tool, making sure it’s fully coated. Let any excess chocolate drip off for a second, then place it on wax paper. Repeat with all your caramels. Let them sit on the wax paper until the chocolate is completely set. Voila! Perfect Chocolate Covered Caramels!
Tips for Success with Your Chocolate Covered Caramels
Making these Chocolate Covered Caramels is pretty straightforward, but a few little tricks can make all the difference. First off, that candy thermometer is your best friend when making the caramel. Getting the temperature just right ensures a perfect chewy texture, not too hard and not too soft. And please, use good quality chocolate! It really does make a difference in the final flavor and how smoothly it melts for that gorgeous coating. When you’re dipping, make sure your caramels are *really* cold and firm; this stops them from melting into the warm chocolate and making a mess. Also, try not to rush the chocolate setting time on the wax paper. Let it fully harden before you try to peel them off. A little patience goes a long way for beautiful Chocolate Covered Caramels!
Serving and Storing Your Chocolate Covered Caramels
These beautiful Chocolate Covered Caramels are so lovely to serve! You can arrange them on a pretty platter for dessert or package them up in little cellophane bags tied with ribbon for a sweet gift. They always disappear so fast, so I usually make a double batch!
How to Store Chocolate Covered Caramels
Storing these treats is super simple. Once the chocolate has completely hardened, just place your Chocolate Covered Caramels in an airtight container. You can layer them between sheets of wax paper or parchment paper if you’re worried about them sticking together, though usually, they’re fine as long as they’re fully set. Keep the container at cool room temperature, away from direct sunlight or heat. They’ll stay delicious like this for about 1-2 weeks. If your kitchen gets really warm, popping them in the fridge is okay, but sometimes that can make the chocolate coating a bit chalky, so room temperature is usually best.
Frequently Asked Questions about Chocolate Covered Caramels
Got questions about whipping up these delicious Chocolate Covered Caramels? I’ve got answers! Making homemade candy is so rewarding, but sometimes little things can pop up. Let’s clear them all up so you can make the best batch possible!
Can I use dark chocolate instead of milk chocolate for my Chocolate Covered Caramels?
Oh, absolutely! You can totally swap out the milk chocolate for dark chocolate if that’s more your style. Just make sure you use a good quality dark chocolate that melts nicely. Keep in mind that dark chocolate tends to be a little less sweet, so if you’re a super sweet fan, you might want to use a semi-sweet chocolate instead. The process is exactly the same!
My caramels are too hard or too soft, what went wrong?
This usually comes down to temperature when you’re making the caramel base! If your caramels are too hard, it likely means the sugar syrup cooked a little too long or got too hot. If they’re too soft and gooey, it probably means it didn’t cook quite long enough or hot enough. That firm ball stage (or the precise temperature on your candy thermometer) is super important for getting that perfect chewy texture. Don’t worry, it just takes a little practice!
How long do Chocolate Covered Caramels last?
These homemade beauties will stay yummy for about 1 to 2 weeks when stored properly in an airtight container at cool room temperature. Just make sure they’re fully cooled and set before you seal them up. If your kitchen gets really warm, you can pop them in the fridge, but sometimes that can make the chocolate coating look a little dull or chalky. So, cool and dry is usually the best bet!
Estimated Nutritional Information for Chocolate Covered Caramels
Here’s an approximate idea of what you’re getting in each delicious bite of these Chocolate Covered Caramels. Remember, these numbers can change a bit depending on the exact brands of ingredients you use, but it gives you a good ballpark! For more information on sugar content in candy, you can check out resources on sugar.
| Serving Size | 1 caramel |
| Calories | 63 |
| Sugar | 7g |
| Sodium | 21mg |
| Fat | 3g |
| Saturated Fat | 2g |
| Unsaturated Fat | 1g |
| Trans Fat | 0g |
| Carbohydrates | 9g |
| Fiber | 0g |
| Protein | 1g |
| Cholesterol | 6mg |

Amazing 1-step Chocolate Covered Caramels
- Total Time: 50 minutes plus chilling time
- Yield: Approximately 64 caramels 1x
- Diet: Vegetarian
Description
Make delicious Chocolate Covered Caramels at home. This recipe is perfect for holidays or as a sweet treat.
Ingredients
- CARAMELS:
- 1 cup butter
- 2 ¼ cups brown sugar
- 1 cup light corn syrup
- 1 (14 ounce) can sweetened condensed milk
- 1 teaspoon vanilla extract
- CHOCOLATE:
- 1 pound milk chocolate
- 1 tablespoon butter
Instructions
- Grease an 8 x 8 inch square pan.
- In a heavy 4 quart saucepan, melt butter over medium heat. Add brown sugar, corn syrup, and milk. Stirring constantly, heat to 242 to 248 degrees F (116 to 120 degrees C), or until a small amount of syrup dropped into cold water forms a firm but pliable ball.
- Remove from heat and stir in vanilla extract. Pour into the prepared pan.
- When caramel has cooled and set, cut into 1 inch squares. Chill in the refrigerator until firm.
- Melt chocolate with 1 tablespoon butter in the top of a double boiler or in a bowl in the microwave. Stir until smooth.
- Dip caramel squares in chocolate and place on wax paper to cool.
- Prep Time: 20 minutes
- Cook Time: 30 minutes
- Category: Dessert
- Method: Stovetop and Double Boiler/Microwave
- Cuisine: American
Nutrition
- Serving Size: 1 caramel
- Calories: 63
- Sugar: 7g
- Sodium: 21mg
- Fat: 3g
- Saturated Fat: 2g
- Unsaturated Fat: 1g
- Trans Fat: 0g
- Carbohydrates: 9g
- Fiber: 0g
- Protein: 1g
- Cholesterol: 6mg