Skip to content
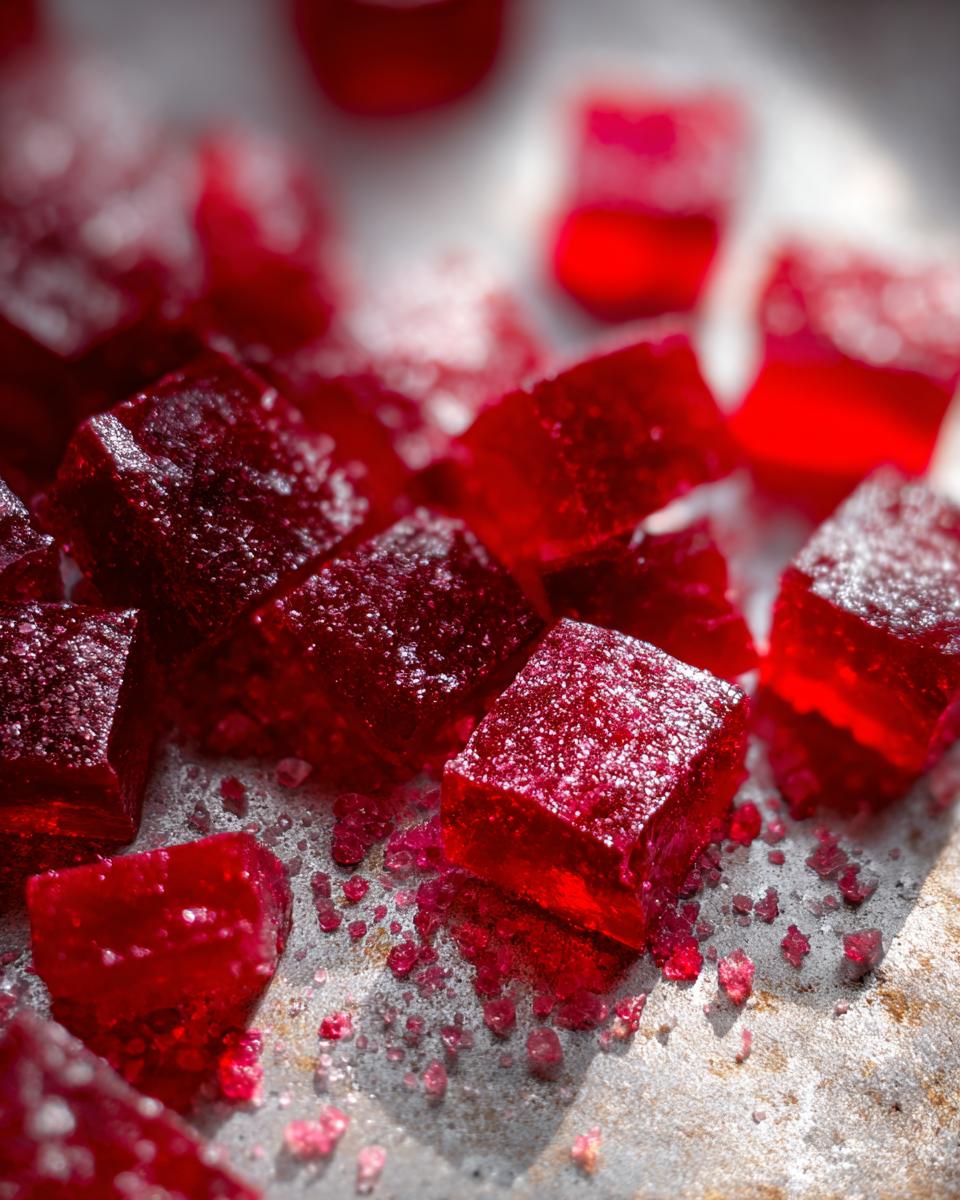
Oh, hello there! I’m Anna Kowalska, and here I share tried-and-true homemade recipes that you and your family will love. For me, cooking is all about heart and flavor, and I just adore bringing those classic tastes back to life. There’s something so special about whipping up a batch of Old-Fashioned Homemade Hard Candy. It brings me right back to simpler times, and I bet it does for you too! You know, sometimes the most magical treats are the ones that feel like a warm hug from the past. That’s exactly what this recipe is – a little bit of nostalgia, made with love, and ready to create sweet memories for your own family. Get ready to experience a taste of pure, old-fashioned joy!
Jump to:
Why You’ll Love This Old-Fashioned Homemade Hard Candy Recipe
Making your own candy doesn’t have to be complicated, trust me! This Old-Fashioned Homemade Hard Candy recipe is a winner because it’s surprisingly simple and delivers that classic, satisfying crunch you’re craving. It’s the perfect way to bring a little bit of joy and a whole lot of deliciousness into your kitchen. Plus, who doesn’t love a treat that tastes like pure happiness?
Quick and Easy Preparation
Seriously, you can whip up a batch of this candy in about 30 minutes total! It uses pantry staples and comes together so fast, you’ll wonder why you haven’t made it sooner. It’s perfect for those times you need a sweet fix without a fuss.
Classic Comfort Flavors
That bright peppermint flavor and the satisfying crackle of hard candy are just pure comfort in a bite. It’s a taste that instantly transports you back to happy memories, making it a truly special treat for any occasion.
Perfect for Family Fun
This recipe is an absolute blast to make with the kids! They’ll love watching the sugar transform and helping to cut the candy (with a little supervision, of course!). It’s a fantastic way to create memories and enjoy a delicious reward together.
Gathering Your Old-Fashioned Homemade Hard Candy Ingredients
Alright, let’s get our ingredients ready to make some fantastic Old-Fashioned Homemade Hard Candy! Don’t worry, you probably have most of this stuff right in your pantry already. It’s really just a few simple things that come together to make candy magic. The key is to have everything measured out and ready to go because once that sugar mixture starts cooking, things move pretty fast! Having all your ducks in a row means you can focus on getting that perfect temperature without any last-minute scrambling. Let’s see what we need…
Essential Ingredients for Old-Fashioned Homemade Hard Candy
| 2 cups | Granulated white sugar |
| 1 cup | Filtered water |
| ¾ cup | Light corn syrup |
| ½ teaspoon | Pure peppermint extract (or your favorite oil flavoring!) |
| 1 drop | Red food coloring (optional, but it makes it so pretty!) |
| ⅛ cup | Confectioners’ sugar (for dusting later) |
Step-by-Step Guide to Making Old-Fashioned Homemade Hard Candy
Alright, get ready to make some magic! Making this Old-Fashioned Homemade Hard Candy is actually pretty straightforward if you follow these steps. The most important thing is to have everything prepped and ready to go because once that sugar hits the heat, things move quickly! Don’t be intimidated; just take it one step at a time and you’ll have beautiful, delicious candy in no time.
Preparing Your Workspace and Pans
First things first, let’s get our station ready. You’ll want to generously grease two 9-inch round pans and a baking sheet. I like to use a good quality baking spray or a thin layer of butter. Make sure you get into all the nooks and crannies! This step is super important to prevent your candy from sticking. Trust me, you do *not* want to spend ages trying to scrape candy off your pans!
Cooking the Sugar Mixture to the Hard Crack Stage
Now, grab a heavy-bottomed saucepan – this is key for even heating. Combine your sugar, water, and corn syrup. Stir it constantly until all the sugar is dissolved. Once it’s dissolved, stop stirring! Let it bubble away. Lower the heat a bit and let it cook slowly towards what we call the “hard crack stage,” which is exactly 300 degrees Fahrenheit (150°C). If you see any sugar crystals forming on the sides of the pan, just gently wipe them away with a damp pastry brush. This little trick stops them from ruining the smooth texture of your candy. For more on candy making temperatures, check out this guide to candy making temperatures.
Adding Flavor and Color
As soon as your candy mixture hits that magical 300-degree mark, carefully remove the pan from the heat. Now’s the fun part! Stir in your peppermint extract – or whatever flavor you’re using – and if you want that pretty pink color, add just one drop of red food coloring. Stir *only* until it’s just mixed. We don’t want to overmix here!
Pouring and Cooling the Candy
Quickly pour the hot candy mixture into your prepared pans. Here’s a little trick: set one of the candy-filled pans over a saucepan with a bit of simmering hot water. This keeps that batch warm and pliable, making it easier to cut later. If you have a helper, even better! But if you’re flying solo, this water bath method is a lifesaver for the second pan.
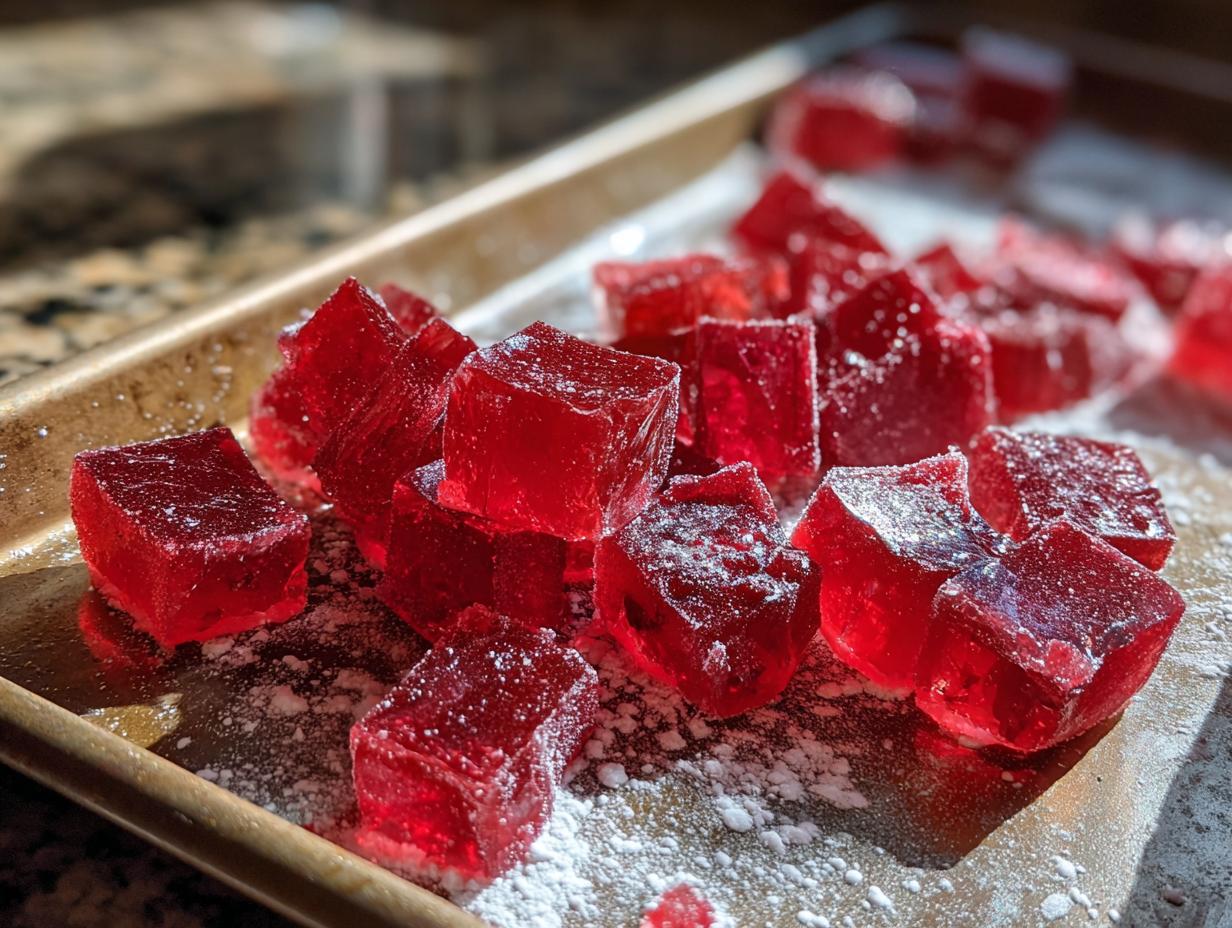
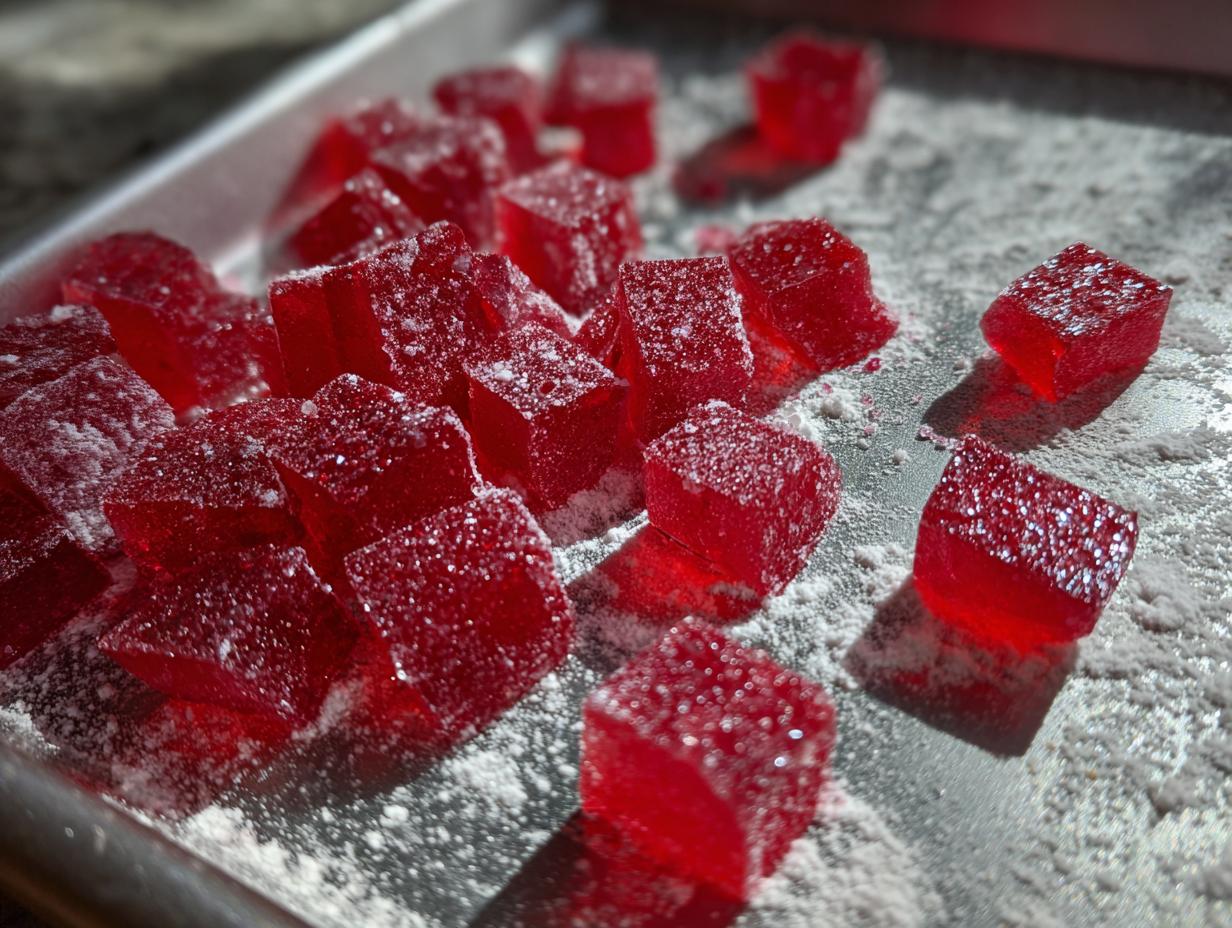
Cutting and Shaping Your Old-Fashioned Homemade Hard Candy
Once the candy in the pan *not* sitting over the water is cool enough to handle (but still warm!), it’s time to get cutting! Grab some kitchen shears and work fast. Snip the candy into about 1-inch strips, and then snip those strips into bite-sized pieces. Drop these little pieces onto your buttered baking sheet. If the candy starts to get too hard to cut, just pop that pan back over the warm water for a minute to soften it up. If it ever gets sticky, though, take it off the heat right away and let it cool on the counter.
Tips for Perfectly Set Old-Fashioned Homemade Hard Candy
Making Old-Fashioned Homemade Hard Candy is super rewarding, but sometimes things can get a little… sticky or hard. Don’t you worry! I’ve got a few little tricks up my sleeve to help you nail it every time. It’s all about knowing how to handle the candy while it’s doing its thing.
Working Quickly is Key
Seriously, when it comes to cutting and shaping, you’ve got to move! As soon as the candy is cool enough to touch but still pliable, get those scissors snipping. The faster you work, the cleaner your pieces will be, and the less chance they have of getting too hard to manage.
Managing Candy Temperature
If your candy starts to get too hard to cut, don’t panic! Just set the pan over some warm water for a minute or two to soften it up. On the flip side, if it starts feeling sticky, that means it’s too warm. Take it off the heat immediately and let it cool on the counter for a bit. It’s a delicate balance!
Preventing Sticking
Once your candy pieces are cut and dropped onto the baking sheet, toss them with a little bit of confectioners’ sugar. This is the secret sauce to keeping them from clumping together as they cool completely. Just a light dusting is all you need to keep each piece separate and perfect.
Frequently Asked Questions About Old-Fashioned Homemade Hard Candy
Got questions about making this delightful Old-Fashioned Homemade Hard Candy? I totally get it! Candy making can seem a little tricky, but I promise this recipe is super forgiving. Let’s clear up any lingering doubts so you can get to the fun part – enjoying your delicious, homemade treats!
Can I use a different extract flavor?
Oh, absolutely! Peppermint is a classic, but feel free to get creative. Vanilla, cinnamon, or even a fruit-flavored oil extract work wonderfully. Just remember to add it after you take the candy off the heat, and stick to about ½ teaspoon, adjusting to your taste. Some flavors might be a bit stronger than others!
How do I store homemade hard candy?
Storing is easy peasy! Once your candy is completely cool and no longer sticky, toss it gently with a little confectioners’ sugar to keep it from clumping. Then, store it in an airtight container at room temperature. Avoid humid places if you can – moisture is the enemy of hard candy! For more tips on storing sweets, you might find this guide to storing baked goods helpful.
What if my candy crystallizes?
Crystallization happens when sugar crystals form. To prevent it, make sure you stir the sugar mixture *only* until it’s dissolved, then stop stirring. Also, wipe down the sides of the pan with a damp brush to remove any stray crystals. If it does crystallize, don’t despair! You might be able to re-melt it and try again, but sometimes it just makes for a slightly different texture.
Is this recipe suitable for beginners?
You bet! This Old-Fashioned Homemade Hard Candy recipe is a fantastic starting point for anyone new to candy making. The ingredients are simple, the steps are clear, and the tips I’ve shared will help you navigate any tricky moments. Just follow along carefully, work safely, and you’ll be a candy pro in no time!
Estimated Nutritional Information for Old-Fashioned Homemade Hard Candy
Just so you know, the numbers for homemade treats can vary a bit depending on the exact ingredients you use, like the brand of corn syrup or how much food coloring you add. But, to give you a general idea, here’s an estimated breakdown for a serving of this delicious Old-Fashioned Homemade Hard Candy. It’s mostly sugar, of course, but it’s such a fun treat!
Nutritional Breakdown Per Serving
| Serving Size | 1 ounce |
| Calories | 116 |
| Sugar | 24g |
| Sodium | 8mg |
| Fat | 0g |
| Saturated Fat | 0g |
| Carbohydrates | 30g |
| Protein | 0g |
Sharing Your Old-Fashioned Homemade Hard Candy Creations
I just love seeing what you all create in your kitchens! If you make this Old-Fashioned Homemade Hard Candy, please drop a comment below and tell me how it turned out. Did you try a fun flavor? Did the kids help? I’d be tickled pink to hear all about it, and maybe even see a photo if you’re feeling fancy!
Print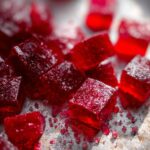
Old-Fashioned Homemade Hard Candy: 1 Delicious Recipe
- Total Time: 30 minutes
- Yield: Approximately 1 pound 1x
- Diet: Vegetarian
Description
This recipe for Old-Fashioned Homemade Hard Candy brings a classic treat right into your kitchen. Anna Kowalska shares this simple, nostalgic recipe, perfect for creating sweet moments with your family.
Ingredients
- 2 cups white sugar
- 1 cup water
- ¾ cup light corn syrup
- ½ teaspoon peppermint extract
- 1 drop red food coloring (Optional)
- ⅛ cup confectioners’ sugar
Instructions
- Generously grease two 9-inch pans and one baking sheet.
- Combine sugar, water, and corn syrup in a heavy 2-quart saucepan. Cook, stirring constantly until the sugar is dissolved. Then cook without stirring, lowering the heat and cooking more slowly during the last few minutes, to the hard crack stage (300 degrees F). If sugar crystals form on the sides of the pan, wipe them off with a damp brush.
- Remove from heat, add oil flavoring and enough food coloring to color; stir only to mix. Pour into greased 9-inch pans. Set one pan of candy over a saucepan containing hot water (unless you have a helper to help cut the candy).
- As soon as the other pan of candy is cool enough to handle, cut it with scissors into 1-inch strips. Then snip the strips into pieces. Work fast. Drop the pieces onto the buttered baking sheet.
- If the candy cools too quickly, set it on a saucepan over hot water to soften it, but if it gets sticky, return at once to the work counter.
- Toss in a small amount of powdered sugar to keep from sticking together. Repeat with the second pan of candy.
Notes
- Work quickly when cutting the candy as it cools.
- If candy becomes too hard to cut, gently reheat it over hot water.
- If candy becomes sticky, return it to the counter to cool slightly.
- Prep Time: 10 minutes
- Cook Time: 20 minutes
- Category: Candy
- Method: Stovetop
- Cuisine: American
Nutrition
- Serving Size: 1 ounce
- Calories: 116
- Sugar: 24g
- Sodium: 8mg
- Fat: 0g
- Saturated Fat: 0g
- Unsaturated Fat: 0g
- Trans Fat: 0g
- Carbohydrates: 30g
- Fiber: 0g
- Protein: 0g
- Cholesterol: 0mg