Skip to content
Oh, get ready for a real treat, because we’re diving headfirst into the glorious world of Kumquat Pie! Seriously, if you’ve never tried kumquats before, you’re in for such a delightful surprise. They’re like little bursts of sunshine, sweet and tart all at once, and they make the most incredible pie. I’m Anna Kowalska, and here in my kitchen, I’m all about sharing those tried-and-true homemade recipes that you and your family will just adore. Everything I make is with heart and flavor, and this Kumquat Pie is no exception. It’s got that special something that just makes a meal feel complete, a real testament to how simple, good ingredients can create something truly magical.
Jump to:
Why You’ll Love This Kumquat Pie
Trust me, this Kumquat Pie is an absolute winner! It’s one of those recipes that looks fancy but is surprisingly easy to whip up, making it perfect for weeknights or special occasions. You’ll love it because:
- It’s packed with that amazing sweet-tart kumquat flavor that’s totally unique.
- The recipe is straightforward and doesn’t require any fussy techniques.
- It’s a crowd-pleaser that brings a little bit of sunshine to any table!
A Sweet and Tart Flavor Sensation
The star of this pie, the kumquat, brings this incredible flavor. Imagine a burst of tangy citrus followed by a delightful sweetness – that’s what you get! It’s not too sour and not too sweet, just perfectly balanced, making every bite a little taste of sunshine you won’t forget. For more information on the nutritional benefits of citrus fruits, you can check out this resource.
Simple Steps for a Stunning Dessert
Don’t let the gorgeous look of this Kumquat Pie fool you! I’ve designed it to be super approachable. You’ll be amazed at how simple the steps are, and before you know it, you’ll have a beautiful, golden pie ready to impress everyone. It’s proof that delicious homemade desserts don’t have to be complicated.
Gathering Your Kumquat Pie Ingredients
Alright, let’s get down to business for our amazing Kumquat Pie! Having all your ingredients prepped and ready makes the whole process so much smoother. I always like to have everything measured out before I even start mixing. It’s my little secret to stress-free baking. Here’s what you’ll need to gather for this sunshine-in-a-pie:
| Ingredient Name | Quantity | Preparation Notes |
| Kumquats | 2 cups | Make sure they’re washed well, stems removed, and then sliced nice and thin. Those little slices are key! |
| All-purpose flour | 1 ½ cups | Have a little extra on hand for dusting your surface when you roll out the dough. |
| Granulated sugar | 1 cup | We’ll divide this: 3/4 cup goes into the filling, and the remaining 1/4 cup is for our yummy topping. |
| Cold unsalted butter | ½ cup (1 stick) | Cut it into small cubes. Keeping it cold is super important for a flaky crust! |
| Ice water | 4-6 tablespoons | Seriously, make it ice cold! This is another crust secret. |
| Cornstarch | 3 tablespoons | This helps thicken up our glorious kumquat filling. |
| Ground cinnamon | ½ teaspoon | Just a little warmth to complement the citrus. |
| Ground nutmeg | ¼ teaspoon | Adds that cozy, comforting spice note. |
| Large eggs | 2 | Give ’em a quick whisk for our egg wash – this makes the crust so pretty and golden. |
| Evaporated milk | ½ cup | This adds a lovely richness to the kumquat filling. |
| Vanilla extract | 1 teaspoon | Because vanilla makes almost everything taste better, right? |
Crafting Your Perfect Kumquat Pie: Step-by-Step
Alright, let’s get our hands a little floury and make some magic happen! Crafting this Kumquat Pie is like a little baking adventure, and I’m here to guide you through every single step. Don’t worry, it’s all about taking your time and enjoying the process. We’ll start with that all-important crust!
Preparing the Kumquat Pie Crust
First things first, let’s make that beautiful crust. In a large bowl, whisk together your 1 ½ cups of all-purpose flour and a pinch of salt if you like. Now, toss in those cold, cubed butter pieces. Use a pastry blender, your fingertips, or even a food processor (just pulse it!) until the mixture looks like coarse crumbs with some pea-sized pieces of butter still visible. That’s what gives us that flaky texture! Gradually drizzle in the ice water, one tablespoon at a time, mixing gently until the dough just comes together. Don’t overwork it! Gather the dough into a ball, flatten it into a disc, wrap it in plastic wrap, and pop it in the fridge for at least 30 minutes. This resting period is crucial! Once chilled, lightly flour your surface and roll out the dough into a circle large enough to fit your pie plate. Carefully transfer it, press it gently into the plate, and trim any excess dough, leaving about a half-inch overhang. Crimp the edges however you like – your signature touch!
Assembling the Kumquat Pie Filling
Now for the star of the show – that vibrant kumquat filling! In a separate bowl, gently toss your sliced kumquats with the 3 tablespoons of cornstarch, ½ teaspoon of cinnamon, and ¼ teaspoon of nutmeg. Make sure each slice gets a little coating. In another medium bowl, whisk together the ¾ cup of granulated sugar, the ½ cup of evaporated milk, and the 1 teaspoon of vanilla extract. Add the coated kumquats to this wet mixture and stir everything together just until combined. You don’t want to mash those beautiful kumquat slices! Carefully pour this glorious filling into your prepared pie crust. Smooth it out gently with your spoon so it’s relatively even.
Baking Your Delicious Kumquat Pie
Time to bake this beauty! Preheat your oven to 375°F (190°C). Now, for that lovely golden crust, brush the edges of your pie crust with the lightly beaten eggs. Sprinkle the remaining ¼ cup of granulated sugar evenly over the top of the kumquat filling. This gives it a nice little crunch and extra sweetness. Place your Kumquat Pie on a baking sheet (this catches any potential drips and makes it easier to get in and out of the oven). Bake for about 20 minutes at 375°F, then reduce the oven temperature to 350°F (175°C) and continue baking for another 30-35 minutes. You’ll know it’s done when the crust is golden brown and the filling is bubbly and slightly thickened. Let it cool completely on a wire rack before slicing!
Tips for Kumquat Pie Success
Making a fantastic Kumquat Pie is totally achievable, and a few little tricks can make all the difference. I’ve learned these from years of baking, and they really help ensure your pie turns out just right. So, let’s make sure your pie is a showstopper!
Choosing the Best Kumquats
When you’re picking out your kumquats, look for ones that are bright orange and feel firm, not mushy. A few little brown spots are okay – that just means they’re ripe and full of flavor! Avoid any that look dull or have soft patches.
Achieving a Flaky Pie Crust
The secret to a flaky crust? Keep everything COLD! Use ice-cold butter and ice water, and don’t overwork the dough. When you cut the butter into the flour, leave some small, pea-sized pieces. Those bits melt in the oven and create those lovely layers. For more pie crust tips, check out this guide.
Preventing a Soggy Bottom
A soggy bottom can be a pie’s worst enemy! For this Kumquat Pie, make sure your crust is well-chilled before baking. Also, baking the pie on a preheated baking sheet helps circulate heat from the bottom, and letting the filling thicken properly in the oven is key.
Kumquat Pie Frequently Asked Questions
Got a few lingering questions about making this delightful Kumquat Pie? I’ve got you covered! Here are some common queries I get, along with my best advice to ensure your pie turns out perfectly every time.
Can I use other citrus fruits instead of kumquats in this Kumquat Pie?
While this recipe is really designed for the unique sweet-tart punch of kumquats, you *could* try it with other citrus, but it won’t be quite the same! Kumquats have a wonderful balance and you eat the peel, which is part of the charm. If you can’t find kumquats, you might experiment with thinly sliced oranges or a mix of lemon and orange, but be prepared to adjust the sugar and maybe add a bit more cornstarch as their flavor profile is different.
How do I know when my Kumquat Pie is fully baked?
You’ll know your Kumquat Pie is ready when the crust is a beautiful golden brown all over, especially around the edges. The filling should look bubbly and slightly thickened – not watery. If you gently nudge the pie, the center shouldn’t jiggle too much. It’s best to let it cool down completely, as the filling will set up even more as it rests.
What is the best way to store leftover Kumquat Pie?
Leftover Kumquat Pie is best stored loosely covered at room temperature for a day or two, or in the refrigerator for up to 4 days. Covering it too tightly can make the crust a bit soft. If you refrigerate it, you might want to warm up a slice gently before serving to bring back that lovely texture!
Nutritional Information for Kumquat Pie
Now, I always like to give you a little heads-up about what you’re enjoying. These numbers are just estimates, of course, because every kitchen is a little different! But this should give you a good idea of what’s in a slice of our delicious Kumquat Pie.
| Nutrient | Amount (per serving) |
| Calories | 350 (estimated) |
| Fat | 18g (estimated) |
| Saturated Fat | 10g (estimated) |
| Carbohydrates | 45g (estimated) |
| Sugar | 25g (estimated) |
| Protein | 4g (estimated) |
| Sodium | 150mg (estimated) |
| Fiber | 3g (estimated) |
Sharing Your Thoughts on Kumquat Pie
I just love hearing from you all! Have you tried making this sunshine-filled Kumquat Pie? Please leave a comment below and let me know how it turned out for you. A star rating would be wonderful too! I can’t wait to hear about your baking adventures! If you’re looking for more dessert inspiration, you might enjoy our dessert recipes.
Print
Amazing Kumquat Pie: 1 Sunshine Burst
- Total Time: 60 minutes
- Yield: 6 servings 1x
- Diet: Vegetarian
Description
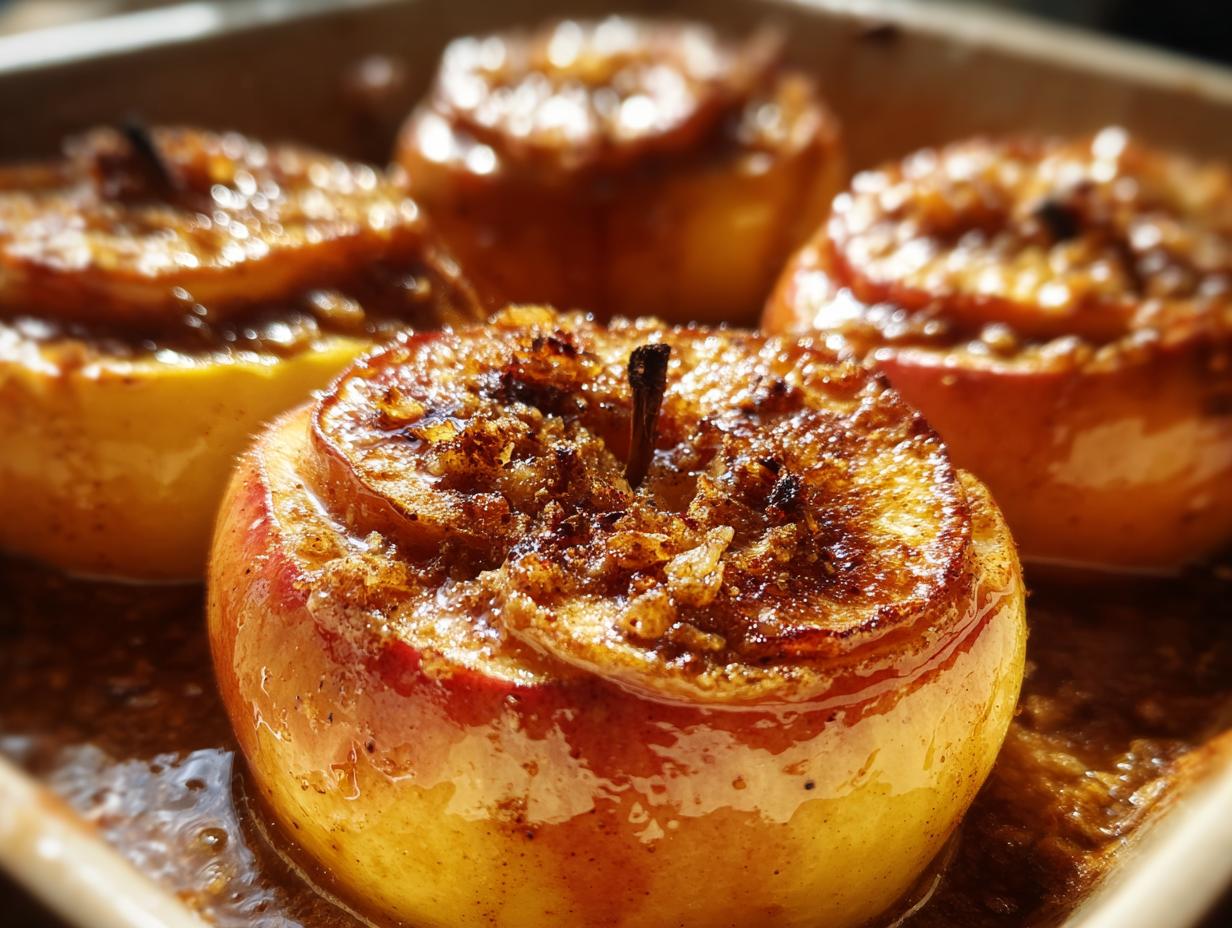
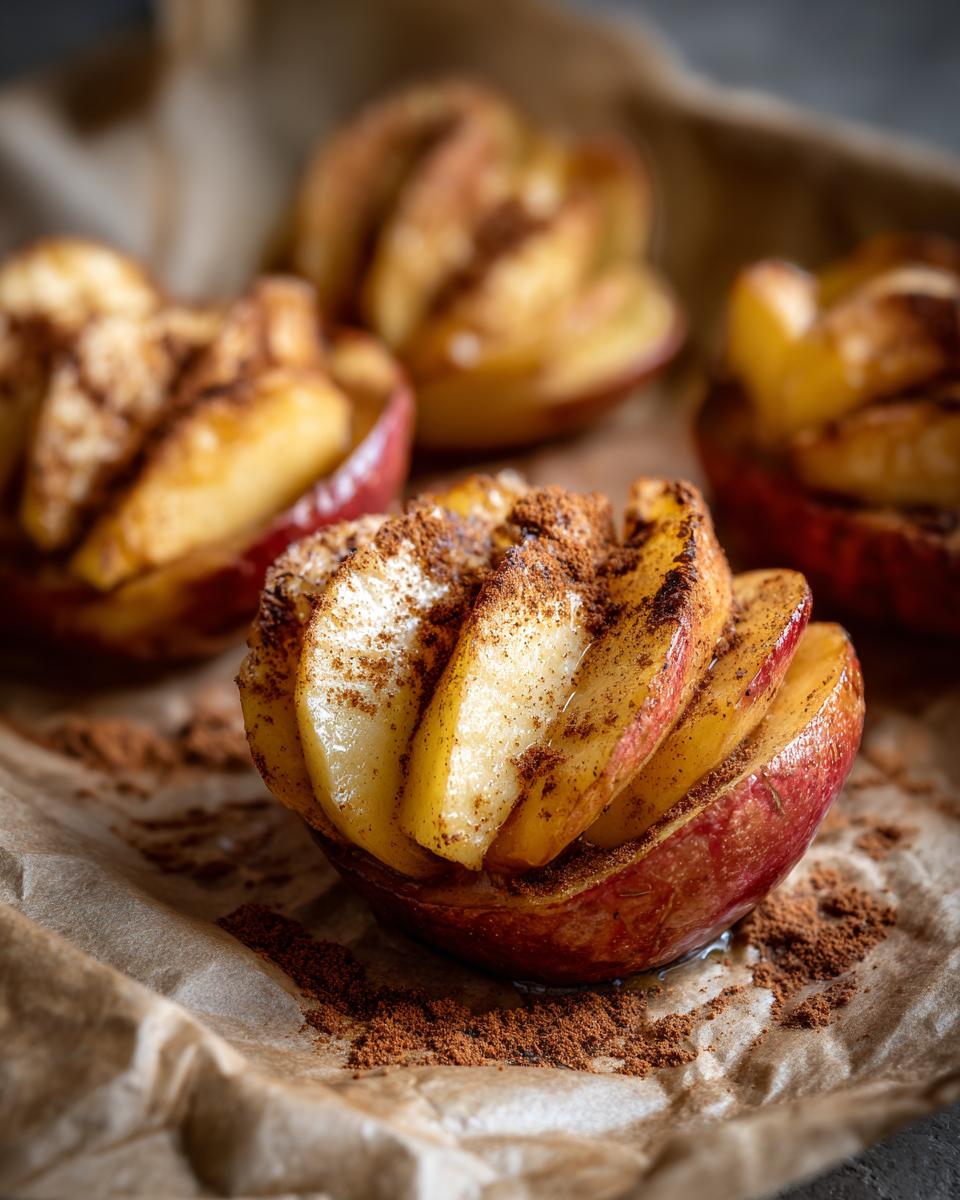
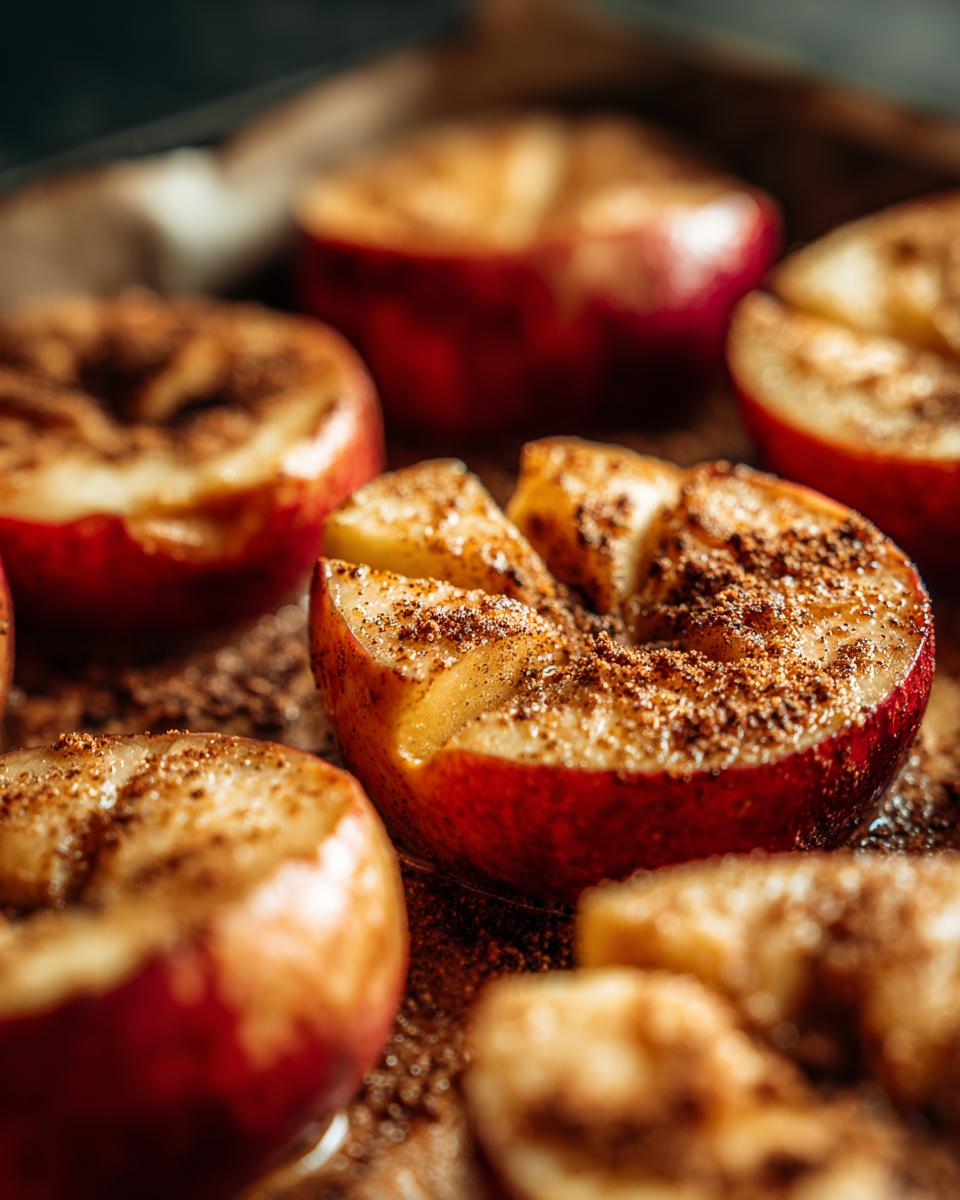
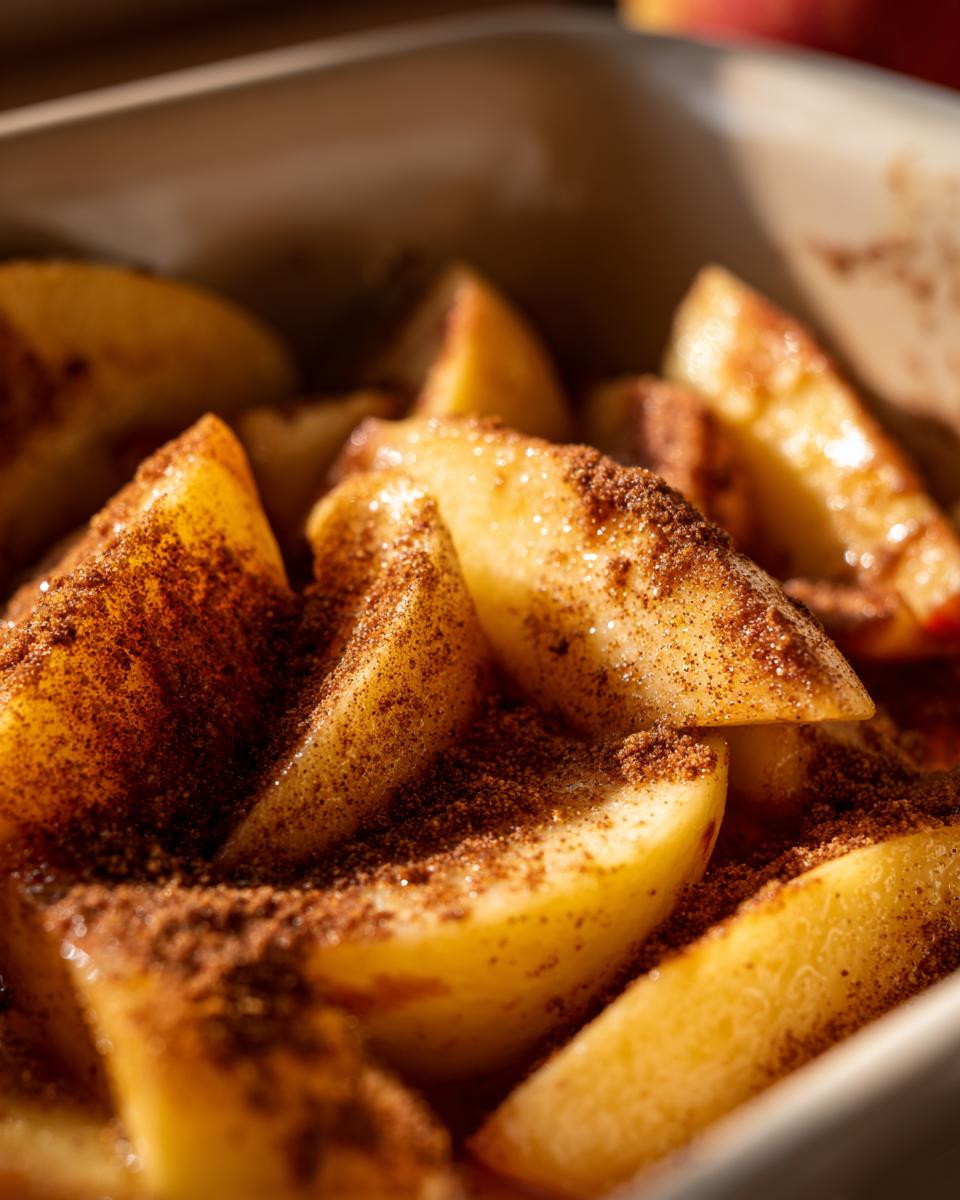
Enjoy these Delicious Baked Apples, a simple yet satisfying dessert perfect for any occasion. Anna Kowalska shares this recipe, made with heart and flavor, for you and your family to love.
Ingredients
- 1 teaspoon butter
- 2 tablespoons brown sugar
- 3 teaspoons vanilla sugar
- 3 teaspoons ground cinnamon, or to taste
- 1 teaspoon ground nutmeg, or to taste
- 6 large apples – peeled, cored, and sliced
- 3 ½ tablespoons water
Instructions
- Preheat the oven to 350 degrees F (175 degrees C). Grease a large baking dish with butter.
- Mix brown sugar, vanilla sugar, cinnamon, and nutmeg in a small bowl.
- Layer about 1/3 of the apples in the prepared baking dish; sprinkle with 1/3 of the sugar mixture.
- Repeat layers twice more.
- Bake in preheated oven for 30 minutes. Pour water over apples and continue baking until tender, about 15 minutes more.
Notes
- Serve warm with a scoop of vanilla ice cream for a simple dessert.
- Spoon some of the apples into a ramekin and top with granola and caramel sauce; briefly broil to create a mini apple crisp.
- Prep Time: 15 minutes
- Cook Time: 45 minutes
- Category: Dessert
- Method: Baking
- Cuisine: American
Nutrition
- Serving Size: 1 serving
- Calories: 147
- Sugar: 27g
- Sodium: 9mg
- Fat: 1g
- Saturated Fat: 1g
- Unsaturated Fat: 0g
- Trans Fat: 0g
- Carbohydrates: 37g
- Fiber: 6g
- Protein: 1g
- Cholesterol: 2mg