Skip to content
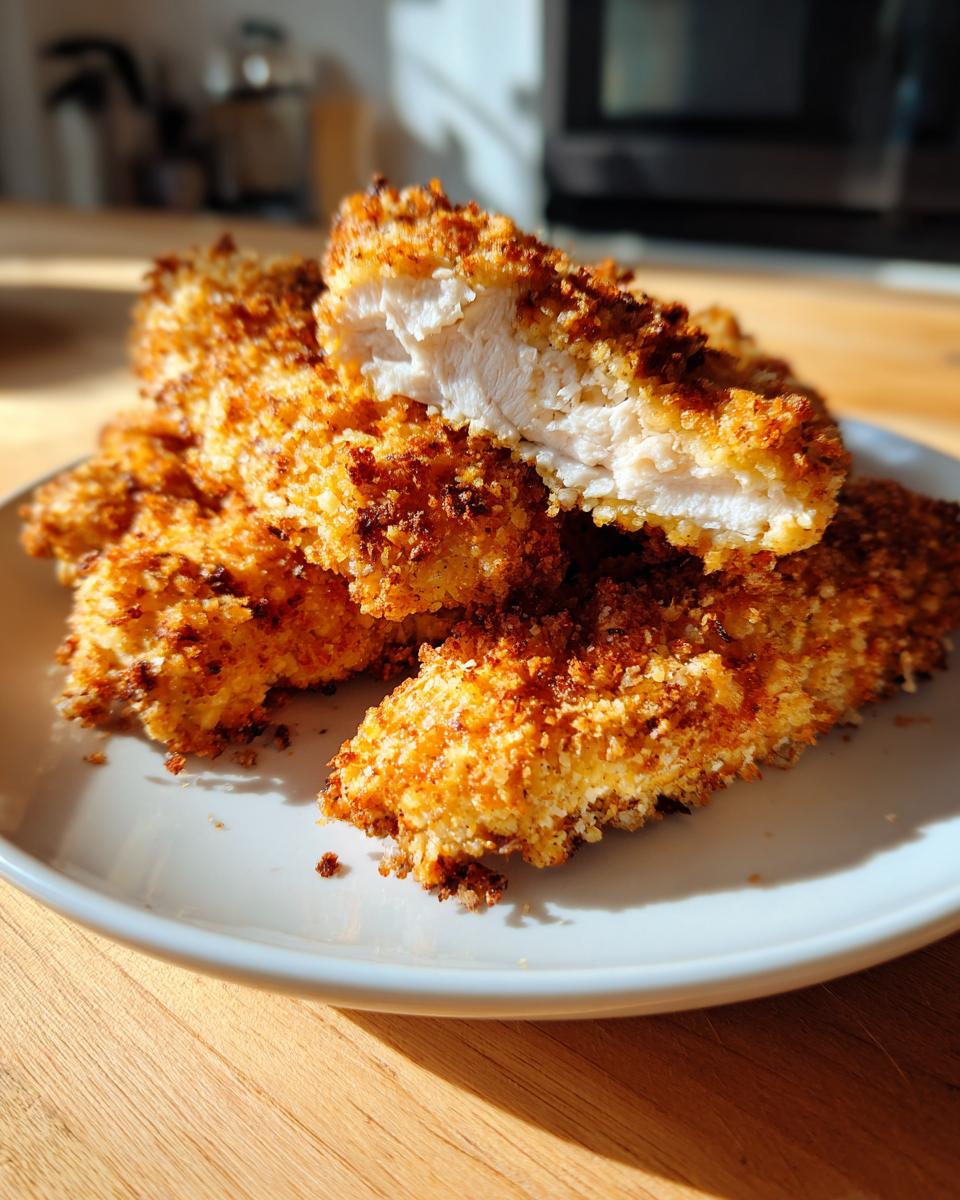
Crispy Baked Chicken Tenders (Healthy & Kid-Friendly) are the absolute answer when you’re staring down a hungry family at 6 PM and the thought of deep-frying just makes you tired. Seriously, if you’re looking for that crunch without the mess and guilt, stop what you’re doing! I’m Anna Kowalska, and here I share tried-and-true homemade recipes that you and your family will love, everything made with heart and flavor. I spent years trying to perfect a version of this classic that tasted like the real deal but didn’t require a gallon of oil. This recipe does it! It’s fast, it uses simple pantry staples, and honestly, my kids never even ask for the drive-thru version anymore. You won’t believe how easy it is to get that satisfying texture right on a baking sheet.
Jump to:
Why You Will Make These Crispy Baked Chicken Tenders (Healthy & Kid-Friendly) Often
I know you’re busy, so that’s why these Crispy Baked Chicken Tenders (Healthy & Kid-Friendly) are going to fly off your menu rotation every single week. You need reliability, and these deliver big time. Forget complicated steps; we’re focusing on what matters: flavor and speed!
Quick Prep and Cook Times
Seriously, look at the clock! You have ten minutes to prep and fifteen minutes to bake. That means you’re looking at a delicious, satisfying meal on the table in under 25 minutes total. That’s faster than ordering takeout, and you haven’t even had to clean a deep fryer!
A Guilt-Free Family Favorite
When I first started cutting back on frying, I worried about texture, but trust me on this one—baking works wonders. We get all the crunch we crave without the heavy residue of deep-frying. I’ve tested every trick in the book to lock in that crispiness while keeping the chicken low fat. This is the alternative you can feel good about serving every night.
Essential Components for Perfect Crispy Baked Chicken Tenders (Healthy & Kid-Friendly)
Okay, so you’ve got your oven preheating, and now we need to talk about the magic dust! Getting truly Crispy Baked Chicken Tenders (Healthy & Kid-Friendly) hinges entirely on the coating. It’s not just about slapping some crumbs on; we need the right breading texture and the perfect spice blend to make these taste like they came from a restaurant, but healthier. Don’t skip the egg wash step—it’s the glue that holds all that beautiful crunch in place while they bake. I’ve kept this list super simple because when you’re aiming for a weeknight win, you don’t need twenty ingredients. We just need the essentials to create that signature snap!
Ingredient List for Crispy Baked Chicken Tenders (Healthy & Kid-Friendly)
Here is exactly what you need for a batch that feeds four hungry people. Make sure your chicken is patted completely dry first; moisture is the enemy of crispiness!
- 1 lb chicken tenders (Look for uniform size if you can!)
- 1 cup breadcrumbs (Plain, fine crumbs work best here.)
- 1 tsp paprika (Use sweet paprika unless you love heat.)
- 1 tsp garlic powder (Not garlic salt—we control the sodium ourselves!)
- 1 egg (The binding agent!)
Necessary Equipment for Preparation
You won’t need a stand mixer for this, which is part of the beauty! Grab these things:
- Two shallow bowls or dishes (for your dipping stations)
- A whisk or fork
- A standard baking sheet
- Parchment paper (Don’t skip this, it saves cleanup time!)
Step-by-Step Instructions for Crispy Baked Chicken Tenders (Healthy & Kid-Friendly)
Making these Crispy Baked Chicken Tenders (Healthy & Kid-Friendly) is almost like playing a little assembly line game, and it’s so satisfying when you see them pile up, ready for the oven. We’re going to move fast here! Remember, the goal is to get that egg coating on, and then immediately into the crumbs so everything sticks perfectly to the chicken. Don’t rush the coating, but don’t let the tenders sit around after they’ve been dipped either. Keep your pace steady, and you’ll have a beautiful tray ready to bake in minutes. This active coating process is what guarantees that beautiful crunch we are after!
Setting Up Your Breading Station
First things first, get your oven cranked up to 400 degrees Fahrenheit (200 Celsius). You want it hot and ready to go. Now, set up your two shallow dishes right next to each other. In the first one, you need to whisk that single egg until the yolk and white are totally combined—no dry streaks allowed! That’s your wet station. In the second dish, dump in your breadcrumbs, the paprika, and the garlic powder. Use a fork to mix those dry ingredients thoroughly. You’re aiming for a uniform color, so every tender gets the same amount of seasoning. Once that’s done, line your baking sheet with parchment paper. That paper helps the bottom crisp up nicely!
Coating the Chicken Tenders Correctly
This is the fun part where the magic happens! Take one chicken tender at a time—don’t try to do two at once, or you’ll get messy fingers later. Dip the tender completely into the whisked egg mixture. Make sure you get every nook and cranny coated. Then, lift it out and let the excess egg drip off for just a second. You don’t want a soggy coating! Immediately move that egg-dipped piece into the breadcrumb mixture. Press the crumbs onto the chicken firmly with your fingers, turning it over until it’s totally covered. You want a thick, even layer. Place the fully coated tender onto your prepared baking sheet, making sure they aren’t touching each other. They need space to breathe and crisp up!
Baking for Maximum Crispiness
Once all your tenders are lined up on the pan, they are ready for the heat. Slide that pan right into your preheated 400°F oven. We bake these for a total of 15 minutes. But here is the trick for even cooking: Set a timer for 7 or 8 minutes. When that alarm goes off, carefully use tongs to flip every single tender over. This ensures both sides get that beautiful golden brown color. Pop them back in for the remaining time. They should be golden and firm to the touch when they are done. If you’re worried, you can always check the internal temperature, but usually, that golden color tells the whole story!
Tips for Achieving Expert Crispy Baked Chicken Tenders (Healthy & Kid-Friendly)
Even though this recipe for Crispy Baked Chicken Tenders (Healthy & Kid-Friendly) is designed to be foolproof, I always have a few extra tricks up my sleeve to guarantee that bakery-level crunch at home. Baking is different from frying, so we have to help the breadcrumbs along a little bit! Don’t worry if your first batch isn’t exactly restaurant-perfect; a few small tweaks make a huge difference in the final texture. These little adjustments are what separate a good tender from an amazing one, and they keep the chicken healthy, too!
Ingredient Adjustments for Texture
If you want that extra crackle, you have to mist them lightly before they go into the oven. Seriously, just grab your cooking spray—or even a little drizzle of olive oil from a bottle if you don’t have spray—and lightly coat the tops of the breaded tenders. That tiny bit of extra fat helps the crumbs toast up faster and keeps them from drying out while they bake. It’s a game-changer for crispiness! If you don’t have cooking spray, you can lightly brush them with melted butter, but the spray is cleaner and easier for this job.
Serving Suggestions for Your Meal
These tenders are fantastic on their own, but the sauce is where you can really amp up the flavor without adding a ton of junk. Skip the sugary ketchup most of the time! My favorite pairing right now is a homemade Greek yogurt ranch. Just mix thick Greek yogurt with a little dried dill, chives, onion powder, and garlic powder, thinning it with a splash of milk or lemon juice until it drizzles nicely. If you prefer something tangier, a good quality Dijon mustard mixed with a tiny bit of honey is always a winner. They hold up great to those dips!
Frequently Asked Questions About Crispy Baked Chicken Tenders (Healthy & Kid-Friendly)
I always get questions about how to adjust things when making these Crispy Baked Chicken Tenders (Healthy & Kid-Friendly), especially when trying to keep them low fat or when you realize you’re missing one tiny thing in the pantry. Don’t panic! This recipe is super adaptable, but a few key ingredients really help nail that perfect texture. Here are the things I hear most often from home cooks trying to nail this Baked Chicken Recipe.
Can I Use Different Breadcrumbs for These Healthy Chicken Tenders?
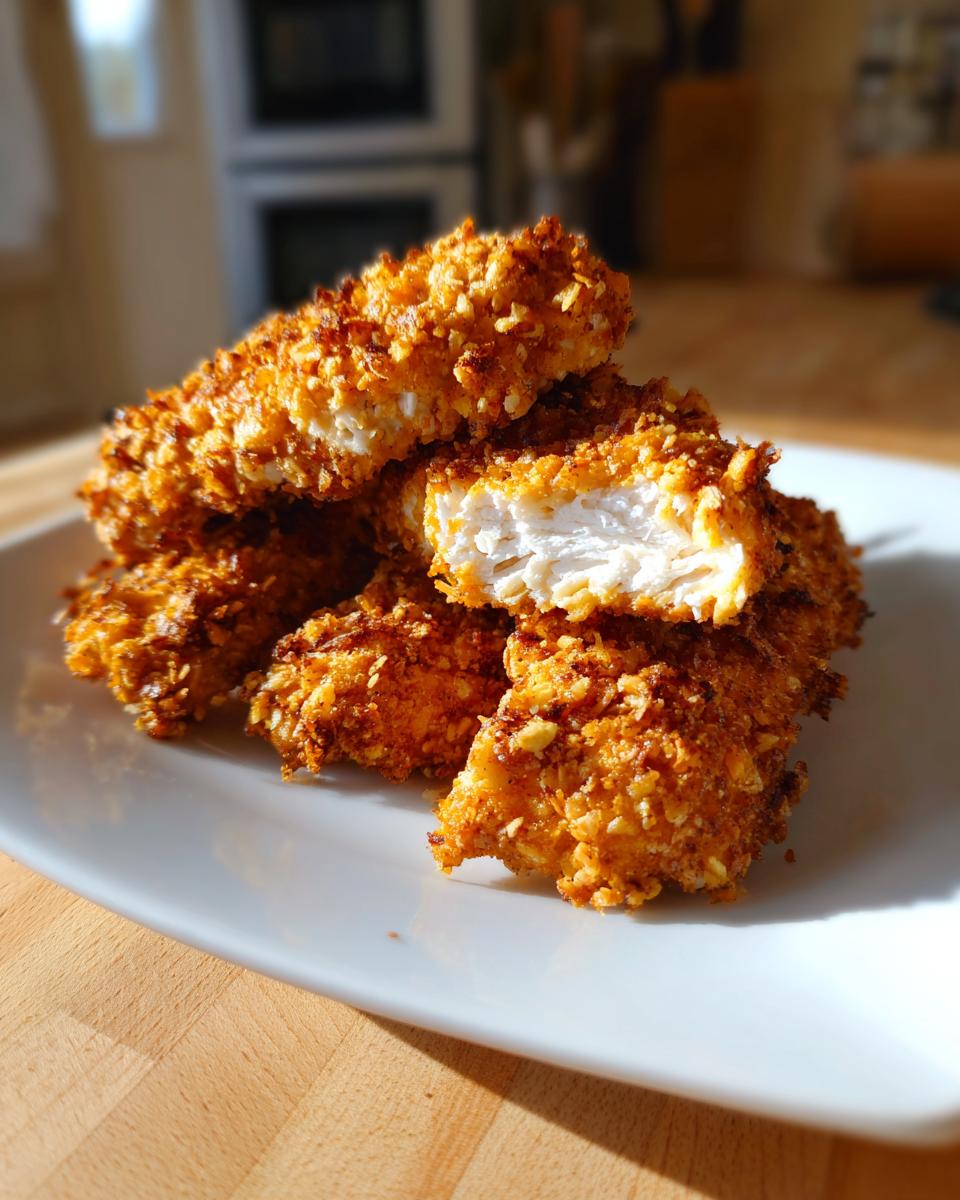
Yes, absolutely! While plain, fine breadcrumbs give you that classic texture, these Healthy Chicken Tenders are sturdy enough to handle substitutes. If you want more flavor, try panko breadcrumbs—they give you an even airier crunch, but you might need to spray them a little extra with oil to get them to brown beautifully. You can also use cracker crumbs or even crushed cornflakes if you’re feeling adventurous! Just be aware that different crumbs absorb moisture differently, so you might need to adjust your dip time slightly.
How Do I Know When the Baked Chicken Recipe Tenders Are Done?
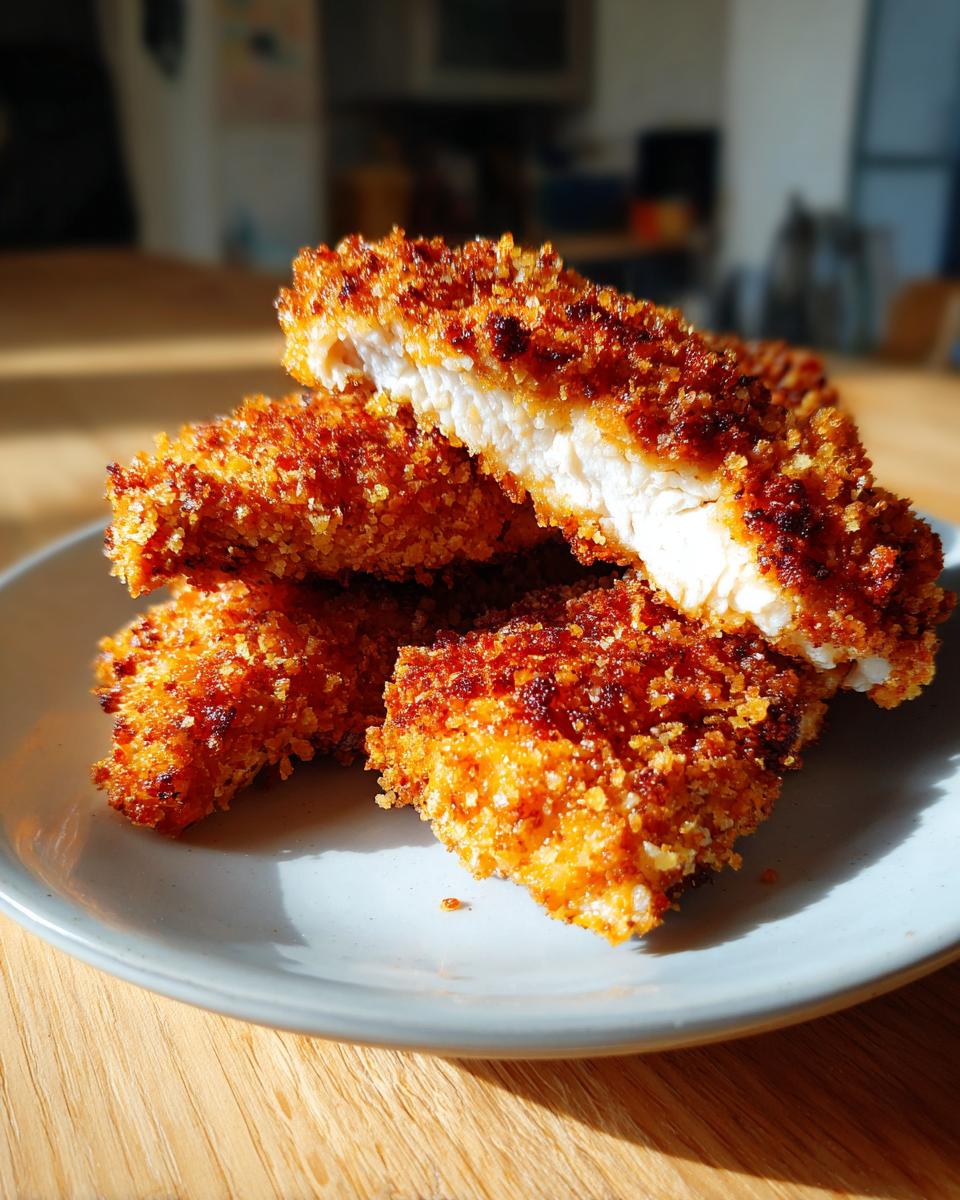
The visual cue is your best friend here. You are looking for that deep golden brown color all over the tender, which usually happens right around the 15-minute mark at 400°F. But the real test for any Kid-Friendly Chicken is the internal temperature. You need to make sure they hit 165°F (74°C) in the thickest part. If you don’t have a thermometer, cut into the largest one—the juices should run clear, and the center should be opaque white, not pink at all. That means they are perfectly cooked through and safe to eat!
Storing and Reheating Your Leftover Crispy Baked Chicken Tenders
Even though these Crispy Baked Chicken Tenders (Healthy & Kid-Friendly) are so good you’ll probably eat them all in one sitting, sometimes you end up with leftovers! The biggest challenge with any baked, breaded item is bringing back that crunch. If you just throw them in the microwave, you end up with sad, soggy chicken—and nobody wants that! The key is to avoid trapping moisture. I always tell people to let them cool completely on a wire rack before storing them, which helps prevent condensation from softening the crust.
Here is how I handle leftovers to keep them tasting almost as good as fresh:
| Storage Method | Time Frame | Reheating Tip for Crispness |
|---|---|---|
| Airtight Container | Up to 3 days | Reheat in a 375°F oven or toaster oven for 5-7 minutes until hot and crispy again. |
Reader Feedback and Next Steps
I truly hope these Crispy Baked Chicken Tenders make your weeknights easier and tastier! Now it’s your turn to jump in. Did you find them as easy to prepare as I promised? Tell me in the comments below how the flavor turned out for your family. Don’t forget to leave a star rating so others know how much you loved this simple, healthy chicken!
Print
Crispy Baked Chicken Tenders: 1 Great Crunch
- Total Time: 25 minutes
- Yield: 4 servings 1x
- Diet: Low Fat
Description
Crispy Baked Chicken Tenders (Healthy & Kid-Friendly) provide a guilt-free alternative to fried chicken. These tenders bake up perfectly crispy and are a hit with the whole family.
Ingredients
- 1 lb chicken tenders
- 1 cup breadcrumbs
- 1 tsp paprika
- 1 tsp garlic powder
- 1 egg
Instructions
- Whisk the egg in a shallow bowl.
- In another shallow dish, combine the breadcrumbs, paprika, and garlic powder.
- Dip each chicken tender first into the whisked egg, letting excess drip off.
- Coat the egg-dipped tender thoroughly in the breadcrumb mixture.
- Place the coated tenders on a baking sheet lined with parchment paper.
- Bake at 400°F (200°C) for 15 minutes, flipping halfway through, until golden brown and cooked through.
Notes
- For extra crispiness, lightly spray the coated tenders with cooking spray before baking.
- Serve with your favorite healthy dipping sauces like Greek yogurt ranch or mustard.
- Prep Time: 10 minutes
- Cook Time: 15 minutes
- Category: Main Dish
- Method: Baking
- Cuisine: American
Nutrition
- Serving Size: 4 oz
- Calories: 250
- Sugar: 1g
- Sodium: 350mg
- Fat: 6g
- Saturated Fat: 1.5g
- Unsaturated Fat: 4.5g
- Trans Fat: 0g
- Carbohydrates: 18g
- Fiber: 1g
- Protein: 28g
- Cholesterol: 80mg