Skip to content
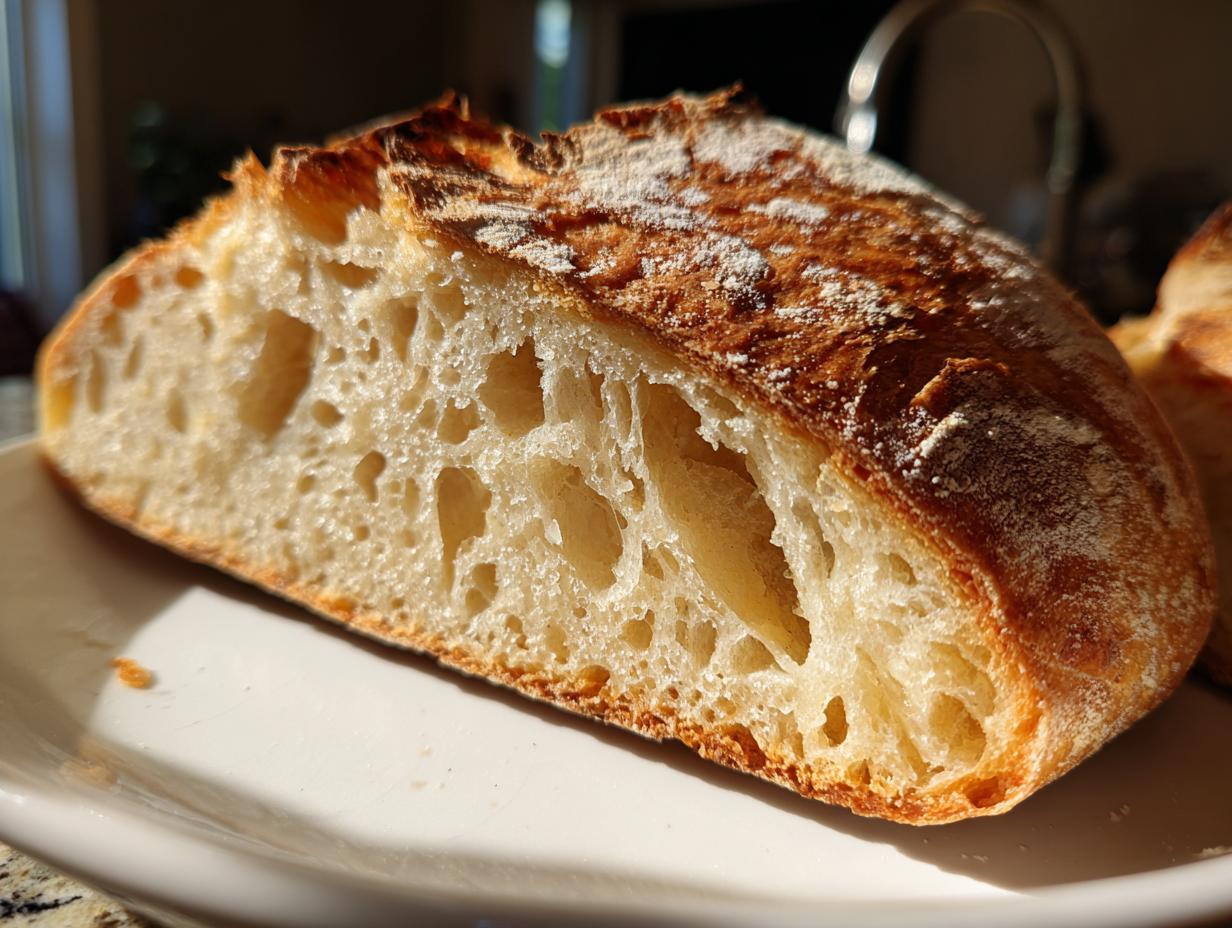
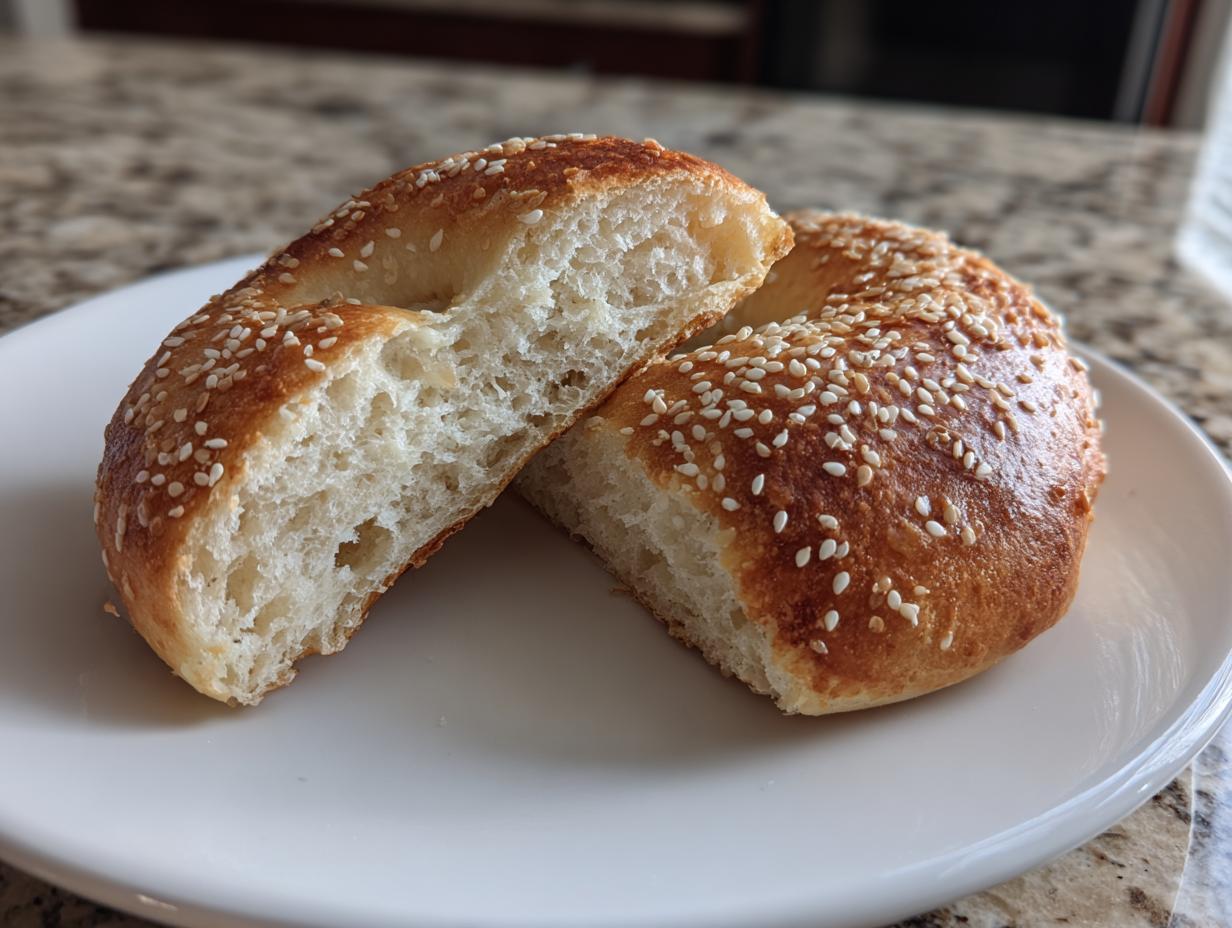
If you’ve ever dreamed of pulling a gorgeous, crackly loaf of artisan bread out of your own oven but thought kneading was some kind of mystical workout you weren’t ready for, then listen up! This No Knead Bread – Easy Pane Pugliese recipe is about to change your entire baking life. Seriously, it’s that simple. I’m Anna Kowalska, and here I share tried-and-true homemade recipes that you and your family will love; everything is made with heart and flavor. I used to think real Italian bread required hours of strenuous work, but I discovered that the magic is actually in the waiting, not the working!

This specific technique focuses entirely on hydration and time to develop the gluten structure. That means we skip the hard work, and you get that spectacular, chewy interior and that unbelievably crunchy crust without breaking a sweat. Forget complicated starters or fancy machinery. We are achieving artisan results with just a bowl and patience. Trust me, once you master this no-knead dough, you’ll never go back to the store-bought stuff!
Jump to:
Gathering What You Need for No Knead Bread – Easy Pane Pugliese
Baking bread, even the super easy kind, always starts with getting your ducks in a row. Laying out every component before you begin mixing prevents that frantic search halfway through. For this No Knead Bread – Easy Pane Pugliese, we are keeping things basic, which is part of the charm, but precision matters more than usual because we aren’t kneading out the imperfections!
Essential Ingredients for Your No Knead Bread – Easy Pane Pugliese
You only need five things, but make sure your measurements are right! The water temperature is key, so use lukewarm water unless you are doing the long cold ferment in the fridge. Remember, if you rush the rise, you need a bit more yeast. The ratio of water to flour is what gives this dough its signature stickiness.
- 400g of Good Quality Flour (All-purpose works great)
- 350g of Water (Lukewarm if rising quickly)
- 5g of Sugar (Just a tiny bit to wake up the yeast)
- 5g of Salt
- 2g of Active Dry Yeast (Or 4g if you are in a hurry!)
Necessary Equipment for Artisan Bread Baking
We don’t need a stand mixer, which is fantastic news for everyone. The most important piece of gear here is something heavy that can hold heat well. If you don’t have a Dutch oven, find the heaviest pot with a tight-fitting lid you own. That trapped steam is what creates that incredible crust!
- Large mixing bowl
- Plastic wrap or a tight-fitting lid
- A sturdy spatula or wooden spoon for mixing
- A Dutch oven or heavy oven-safe pot with a lid
- Parchment paper
- A well-floured surface for shaping
Mastering the No Knead Dough: Step-by-Step Instructions
This is where the magic starts, and trust me, it takes about five minutes of actual work. Don’t look at the clock yet—the real work is done by time and temperature! Getting the initial mix right is vital for our No Knead Bread – Easy Pane Pugliese because we are relying on long, slow hydration to develop the gluten structure instead of punching and pulling the dough.
Initial Mixing and Hydration
Grab your largest bowl. We start by tossing in the flour, the sugar, and the yeast first. Give those three dry things a quick whisk together. Now, here’s the part that always makes new bakers nervous: the salt goes in last, right before the water. Salt can sometimes slow down or even kill the yeast if they sit together too long, so we keep them separate until the last second!
Pour in all 350g of your water. Mix it all up using a wooden spoon or a sturdy spatula until every bit of flour is incorporated. And I mean every bit! You are aiming for a shaggy, wet mess. It should look far too sticky to handle, maybe even like wet cement. That’s perfect! I sometimes use my hands at the very end just to scrape the sides down, but be warned, it will stick to everything. That high hydration is exactly what we need for that airy interior in our No Knead Bread – Easy Pane Pugliese.
The Crucial Resting Period for No Knead Bread
Once you’ve folded the dough onto itself a few times—just a quick turn or two to bring the sticky edges into the middle—cover that bowl tightly. You have two paths here, and both are delicious, just different flavors!
Path one is the artisan standard: cover it and put it right into the fridge for 12 to 18 hours, or even overnight. This cold fermentation develops deep, complex flavors. If you choose this route, stick to the 2g of yeast. Path two is for when you need bread in your life *today*. If you want a quicker rise, leave it on the counter, covered, until it has doubled in size. If you go this fast route, remember my note: bump that yeast up to 4g to help it along. Either way, patience is your main tool here!
Shaping and Final Proofing Your No Knead Bread – Easy Pane Pugliese
Okay, your dough has rested, maybe it’s massive and bubbly from the fridge, or maybe it’s just doubled on the counter. Now comes the shaping, and this is the only time we really “work” the dough, but it’s so gentle it barely counts! We are building the structure we skipped by not kneading traditionally. Handling this sticky mass takes a little finesse, but the result is worth it for this No Knead Bread – Easy Pane Pugliese. Don’t panic if it feels floppy; that’s the high water content doing its job!
Gentle Folding Technique Explained
Flour your counter generously—and I mean generously! Gently scrape the dough out of the bowl. It will spread out like a pancake, which is fine. Now, we fold. Take one edge and gently pull it up and fold it over toward the center. Do the same thing on the opposite side, folding that edge over the first fold. Then, turn the dough 90 degrees and repeat that folding action with the remaining two sides. This simple process traps air and creates the tension needed for a good rise in the oven. You are essentially tucking it into itself.
Second Rest Before Baking
Once you’ve performed those gentle tucks, use your hands to coax the dough into a nice, tight ball. It should feel slightly tighter now than when it came out of the bowl. Place that beautifully shaped ball seam-side down into a bowl that you’ve dusted heavily with flour or, even better, line with parchment paper. Cover it loosely with a clean kitchen towel and let it rest for one final time. This second proofing usually takes about an hour to an hour and a half. You want it to look puffy and feel slightly pillowy when you poke it gently—that’s how you know your No Knead Bread – Easy Pane Pugliese is ready for the heat!
Baking Secrets for the Perfect Crust on Your No Knead Bread
This is the moment of truth! All that waiting results in a spectacular explosion of flavor and texture when this bread hits the heat. For truly artisan results that make everyone ask where you bought your No Knead Bread – Easy Pane Pugliese, you have to treat your oven like a professional brick oven. That means extreme heat and trapped steam are non-negotiable! Don’t be tempted to peek early; the initial bake needs that sealed environment to encourage the dough to spring up before the crust sets.
Preheating the Oven and Pot Correctly
Turn your oven up high—we are talking 240°C (that’s about 465°F for my American bakers!). More importantly, you need to put your Dutch oven or heavy pot, *with the lid on*, into the oven while it’s cold. Let it preheat for at least 30 minutes once the oven hits temperature. This ensures the bottom of your pot is screaming hot. When you drop that dough in, that intense heat transfer immediately starts creating that gorgeous, robust base crust.
When you’re ready to transfer the dough, be careful! It’s hot! If you used parchment paper under the dough for the final proof, just use the edges of the paper like little handles and gently lower the entire thing into the sizzling hot pot. It should hiss dramatically—that’s the steam starting to work its magic right away.
Covered vs. Uncovered Baking Times
Once the dough is nestled inside, put the lid right back on immediately. Now, bake it covered for a solid 40 minutes. This trapped steam keeps the surface of the bread soft enough to expand fully; if it dried out too fast, the loaf would set its size prematurely. After those 40 minutes, gently take the lid off. Watch it—it will look pale but huge!
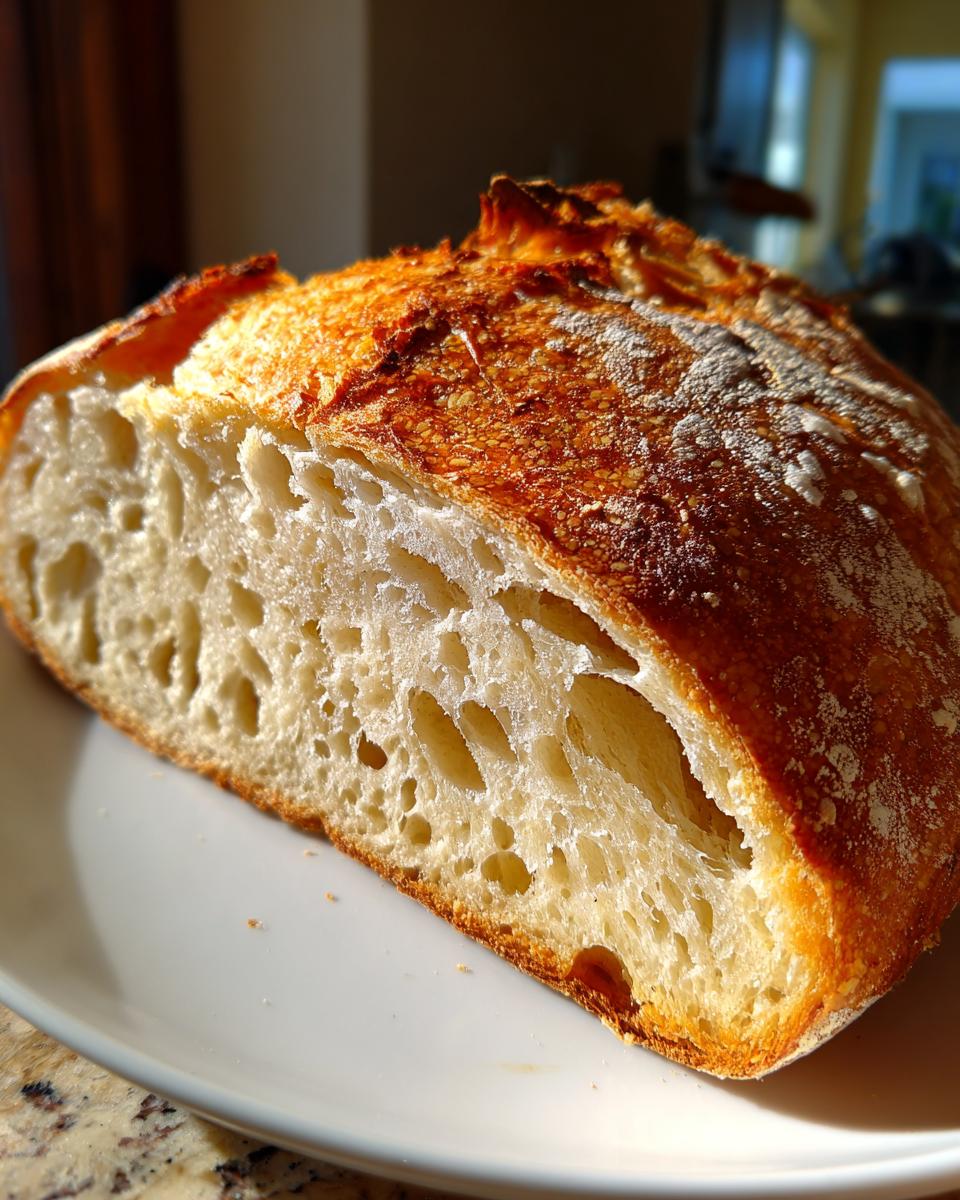
Now comes the crust development time. Bake it uncovered for another 20 to 30 minutes. This is where the color comes in. You are looking for a deep, dark golden brown. Don’t be afraid of color; that deep golden hue is where all the flavor is hiding in your No Knead Bread – Easy Pane Pugliese. When it sounds hollow when tapped, it’s done!
Why You’ll Love This Easy Pane Pugliese Recipe
- Incredibly simple technique requiring maybe 15 minutes of active work, total.
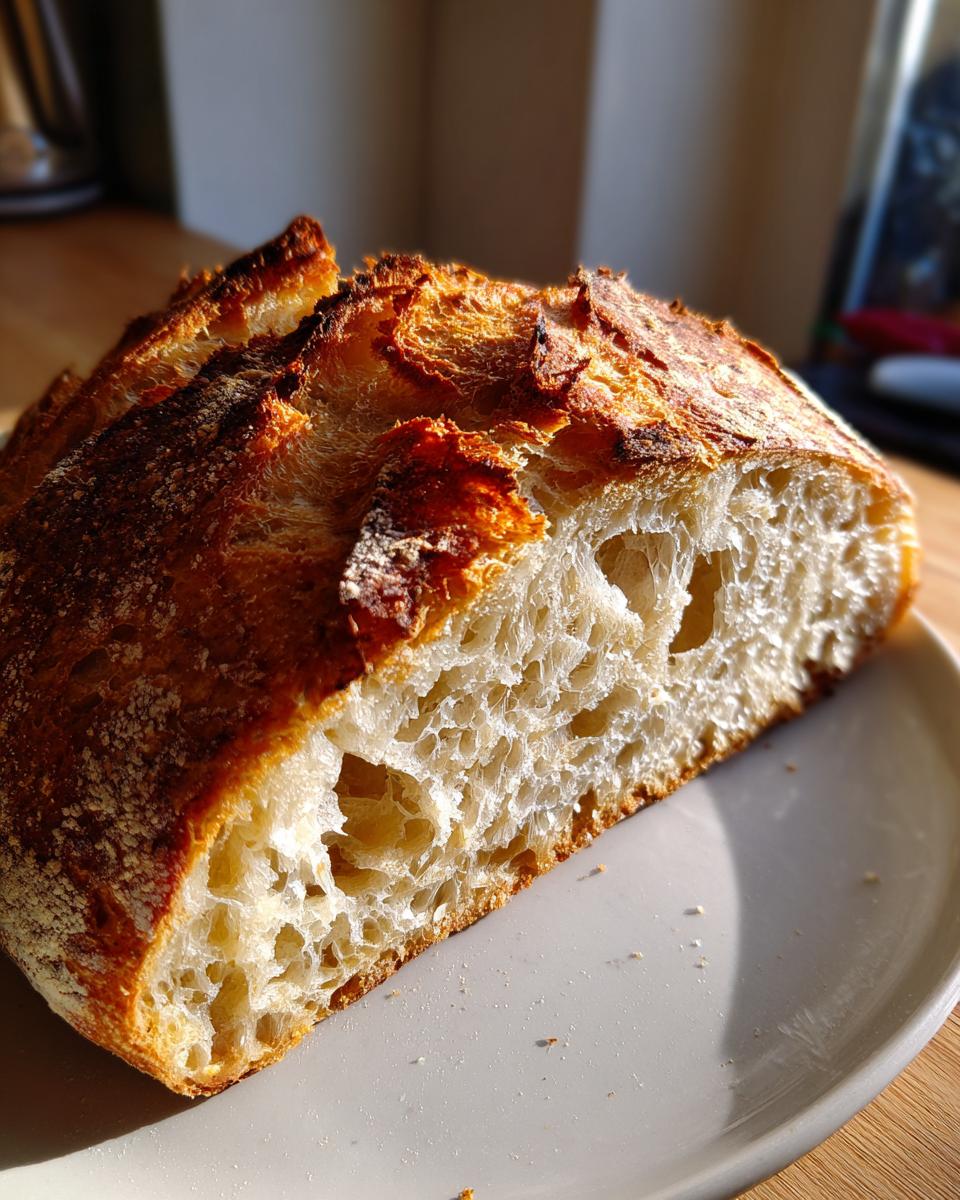
- You achieve a bakery-quality, shatteringly crisp crust thanks to the high-heat, covered baking method.
- The texture inside is airy, chewy, and perfect for soaking up olive oil or soup because of the high hydration.
- It uses pantry staples—you likely don’t need to run to the store for specialty items.
- It’s perfect for beginners; the dough is forgiving because you can’t over-knead it!
Storage and Reheating Instructions for Your Homemade Bread
I know how tempting it is to dive in immediately, but you absolutely must let this bread cool completely on a wire rack. If you cut into that Easy Pane Pugliese while it’s still warm, all that steam trapped inside escapes, and you end up with a gummy texture instead of that beautiful, airy crumb we worked so hard for! Cooling completely allows the interior structure to set properly and keeps that crust crunchy.
Once fully cooled, storing it is simple, but remember, homemade bread doesn’t have the preservatives of the store-bought stuff, so it’s best eaten within two or three days. Never put rustic bread in the fridge; it just goes stale faster!
Storing Leftover No Knead Bread
The best way to keep this bread happy on your counter is to wrap it cut-side down in a clean kitchen towel. This allows the crust to breathe a little while keeping the cut surface from drying out too quickly. If you have a dedicated bread box, that works wonders too! If you are looking for other simple, pantry-staple recipes, check out my quick and easy recipes collection.
If you know you won’t finish it in two days, slice it up before storing it in an airtight bag in the freezer. It freezes beautifully! When you want a slice, just pop it straight into the toaster or under the broiler for a minute to bring back that fresh-baked goodness. For other great baking projects, you might enjoy my recipe for chewy big fat chocolate chip cookies.
| Storage Method | Best For | Tip to Restore Crunch |
|---|---|---|
| Wire Rack (Uncovered) | 1 Day | Quick 5 minutes in a 350°F oven |
| Kitchen Towel Wrap | 2-3 Days | Mist lightly with water before heating |
| Freezer (Sliced) | Up to 2 Months | Toast directly from frozen |
Frequently Asked Questions About No Knead Bread – Easy Pane Pugliese
It’s normal to have questions when you’re working with a high-hydration dough for the first time. I get asked the same things all the time when people first try my No Knead Bread – Easy Pane Pugliese recipe! Don’t worry if your dough looks wetter than you expect; that’s usually a sign you’re doing it right. For more general baking science, you can read about the importance of the science of yeast and bread making.
Here are a few things I hear often:
- Q: My dough is ridiculously sticky—did I mess up the water ratio?
No, that’s exactly what we want! Remember, this No Knead Bread – Easy Pane Pugliese relies on the water doing the work instead of your arms. If it looks like soup, cover it immediately and let it rest. It firms up beautifully during the long rest. - Q: Can I use bread flour instead of all-purpose flour?
You certainly can! Bread flour has a higher protein content, which will give you a slightly chewier crumb, but all-purpose flour works perfectly fine for the standard recipe. Just check your water absorption, as different flours drink liquid differently. - Q: What if my dough doesn’t double in size during the quick rise?
If you used the 2g of yeast and it’s cool in your kitchen, it might take longer than expected. If you’re in a rush, it’s safer to switch to the 4g yeast measurement next time, or just let it rest longer until you see those bubbles! - Q: Why is the bottom of my bread burnt?
This almost always means your pot wasn’t preheated long enough, or you placed the bread directly onto a hot stone or rack instead of inside the preheated Dutch oven. That heavy pot acts as a buffer!
Share Your Easy Pane Pugliese Success
Baking should always be a shared experience! I put my heart into these recipes so you can bring amazing flavor to your own table, and I truly love hearing about your successes, your little tweaks, and even the funny baking mishaps along the way. Don’t keep that beautiful, crusty loaf a secret!
If you tried this method and pulled out a loaf of homemade bread that made your kitchen smell heavenly, I want to know! Did you use the overnight fridge method or the quick rise? Did you manage to get that perfect crackle on the crust? Drop a comment below and tell me how it went. Your feedback helps other bakers feel confident trying this recipe for the first time. Happy baking, friends!
Print
No Knead Bread – Easy Pane Pugliese Marvel
- Total Time: 75 minutes (plus resting time)
- Yield: 1 loaf 1x
- Diet: Vegetarian
Description
This recipe shows you how to make Easy Pane Pugliese using a no-knead method. You achieve a great crust and texture with simple steps.
Ingredients
- 400g Flour
- 350g Water
- 5g Sugar
- 5g Salt
- 2g Active dry Yeast
Instructions
- In a large bowl, mix the flour, sugar, and yeast.
- Add the salt and water. Mix until you have a very sticky dough.
- Mix the dough with a spatula or wooden spoon, folding the bottom to the top for a few seconds.
- Cover the bowl hermetically with wrapping film.
- If resting overnight, place the bowl in the fridge. For a quicker rise, let it rest at room temperature until doubled (use 4g yeast if rising quickly).
- Transfer the dough to a well-floured surface. Sprinkle flour on top.
- Gently fold the dough onto itself by taking the edges to the center. Press slightly and repeat with the other edge.
- Shape the dough into a ball with your hands.
- Place the dough in a floured bowl or on parchment paper inside a bowl. Cover with a kitchen fabric.
- Let the dough rest for 1-2 hours, or just 20 minutes.
- Heat the oven to 240°C. Place an empty pot inside the oven to preheat.
- Turn the dough over into the hot pot (use parchment paper edges for transfer if needed).
- Cover with the lid and bake for 40 minutes.
- Remove the lid and bake for 20 to 30 more minutes until the crust is golden.
- Let the bread cool on a baking rack to maintain crunchiness.
Notes
- The final dough must be very sticky.
- Water quantity depends on the flour used.
- If you choose the quick rise option, double the yeast to 4g.
- Cooling on a rack prevents bottom condensation.
- Prep Time: 15 minutes
- Cook Time: 60 minutes
- Category: Bread
- Method: Baking
- Cuisine: Italian
Nutrition
- Serving Size: 1 slice
- Calories: Estimate needed
- Sugar: Estimate needed
- Sodium: Estimate needed
- Fat: Estimate needed
- Saturated Fat: Estimate needed
- Unsaturated Fat: Estimate needed
- Trans Fat: Estimate needed
- Carbohydrates: Estimate needed
- Fiber: Estimate needed
- Protein: Estimate needed
- Cholesterol: Estimate needed