 Skip to content
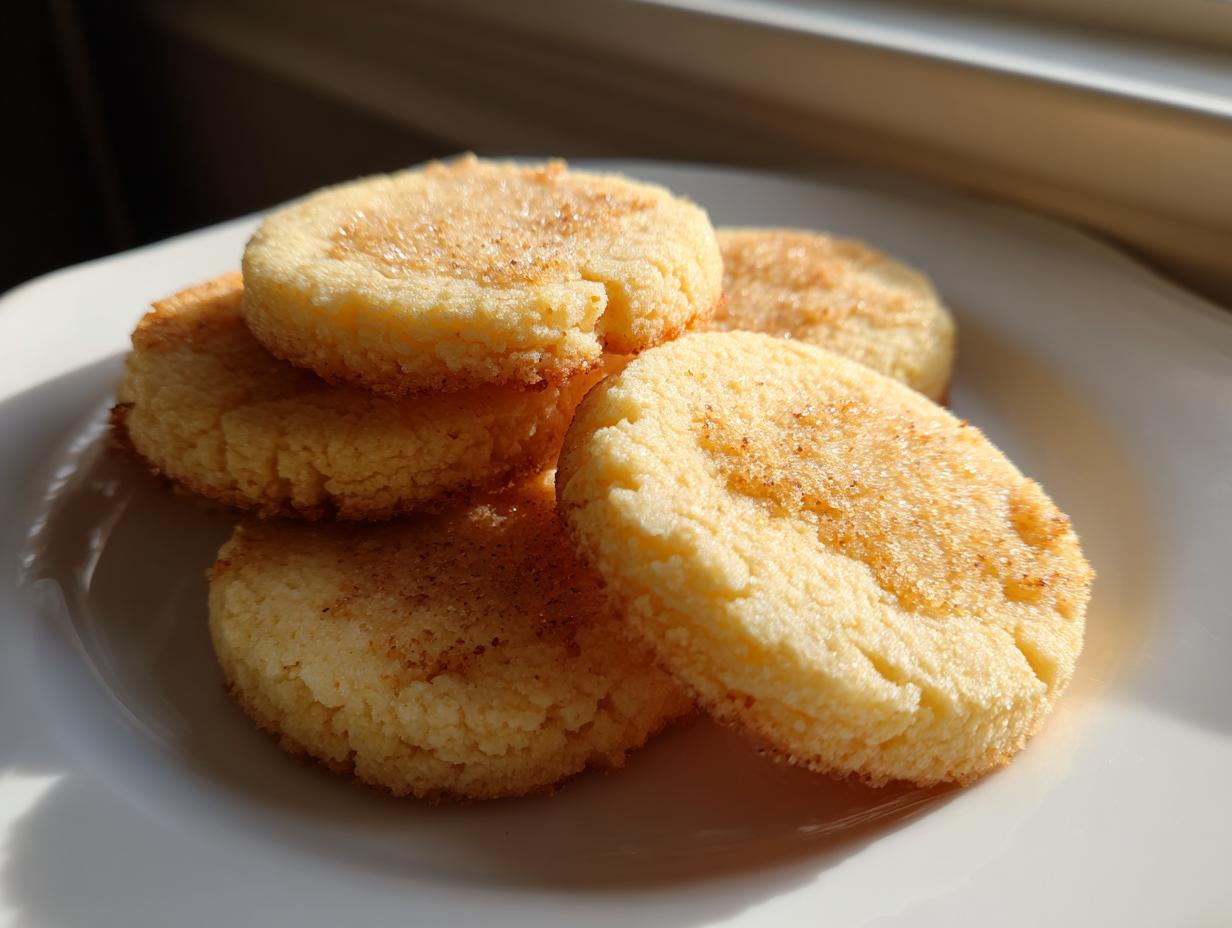
Grandma’s Old Fashioned Tea Cakes are what happiness tastes like, baked right into a buttery, tender cookie. I’m Anna Kowalska, and here I share tried-and-true homemade recipes that you and your family will love. Everything I post here is made with heart and flavor, just like my grandmother taught me. We’re talking about recipes that have survived countless family picnics and afternoon tea sessions—they are tried and truly tested!
My journey into baking started right there in her warm kitchen where the only measurement that truly mattered was ‘a little extra love.’ That’s why these classic cookie recipes, especially these gorgeous Grandma’s Old Fashioned Tea Cakes, are so important to me. They aren’t fancy, but they deliver pure, comforting flavor every single time. Forget the complicated stuff; these are the foundational recipes that prove simple ingredients, handled with care, create the best memories.
Jump to:
Gathering Your Ingredients for Grandma’s Old Fashioned Tea Cakes
Getting ready to make Grandma’s Old Fashioned Tea Cakes is half the fun! These cookies are wonderfully straightforward, which is why they are such a reliable classic. We just need to make sure we have our butter perfectly softened, which is crucial for that initial creaming step. Trust me, cold butter equals sad, crumbly dough!

Once you have everything measured out, the dough comes together so quickly. The best part is that the spice element is so subtle—just a hint of nutmeg to elevate that rich, buttery flavor.
Essential Dry and Wet Components
- 1 3/4 cups white sugar
- 1 cup butter (must be softened to room temperature)
- 2 large eggs (at room temperature is best)
- 1 teaspoon vanilla extract
- 3 cups all-purpose flour
- 1/2 teaspoon baking soda
- 1/2 teaspoon salt
- 1/4 teaspoon ground nutmeg
Step-by-Step Instructions for Perfect Grandma’s Old Fashioned Tea Cakes
Now we get to the truly satisfying part—making the dough! Following these steps exactly is how we ensure these Grandma’s Old Fashioned Tea Cakes have that melt-in-your-mouth tenderness instead of turning into hard biscuits. Don’t rush the mixing, especially that first step, because that’s where the air gets incorporated!
Creaming Butter and Sugar
We start by beating that softened butter and the white sugar together in a big bowl. You’ll want to use an electric mixer here if you have one, but Grandma used a sturdy wooden spoon, so don’t worry if you don’t. Keep beating until the mixture looks genuinely pale yellow and fluffy. I mean it—fluffy! This process traps the air that keeps these butter cookies from being too dense later on.
Incorporating Wet Ingredients
Once you have that light base, it’s time for the eggs. Add them one at a time, making sure you beat thoroughly after each one goes in. If you dump them all in at once, the dough can curdle on you, and we don’t want that mess. After the eggs are fully incorporated, beat in your vanilla extract until everything looks smooth and uniform.
Mixing Dry Ingredients Before Combining
Before you introduce the flour mixture, you need to combine all your dry elements separately. In a medium bowl, whisk together the flour, baking soda, salt, and that tiny bit of nutmeg. Whisking them together ensures the leavening agents and the spice are evenly distributed. This prevents those random salty or bitter bites you sometimes get in homemade cookies.
Dough Handling and Chilling Requirements
Now, slowly stir the dry mixture into the creamed butter mixture. Once it’s mostly combined, turn the dough out onto a lightly floured board. You only need to knead it just a few times—literally just until it comes together into a smooth ball. Over-kneading develops too much gluten, and that ruins the tender texture. Cover the dough tightly and pop it into the fridge for about 30 minutes until it’s firm enough to handle without sticking everywhere.
Rolling, Cutting, and Baking Your Tea Cakes
While the dough chills, preheat your oven to 325 degrees F (165 degrees C). Once chilled, roll the dough out on a floured surface until it’s exactly 1/4 inch thick. Use your favorite cookie cutters—don’t worry about the shape! Place them on your cookie sheets about 1 1/2 inches apart so they have room to breathe. Bake them for 8 to 10 minutes. Watch the edges; when they turn just barely golden, they are done! Let them sit on the hot sheet for just a minute before moving them carefully over to a wire rack to cool completely.

Tips for Success with Old Fashioned Tea Cakes
Even though these are simple butter cookies, mastering Grandma’s Old Fashioned Tea Cakes comes down to a few crucial details. If you follow these tips, you’ll get consistent, beautiful results every time you pull a batch out of the oven. Don’t let the short ingredient list fool you; technique matters in classic baking!
My biggest piece of advice, straight from Grandma’s notes, is that chilling the dough completely before rolling is non-negotiable. It’s the secret weapon for clean cuts and perfectly shaped cookies.
Achieving the Right Dough Consistency
If you try to cut shapes out of warm dough, you’ll end up with sad, misshapen blobs that spread into one giant cookie when they bake. Chilling firms up that butter, making the dough stiff enough to hold its intricate shape when you cut it out. It also stops the cookies from melting into each other on the baking sheet. A firm dough equals sharp edges!
Baking Time Adjustments for Your Oven
The recipe says 8 to 10 minutes, but honestly, no two ovens are exactly the same, right? Cookies are tricky because they bake fast. Always trust your eyes over the clock when you get near the 8-minute mark. You are looking for that very faint golden ring forming around the bottom edge. If your oven runs hot, check them at 7 minutes! If they look pale, give them another minute or two. Better slightly underbaked than burnt!
Quick Facts About Grandma’s Old Fashioned Tea Cakes
When you’re whipping up a batch of Grandma’s Old Fashioned Tea Cakes, knowing the timeline helps you plan your day. These are fantastic because they come together surprisingly fast, especially since the dough doesn’t need hours in the fridge! You can have these classic cookie treats ready for an afternoon snack. For more quick baking ideas, check out my section on quick easy recipes.
Preparation and Yield Details
| Detail | Time/Amount |
|---|---|
| Prep Time | 15 minutes |
| Cook Time | 10 minutes |
| Total Time | 55 minutes |
| Yield | About 3 dozen |
Ingredient Notes and Simple Substitutions
I always tell people that while these are Grandma’s recipes, they should be flexible enough for your own kitchen. The beauty of a classic cookie recipe is its adaptability, but we have to be smart about what we swap out so we don’t lose that signature texture.
For example, if you absolutely must use salted butter, just skip adding the extra salt called for in the dry ingredients. Taste the dough slightly before you chill it, and adjust from there. Never use less than one cup of fat, though; that’s what keeps these tender!
When it comes to flour, all-purpose is what Grandma used, and it works perfectly for the structure we need. If you want to try whole wheat pastry flour, you can substitute about half of the AP flour, but you might need an extra tablespoon of liquid, like milk, because whole grains absorb more moisture. Understanding the science behind flour types can really elevate your baking, especially when dealing with gluten development in tender items like these baking fundamentals.
As for vanilla, use the real stuff if you can. That extract is where so much of the aroma comes from. If you’re out, a tiny splash of almond extract works well as an enhancer, but use about half the amount, as almond is much stronger than vanilla.
Storing and Reheating Your Classic Tea Cakes
These Grandma’s Old Fashioned Tea Cakes are just as good—maybe even better—the next day, but you have to store them right! Since these are butter cookies, they can go stale quickly if left out exposed to the air.
The key here is an airtight container. You don’t need fancy tins, just anything that seals well. We want to keep all that buttery goodness locked in so they stay soft for snacking all week long.
- Store cooled tea cakes in a single layer in an airtight container. If you stack them, use parchment paper between the layers so they don’t stick together.
- They keep beautifully at room temperature for about five to seven days. Don’t refrigerate them unless your kitchen is extremely humid, as the cold can sometimes dry them out faster.
- If they seem a little less tender after a few days, don’t worry! Pop just one or two on a microwave-safe plate for about 8 seconds. They come right back to life!
Frequently Asked Questions About These Tea Cakes
Can I make the dough ahead of time?
Oh, absolutely! Making the dough ahead is one of my favorite tricks. After you knead it smooth and wrap it up, you can keep it in the refrigerator for up to three days. Just make sure it’s wrapped tightly so it doesn’t absorb any fridge smells. If you chill it longer than the recommended 30 minutes, you might need to let it sit on the counter for about 10 minutes before rolling, just so it’s pliable enough to cut cleanly.
What is the role of nutmeg in this butter cookie recipe?
That tiny bit of nutmeg is our little secret weapon in this classic cookie recipe! Since these are such rich butter cookies, they can sometimes taste a little flat if we don’t add one warm spice. The nutmeg doesn’t make them taste like Christmas cookies; it just adds a tiny background warmth that balances the sweetness of the sugar and the richness of the butter. It’s subtle, but you’d miss it if it wasn’t there!
Can I use a different shape for these old fashioned cookies?
Yes, please do! The shape is totally up to you. You could use simple circles, squares, or even holiday shapes if you’re making them for a party. The important thing isn’t the cutter you use, but the thickness. As long as you roll the dough out to that consistent 1/4 inch thickness, the baking time should stay right around that 8 to 10-minute mark. Thin dough equals sharp edges!
Sharing Your Grandma’s Old Fashioned Tea Cakes Experience
I truly hope these Grandma’s Old Fashioned Tea Cakes bring as much comfort to your kitchen as they do to mine. Baking these is a little connection back to the basics of good, honest food. Now that you’ve tried this classic cookie recipe, I’d love to hear all about it! If you are looking for other comforting baked goods, you might enjoy my recipe for Grandma’s Apple Pie.
Did you use a special cookie cutter? Did your family have a favorite way to enjoy their butter cookies? Drop a comment below and let me know your thoughts, or give this recipe a quick star rating so others know these old fashioned cookies are worth making! For more inspiration on classic desserts, feel free to browse my desserts category.
Print
Grandma’s Old Fashioned Tea Cakes: 3 Dozen Joy
- Total Time: 55 minutes
- Yield: About 3 dozen 1x
- Diet: Vegetarian
Description
Enjoy Grandma’s Old Fashioned Tea Cakes, a simple, buttery cookie recipe perfect for any occasion. These classic treats bake up tender with a hint of nutmeg.
Ingredients
- 1 ¾ cups white sugar
- 1 cup butter
- 2 large eggs
- 1 teaspoon vanilla extract
- 3 cups all-purpose flour
- ½ teaspoon baking soda
- ½ teaspoon salt
- ¼ teaspoon ground nutmeg
Instructions
- Beat sugar and butter together in a large bowl with an electric mixer until light and fluffy.
- Add eggs one at a time, beating well after each addition.
- Beat in vanilla extract.
- Combine flour, baking soda, salt, and nutmeg; stir into creamed mixture.
- Knead dough for a few turns on a floured board until smooth.
- Cover and refrigerate until firm, about 30 minutes.
- Preheat the oven to 325 degrees F (165 degrees C).
- On a lightly floured surface, roll the dough out to 1/4 inch in thickness.
- Cut into desired shapes with cookie cutters.
- Place cookies 1 1/2 inches apart onto cookie sheets.
- Bake in the preheated oven until edges are golden, about 8 to 10 minutes.
- Cool on the cookie sheets briefly before removing to a wire rack to cool completely.
Notes
- For best results, chill the dough completely before rolling.
- Adjust baking time slightly based on your oven.
- These cookies are best stored in an airtight container at room temperature.
- Prep Time: 15 minutes
- Cook Time: 10 minutes
- Category: Dessert
- Method: Baking
- Cuisine: American
Nutrition
- Serving Size: 1 cookie
- Calories: 188
- Sugar: 15g
- Sodium: 135mg
- Fat: 8g
- Saturated Fat: 5g
- Unsaturated Fat: 3g
- Trans Fat: 0g
- Carbohydrates: 27g
- Fiber: 0g
- Protein: 2g
- Cholesterol: 36mg

I made these this past weekend. I added extra nutmeg to taste. These cookies were DELICIOUS. They went fast. Everyone loved them. Thank you for the recipe and all of the helpful hints.