Skip to content
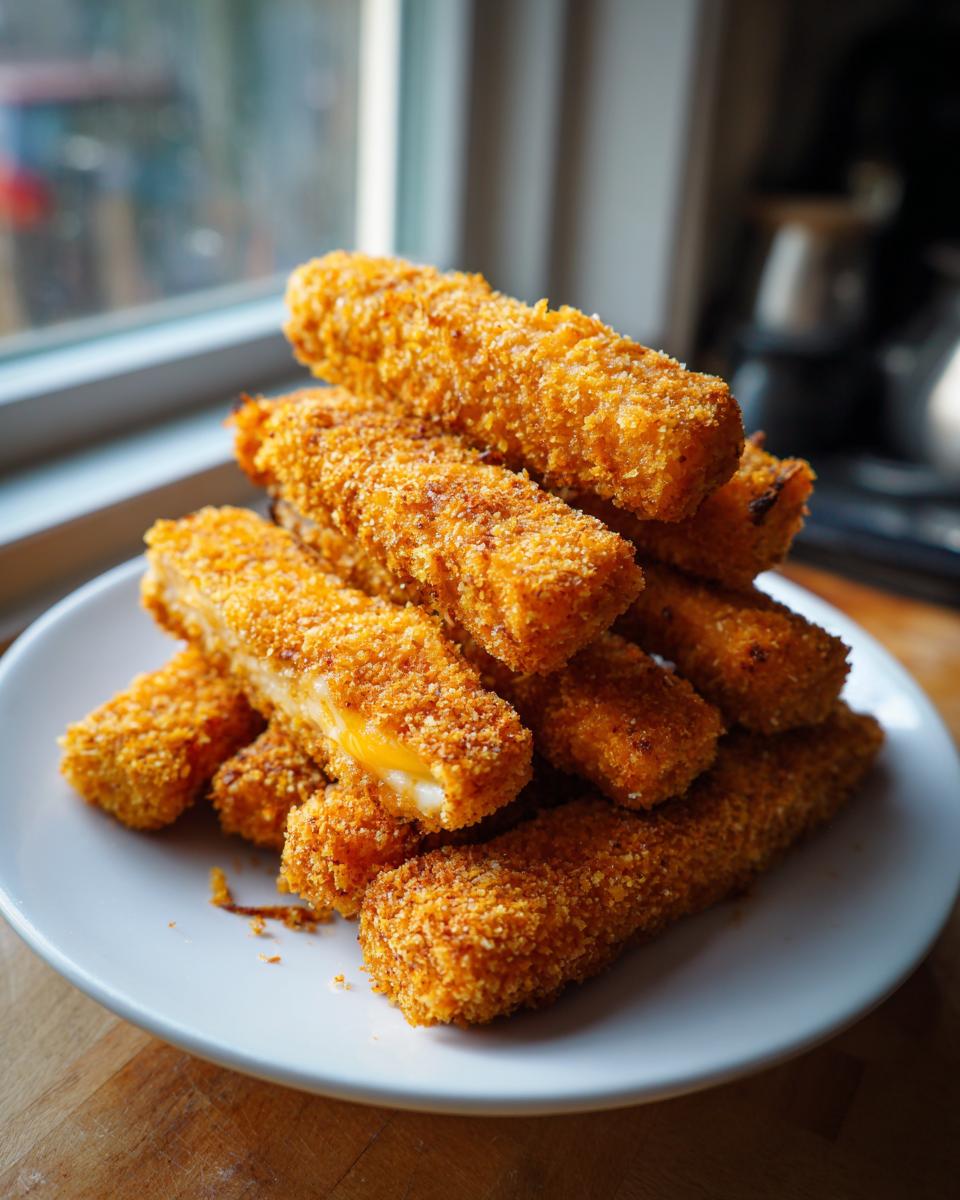
If you’re like me, sometimes you just need that perfect, savory, dippable bite that hits the spot without any fuss. Seriously, who has time for complicated appetizers during the week? That’s why I’m so excited to share my recipe for Cheesy Ham and Cheese Sticks: A Delicious Snack Idea! These baked wonders are pure comfort food wrapped up in a crispy, golden shell. Welcome, I’m Anna Kowalska, and here I share tried-and-true homemade recipes that you and your family will love. Everything I post here is made with heart and flavor, built on years of tinkering in my own kitchen until I get things just right.
My cooking philosophy grew from simple necessity—making wonderful food for my own busy family without spending hours slaving over a hot stove. I believe every recipe should be accessible, delicious, and capable of making a regular Tuesday night feel a little more special. Forget those freezer-aisle disappointments; these homemade sticks prove that the best snacks come from your own oven. They are unbelievably simple to throw together, and the smell alone tells you you’re onto a winner.
Jump to:
Why You Will Love These Cheesy Ham and Cheese Sticks: A Delicious Snack Idea!
Honestly, these sticks are my secret weapon when unexpected guests drop by or when the kids declare they are starving five minutes before I need to start dinner. They are everything you want in a handheld savory bite. You absolutely need to try these Cheesy Ham and Cheese Sticks: A Delicious Snack Idea! because they require almost zero fuss but deliver maximum flavor payoff.
- They bake up beautifully golden brown—no messy frying required!
- The prep time is shockingly short; you’re looking at just 15 minutes before they hit the oven.
- That perfect combination of salty ham, sharp cheddar, and seasoning is addictive.
- They hold their shape wonderfully, making them ideal for little hands or party platters.
Quick Preparation for Busy Days
If you see 15 minutes on the clock, you can make these! The prep is incredibly straightforward. You just mix, form, coat, and bake. Seriously, I often make a batch while the kettle is boiling for my afternoon tea. Because the ingredients are mostly prepped—diced chicken and shredded cheese—the mixing stage flies by. You won’t believe how quickly you get flavor this good.
Versatile Serving Options
These aren’t just for game day, though they are perfect then! I’ve served these Cheesy Ham and Cheese Sticks: A Delicious Snack Idea! alongside soup for a light lunch, and they were the star appetizer at my neighbor’s potluck last month. They are sturdy enough to be dipped but stand up well on their own. They’re the ultimate crowd-pleaser, no matter the occasion.
Essential Ingredients for Cheesy Ham and Cheese Sticks: A Delicious Snack Idea!
When you’re making something this simple, the quality of your ingredients really shines through. Trust me, using good, sharp cheddar makes all the difference in these Cheesy Ham and Cheese Sticks: A Delicious Snack Idea! We aren’t messing around with a ton of obscure items here; everything you need is probably already in your pantry or fridge right now. I promise, these ingredients combine in the most magical way to form that perfect savory dough base.
Here is what you’ll need to gather before we start mixing:
- 2 cups shredded cheddar cheese
- 1 cup diced cooked chicken
- 1 cup all-purpose flour
- 1 teaspoon baking powder
- 1/2 teaspoon garlic powder
- 1/2 teaspoon onion powder
- 1/4 teaspoon black pepper
- 1/4 teaspoon salt
- 1 large egg
- 1/4 cup milk
- 1/2 cup breadcrumbs
- Cooking spray or oil for greasing
Ingredient Preparation Guidance
A couple of quick notes here to ensure success. Make sure your cheddar cheese is fully shredded; pre-shredded bags are fine, but if you shred it yourself, it melts just a bit better into the dough. For the chicken, since we aren’t cooking it during the stick-making process, it needs to be fully cooked beforehand—rotisserie chicken works like a charm here! Dice it small so it distributes evenly.
Ingredient Substitutions for Flexibility
If you like a little fire in your snack, don’t hesitate to throw in a quarter teaspoon of cayenne pepper with the dry spices, or maybe some finely chopped jalapeños if you’re feeling brave! Also, if cheddar isn’t your absolute favorite, you can easily swap it out for mozzarella. Mozzarella gives you that fantastic, gooey pull when you bite into the stick, which is always fun.
Equipment Needed for Perfect Cheesy Ham and Cheese Sticks
You don’t need any fancy gadgets for this recipe, which is another reason I love it so much! We are keeping things simple and relying on good old elbow grease and basic kitchen staples. Make sure you have your measuring cups and spoons handy so you can get those spices just right—that’s where the flavor lives!
Here are the essentials you should pull out before you start:
- Two sturdy mixing bowls—one big one for the main dough and one shallow dish for the breadcrumbs.
- A reliable whisk or fork for beating that egg and milk mixture.
- Measuring cups and spoons are non-negotiable for accurate seasoning!
- A large mixing spoon or spatula to bring the dough together.
- A baking sheet lined with parchment paper—this is key for cleanup!
- A little bit of parchment paper or a silicone mat if you plan on shaping the sticks right on the counter.
Step-by-Step Instructions for Cheesy Ham and Cheese Sticks: A Delicious Snack Idea!
Okay, now for the fun part! Getting these Cheesy Ham and Cheese Sticks: A Delicious Snack Idea! into the oven is easier than you think. I always start by getting the oven going first because waiting around is the worst. Preheat to 375°F (190°C). Line a baking sheet with parchment paper—I learned the hard way that skipping this step means a lot more scraping later on! Give that parchment a quick spritz of cooking spray or a light brush of oil.
Preparing the Base Mixture
We tackle this in two stages, just like making a good cake! First, grab your biggest bowl. Toss in all the dry stuff: the flour, baking powder, garlic powder, onion powder, pepper, and salt. Give that a quick whisk just to make sure the leavening agent is evenly distributed. Now, add in your shredded cheddar and that diced cooked chicken. Mix that all up until everything looks nicely coated with the flour mixture.
In a separate, smaller bowl, get your wet ingredients ready. Whisk that single egg vigorously with the milk until it’s smooth and pale yellow. Now, pour this liquid right into your big bowl of cheesy chicken and flour mix. Use your spatula and stir, stir, stir! It’s going to look messy at first, but keep going until it finally comes together into one cohesive, slightly sticky dough. Don’t overmix it once it clumps up—we don’t want tough sticks!
Shaping and Coating the Sticks
This is where we create the shape! Grab a small piece of dough—think about the size of a ping pong ball, maybe a little less. Gently roll it between your palms to form a stick, maybe about 3 inches long and about an inch thick. They don’t need to be perfectly uniform; handmade always looks better, right?
Next, get your breadcrumbs ready in a shallow dish. Take each formed stick and gently roll it around in the crumbs until it’s completely covered. Make sure you press lightly to get a nice, even coating. That breadcrumb layer is what gives these Cheesy Ham and Cheese Sticks: A Delicious Snack Idea! their amazing crisp exterior! Place them on your prepared baking sheet, leaving a little space between each one so they can brown up nicely on all sides.
Baking for Golden Perfection
Once your sheet is full, pop it straight into that 375°F oven. They usually take between 15 and 20 minutes. You’re looking for a beautiful, deep golden brown color. They should smell incredible—savory, cheesy, and toasty. When they look done, pull them out. They will be hot, so be careful! Let them cool right there on the pan for about five minutes. This resting time is crucial because it lets the cheese set up slightly so they don’t crumble when you pick them up for dipping!
Tips for Making Exceptional Cheesy Ham and Cheese Sticks
Even though this recipe is super simple, a couple of little tricks can take your sticks from good to absolutely unbelievable. My biggest piece of advice centers around temperature and handling the dough when it’s sticky. If your dough feels too soft when you try to roll it, that usually means your cheese was too warm when you started mixing. Resist the urge to add more flour! Instead, wrap the dough into a rough ball, cover it, and stick it in the fridge for about ten minutes.
That short chill time lets the fat in the cheese firm up just enough so you can handle it without everything turning into a mess. When you roll them in the breadcrumbs, don’t rush it! Ensure every surface is coated. If you have bare spots, that’s where the cheese might try to ooze out during baking and cause sticking. Also, don’t pack them too tightly on the pan; air circulation helps them crisp up evenly all around. Trust me, these small steps separate a batch that crumbles from a batch that stays perfectly intact.
Serving Suggestions for Cheesy Ham and Cheese Sticks: A Delicious Snack Idea!
Now that you have these gorgeous, golden sticks, the only question left is what to dip them in! Since these Cheesy Ham and Cheese Sticks: A Delicious Snack Idea! are so rich and savory, you want a dipping sauce that offers a little brightness or tang to cut through that richness. I keep my dips simple, because the sticks are the real star here.
For a classic pairing, you can’t beat a good honey mustard—the sweetness balances the saltiness beautifully. If you’re feeling a little more adventurous, a creamy ranch dressing mixed with a tiny splash of hot sauce is fantastic. For a lighter option, a simple side of fresh, crisp celery sticks or carrot coins offers a great crunch alongside the baked goodness. They are just as tasty eaten plain, but a good dip always makes it feel like a real party!
Storing and Reheating Your Cheesy Ham and Cheese Sticks
If you manage to have any leftovers—which is rare in my house!—storing them correctly is the key to keeping that crispy exterior intact. You definitely don’t want to just toss them in a plastic bag; they’ll steam themselves soft, and nobody wants a soggy cheese stick!
The best way to store them is totally cooled down, placed in a single layer inside an airtight container. If you have too many for one layer, put a piece of parchment paper between the layers. This keeps the moisture exchange minimal. They are good for about three days stored this way in the fridge.
Reheating is where we bring them back to life. Forget the microwave; that’s the enemy of crispiness! The oven or an air fryer is your best friend here. You want a quick blast of dry heat to crisp up that breadcrumb coating again.
Here is how I usually handle leftovers:
- Oven Method: Preheat to 350°F (175°C). Spread the sticks on a baking sheet and bake for about 5 to 7 minutes. Keep an eye on them; they heat fast!
- Air Fryer Method: Set the air fryer to 325°F (160°C). Cook for 3 to 4 minutes, shaking the basket halfway through. They come out almost perfectly crisp!
If you freeze them before they are cooked, that’s another story—but for leftovers, those reheating tips work like a charm!
| Storage Method | Duration | Best Reheating Tip |
|---|---|---|
| Airtight Container (Refrigerated) | Up to 3 Days | Oven or Air Fryer |
| Airtight Container (Room Temp) | Up to 4 Hours | Serve immediately or refrigerate |
| Freezer (Uncooked Dough Sticks) | Up to 1 Month | Bake from frozen, adding 5-10 minutes to cook time |
Frequently Asked Questions About Cheesy Ham and Cheese Sticks
I get so many great questions about customizing these snacks, which tells me you all are already thinking about how to make these Cheesy Ham and Cheese Sticks: A Delicious Snack Idea! your own! Here are a few of the questions I hear most often from folks trying out this recipe for the first time.
Can I prepare the dough ahead of time?
Yes, you absolutely can prep the dough ahead of time, which is a lifesaver on busy days! Once the dough comes together—after you add the egg and milk—wrap the whole ball tightly in plastic wrap. Keep it in the fridge for up to 24 hours. When you are ready to bake, just let it sit on the counter for about 15 minutes to soften slightly before rolling it into sticks. If it’s too cold, it will crack when you try to shape it, so don’t skip that little warm-up period!
What is the best cheese to use besides cheddar?
While I adore sharp cheddar for that tangy kick, mozzarella is definitely my second favorite choice, as I mentioned earlier. Mozzarella gives you that classic, glorious cheese pull—it’s just pure fun when you bite into it. If you want something a little sharper but still melty, try Gruyère! It adds a nutty, complex flavor that pairs wonderfully with the ham and spices. Just make sure whatever cheese you choose is shredded well so it incorporates smoothly into the dough.
How do I make these Cheesy Ham and Cheese Sticks: A Delicious Snack Idea! dairy-free?
This is a great question, as many people are looking for dairy-free options these days! Because cheese is such a core structural component here, it can be tricky, but it’s not impossible. You will need to substitute the cheddar with a high-quality, firm dairy-free cheddar alternative. Look for brands that use coconut oil or nut bases, as they tend to melt and bind better than some others. Also, remember to swap the milk for an unsweetened, unflavored plant-based milk, like soy or almond milk, to keep the dough consistency right!
Share Your Cheesy Ham and Cheese Sticks Experience
I truly hope you loved making these just as much as I love sharing them with you! When I put a recipe out there, I’m hoping it becomes part of your family’s rotation, too. That’s the whole point of sharing tried-and-true goodness, right? I always want to know how things turn out in your kitchen.
Did you try the spicy jalapeño kick? Or maybe you went for the gooey mozzarella swap instead? Don’t be shy! Head down to the comments section below and let me know what you thought. If you made these wonderful Cheesy Ham and Cheese Sticks: A Delicious Snack Idea!, please give the recipe a star rating! It really helps other cooks know they are making something worthwhile. I love seeing photos of your creations, so share your snaps on social media and tag me—I can’t wait to see your golden, crispy results!
Print
Amazing 15 Min Cheesy Ham and Cheese Sticks
- Total Time: 35 minutes
- Yield: Varies based on stick size
- Diet: Vegetarian
Description
Cheesy Ham and Cheese Sticks: A Delicious Snack Idea! These baked sticks offer a savory, cheesy, and satisfying bite perfect for snacking or serving as an appetizer.
Ingredients
- 2 cups shredded cheddar cheese
- 1 cup diced cooked chicken
- 1 cup all-purpose flour
- 1 teaspoon baking powder
- 1/2 teaspoon garlic powder
- 1/2 teaspoon onion powder
- 1/4 teaspoon black pepper
- 1/4 teaspoon salt
- 1 large egg
- 1/4 cup milk
- 1/2 cup breadcrumbs
- Cooking spray or oil for greasing
Instructions
- Preheat your oven to 375°F (190°C). Line a baking sheet with parchment paper. Lightly grease the parchment with cooking spray or oil.
- In a large mixing bowl, combine the shredded cheddar cheese, diced chicken, flour, baking powder, garlic powder, onion powder, black pepper, and salt. Mix until well combined.
- In a separate bowl, whisk together the egg and milk until smooth. Pour the egg mixture into the cheese and chicken mixture, stirring until a dough forms.
- Take small portions of the dough and roll them into sticks, about 3 inches long and 1 inch thick.
- Place the breadcrumbs in a shallow dish. Roll each stick in the breadcrumbs until fully coated.
- Arrange the coated sticks on the prepared baking sheet, leaving space between each one.
- Bake in the preheated oven for 15-20 minutes, or until golden brown and crispy.
- Remove from the oven and let cool for a few minutes before serving.
Notes
- For a spicy kick, add 1/4 teaspoon of cayenne pepper or some chopped jalapeños to the mixture.
- Substitute the cheddar cheese with mozzarella for a different flavor and texture.
- Prep Time: 15 minutes
- Cook Time: 20 minutes
- Category: Snack/Appetizer
- Method: Baking
- Cuisine: American
Nutrition
- Serving Size: 1 stick
- Calories: Estimate needed
- Sugar: Estimate needed
- Sodium: Estimate needed
- Fat: Estimate needed
- Saturated Fat: Estimate needed
- Unsaturated Fat: Estimate needed
- Trans Fat: Estimate needed
- Carbohydrates: Estimate needed
- Fiber: Estimate needed
- Protein: Estimate needed
- Cholesterol: Estimate needed