Skip to content
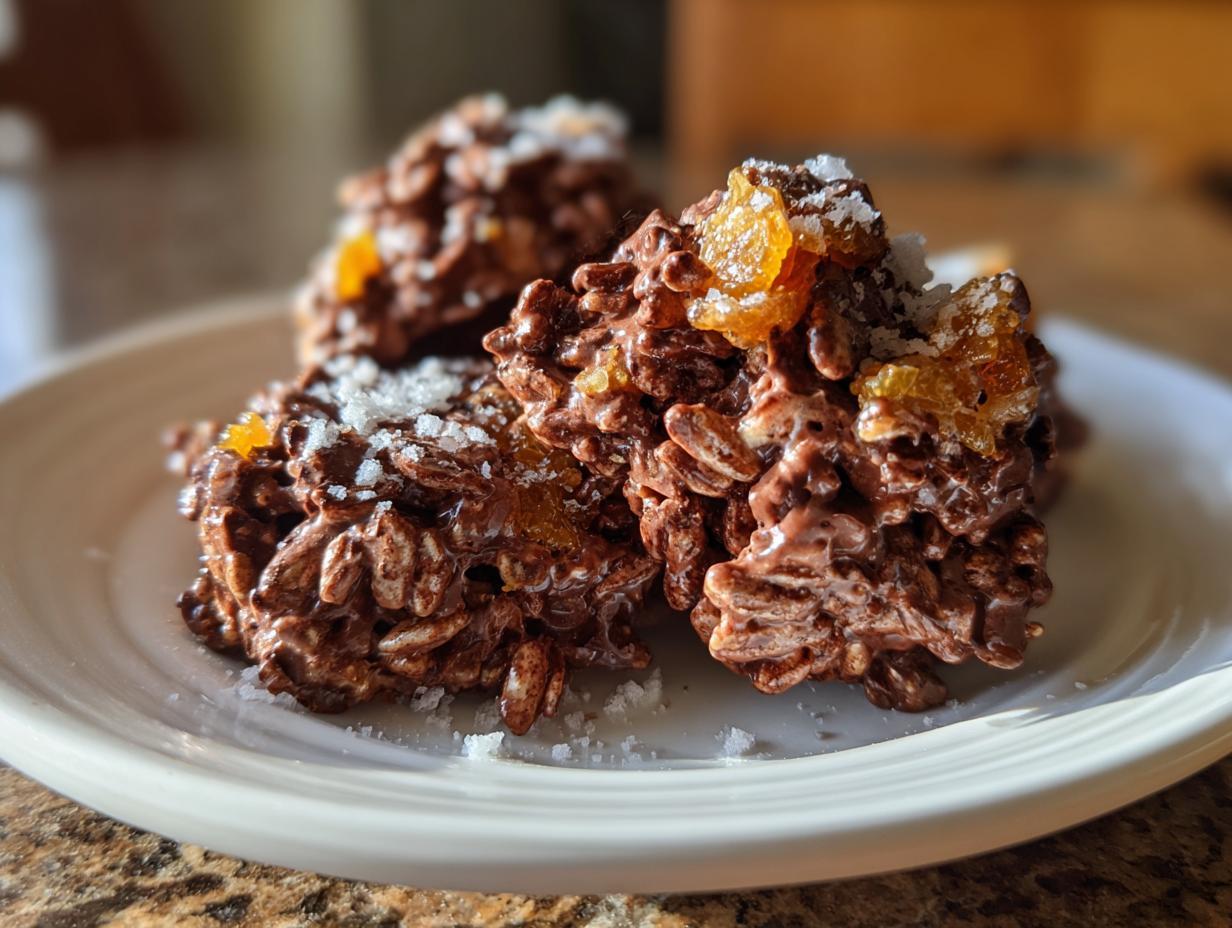
If you’re anything like me, sometimes you need a serious, satisfying treat but you just cannot face turning on the oven. That’s why I’m so excited to share my absolute favorite quick fix: Healthy Chocolate & Peanut Butter Quinoa Squares. I’m Anna Kowalska, and here I share tried-and-true homemade recipes that you and your family will love. Everything I post here is made with heart and flavor, and this recipe is no exception. I’ve spent years perfecting treats that taste indulgent but use ingredients I don’t feel guilty about eating mid-afternoon. This recipe came about because I needed something ready in under 30 minutes that satisfied that deep craving for peanut butter and chocolate we all get!
Why You Will Love These Healthy Chocolate & Peanut Butter Quinoa Squares
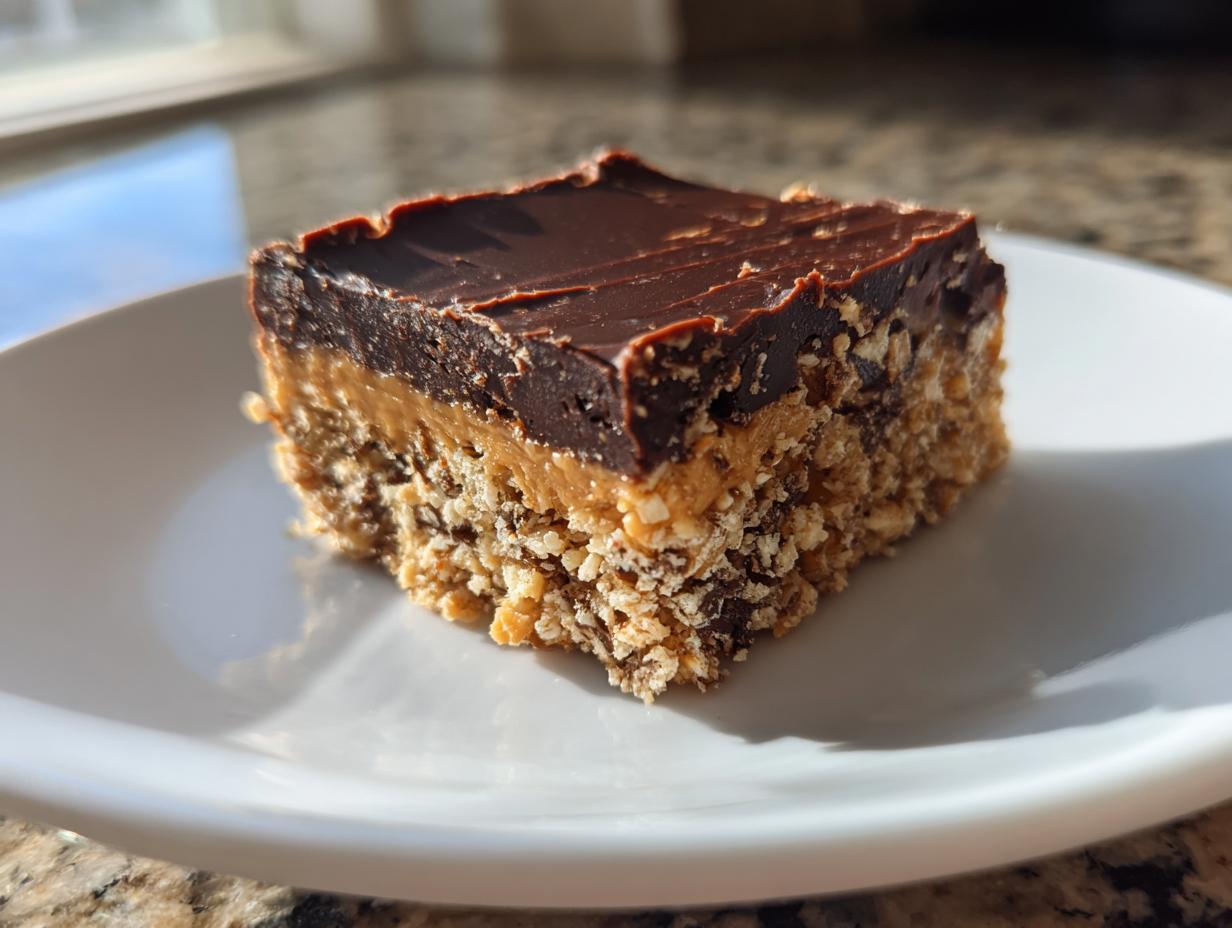
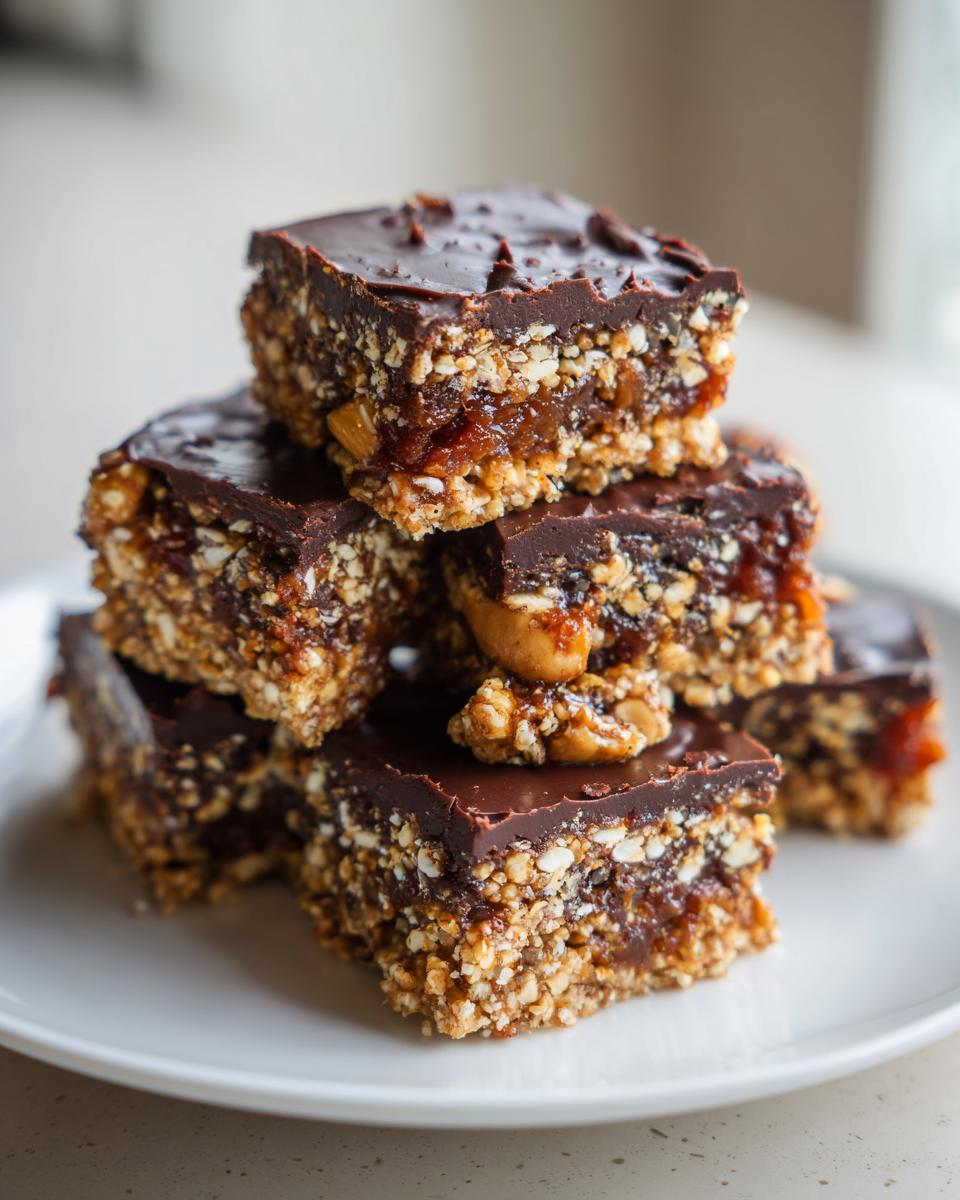
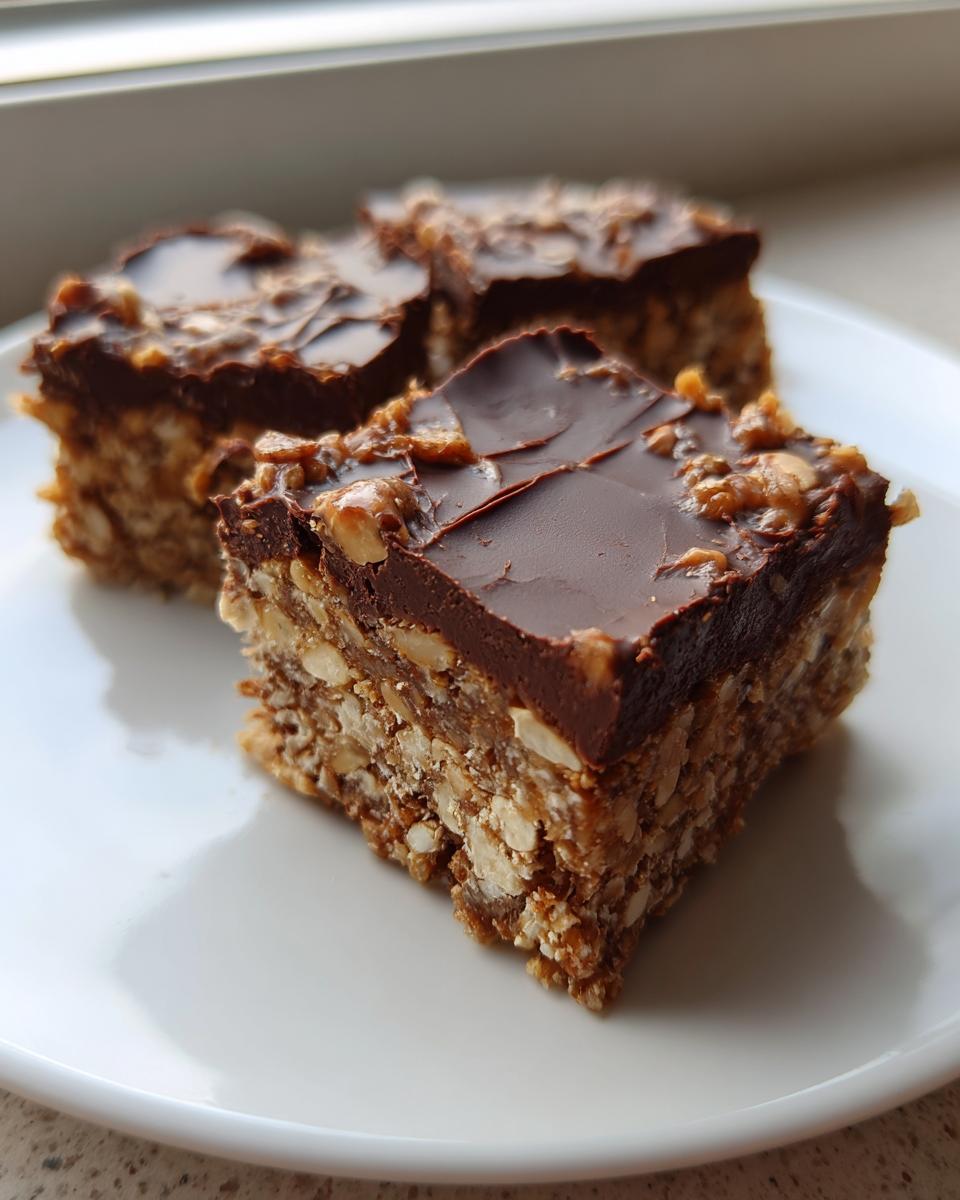
Seriously, these Healthy Chocolate & Peanut Butter Quinoa Squares are a game-changer for busy weeks. The biggest win? They are completely no-bake! You mix the base, press it down, top it with chocolate, and let the fridge do the hard work. That crunchy texture from the puffed quinoa mixed with creamy peanut butter is just heaven. And the dates? They give you that sweet chewiness without needing tons of refined sugar. It’s truly the perfect healthy snack when you need something fast, filling, and deeply satisfying. You’ll be whipping these up every single week, trust me on this one.
Jump to:
Gathering Ingredients for Healthy Chocolate & Peanut Butter Quinoa Squares
Okay, before we dive into the assembly of these wonderful Healthy Chocolate & Peanut Butter Quinoa Squares, let’s talk about what you need to pull together. Since this is a no-bake recipe, the quality of your few ingredients really shines through. We aren’t hiding anything under a heavy bake time, so grabbing the right stuff makes all the difference in the final texture and flavor profile. Don’t skimp here; a little prep goes a long way!
Ingredient Requirements
First up, make sure those dates are super soft. If they feel hard and dry, they won’t blend properly into the base and you’ll end up with chunks instead of a sticky binder. I usually soak mine in hot water for about five minutes if they aren’t quite pliable enough. Also, for the healthiest results and the best flavor pairing with the chocolate, you absolutely must use natural, unsweetened peanut butter. You know the kind where the oil separates on top? Give that jar a good stir before you scoop it out!
Necessary Equipment for Preparation
You won’t need much fancy gear for this. Grab an 8×8 inch baking pan; you’ll want to line it completely with parchment paper first so that paper hangs over the sides like little handles—that’s how we get them out cleanly later! You’ll need a large mixing bowl, a sturdy spatula for pressing, and a separate small bowl or microwave-safe dish just for melting that beautiful dark chocolate topping.
Step-by-Step Instructions for Healthy Chocolate & Peanut Butter Quinoa Squares
This is where the magic happens, and it’s so fast! Remember, we are aiming for that 15-minute prep time, so keep your movements quick and efficient. The goal is a dense, chewy base that can support that gorgeous chocolate layer on top of your Healthy Chocolate & Peanut Butter Quinoa Squares.
Preparing the Base Mixture
First things first, get your puffed quinoa into that large mixing bowl. Next, add your chopped dates. If you soaked them, make sure you drain them really well before adding them in! Now, dollop in your peanut butter. Don’t measure it too strictly yet; we need to mix it all together before we judge the consistency. Start folding everything together gently with your spatula. It will look dry at first, like everything is just coated in powder, but keep working it! The warmth from the peanut butter will start activating the stickiness of the dates.
Keep mixing until every single piece of quinoa has a nice, even coating of the peanut butter and date mixture. Once it looks uniformly sticky, transfer the whole thing into your parchment-lined 8×8 pan. Now, this next part is crucial for a square that doesn’t crumble apart on you: pressing! Use the bottom of a flat drinking glass or the back of your spatula and press this mixture down hard. I mean, really push it! You want this layer to be super compact and firm. Don’t be shy; the tighter you pack it now, the better your final squares will hold up when you cut them.
Melting and Applying the Chocolate Topping
While you’re pressing, go ahead and get your chocolate ready. I usually take about 6 ounces of dark chocolate chips or chopped bars and put them in a small microwave-safe bowl. Zap them for 30 seconds, stir really well, and then zap again for 15-second bursts, stirring completely between each burst. This prevents scorching, which gives you that awful grainy texture. If you prefer a double boiler, that works great too! Once it’s smooth and shiny, pour that melted chocolate right over your pressed quinoa base.
Spread it out quickly and evenly to cover the entire surface. If your base layer isn’t perfectly flat, the chocolate will pool in the dips, so make sure you leveled it out before pouring! A quick, gentle wiggle of the pan usually helps settle the chocolate into a smooth sheet across the top of your quinoa treat.
Chilling and Serving Your Healthy Chocolate & Peanut Butter Quinoa Squares
Now we wait! Since this is a no-bake recipe, chilling is our oven. Place the pan carefully into the refrigerator. You need these to chill for at least two hours, but honestly, three hours is much better. You want that chocolate layer to be completely hard and the base to feel solid when you gently press the top. When they are fully chilled, grab those parchment paper handles you left hanging over the side and lift the whole slab out onto a cutting board.
For the cleanest cuts, run a large, warm knife under hot water, wipe it dry, and then slice down. Wipe the knife clean between every cut. This prevents the chocolate from cracking badly and keeps your edges looking sharp. You should get about 12 perfect squares ready to eat!
Tips for Perfect Healthy Chocolate & Peanut Butter Quinoa Squares
Even though these Healthy Chocolate & Peanut Butter Quinoa Squares seem simple because they don’t need an oven, there are a few little tricks I’ve learned over time to make sure they come out absolutely perfect every single time. We want zero crumbling and maximum chewiness, right? Follow these tips, and you’ll be serving up professional-looking squares!
Achieving the Best Texture
Moisture management is everything here. If your peanut butter is too cold straight from the fridge, it won’t mix well with the dates, resulting in a crumbly base rather than a sticky one. Let your natural peanut butter sit on the counter for about 30 minutes before starting. Also, if you notice your mixture seems too dry even after mixing everything thoroughly, add peanut butter just one teaspoon at a time until it holds together when you squeeze a small amount in your hand. That’s how you guarantee that satisfying, dense texture.
Substitution Guidance for This Healthy Chocolate & Peanut Butter Quinoa Squares Recipe
I know not everyone keeps puffed quinoa stocked, though I highly recommend it for that unique crunch! If you need a swap, puffed brown rice cereal works really well, though it will be slightly less nutty. For the peanut butter, you can certainly swap it for almond butter or sunflower seed butter if you have allergies or just want a change of flavor. Just remember that almond butter tends to be a little runnier, so you might need to chill the base mixture for an extra 15 minutes before pressing it firmly into the pan. Keep that base tight!
Frequently Asked Questions About Healthy Chocolate & Peanut Butter Quinoa Squares
I get so many questions every time I post these, and honestly, that tells me how much everyone loves a good, quick, no-bake treat! It’s so rewarding to see people enjoying these Healthy Chocolate & Peanut Butter Quinoa Squares. Here are some of the things I hear most often when folks are getting ready to whip up a batch of this favorite quinoa treat.
Can I use a different nut butter in this Healthy Chocolate & Peanut Butter Quinoa Squares recipe?
Yes, absolutely! You can definitely swap out the peanut butter. Almond butter works beautifully and keeps that rich, nutty flavor profile we love. Cashew butter is another creamy option. The only thing you need to watch out for is consistency. If your chosen nut butter is much thinner than standard peanut butter, you might find your base mixture is a little looser. If that happens, just pop the base into the fridge for an extra 15 minutes before you press it down. That extra chill time will help it firm up before you add the chocolate layer.
How long do these squares last in the refrigerator?
Because we use natural ingredients and the chocolate topping, these are best kept chilled. Stored properly in an airtight container, they stay fantastic for about a week in the refrigerator. They actually taste even better on day two once all those flavors have really settled together! If you need them to last longer, you can absolutely freeze them. They freeze beautifully for up to three months. Just let them thaw on the counter for about 20 minutes before you enjoy that perfect no-bake snack.
Storing and Reheating Your Healthy Chocolate & Peanut Butter Quinoa Squares
Since these treats are no-bake and rely on the chill to hold their shape, storing them correctly is super important. You want to keep them airtight so they don’t pick up any weird fridge smells or dry out on the edges. Honestly, you rarely need to reheat them! They are designed to be eaten cold or at cool room temperature. If they get too warm, that beautiful dark chocolate topping can get a little soft and messy, so keeping them cool is the way to go.
Creating a Storage Table
To make things easy for you, I put together a quick little reference chart so you always know the best place for your squares, depending on when you plan to eat them next. Keeping track is simple!
- Storage Method: Airtight Container in Fridge
Duration: Up to 1 Week
Location: Refrigerator
- Storage Method: Freezer Safe Container with Parchment Separators
Duration: Up to 3 Months
Location: Freezer
Sharing Your Experience Making Healthy Chocolate & Peanut Butter Quinoa Squares
Well, that’s it! You’ve made it through the process, and I truly hope you love these Healthy Chocolate & Peanut Butter Quinoa Squares as much as my family does. They are such a satisfying, simple win for any day of the week. Once you try them, come right back here! Let me know how fast you devoured them, and please leave a rating below so others know what a fantastic, no-bake treat this is. I can’t wait to hear about your results!
Print
Divine 12 Healthy Chocolate & Peanut Butter Quinoa Squares
- Total Time: 15 minutes (plus chilling time)
- Yield: 12 squares
- Diet: Vegetarian
Description
Make these Healthy Chocolate & Peanut Butter Quinoa Squares for a satisfying, no-bake treat. They combine crunchy puffed quinoa with creamy peanut butter and sweet dates, topped with rich dark chocolate.
Ingredients
- Puffed quinoa
- Peanut butter
- Dates
- Dark chocolate
Instructions
- Combine puffed quinoa with chopped dates.
- Mix in peanut butter until evenly coated.
- Press the mixture firmly into a lined pan.
- Melt dark chocolate and spread it evenly over the top layer.
- Refrigerate the squares until they are completely firm.
- Cut into desired square portions.
Notes
- Ensure your dates are soft for easy mixing.
- Use natural, unsweetened peanut butter for a healthier option.
- For a cleaner cut, allow the chocolate topping to set fully before slicing.
- Prep Time: 15 minutes
- Cook Time: 0 minutes
- Category: Snack/Dessert
- Method: No-Bake
- Cuisine: American
Nutrition
- Serving Size: 1 square
- Calories: Approx. 150
- Sugar: Approx. 8g
- Sodium: Approx. 50mg
- Fat: Approx. 9g
- Saturated Fat: Approx. 3g
- Unsaturated Fat: Approx. 6g
- Trans Fat: 0g
- Carbohydrates: Approx. 15g
- Fiber: Approx. 2g
- Protein: Approx. 5g
- Cholesterol: 0mg