Skip to content
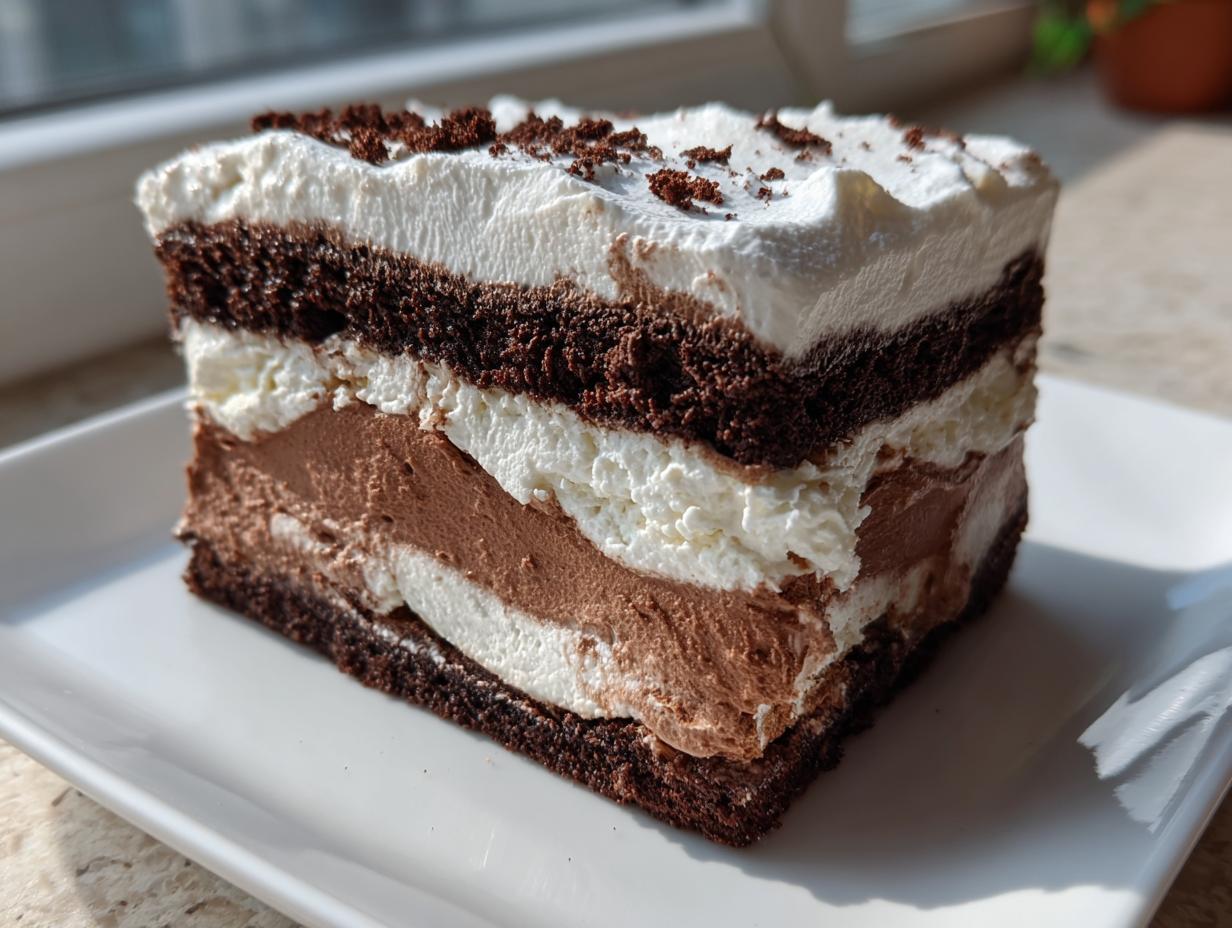
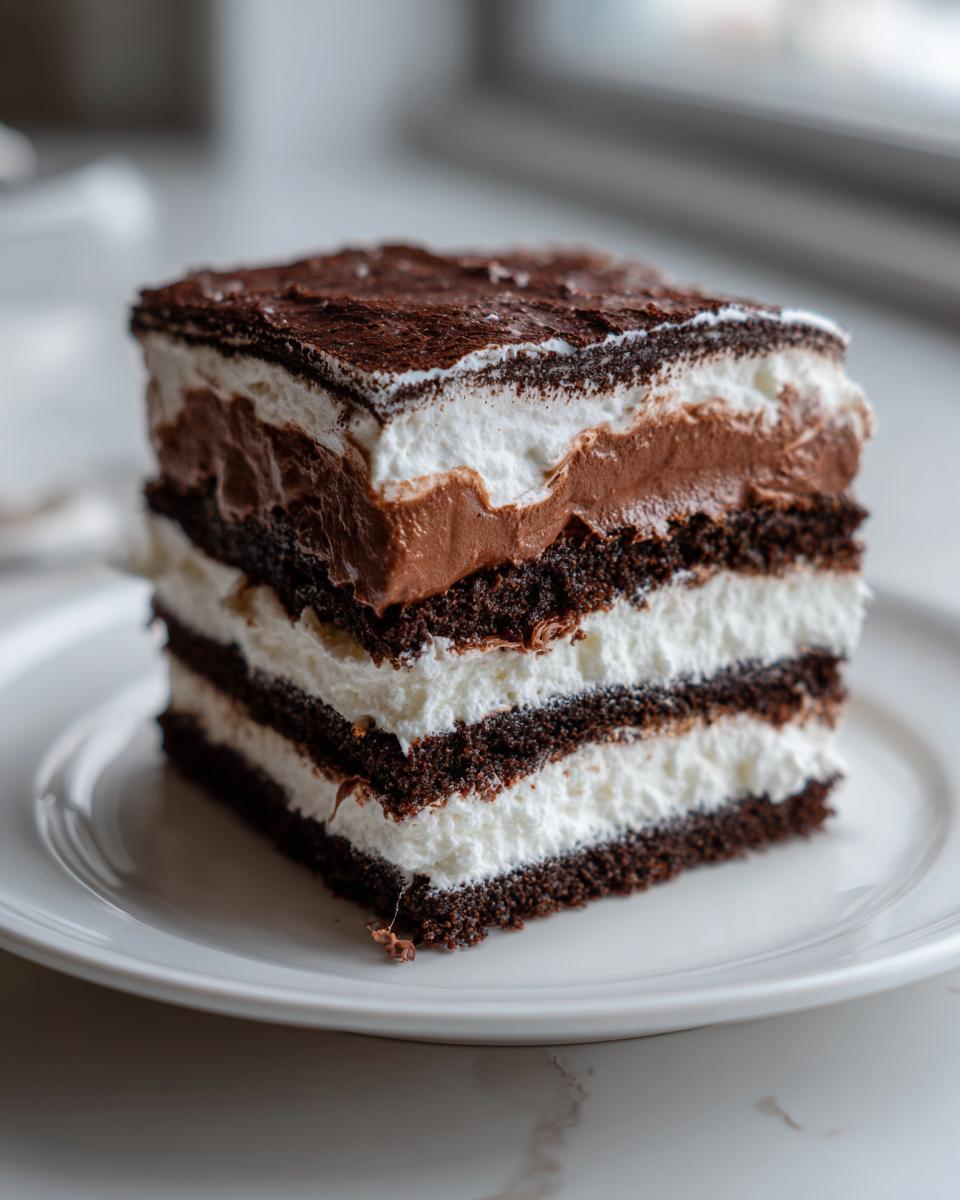
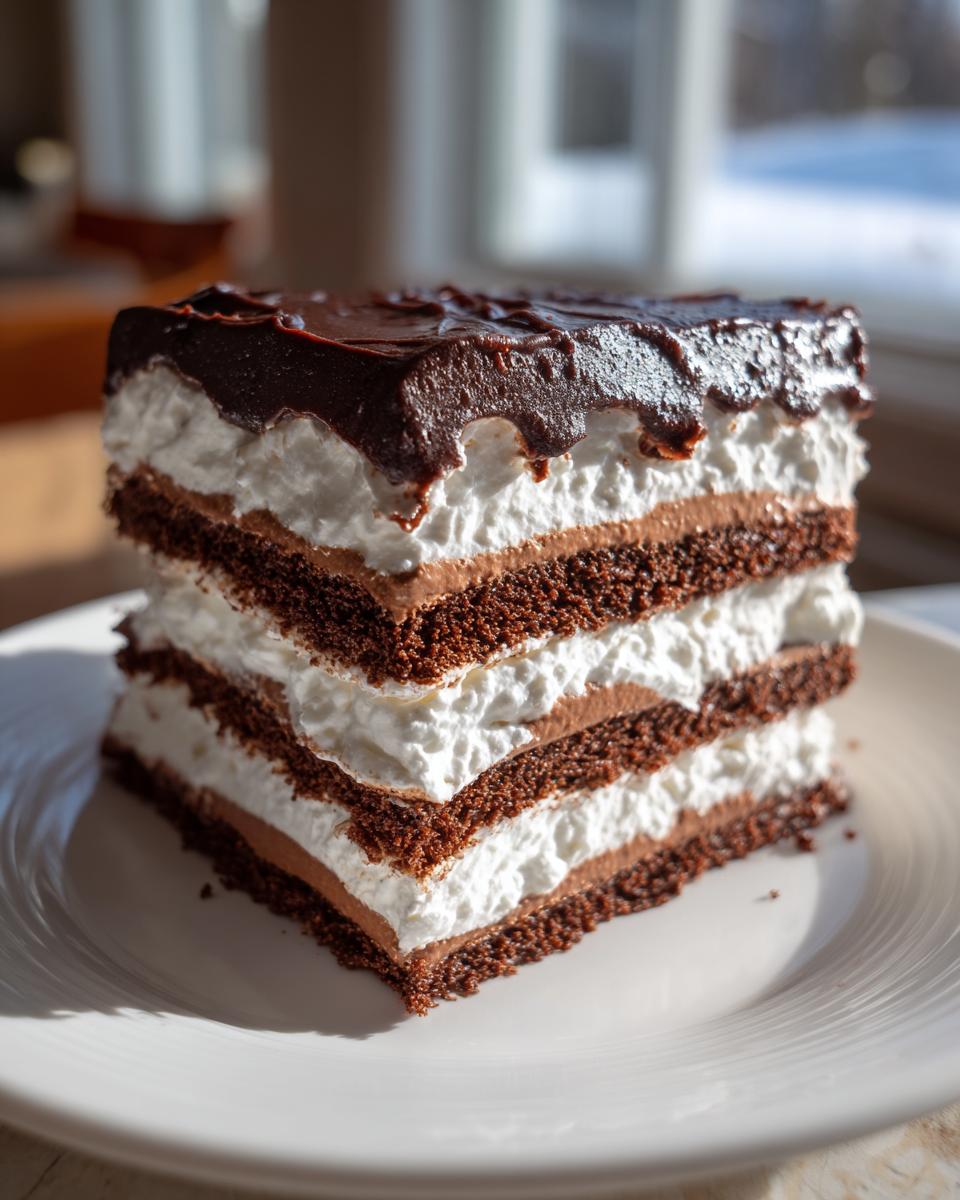
When summer heat hits and the thought of turning on the oven makes me break out in a sweat, that’s when my famous Icebox Cake (No‑Bake Refrigerator Cake) comes out to play! Hello there, I’m Anna Kowalska, and here I share tried-and-true homemade recipes that you and your family will love. Everything I make, including this dreamy dessert, is made with heart and flavor. This recipe is pure magic because it relies entirely on the refrigerator to do the heavy lifting. It’s the perfect solution when you need a stunning, rich chocolate dessert but only have about 15 minutes of active time before you put your feet up.
Why You Will Make This Icebox Cake (No‑Bake Refrigerator Cake) Often
Honestly, this Icebox Cake is going to become your new go-to when company drops by unexpectedly or when you just need a sweet fix without the fuss. It’s proof that simple doesn’t mean boring! The payoff for almost no effort is huge.
- It’s genuinely no-bake—zero oven time, ever.
- The texture is incredible; those wafers get perfectly soft and cake-like.
- It’s incredibly budget-friendly using pantry staples like wafers and pudding.
- It only takes about 15 minutes to assemble before it chills into perfection.
Jump to:
Gathering What You Need for Your Icebox Cake (No‑Bake Refrigerator Cake)
When we talk about an Icebox Cake (No‑Bake Refrigerator Cake), the quality of the few ingredients we use really sings through. Since we aren’t baking anything, there’s nowhere to hide if a component isn’t up to snuff! I always stress using the best chocolate wafers you can find. They are the backbone of this dessert, and if they taste stale or crumbly going in, the final texture won’t be that dreamy, sliceable cake we are aiming for.
Also, don’t skimp on your whipped cream! I prefer whipping heavy cream fresh—it tastes so much better than the aerosol stuff, though I admit, sometimes I take that shortcut when I’m running late. For the best result, though, whip it yourself until stiff peaks form. It holds up beautifully against the pudding.
Precise Ingredients for the Best Icebox Cake (No‑Bake Refrigerator Cake)
You’ll need to gather these items. I always write down the exact measurements before I start layering so I don’t run out halfway through! For the most accurate recipe, please refer to the table below for the precise amounts we use for 8 servings.
Here’s what you need for this classic Icebox Cake:
| Ingredient | Amount | Notes |
|---|---|---|
| Chocolate Wafers | 1 package (about 9 oz) | Must be firm and fresh |
| Heavy Whipping Cream | 2 cups | Needs to be very cold for whipping |
| Instant Chocolate Pudding Mix | 1 standard box (3.4 oz) | Prepared according to package directions |
Essential Equipment for Assembly
You don’t need much fancy gear for this one, which is part of the fun! Make sure you have a sturdy mixing bowl and an electric mixer or a whisk for your whipped cream. You’ll also need a large, deep serving dish—a 9×9 inch square or an 8×8 inch square works perfectly for getting those nice, clean layers.
- Large mixing bowl
- Electric mixer or strong whisk
- Rubber spatula
- Deep 8×8 or 9×9 inch serving dish
Step-by-Step Assembly of Your Icebox Cake (No‑Bake Refrigerator Cake)
This is where the fun begins! Honestly, assembling this Icebox Cake feels more like playing with building blocks than actual baking. The key here is speed and evenness, especially since your whipped cream won’t wait around forever looking pretty. Make sure your pudding is mixed up and slightly thickened before you start, and your whipped cream should be stiff. We are aiming for a sturdy structure!
Layering the Base Components
First things first, grab your serving dish. We start with a thin layer of protection on the bottom—just a tiny smear of whipped cream or pudding. This stops the first layer of wafers from sticking stubbornly to the glass when you try to serve it later. Next, lay down your chocolate wafers in a single, snug layer, trying not to overlap them too much. If you have gaps, the pudding will just seep through, and we want defined layers!
Once the wafers are down, take about a third of your prepared whipped cream and spread it gently over the cookies. Use your offset spatula and make sure you cover every single wafer edge to edge. We don’t want any dry spots! After the cream, gently spoon about a third of your chocolate pudding over that layer. Don’t press down too hard; you don’t want to crush the cream underneath.
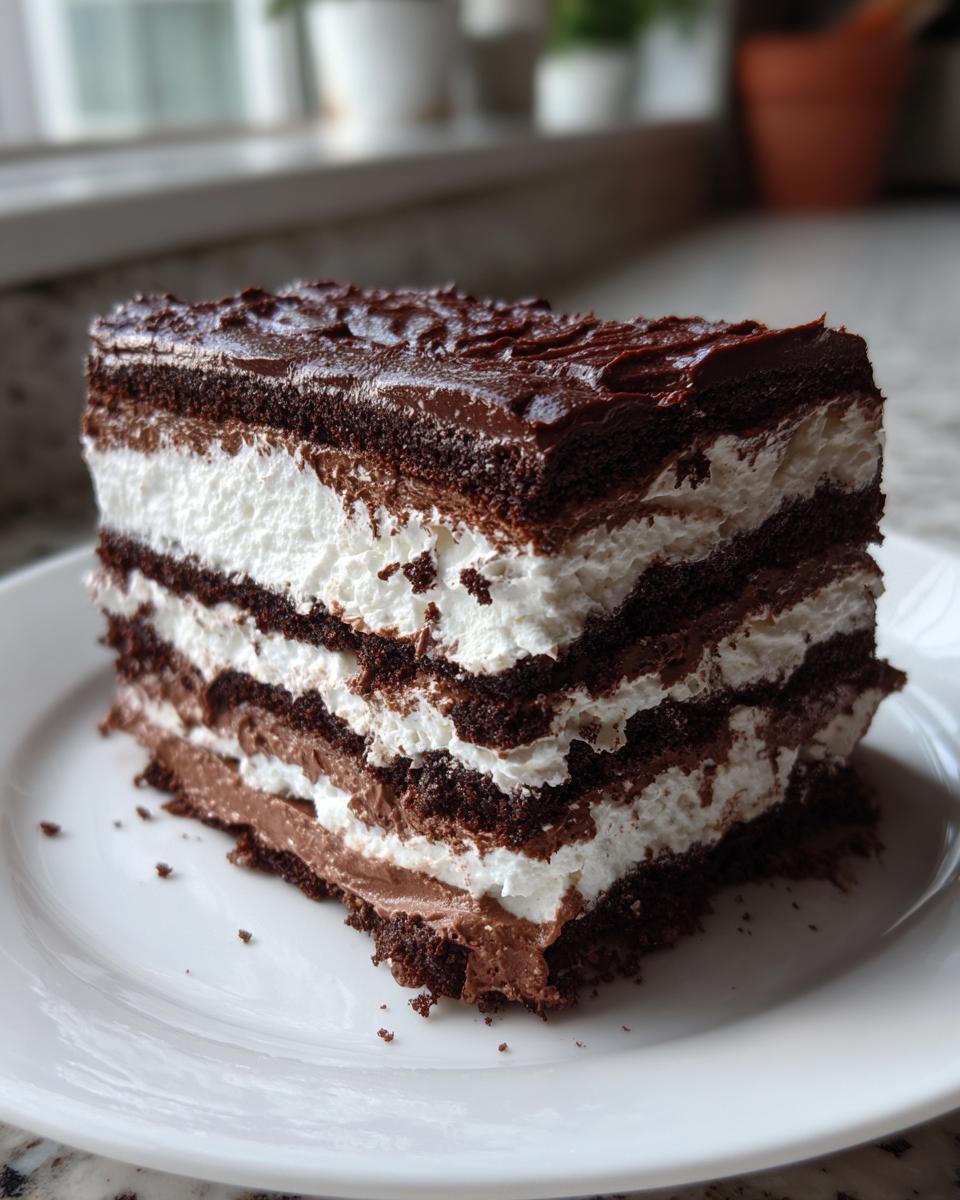
Building Height and Repeating Layers
Now that you have your first sturdy base—wafer, cream, pudding—it’s time to repeat! Lay down your second layer of chocolate wafers directly on top of the pudding. Again, try to keep them tight together. Then, repeat the cream and pudding process: layer of whipped cream, followed by a layer of chocolate pudding.
You should have enough ingredients for about three full sets of layers, depending on how thick you spread everything. I always try to make sure my final layer on top is pudding, as it seals everything in nicely and looks beautiful once chilled. If you have any leftover cream or pudding after your last wafer layer, just dollop it right on top and smooth it out. It’s going to look messy now, but trust me, the magic happens next!
Preparing the Icebox Cake (No‑Bake Refrigerator Cake) for Setting
This is the most critical, yet easiest, step for any successful Icebox Cake (No‑Bake Refrigerator Cake). You must cover the dish tightly with plastic wrap—make sure the wrap doesn’t touch the top pudding layer if you can help it, or you might smudge your final presentation layer. Then, pop the whole thing into the refrigerator. Don’t peek! It needs a minimum of four hours, but honestly, overnight is where this dessert truly shines.
That chilling time is non-negotiable; it allows the moisture from the cream and pudding to slowly seep into those crisp chocolate wafers. They transform from hard cookies into something soft, moist, and deeply chocolatey, giving you that signature cake texture. Patience is the secret appliance in this recipe! Desserts rely on proper setting times.
Tips for The Most Perfect Icebox Cake (No‑Bake Refrigerator Cake)
Even though this is a no-bake wonder, there are definitely ways to mess up the texture if you rush the steps or use the wrong stuff! I learned these tricks the hard way—usually by eating a layer that was still too crunchy! Achieving that perfect, sliceable, melt-in-your-mouth texture in your Icebox Cake is all about respecting the ingredients and giving them the time they need to mingle in the cold.
Ingredient Quality Matters
Seriously, don’t grab the cheap stuff for the wafers. You need those crisp, dark chocolate wafers—the ones that are sturdy enough to hold their shape when you layer them. If they are already somewhat soft or broken in the package, your final cake will be mushy in spots, not uniformly tender. For the cream, if you can swing it, use heavy whipping cream and sweeten it lightly yourself. Store-bought aerosol whipped topping often contains stabilizers that don’t break down as nicely as real cream does when soaking into those wafers.
Timing Your Chill Period
This is the big one for your Icebox Cake. Four hours is the absolute, bare minimum time you should let this chill, and that’s only if you are desperate! If you slice it at four hours, you’ll get a slightly softer cookie layer. For that true, rich cake texture where the wafers are completely indistinguishable from cake, you need to leave it overnight—at least 10 to 12 hours. The longer it sits, the more the moisture transfers, and the better your final slice will be. Don’t rush the setting process! Food science explains how moisture transfer affects texture.
Frequently Asked Questions About Your Refrigerator Dessert
People always have questions when they first try an Icebox Cake since it’s so different from baked desserts. It’s so simple, but the chilling time makes everyone nervous! Here are the things I get asked most often about putting this refrigerator dessert together.
Q1. Can I use a different flavor of pudding, like vanilla or butterscotch?
Absolutely! That’s the beauty of this recipe—it’s totally adaptable. If you use vanilla pudding, you won’t get that deep chocolate flavor, but it tastes wonderful, especially if you top it with fresh berries instead of just chocolate shavings. Some people even use cheesecake-flavored instant pudding mix for a slight tang. Just make sure whatever you choose is the instant variety so it sets up fast!
Q2. My whipped cream is weeping (separating) while I’m layering. What went wrong?
Oh, that happens when the cream gets too warm or if you didn’t whip it stiff enough to begin with. If you notice it happening, work faster! Try placing your mixing bowl in an ice bath while you whip it next time. If it’s already weeping in the dish, gently stir it back together briefly with a spatula, but honestly, the chilling time will usually help it stabilize once it’s cold again.
Q3. How long can I keep leftovers? Does this freeze well?
You can keep leftovers covered tightly in the fridge for up to four days. The wafers will continue to get softer the longer it sits, which some people love! However, I don’t recommend freezing this particular dessert. When it thaws, the texture of the whipped cream and the softened wafers tends to get a bit watery or grainy. It’s definitely best eaten fresh from the fridge within a couple of days.
Q4. Do I have to use chocolate wafers? Can I use graham crackers instead?
You *can* use graham crackers, but it completely changes the character of the dessert! Graham crackers make a more traditional layered dessert, often called a refrigerator cake, but they don’t soften into that distinct, cake-like crumb that the thin chocolate wafers do. For the classic Icebox Cake experience, stick with the chocolate wafers. They are the key to that famous texture! If you are interested in other simple, no-bake treats, check out my recipe for Scotcharoos.
Storing and Serving Your Leftover Icebox Cake (No‑Bake Refrigerator Cake)
The biggest problem with this amazing Icebox Cake (No‑Bake Refrigerator Cake) is usually having leftovers! It tastes so good right out of the fridge that it tends to disappear quickly. But if you do manage to save some, storage is super easy, provided you keep it cold. Remember, since this dessert has no eggs that have been baked, keeping it properly chilled is important for food safety and texture integrity.
When you cover it up again, try to press the plastic wrap gently onto the surface if you can, or use a tight-fitting lid. This stops the exposed pudding and cream from drying out or picking up any funny smells from the fridge. I find that the flavor actually deepens slightly overnight, so leftovers are often just as good the next day! If you are looking for other great make-ahead recipes, perhaps you’d enjoy my Zucchini Bread recipe, which also improves overnight.
For serving, make sure it’s had at least 30 minutes out of the coldest part of the fridge before you slice it. If it’s rock hard, the wafers might still seem a little too firm. A small dusting of cocoa powder or some chocolate shavings right before serving always makes those leftovers look brand new!
Here is a quick guide on how long this refrigerator dessert lasts under ideal conditions:
| Storage Method | Duration | Best For |
|---|---|---|
| Airtight Container in Refrigerator | Up to 4 days | Optimal flavor and texture |
| Freezer | Not Recommended | Texture changes upon thawing |
Share Your Experience With This Icebox Cake (No‑Bake Refrigerator Cake)
I truly hope you love making this simple, dreamy Icebox Cake (No‑Bake Refrigerator Cake) as much as I love sharing it with you! It’s one of those desserts that proves you don’t need complicated steps to achieve spectacular results in the kitchen. Now, I’m dying to know what you thought! If you are interested in other simple recipes, check out my Quick & Easy Recipes collection.
Did you try jazzing up your whipped cream? Did you chill it overnight like I begged you to? Let me know in the comments below how your layering turned out and how quickly your family devoured it. Drop a rating so others know what a winner this refrigerator dessert is!
Print
9 Amazing Icebox Cake Secrets
- Total Time: 4 hours 15 minutes
- Yield: 8 servings
- Diet: Vegetarian
Description
This Icebox Cake is a simple, no-bake dessert. It layers chocolate wafers, whipped cream, and chocolate pudding. You chill it until firm. It requires minimal effort for a delicious result.
Ingredients
- Chocolate wafers
- Whipped cream
- Chocolate pudding
Instructions
- Layer chocolate wafers and whipped cream in a dish.
- Spread chocolate pudding over the layers.
- Repeat the layers until you use all the ingredients.
- Refrigerate for several hours until the cake is set.
- Slice and serve the cake chilled.
Notes
- This dessert relies on refrigeration time to soften the wafers.
- Use good quality whipped cream for the best flavor.
- You can use different flavors of pudding if you prefer.
- Prep Time: 15 minutes
- Cook Time: 0 minutes
- Category: Dessert
- Method: No-Bake
- Cuisine: American
Nutrition
- Serving Size: 1 slice
- Calories: 350
- Sugar: 30g
- Sodium: 150mg
- Fat: 18g
- Saturated Fat: 10g
- Unsaturated Fat: 8g
- Trans Fat: 0g
- Carbohydrates: 45g
- Fiber: 2g
- Protein: 5g
- Cholesterol: 40mg