Skip to content
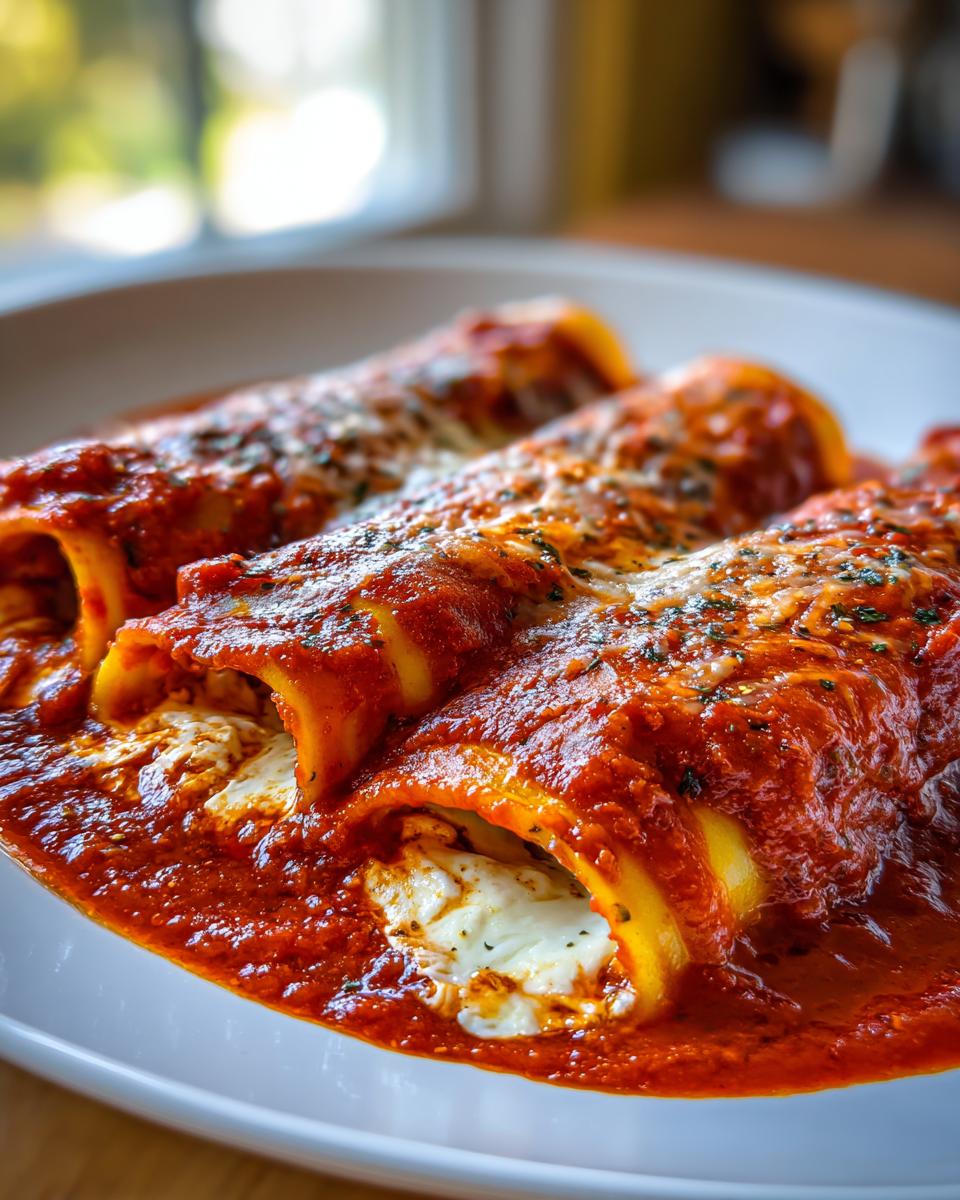
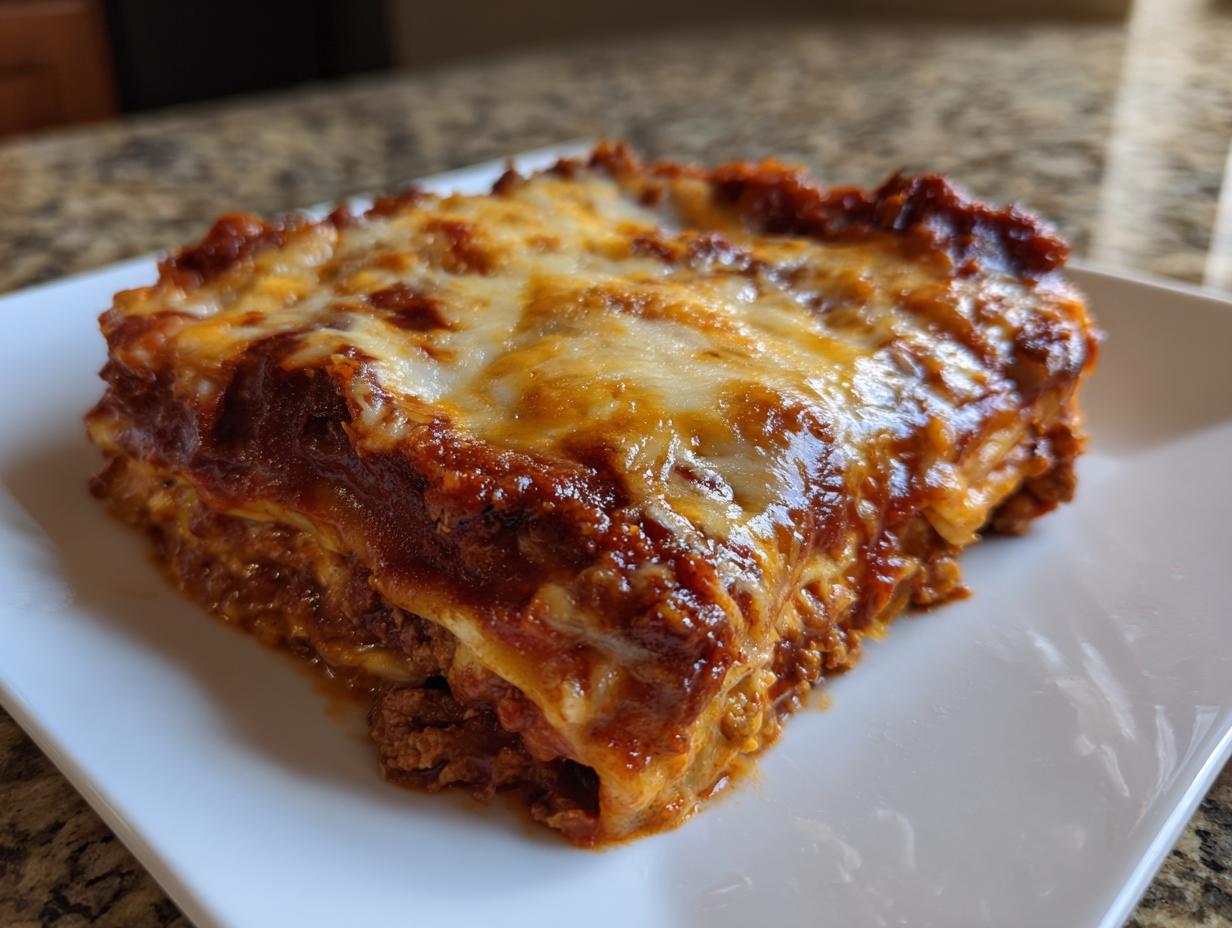
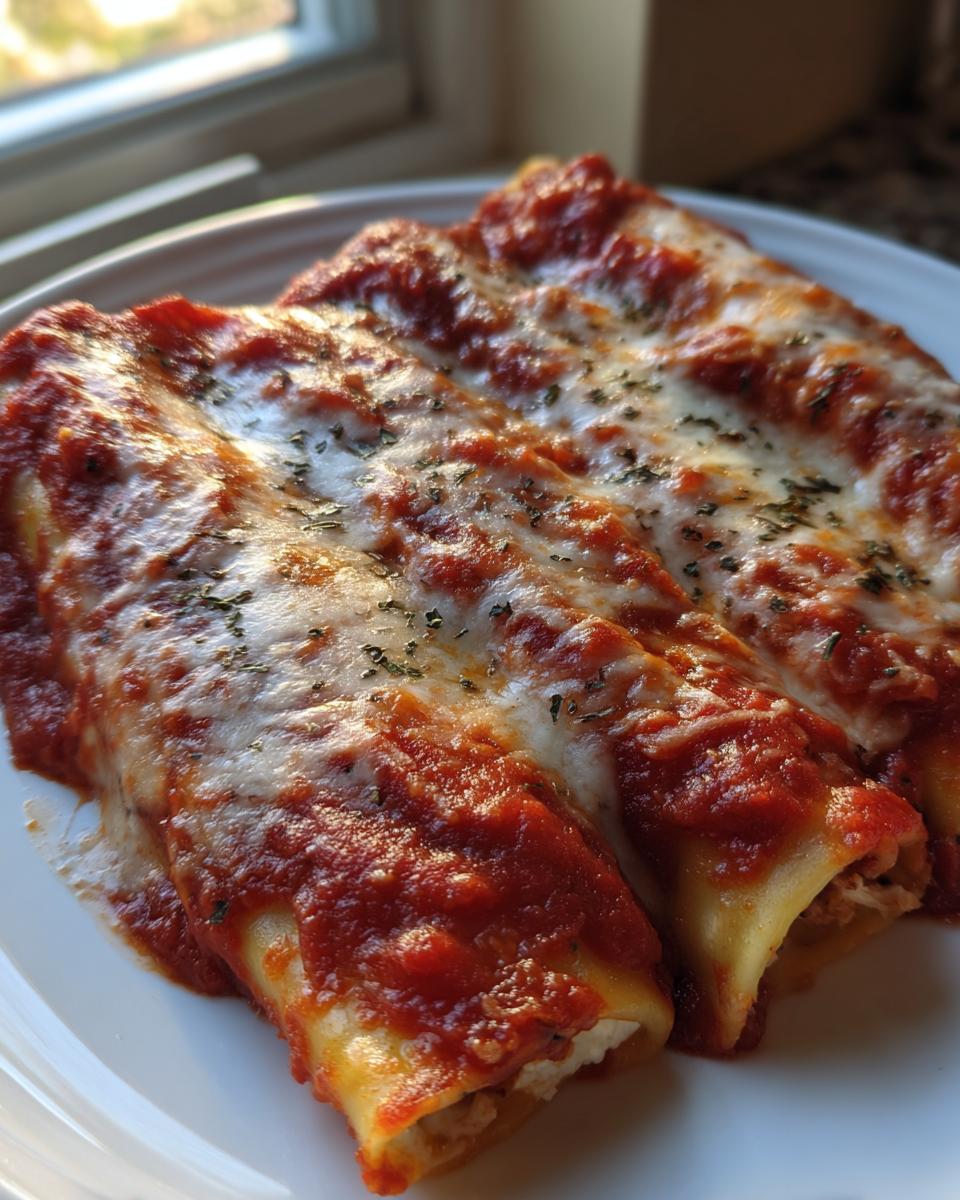
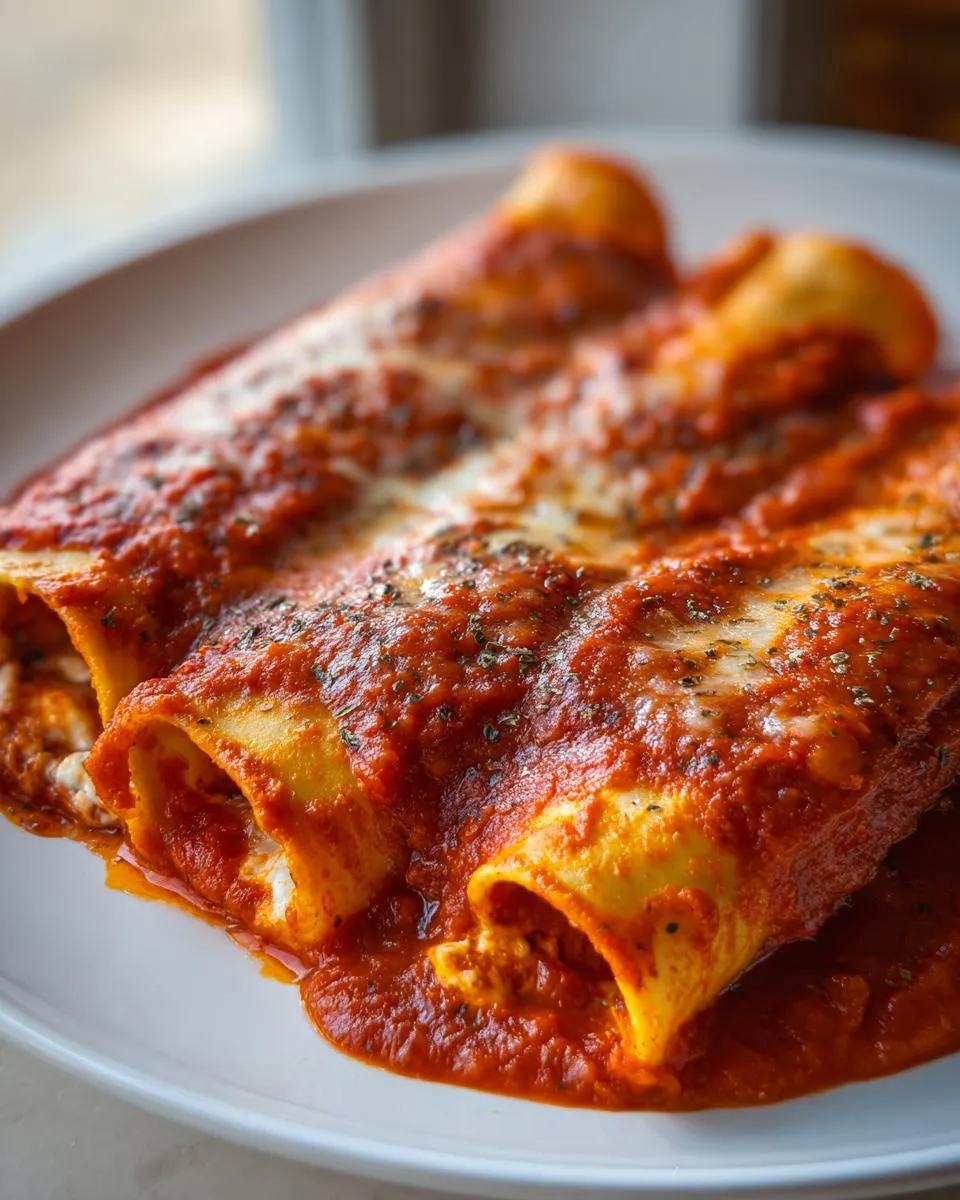
If you’re anything like me, sometimes you just need that ultimate hug-in-a-bowl kind of meal. We’re talking about pure, unadulterated comfort, and that’s exactly what my Cheese‑Only Manicotti delivers. Forget fussy meat sauces or endless layers; this recipe strips it down to what matters: a rich, creamy, three-cheese filling tucked into tender pasta shells and smothered in bright marinara. This is my go-to baked pasta when the weather turns chilly or when the family just needs something familiar and delicious.
Hi there, I’m Anna Kowalska, and here I share tried-and-true homemade recipes that you and your family will love. Everything I post here is made with heart and flavor, and this simple Cheese‑Only Manicotti is proof that the best meals often come from the simplest ideas. Trust me, once you try this pure cheese version, you won’t look back!
Jump to:
Gathering What You Need for Perfect Cheese‑Only Manicotti
Okay, before we dive into the mixing and stuffing, let’s talk supplies. Making truly amazing Cheese‑Only Manicotti isn’t about complicated steps; it’s about having the right building blocks ready to go. I always lay everything out on the counter before I even turn on the stove. It stops me from scrambling later, especially when the pasta is hot and ready to be filled!
We need to focus on three main areas: the pasta itself, the amazing cheese filling components, and of course, that lovely sauce that brings it all together in the oven. Getting these items together first makes the whole assembly process feel like a relaxing Sunday afternoon rather than a race against time.
Essential Components for Your Cheese‑Only Manicotti
- The Manicotti Pasta Tubes
- The Creamy Three-Cheese Filling Base (Ricotta, Mozzarella, Parmesan)
- Fresh Seasonings (Basil and Oregano)
- Your Favorite Marinara Sauce
Equipment Needed for Baked Cheese‑Only Manicotti
You don’t need a million gadgets for this, but a few things are non-negotiable! Make sure you have a large pot for boiling the pasta. Then, grab a big mixing bowl—you need room to fold in all that cheese without making a mess everywhere. A 9×13 inch baking dish is the standard for this recipe, but anything deep enough to hold a single layer of stuffed shells works. And please, have a spoon or a small offset spatula handy for carefully spreading that sauce!
Preparing the Three-Cheese Filling for Your Cheese‑Only Manicotti
This filling is the heart and soul of the dish—it’s why we call it Cheese‑Only Manicotti, after all! We aren’t messing around with meat here; we are amplifying the richness of the dairy. When I make this, I always make sure my cheeses are at room temperature. It might sound silly, but cold ricotta can make everything clump up weirdly, and we want smooth sailing when we stuff those tubes.
The secret to making this filling sing is the herbs. If you have fresh basil and oregano hanging around, please use them! Chop them finely; those bright, sharp notes cut right through the richness of the cheeses so the final baked pasta doesn’t taste heavy. If you absolutely must use dried, cut the amount in half, because dried herbs are much more potent, you know?
Remember that note I shared? You can totally mix this up the day before. I often do this part while watching TV. Just cover the bowl tightly with plastic wrap and pop it in the fridge. When you’re ready to assemble your Cheese‑Only Manicotti the next day, give it a quick stir, and you’re ready to go!
Mixing the Ricotta, Mozzarella, and Parmesan Blend
Grab that big bowl we set aside! Start with your ricotta first. It’s the backbone. Gently fold in the mozzarella and the grated Parmesan. Don’t go crazy mixing yet; we want to combine, not whip. If you beat it too hard, the ricotta gets stringy, and we’re aiming for creamy, not elastic. Once they are mostly incorporated, sprinkle in your finely chopped fresh basil and oregano, along with a good pinch of salt and pepper. Use a spatula for this part, folding until everything is evenly distributed and you can see flecks of green throughout the creamy white mixture. That’s the sign of a perfect filling for your Cheese‑Only Manicotti!
Step-by-Step Assembly of Cheese‑Only Manicotti
Now for the fun part—putting it all together! We’ve got our heavenly three-cheese mix ready, and the pasta needs attention. When assembling your Cheese‑Only Manicotti, remember that everything needs to happen relatively quickly after the pasta comes out of the water so it doesn’t get sticky. First things first, let’s talk about getting those tubes just right so they can hold all that wonderful filling.
Once the tubes are filled, we move onto the baking dish. You absolutely must start with a layer of marinara sauce on the bottom. This isn’t just for flavor; it keeps the bottom layer of pasta from grabbing onto the glass dish and burning. After arranging the stuffed tubes snugly in a single layer, pour the rest of that sauce right over the top. Make sure every bit of exposed pasta is covered in sauce—that’s how you keep things moist during the bake!
Cooking Manicotti Tubes Perfectly
This step seems simple, but please listen to me on this one: Do NOT overcook the manicotti. Check the package directions, and then subtract about two minutes from their suggested time. We want them al dente, maybe even a little bit undercooked, because they are going to continue cooking in that hot sauce in the oven. If they are too soft when you stuff them, they will tear into a million pieces when you try to fill them!
Drain them immediately and run them under cool water just for a second to stop the cooking process. Lay them out gently on a clean baking sheet or cutting board while you work on filling. This prevents them from sticking together into one giant pasta clump.
Stuffing Each Manicotti Tube with Care
This is where patience pays off. You have a couple of options for stuffing your Cheese‑Only Manicotti. If you have a piping bag with a wide round tip, use that! It’s clean and fast. If you’re like me and don’t want to wash a piping bag, use a small spoon—a teaspoon works perfectly. Scoop a modest amount of filling onto the spoon, gently insert the spoon tip into one end of the tube, and push the cheese mixture through until it feels firm. Don’t force it, or the pasta will split right open. Work slowly, lay the filled tube immediately into the sauce-lined dish, and repeat until all your shells are tucked in tight.
Baking Your Cheese‑Only Manicotti to Golden Perfection
We’ve stuffed them, we’ve nested them in sauce—now it’s time for the oven magic! For the best results with your Cheese‑Only Manicotti, preheat your oven to 375 degrees Fahrenheit. That medium heat helps the sauce bubble up nicely without burning the edges before the center is hot.
Remember how I told you to cover the bottom with sauce? Now, pour the rest evenly over the top. You want a nice blanket of marinara covering every single tube. If you want a little extra golden crust, sprinkle a tiny bit more Parmesan right on top of the sauce layer. That little bit of extra cheese melts beautifully.
Bake time is usually around 30 minutes, but keep your eyes on it! You’re looking for two main things: the sauce should be actively bubbling around the edges, and if you added extra cheese on top, it should be melted and just starting to turn a light golden brown. Use a fork to gently test one of the center tubes to make sure the pasta is tender. If it’s soft all the way through, your perfect Cheese‑Only Manicotti is ready to come out!
Tips for Making the Best Cheese‑Only Manicotti
Achieving the absolute best texture and flavor in your Cheese‑Only Manicotti takes just a tiny bit of planning. My biggest piece of advice, which I mentioned before, is that you can prepare that glorious three-cheese filling ahead of time. Mix it up, cover it tight, and let it chill overnight. This actually lets those fresh herbs mingle with the cheeses, deepening the flavor profile! If you are looking for other great make-ahead comfort dishes, check out my recipe for Easy Creamy Lasagna Soup.
When you are ready to stuff the next day, just let the filling sit on the counter for about 20 minutes to take the chill off—it makes stuffing much easier. Also, don’t skimp on the sauce coverage before baking! If any pasta peeks out, it dries into a hard, chewy little shell, and nobody wants that in their perfect Cheese‑Only Manicotti. A generous layer of marinara over the top is essential for that gooey, comforting result.
Frequently Asked Questions About Cheese Manicotti
I get so many wonderful questions about this recipe once people try it! It’s such a simple dish, but there are always little things that pop up when you start baking. Here are a few things readers often ask me about creating the best baked pasta experience. For more tips on baking pasta dishes, you might enjoy my guide on Million Dollar Lasagna.
Q1. Can I add spinach to the filling?
Absolutely! While this recipe focuses on the pure three-cheese filling, spinach pairs beautifully. If you add it, make sure you thaw frozen spinach completely and squeeze out every last drop of water. Too much moisture will make your filling runny and your manicotti messy.
Q2. My pasta tubes keep tearing when I stuff them. What am I doing wrong?
This is almost always due to overcooking the pasta tubes beforehand. You want them slightly underdone—al dente—so they have structure left to hold the cheesy mixture. If they are too soft, they just tear. Also, use a gentle hand and don’t try to cram too much filling into one shell; a teaspoon works best!
Q3. What’s the best way to make sure the cheese on top melts evenly?
For that perfect golden top on your baked pasta, make sure your oven temperature is correct at 375°F. Sometimes, if the sauce on top is too thick, it insulates the cheese from the heat. Try to keep the top layer of sauce a little looser, or sprinkle a light layer of mozzarella right before the last ten minutes of baking to ensure a beautiful, melted finish.
Q4. Can I use different kinds of cheese besides ricotta, mozzarella, and Parmesan?
You can certainly experiment, but those three are the classic trio that provides the best texture contrast—the creaminess of ricotta, the melt of mozzarella, and the salty kick of Parmesan. If you substitute, try using Provolone for a sharper flavor, but keep the proportions similar! Understanding the science behind cheese melting can be helpful when substituting; you can read more about the science of melting cheese.
Storing and Reheating Leftover Cheese‑Only Manicotti
Don’t you just love having leftovers of this baked pasta? It tastes even better the next day once all those flavors have really settled into the cheese! Storing your Cheese‑Only Manicotti properly keeps it delicious for days. The key is making sure it’s well-covered so it doesn’t dry out in the fridge.
When reheating, I always suggest covering the dish loosely with foil first. This traps the steam and prevents the top layer from turning into a crunchy brick before the middle gets hot. Then, uncover it for the last few minutes to get those edges bubbly again! If you are looking for other great make-ahead meals, consider trying my recipe for Easy Sautéed Zucchini.
Storage and Reheating Table
| Storage Location | Duration | Reheating Method |
|---|---|---|
| Refrigerator | Up to 4 days | Covered, bake at 350°F until hot (about 20 minutes) |
| Freezer (Unbaked) | Up to 3 months | Thaw overnight, then bake as directed, adding 10 minutes to cook time |
Sharing Your Homemade Cheese‑Only Manicotti
I just love hearing from you all when you make a recipe that brings comfort to your table! If you whipped up a batch of this incredible Cheese‑Only Manicotti, please let me know how it turned out in the comments below. Did you stick strictly to the cheese, or did you try adding a little something extra to your three-cheese filling? I can’t wait to read your thoughts! For more comforting pasta dishes, check out my recipe for Stovetop Creamy Ground Beef Pasta.
Print
Amazing 3-Cheese Manicotti Secrets
- Total Time: 50 minutes
- Yield: 6 servings
- Diet: Vegetarian
Description
This is a simple recipe for Cheese Manicotti, featuring a rich three-cheese filling baked in marinara sauce. You will love this comforting baked pasta dish.
Ingredients
- Manicotti pasta tubes
- Ricotta cheese
- Mozzarella cheese
- Parmesan cheese
- Marinara sauce
- Basil
- Oregano
Instructions
- Cook the manicotti pasta tubes according to package directions, then drain them well.
- In a bowl, mix the ricotta cheese, mozzarella cheese, Parmesan cheese, basil, and oregano to create the filling.
- Carefully fill each cooked pasta tube with the cheese mixture.
- Arrange the filled tubes in a baking dish lined with marinara sauce.
- Pour the remaining marinara sauce over the top of the stuffed manicotti.
- Bake until the sauce is bubbly and the cheese topping is completely melted and golden.
Notes
- Use fresh herbs for the best flavor in your cheese filling.
- You can prepare the filling and stuff the manicotti ahead of time.
- Prep Time: 20 minutes
- Cook Time: 30 minutes
- Category: Pasta
- Method: Baking
- Cuisine: Italian-American
Nutrition
- Serving Size: 1 serving
- Calories: 450
- Sugar: 8g
- Sodium: 650mg
- Fat: 25g
- Saturated Fat: 15g
- Unsaturated Fat: 10g
- Trans Fat: 1g
- Carbohydrates: 35g
- Fiber: 3g
- Protein: 25g
- Cholesterol: 75mg