Skip to content
Are you searching for that perfect, feel-good dessert that brings back all the campfire memories but takes almost no effort? Trust me, I get it! Sometimes you just need that gooey, chocolatey hit without spending half your afternoon baking. That’s where I come in. I’m Anna Kowalska, and here I share tried-and-true homemade recipes that you and your family will love—everything I bake is made with heart and flavor.
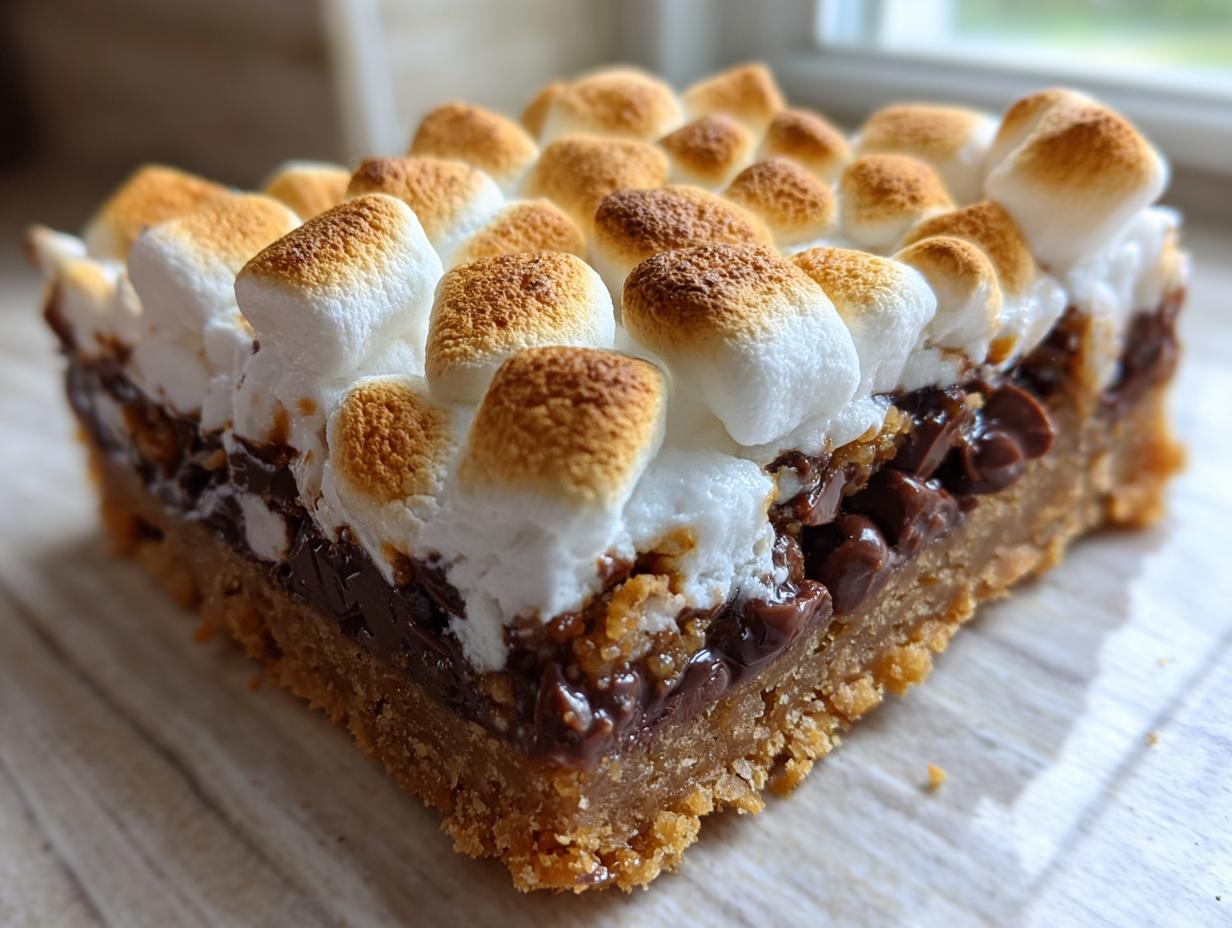
Over the years, I’ve learned that the best recipes are the ones you turn to again and again. My experience in the kitchen tells me that simple, high-impact desserts are the real winners. That’s why I’m thrilled to introduce you to my recipe for the ultimate S’mores Dessert Bars. This recipe skips the sticky mess of a real campfire but keeps all the magic, delivering that signature graham cracker crust, melted chocolate, and toasted marshmallow top in one easy-to-manage square.
Jump to:
Why You’ll Love These S’mores Dessert Bars
This recipe isn’t fussy, and that’s why I keep coming back to it. It delivers massive payoff for minimal kitchen time. You get the classic campfire taste without the smoke or sticky fingers. Seriously, these S’mores Dessert Bars are a total crowd-pleaser for potlucks or just a Tuesday night treat.
Here’s the quick rundown on why these bars are mandatory in your baking rotation:
- They bake up sturdy enough to hold their shape.
- The base is perfectly crunchy, thanks to the brown sugar.
- The top layer of marshmallow gets beautifully golden brown.
- Total time from start to eating is under an hour!
Quick Assembly for Your S’mores Dessert Bars
You won’t believe how fast the base comes together. We’re talking about ten minutes of actual work, tops. You just toss the dry stuff in a bowl, pour in the wet ingredients, mix it up until it looks like crumbly sand, and press it into the pan. That’s it for the crust! Making these S’mores Dessert Bars is genuinely that simple.
Flavor and Texture Profile
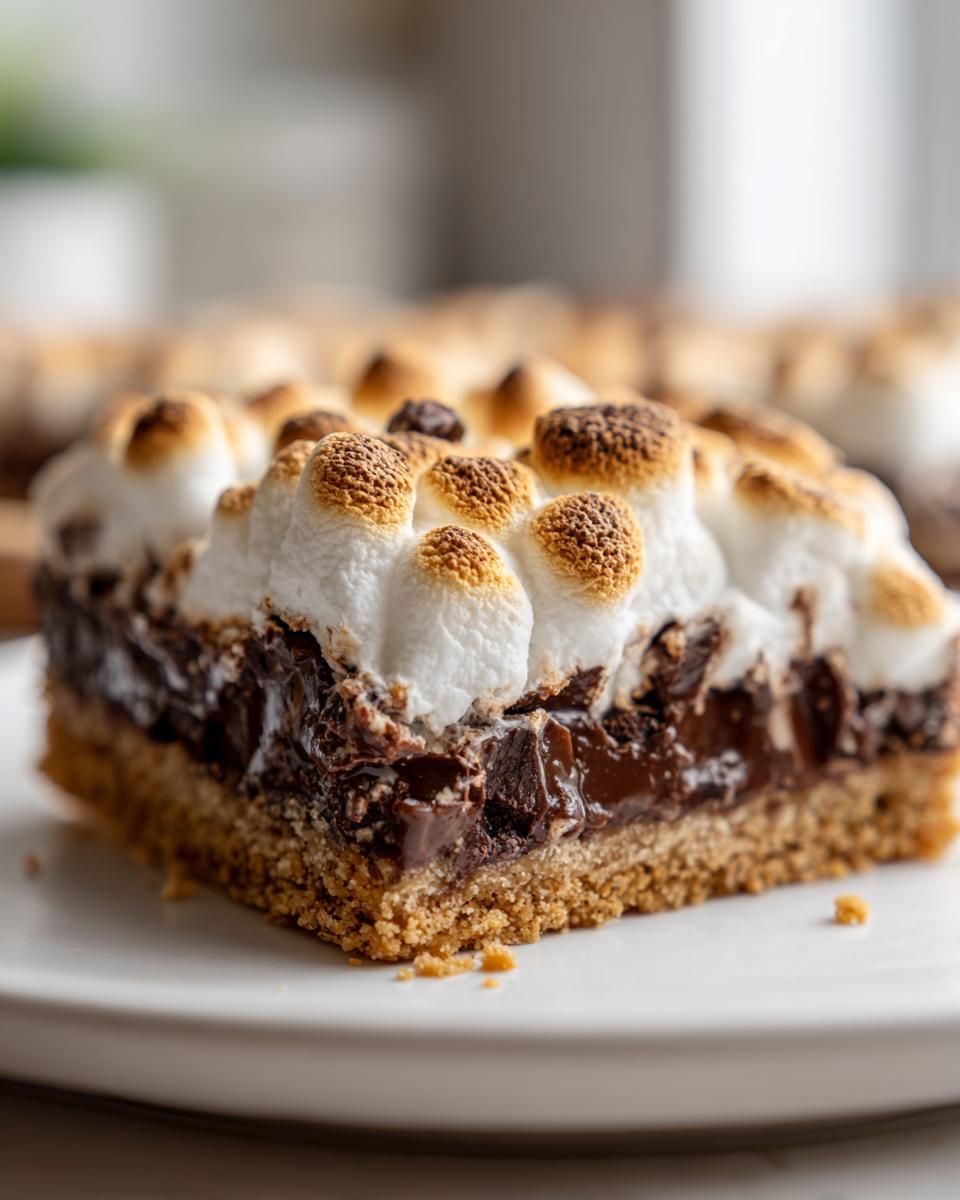
When you pull these out, the smell is incredible—warm vanilla, toasted sugar, and rich chocolate. The texture contrast is the best part. You get that firm, slightly salty crunch from the graham cracker bottom. Then the chocolate layer melts into the crust, and finally, you hit that soft, chewy, slightly browned marshmallow cloud on top. It’s sweet, gooey, and utterly satisfying.
Equipment Needed for Perfect S’mores Dessert Bars
You don’t need a ton of fancy gear for these bars, which is another reason I love them! Keep these essentials handy to make sure your S’mores Dessert Bars come out looking professional and easy to serve.
- One 8×8 inch baking pan (or similar size).
- Mixing bowls for combining the crust ingredients.
- A sturdy spoon or spatula for mixing and pressing.
- Parchment paper (optional, but highly recommended for easy cleanup!).
Gathering Ingredients for Your S’mores Dessert Bars
Making these bars is mostly about having the right ratios, and thankfully, the ingredient list is super short! I always stress quality here because when you only have a few players in the game, each one needs to pull its weight. Don’t try to skimp on the chocolate chips; you want them to melt beautifully into that crust. We are aiming for that perfect balance of salty, sweet, and rich in every one of these S’mores Dessert Bars.
Before you start mixing everything together, just take a quick look at the list below. A few items need a tiny bit of prep work first, but nothing major, I promise!
Ingredient Clarity and Preparation
The success of this recipe relies on having your ingredients ready to go, especially since the mixing process goes so fast. Make sure your butter is fully melted before you start combining the base ingredients—we don’t want any cold clumps! Also, I strongly suggest using the mini marshmallows; they cover the surface much more evenly than the big ones. If you must use full-size ones, just slice them in half horizontally first so they toast evenly.
Ingredient List Table
| Ingredient | Amount | Notes |
|---|---|---|
| Graham Cracker Crumbs | 1 cup | Finely crushed |
| All-Purpose Flour | 1/2 cup | Standard measurement |
| Brown Sugar | 1/2 cup | Packed measurement |
| Unsalted Butter | 1/2 cup | Must be melted |
| Egg | 1 | Large size |
| Chocolate Chips | 1 cup | Semi-sweet recommended |
| Mini Marshmallows | 1½ cups | For topping |
Step-by-Step Instructions to Make S’mores Dessert Bars
Okay, time to get baking! This is where the magic happens, but don’t rush it. The order of operations is key to getting that perfect base before we introduce the sticky, wonderful toppings. We are aiming for 12 perfect S’mores Dessert Bars, so follow along closely!
Preparing the Base Layer for S’mores Dessert Bars
First things first, get your oven ready. Preheat it to 350 degrees Fahrenheit, which is 175 Celsius. While that’s heating up, make sure your 8×8 pan is ready. I always line mine with parchment paper that hangs over the sides—it acts like little handles to lift the whole slab out later. Don’t skip that trick!
Now, grab a medium bowl. You’re going to combine all the base ingredients: the graham cracker crumbs, flour, brown sugar, that melted butter we talked about, and the single egg. Mix this until it looks uniform. It will be thick and crumbly, kind of like wet sand you could build a castle with. That’s the signal it’s ready.
Take this entire mixture and press it down firmly into your prepared pan. Use the bottom of a measuring cup—that works really well—to make sure you get an even, solid layer across the bottom. This base needs to be packed tight so it doesn’t crumble when you cut into your S’mores Dessert Bars later.
Baking and Topping the Marshmallow Layer
Once the base is pressed, sprinkle your cup of chocolate chips evenly over the top. Slide that pan into the preheated oven and let it bake for exactly 20 minutes. This sets the crust and melts the chocolate just enough.
When the timer goes off, pull the pan out—careful, it’s hot! Now, immediately distribute those one and a half cups of mini marshmallows right over the hot chocolate layer. You want them touching each other so they melt together into one big sheet.
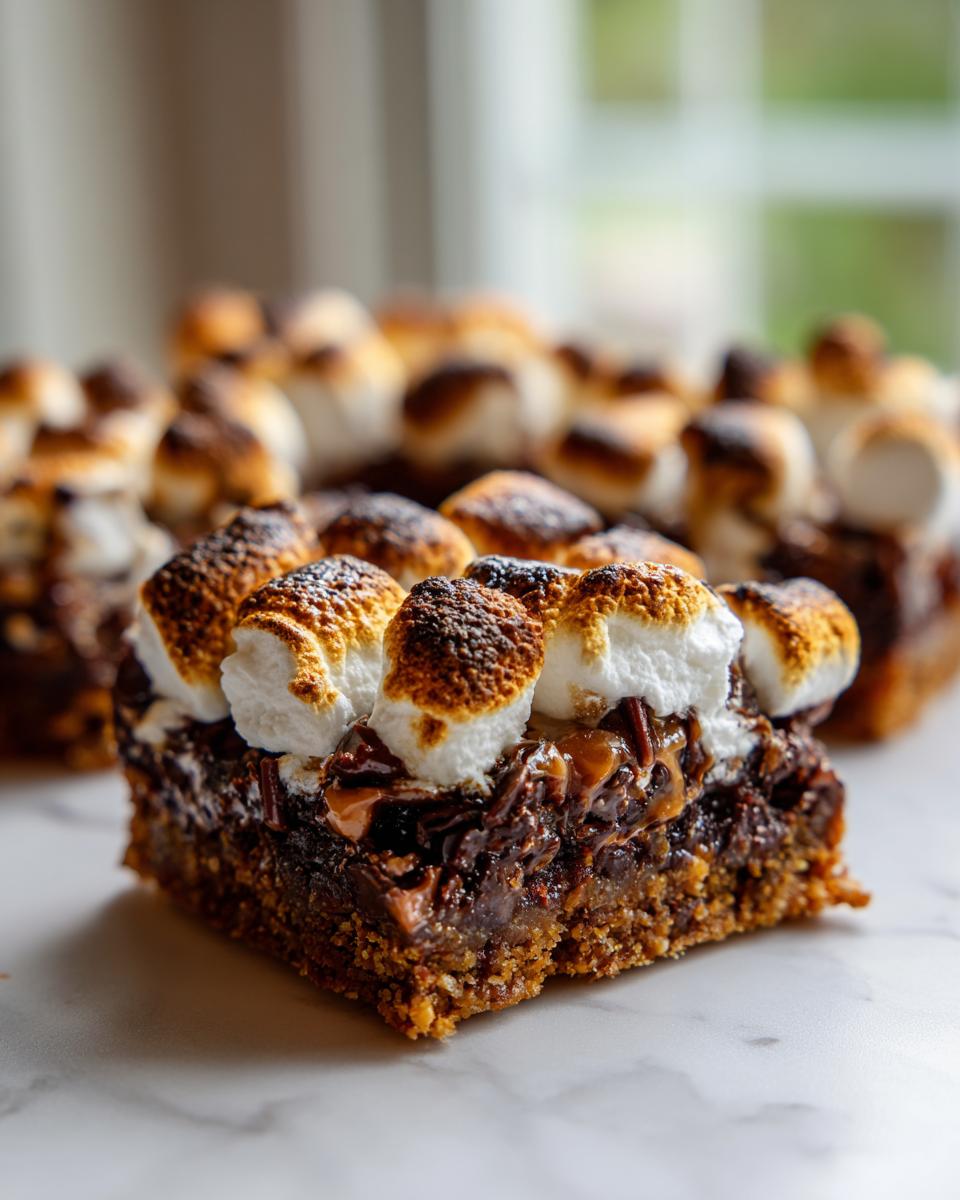
Back into the oven they go! This second bake is short, only about 5 more minutes. This is the part where you must watch them like a hawk! If your oven runs hot, they can go from golden brown to burnt black in about 30 seconds. You’re looking for that lovely, bubbly, golden-brown top. If you notice the edges of the marshmallows browning too fast, you can always turn the oven off and just let the residual heat finish the job.
Cooling and Serving Your S’mores Dessert Bars
This is the hardest step, I swear! Once they are out, you have to let these S’mores Dessert Bars cool completely. I mean it—fully cool. If you try to cut them while they are warm, the marshmallow will stretch, the chocolate will ooze everywhere, and you’ll end up with a sticky mess instead of neat squares. Give them at least an hour, maybe even two, on the counter. Once they are totally cool, use those parchment paper handles to lift the entire block out, and slice into 12 perfect bars.
Tips for Success with Your S’mores Dessert Bars
Baking is fun, but sometimes things go wrong, especially with sticky toppings! If your base seems a little too crumbly after the first 20 minutes, don’t panic. Just gently tap the pan on the counter a couple of times before adding the marshmallows; this helps settle the crust. Remember, these S’mores Dessert Bars rely on that solid foundation to hold up the gooey top layer. If you’re worried about the marshmallows sticking to your pan, make sure you are using parchment paper underneath the crust—it’s a lifesaver!
Substitution Ideas for S’mores Dessert Bars
I love this recipe because it’s flexible. If you don’t have standard semi-sweet chocolate chips on hand, you can absolutely swap them out! Try using milk chocolate chips for an extra sweet bar, or dark chocolate chips if you prefer a richer flavor contrast against the sweet marshmallow. Also, if you’re feeling adventurous, toss in a handful of chopped nuts, like pecans, right on top of the chocolate layer before the marshmallows go on. These simple swaps keep your S’mores Dessert Bars interesting batch after batch.
Frequently Asked Questions About S’mores Dessert Bars
I get so many questions about these bars after people try them the first time! They are just so addictive. Having the answers ready makes baking them even easier next time you need a quick, chocolatey treat. Here are some of the things I hear most often about making these amazing S’mores Dessert Bars.
Can I make these S’mores Dessert Bars ahead of time?
Yes, you totally can! These bars actually taste great the next day. Store them in an airtight container at room temperature for up to three days. I wouldn’t recommend refrigerating them for long periods, though, because the cold can make the graham cracker base harden up a bit too much. If you need to store them longer than three days, pop them in the freezer; they thaw out just fine on the counter.
What is the best way to cut these bars neatly?
This is all about patience! The most important thing for neat cuts on your S’mores Dessert Bars is letting them cool completely—I mean rock solid. If you still struggle, try this trick: wipe a long, sharp knife under hot water, dry it quickly, and then make your cut. Wipe the knife clean between each slice. That hot blade glides right through the gooey marshmallow and chocolate without dragging everything around.
Alternatives to Graham Crackers for the Base
If you run out of graham crackers or just want to mix things up, don’t stress! You can use crushed vanilla wafers or even finely crushed shortbread cookies for the base mixture. Both work wonderfully and add a slightly different, but still delicious, flavor profile to your base layer. This keeps your S’mores Dessert Bars adaptable for any pantry! If you are looking for other easy baked goods, check out my recipe for the best zucchini bread recipe.
Storing Your Homemade S’mores Dessert Bars
Storing these bars correctly keeps them tasting fresh, though honestly, they rarely last long enough to need serious storage planning! For the best texture, keep them at room temperature in a good airtight container. Refrigeration is okay for a few days, but remember it firms up that lovely gooey layer.
Storage and Reheating Guide Table
| Storage Location | Duration | Reheating Tip |
|---|---|---|
| Countertop (Airtight) | Up to 3 days | Serve at room temperature |
| Freezer (Airtight) | Up to 2 months | Thaw on counter for 30 min |
Share Your S’mores Dessert Bars Creations
I always love seeing your kitchen adventures! When you make these simple S’mores Dessert Bars, please snap a picture and share it below in the comments. Tell me how the marshmallows turned out for you and if you tried any of my substitution ideas. Don’t forget to leave a rating so others know just how delicious they are! If you are interested in learning more about the science behind baking marshmallows, you can read about candy making science.
Print
Amazing 12 S’mores Dessert Bars Simple Now
- Total Time: 35 minutes
- Yield: 12 bars 1x
- Diet: Vegetarian
Description
Make these easy S’mores Dessert Bars for a quick, satisfying treat featuring graham cracker, chocolate, and marshmallow layers.
Ingredients
- 1 cup graham cracker crumbs
- 1/2 cup all-purpose flour
- 1/2 cup brown sugar
- 1/2 cup unsalted butter (melted)
- 1 egg
- 1 cup chocolate chips
- 1½ cups mini marshmallows
Instructions
- Preheat your oven to 350°F (175°C). Prepare your baking dish.
- In a bowl, mix the graham cracker crumbs, flour, brown sugar, melted butter, and egg until combined.
- Press this mixture evenly into the prepared pan.
- Sprinkle the chocolate chips over the base layer.
- Bake for 20 minutes.
- Remove from the oven and evenly distribute the mini marshmallows over the top.
- Return to the oven and bake for 5 more minutes, or until marshmallows are golden.
- Let the bars cool completely to allow the marshmallows to set before cutting into squares.
Notes
- For easier cleanup, line your baking dish with parchment paper, leaving an overhang.
- You can use full-size marshmallows, but cut them in half before topping the bars.
- Baking time for marshmallows may vary based on your oven. Watch them closely.
- Prep Time: 10 minutes
- Cook Time: 25 minutes
- Category: Dessert
- Method: Baking
- Cuisine: American
Nutrition
- Serving Size: 1 bar
- Calories: 250
- Sugar: 20g
- Sodium: 100mg
- Fat: 15g
- Saturated Fat: 8g
- Unsaturated Fat: 7g
- Trans Fat: 0g
- Carbohydrates: 28g
- Fiber: 1g
- Protein: 3g
- Cholesterol: 40mg