Skip to content
I’m Anna Kowalska, and here I share tried-and-true homemade recipes that you and your family will love. Everything I bake is made with heart and flavor, and that’s the only way I know how to cook! I grew up watching my nonna turn simple ingredients into feasts, and I try to bring that same warmth and tradition into my own kitchen, focusing on recipes that are approachable but packed with real taste. If you’ve ever dreamed of serving up the incredible flavor of traditional cannoli without spending hours rolling out tiny shells, you are in the right place. Today, we are making Classic Cannoli Squares, and trust me, they are a game-changer for any party or quiet afternoon treat.
Why You Need This Recipe Now
Seriously, forget everything you thought you knew about tedious pastry work! This recipe is pure genius because it gives you that amazing, creamy ricotta filling and flaky crust you crave, but in the easiest bar form imaginable. You get all the flavor payoff with practically zero fuss. Think about it: rich, sweet filling studded with chocolate chips, all nestled between two layers of golden, buttery crust. It’s ready faster than you can decide what movie to watch!
You don’t need to be a professional baker to nail these; that’s the beauty of the pre-made pie crusts we’re using here. They do all the heavy lifting! If you want a dessert that looks impressive, tastes authentically Italian-American, and lets you spend more time eating and less time stressing, these Classic Cannoli Squares are exactly what your weekend needs. They travel well, they slice beautifully, and everyone always asks for the recipe.
Jump to:
Assembling Your Classic Cannoli Squares Ingredients
Okay, gathering your components is half the fun because there’s almost no mixing involved, which is why these Classic Cannoli Squares come together so fast! We are relying on simple, good quality items here to get that authentic, sweet ricotta flavor we all love. Don’t stress about making dough from scratch; we’re keeping it simple and smart with store-bought helpers.
Crust Components
The brilliance here is using two store-bought pie crusts—yes, the refrigerated kind! That saves you so much time. You’ll need the full package, which usually gives you two rounds. We also need one egg, beaten until it’s foamy, for our egg wash, and just a tiny bit of plain sugar to sprinkle on top for that perfect crackly finish.
The Creamy Ricotta Filling Base
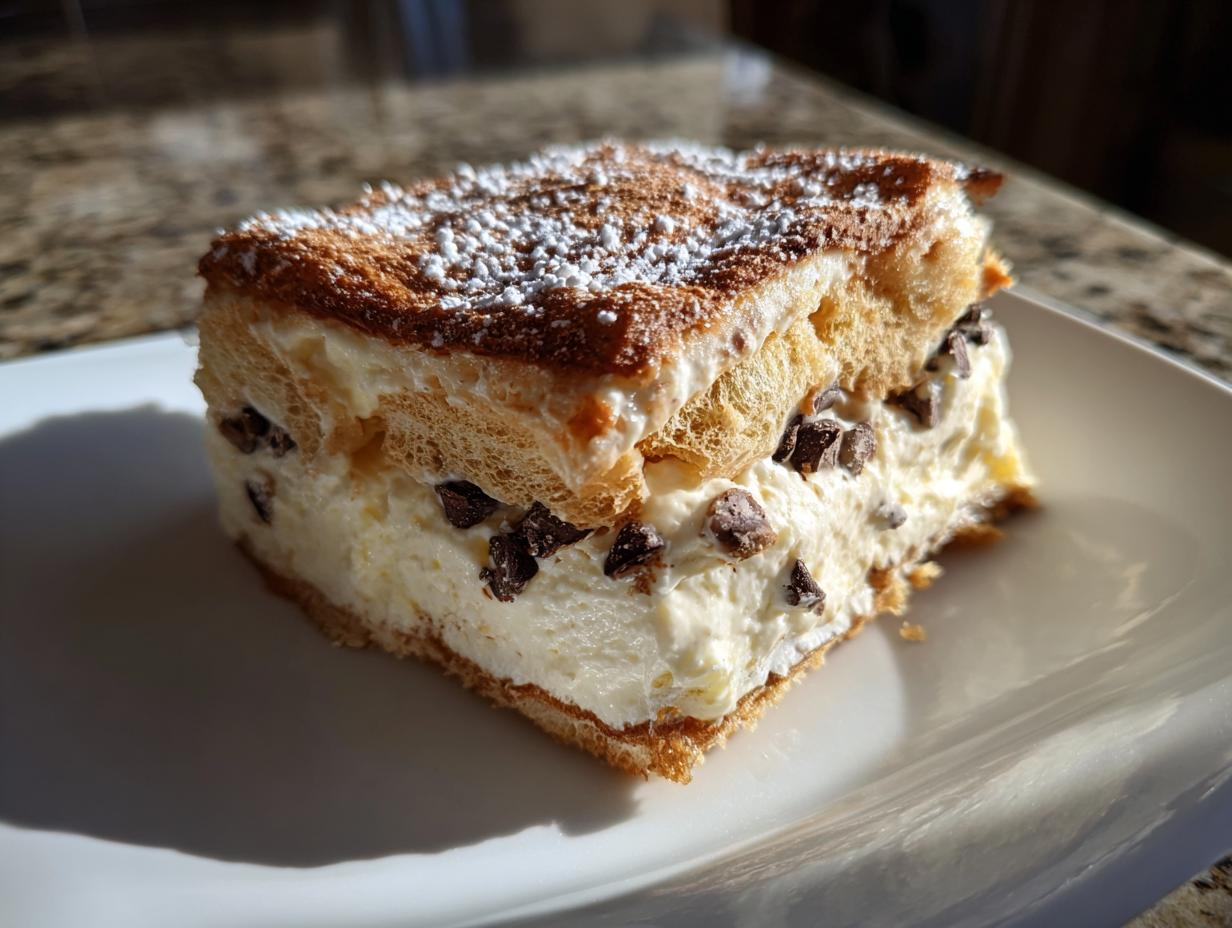
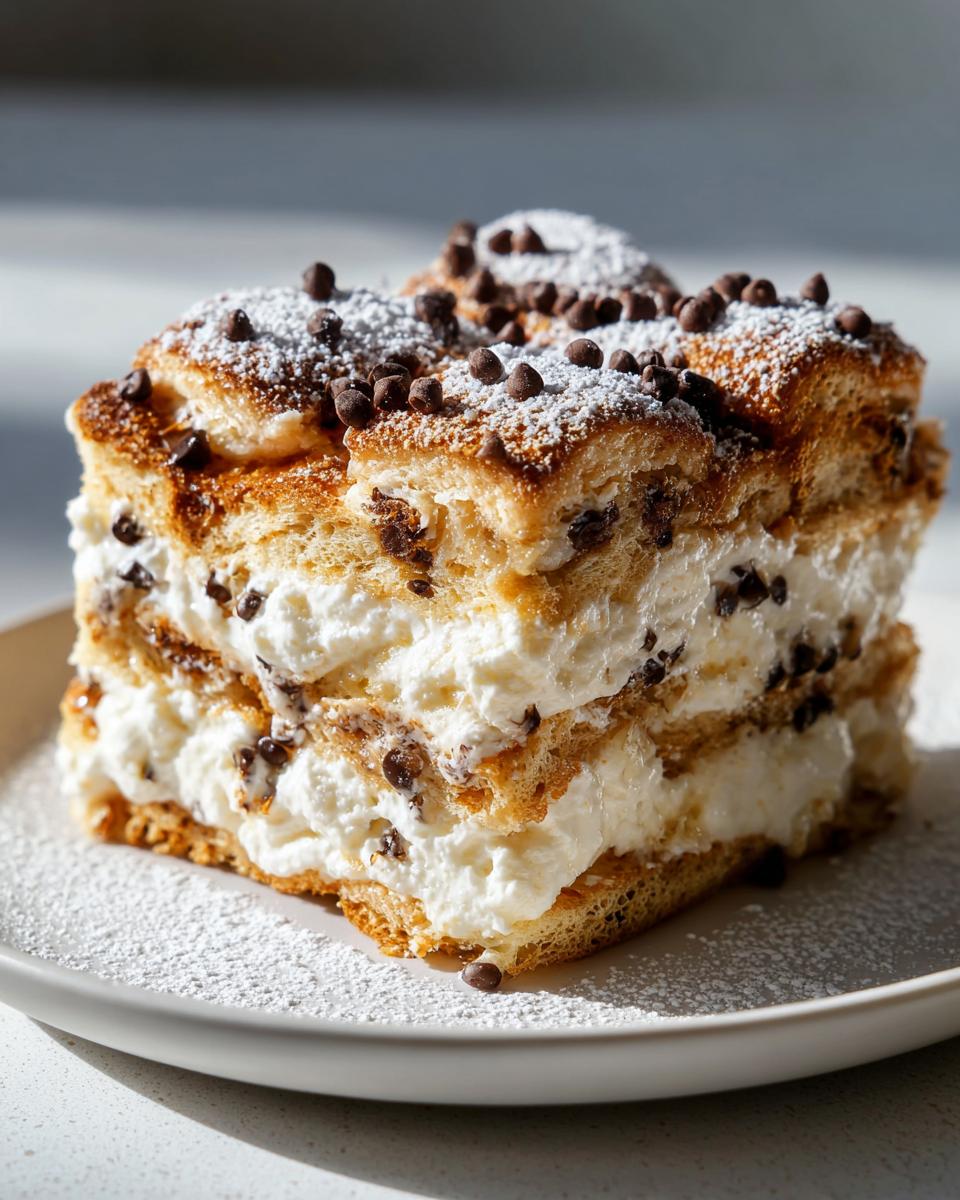
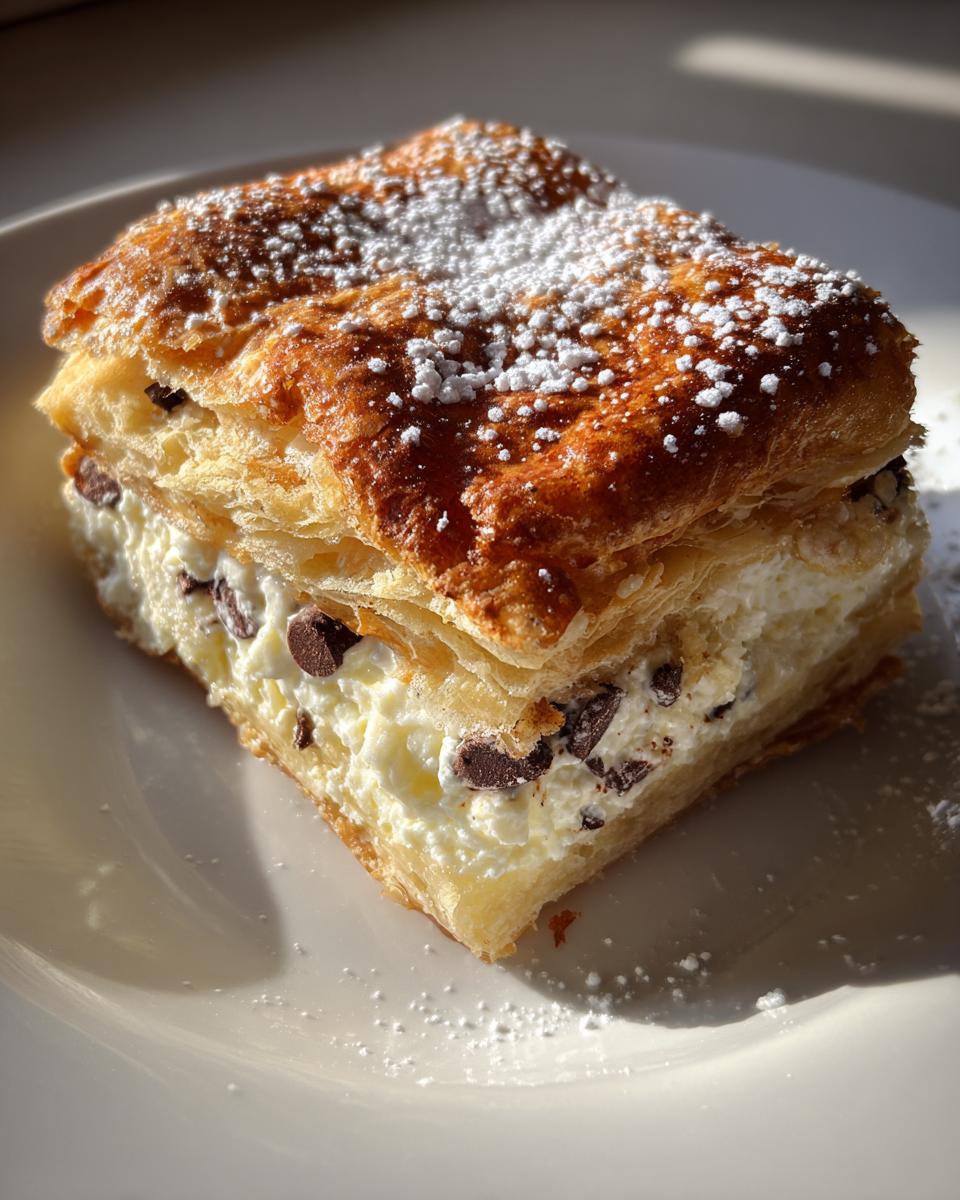
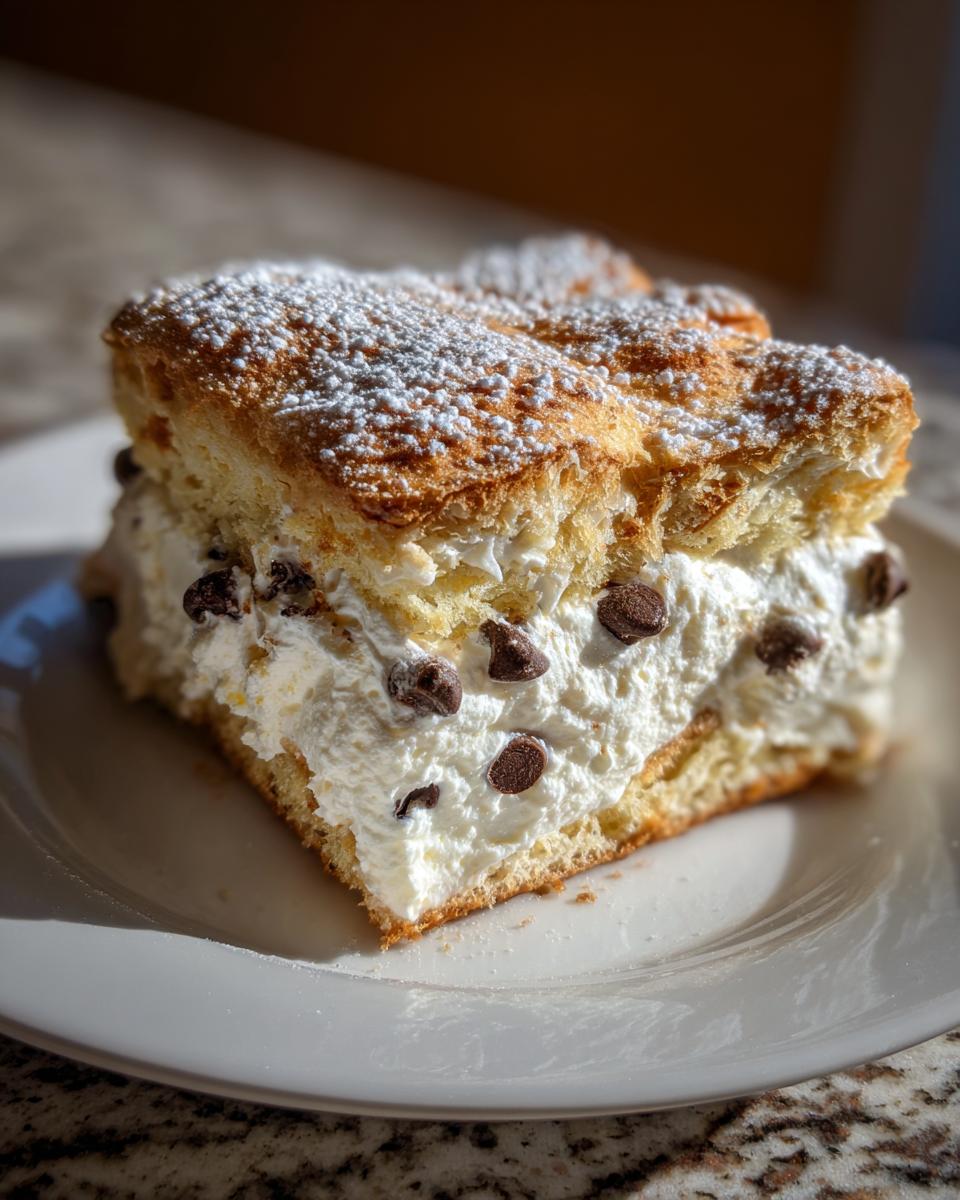
This is where the magic happens! You’ll need 15 ounces of ricotta cheese—and please, use the good stuff! We mix that with a full cup of powdered sugar because we want it sweet and smooth. Then, we add a teaspoon of vanilla extract and half a teaspoon of cinnamon. Cinnamon is non-negotiable; it gives it that classic Italian bakery aroma. Finally, throw in half a cup of those cute little mini chocolate chips. Mix it all until it looks like thick, sweet cloud!
Optional Garnishes for Classic Cannoli Squares
While the squares are delicious plain, presentation matters, right? If you want to make them look extra special for a dessert table, have some chopped pistachios ready for sprinkling. A few bright red maraschino cherries chopped up look gorgeous too. And you can always toss a few extra chocolate chips right on top before they go into the oven!
Essential Equipment for Baking
You don’t need a ton of fancy gadgets for this recipe, which I love because it means less cleanup later! We need space to mix that gorgeous filling, and we need the right vessel for baking. Keeping your tools ready makes the assembly process fly by.
Baking Dish and Mixing Tools
- A standard 9×9-inch baking dish. This size is crucial for getting the right crust-to-filling ratio!
- A medium to large mixing bowl for combining the ricotta mixture.
- A whisk or a sturdy spatula for blending the filling until it’s perfectly smooth.
- Measuring cups and spoons – accuracy matters when baking, even for simple treats!
Step-by-Step Instructions for Classic Cannoli Squares
This is where we put it all together! Since we’re using pre-made crusts, this whole process moves incredibly fast. Just make sure you have your oven preheated so you can pop these beauties in the minute they are assembled. Remember, we’re aiming for golden-brown perfection!
Preparing the Ricotta Filling for Classic Cannoli Squares
Grab your big mixing bowl. Dump in all your ricotta cheese, powdered sugar, vanilla, and cinnamon. Now, mix it up! I like to use a rubber spatula for this part because it helps me scrape down the sides really well. You want this filling to be absolutely smooth—no lumps of dry sugar allowed! Once it’s creamy, gently fold in those mini chocolate chips. Don’t overmix once the chips are in; we want them suspended nicely in that sweet cannoli filling.
Building the Layers
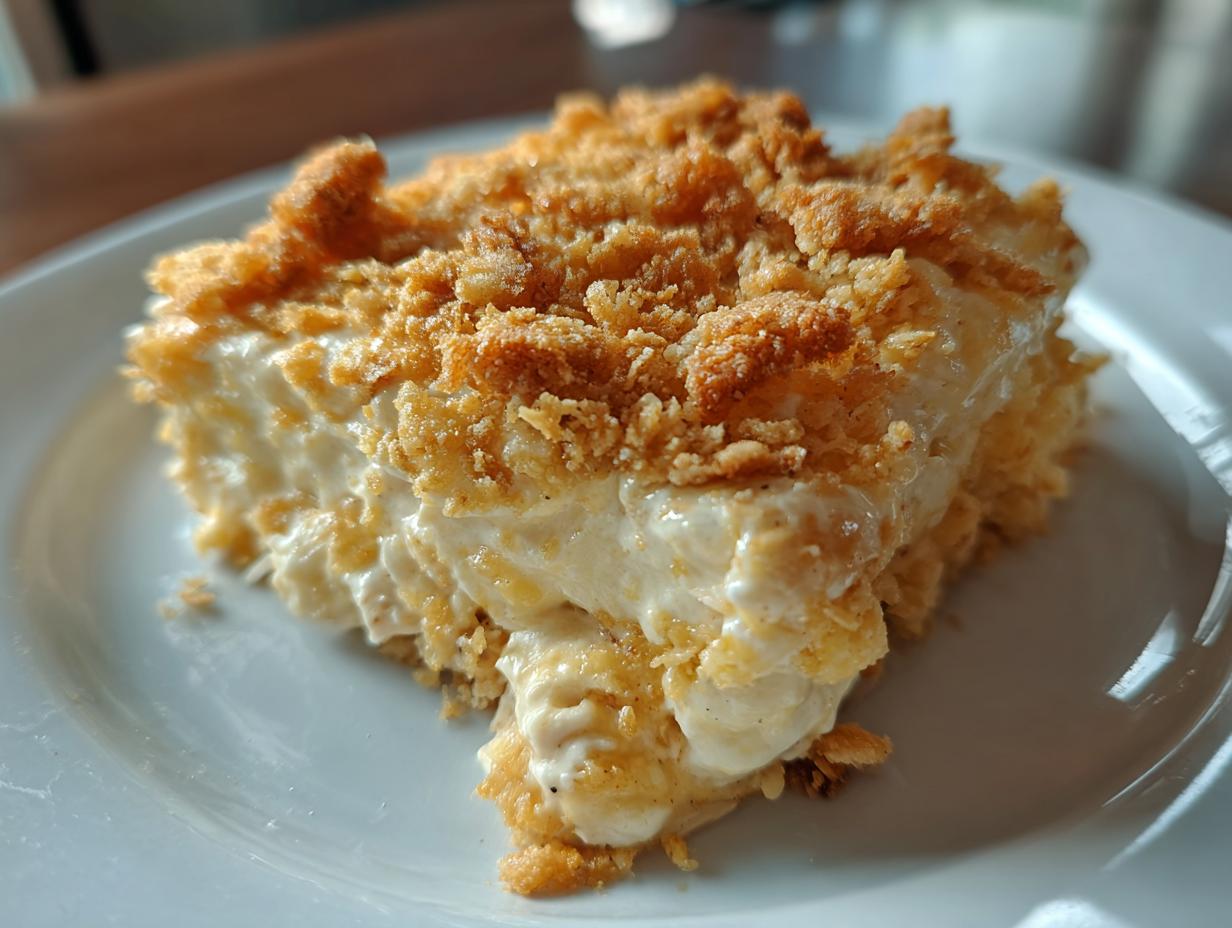
Time to press in that base layer. Take one of your pie crusts and gently press it into your 9×9-inch dish. You don’t need to stretch it or fight it; just coax it into the corners. Spread that glorious ricotta mixture evenly over the bottom crust. Try to keep the filling layer consistent in thickness so everything bakes evenly. Next, take your second pie crust—carefully unroll it—and lay it right on top of the filling. Now for the sealing part! Pinch the edges of the top and bottom crusts together all the way around the perimeter. This seals in all that creamy goodness and helps create defined Classic Cannoli Squares.
Finishing Touches and Baking Time
We need that golden, slightly crisp top! Take your beaten egg and brush it lightly but thoroughly over the entire surface of the top crust. Don’t leave any dry spots! Then, grab that tablespoon of extra sugar and sprinkle it evenly over the egg wash. This creates that lovely, slightly crunchy texture we associate with pastry. Pop the whole thing into your preheated oven—remember, 375°F (190°C). Bake this for about 30 to 35 minutes. Keep an eye on it; you’re looking for a rich, deep golden brown color on top. For more general baking temperature guidance, check out this guide on oven temperatures.
Cooling and Serving the Classic Cannoli Squares
This is the hardest part, honestly: waiting! You must let these squares cool down significantly before you even think about slicing them. If you try to cut them warm, the filling will ooze everywhere, and you’ll end up with a messy puddle instead of neat squares. Let them cool on the counter for a minimum of 30 minutes. They firm up nicely as they reach room temperature, making neat cuts so much easier!
Tips for Achieving Perfect Classic Cannoli Squares
Even though this recipe is super straightforward, a few little tricks can take your Classic Cannoli Squares from good to absolutely unforgettable. It all comes down to respecting the ingredients you’re using, especially that creamy center. My goal is always to make sure you get that rich, authentic bakery flavor without any extra hassle.
Choosing the Best Ricotta
Listen, you can use part-skim ricotta, but please, if you can find it, go for the whole milk version. It makes such a huge difference in the final texture of that filling. Whole milk ricotta has more fat, which means your filling will be richer, silkier, and way creamier after it bakes and cools. The part-skim stuff sometimes dries out a little too much, and we definitely don’t want dry cannoli filling!
Flavor Contrast with Chocolate Chips
I know the recipe just says mini chocolate chips, and that’s fine if that’s what you have. But if you want a real flavor pop, try using dark chocolate chips instead of milk chocolate. The sweetness of the sugar and ricotta is intense—almost like frosting! The slight bitterness and deep cocoa flavor from the dark chocolate truly cuts through that sweetness. It balances everything out perfectly, giving you that wonderful, complex flavor you look for in a great Italian dessert. If you enjoy Italian-American desserts, you might also love my recipe for Greek Baklava.
Storing and Reheating Your Baked Dessert
These squares are fantastic the day they are made, but honestly, they taste even better the next day once the flavors have really settled in. Storing them correctly keeps that crust flaky and the filling perfectly fresh. You’ll want to keep them covered so they don’t dry out, especially if you live somewhere dry.
Storage Guide Table
| Storage Duration | Method |
|---|---|
| Up to 3 Days | Store in an airtight container at room temperature. |
| Up to 5 Days | Store in an airtight container in the refrigerator. |
| Freezing | Wrap tightly in plastic wrap, then foil; freeze up to 2 months. Thaw in the fridge overnight. |
Frequently Asked Questions About Classic Cannoli Squares
Can I Make the Filling Ahead of Time
Oh, absolutely! You can mix up that beautiful cannoli filling mixture a day ahead of time. Just mix everything—ricotta, sugar, vanilla, cinnamon, and chips—just as the recipe says. Pop it into an airtight container and keep it in the fridge. When you’re ready to bake, just make sure it isn’t ice-cold when you spread it onto the crust, or it might be too stiff to spread nicely. Room temperature filling spreads like a dream!
What If I Don’t Have Pre-made Pie Crusts
I get it; sometimes the store is out, or you just prefer making your own! If you have a favorite simple shortcrust or pastry recipe that you use for single-crust pies, that will work great here. You’ll need enough dough to cover a 9×9 inch square for the bottom and another piece for the top. Just make sure the crust isn’t too thick, or it won’t bake properly with the filling inside. Stick to a simpler, butter-based crust rather than anything too flaky or layered, as that can get complicated. For a different kind of baked good using simple dough, check out my recipe for Ciabatta Bread.
How Do I Prevent the Top Crust from Getting Soggy
Sogginess is the enemy of a great baked good! The egg wash and sugar sprinkled on top are your first line of defense because they seal the crust. Also, make sure you are baking at the correct temperature (375°F). If your oven runs cooler, the crust might steam instead of bake. Finally, don’t skip that 30-minute cooling time! If you cut into those Classic Cannoli Squares while they are still hot, the steam trapped in the filling will absolutely turn that bottom crust gummy.
Sharing Your Homemade Dessert
Serving Suggestions for Your Squares
Once these beauties have cooled and you’ve sliced them into perfect little squares, they are ready to dazzle! They pair wonderfully with a strong cup of espresso or maybe a light, sweet dessert wine. If you skipped the chocolate chips inside, a final, light dusting of powdered sugar right before serving really makes them look like they came straight from that little Italian bakery downtown. Snap a picture and let me know how much your family loved these simple, delicious treats! For another simple, sweet treat, see my recipe for Baked Pears.
Print
Divine Classic Cannoli Squares in 35 Minutes
- Total Time: 50 minutes
- Yield: 16 squares 1x
- Diet: Vegetarian
Description
These Classic Cannoli Squares deliver the beloved flavor of traditional cannoli in a simple, shareable bar form. A creamy, sweet ricotta filling sits between layers of flaky baked crust, perfect for any gathering.
Ingredients
- 15 ounces ricotta cheese
- 1 cup powdered sugar
- 1 teaspoon vanilla extract
- 1/2 teaspoon cinnamon
- 1/2 cup mini chocolate chips
- 1 package (14 ounces) pre-made pie crusts (2 crusts total)
- 1 egg, beaten
- 1 tablespoon sugar (for sprinkling)
- Chopped pistachios (Optional Garnishes)
- Maraschino cherries (Optional Garnishes)
- Extra chocolate chips (Optional Garnishes)
Instructions
- Combine ricotta cheese, powdered sugar, vanilla extract, cinnamon, and mini chocolate chips in a bowl. Mix until the filling is smooth.
- Preheat your oven to 375°F (190°C).
- Press one pie crust into a 9×9-inch baking dish.
- Spread the ricotta filling evenly over the bottom crust layer.
- Roll out the second pie crust and place it over the filling.
- Seal the edges of the top and bottom crusts together.
- Brush the top crust with the beaten egg and sprinkle with 1 tablespoon of sugar.
- Bake for 30 to 35 minutes, or until the top crust turns golden brown.
- Allow the squares to cool for a minimum of 30 minutes before cutting them into serving squares.
Notes
- Use whole milk ricotta for a richer, creamier filling texture.
- Dark chocolate chips provide a more intense flavor contrast with the sweet ricotta.
- Garnish with chopped pistachios or extra chocolate chips before serving for added visual appeal.
- Prep Time: 15 minutes
- Cook Time: 35 minutes
- Category: Dessert
- Method: Baking
- Cuisine: Italian-American
Nutrition
- Serving Size: 1 square
- Calories: Approx. 250
- Sugar: Approx. 20g
- Sodium: Approx. 150mg
- Fat: Approx. 12g
- Saturated Fat: Approx. 7g
- Unsaturated Fat: Approx. 5g
- Trans Fat: Trace
- Carbohydrates: Approx. 30g
- Fiber: Approx. 1g
- Protein: Approx. 6g
- Cholesterol: Approx. 35mg