Skip to content
Are you tired of complicated baking projects that promise perfection but deliver stress? Well, stop right there! Because these banana bars are about to become your kitchen MVP. I’m Anna Kowalska, and here I share tried-and-true homemade recipes that you and your family will absolutely love. For me, everything has to be made with heart and flavor—no fussy shortcuts allowed, just real, satisfying results.
If you’re looking for a quick, deeply flavorful, and wonderfully moist treat that feels like a hug from the inside, you’ve found it. This recipe takes that beloved quick bread flavor and transforms it into the perfect handheld snack. We’re diving into an American classic dessert that is simple enough for a Tuesday night but special enough for company. Get ready for the best nutty dessert you’ve ever made!
Jump to:
Gathering Ingredients for Your American Classic Dessert
Before we even think about turning on the oven, we need to talk about ingredients for these fantastic banana bars. Remember, this is an American classic dessert, and we want that classic, comforting flavor to shine through. A great bake starts with great components, so don’t skimp here!
Since these bars are based on banana bread, the quality of those bananas makes a huge difference. I always wait until they are practically black on the counter—that’s when the sugar content is maxed out. Don’t worry about presentation; we’re mashing them anyway!
Essential Components for Perfect Banana Bars
We need to separate our components into two groups: the dry stuff that gives structure and the wet stuff that brings the moisture. This keeps things organized and stops us from overmixing later, which is key for tender banana bars.
It’s important to measure these out correctly, especially the leavening agents, otherwise, your bars might turn out flat or taste metallic. Get everything measured and ready in separate bowls before you combine anything!
Dry Ingredients Measurements
For our structure, we’re using standard all-purpose flour, but the oats are non-negotiable! Make sure you use rolled oats—the bigger flakes—not the instant or quick oats. The quick oats tend to dissolve too much and don’t give us that nice, chewy texture we want in the base of these bars. We also need our brown sugar for that deep molasses flavor, plus a little baking soda and salt to keep everything balanced.
Wet Ingredients and Flavor Base
This is where the magic happens! You need exactly 1/2 cup of mashed, very ripe banana. The butter absolutely must be melted—no softening, no creaming—melted! This is what helps create that fudgy texture unique to bar recipes like this. Don’t forget the egg and a splash of vanilla to round out the flavor profile before we fold in those crunchy walnuts.
Crafting the Cream Cheese Topping
The topping is the perfect creamy counterpoint to the hearty, nutty dessert base. It’s simple: just cream cheese and powdered sugar. The key here is making sure your cream cheese is actually soft—room temperature, not cold from the fridge! If it’s cold, you’ll end up with little lumps of cheese in your beautiful frosting, and nobody wants that surprise.
Step-by-Step Instructions to Make Quick Bread Bars
Now that everything is measured out, putting these quick bread bars together is honestly a breeze—it should take you less than 15 minutes of active work! The most important thing to remember throughout this process is to mix gently. We are aiming for a tender, slightly dense bar, not a tough brick!
Preparing the Pan and Mixing the Batter
First things first, crank that oven up to 350°F (175°C). I always line my 9×9 inch pan with parchment paper, letting the edges hang over slightly. This acts like little handles, making lifting the entire cooled slab out later ridiculously easy. Trust me, you’ll thank me for this step!
In one bowl, whisk together all your dry ingredients—flour, oats, brown sugar, baking soda, and salt. Just a quick whisk is enough to combine them. In your second bowl, mix up the wet stuff: the melted butter, your mashed banana, the egg, and vanilla. Pour the wet right into the dry mixture. Now, grab your spatula and mix only until you see no more dry streaks of flour. Stop immediately! Seriously, stop mixing. If you keep going, you’ll develop the gluten too much, and those beautiful banana bars will turn out tough.
Finally, gently fold in your 1/3 cup of chopped walnuts. You just want them distributed evenly among the batter. Spread this mixture into your prepared pan, making sure it’s relatively level.
Baking Your Nutty Dessert to Perfection
Into the oven they go! Bake these for about 20 to 25 minutes. Keep an eye on them, because every oven is different. We are looking for that perfect state of done-ness for our nutty dessert. You know it’s ready when a toothpick inserted right into the center comes out clean, or maybe with just a few moist crumbs clinging to it—no wet batter allowed!
This step is crucial: You must let the bars cool completely in the pan before you even *think* about frosting them. If you try to frost them warm, the cream cheese topping will melt right into a greasy puddle, and we worked too hard for that!
Finishing Your Banana Bars with Frosting
While the bars are cooling down—which gives you time to clean up, bonus!—whip up your topping. Beat the softened cream cheese until it’s silky smooth, then slowly beat in the powdered sugar until you have a thick, spreadable frosting. If you want that extra crunch on top, mix the final quarter cup of walnuts right into this frosting.
Once the bars are totally cool, spread that sweet, tangy cream cheese layer evenly across the top. If you didn’t mix the nuts in, sprinkle them on now so they stick nicely to the frosting. Then, just slice them into squares and enjoy that perfect handheld snack!
Tips for Success with Banana Bars
Baking is forgiving, but when it comes to these banana bars, a few little tricks I learned over the years really separate a good bar from a truly great one. Remember, these are based on quick bread, which means the chemistry is delicate! Paying attention to these small details ensures you get that amazing, moist texture every single time you bake them.
Ingredient Selection for Maximum Flavor
I cannot stress this enough: your bananas need to be practically black. If you use yellow or even slightly spotted bananas, you’re leaving so much flavor and moisture on the table. Very ripe bananas are sweeter and break down perfectly when mashed, integrating seamlessly into the batter. This is the secret weapon for making these bars taste deeply flavorful, not just sweet. If your bananas aren’t quite there, just wait another day or two—patience pays off here for the best flavor profile!
Technique Focus: Avoiding Overmixing
When you combine the wet and dry ingredients, you have to stop mixing the second they come together. This is the number one mistake people make with any quick bread or bar recipe. When you overmix, you activate the gluten in the flour. This develops too much structure, resulting in a chewy, tough, almost rubbery texture. We want tender crumb! Think of it like gently folding a blanket—you want it combined, but you don’t want to aggressively beat it into submission. A few streaks of flour left when you fold in the nuts are perfectly fine!
Frequently Asked Questions About Quick Bread Bars
I get so many questions when people try making my quick bread bars for the first time! It’s natural when you’re trying a new recipe, especially one that aims to be the perfect homemade snack. I’ve gathered a few of the most common ones to help you out so your first batch of banana bars turns out perfectly!
Most issues people run into are usually related to mixing time or ingredient ripeness, which we’ve covered, but here are the other burning questions I hear most often about this delicious nutty dessert.
Can I substitute the walnuts in these banana bars
Oh, absolutely! While the walnuts give these banana bars that signature crunch that makes them a wonderful nutty dessert, you can swap them out if you have allergies or just prefer a different texture. Pecans work beautifully and offer a slightly sweeter flavor profile. Almonds are also a great choice. Just make sure whatever nut you choose is chopped roughly so you still get those nice pockets of crunch throughout the bar!
How long do these bars stay fresh
Because of that lovely cream cheese topping, these bars are best stored in the refrigerator. They stay wonderfully fresh for about three to four days when kept in an airtight container. If you want them to taste almost fresh-baked, let them sit on the counter for about 15 minutes before serving. They are so good, though, I doubt they’ll last that long!
Serving Suggestions for Your Nutty Dessert
Once these beautiful nutty dessert bars are cooled and frosted, the fun part is deciding what to serve them with! Honestly, they are fantastic all on their own as a grab-and-go snack, but elevating them slightly makes them feel really special.
I love serving these slightly chilled alongside a hot beverage. A strong cup of black coffee cuts through the sweetness of the cream cheese topping perfectly. If you’re serving them after a big meal, a small scoop of vanilla bean ice cream alongside a square adds a lovely temperature contrast. For more dessert ideas, check out my collection of desserts.
For presentation, try cutting them into slightly smaller rectangles instead of squares if you’re serving a crowd. A sprinkle of cinnamon or a tiny drizzle of caramel sauce across the top just before serving makes these banana bars look professional, even though they were made with zero fuss!
Storing and Reheating Your American Classic Dessert
Properly storing these American classic dessert bars keeps them tasting fresh for days. Because of that rich cream cheese topping, I always recommend the fridge. They hold their shape better, and the frosting stays firm. Don’t worry about them drying out; the banana keeps the base perfectly moist!
If you need to reheat them slightly—maybe you’re serving them in the winter and want that just-baked warmth—you have to be gentle, especially with the frosting. Never microwave the whole slab! A quick zap on a single square is usually enough to soften the topping just a touch. When considering how to store baked goods, understanding the science behind moisture retention can be helpful, as detailed in general food science resources like this one from the FDA.
Here is my quick guide to keeping your delicious banana bars in top shape:
| Storage Location | Duration | Reheating Method |
|---|---|---|
| Airtight Container (Room Temp) | Up to 2 days | Serve as is |
| Airtight Container (Refrigerator) | Up to 4 days | Microwave single bar 10-15 seconds |
| Freezer (Wrapped Individually) | Up to 2 months | Thaw overnight in the fridge |
Understanding the Estimated Nutrition for These Banana Bars
I always like to give you an idea of what you’re diving into when you make these delicious banana bars. Now, please remember that because we are using fresh ingredients like homemade mashed bananas and varying the amount of walnuts, these numbers are just estimates! They are here to guide you, not judge your enjoyment of this wonderful nutty dessert.
This estimation helps us understand that while they are a treat, they are also packed with energy from those oats and bananas. Enjoy them guilt-free! If you are interested in the general nutritional breakdown of oats, you can find reliable data from sources like the World Health Organization.
| Nutrient | Amount (Estimated) |
|---|---|
| Calories | 250 |
| Fat | 14g |
| Carbohydrates | 30g |
| Protein | 4g |
Share Your Experience Making These Banana Bars
I put my heart into sharing these banana bars with you, and now I want to hear all about yours! Did you use pecans instead? Did your family devour them in one afternoon? Please drop a rating below and tell me what you thought in the comments. Your feedback helps me keep sharing only the best, most flavorful recipes! If you are looking for more baking inspiration, check out my recipes for frosted zucchini spice bars.
Print
Amazing 250-Calorie banana bars
- Total Time: 40 minutes
- Yield: 9 bars 1x
- Diet: Vegetarian
Description
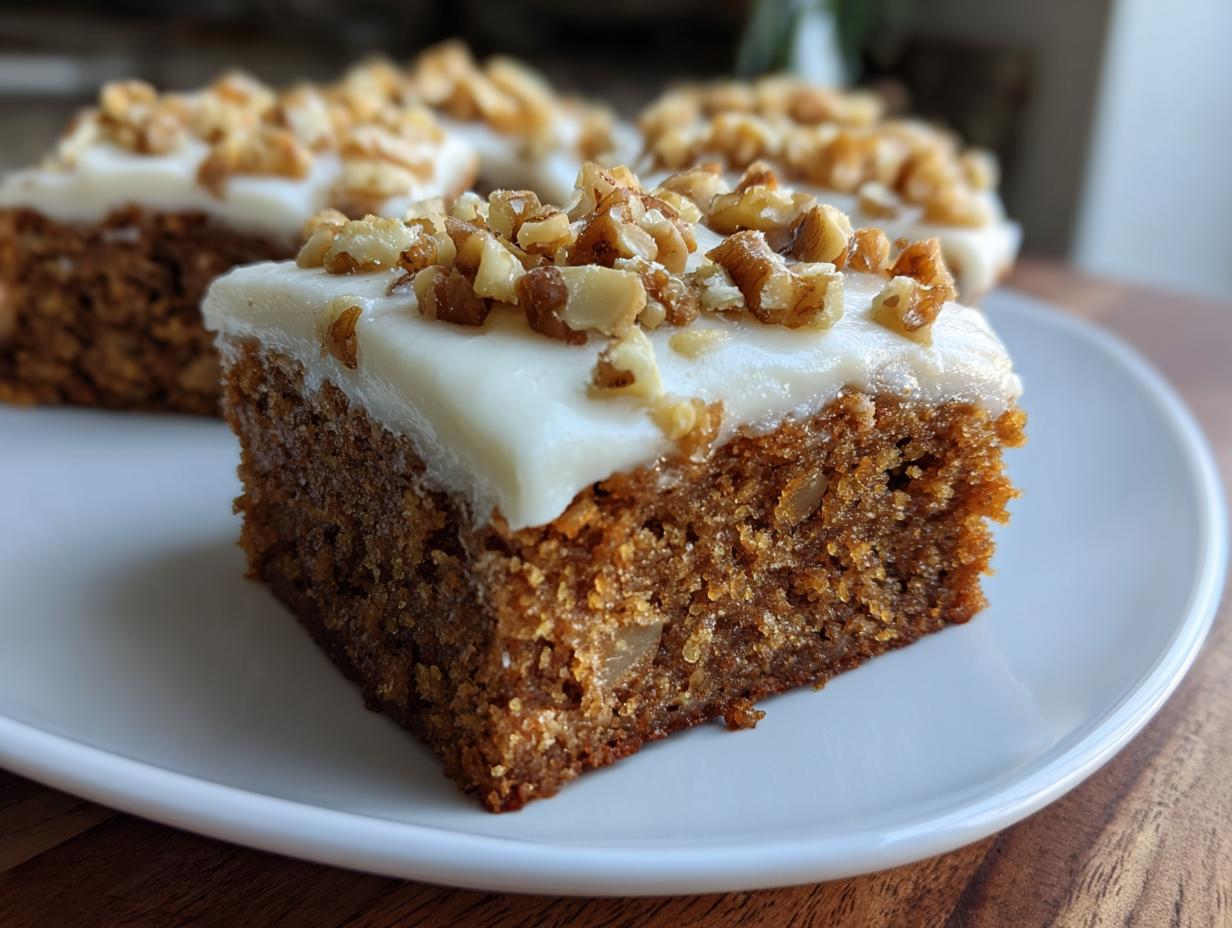
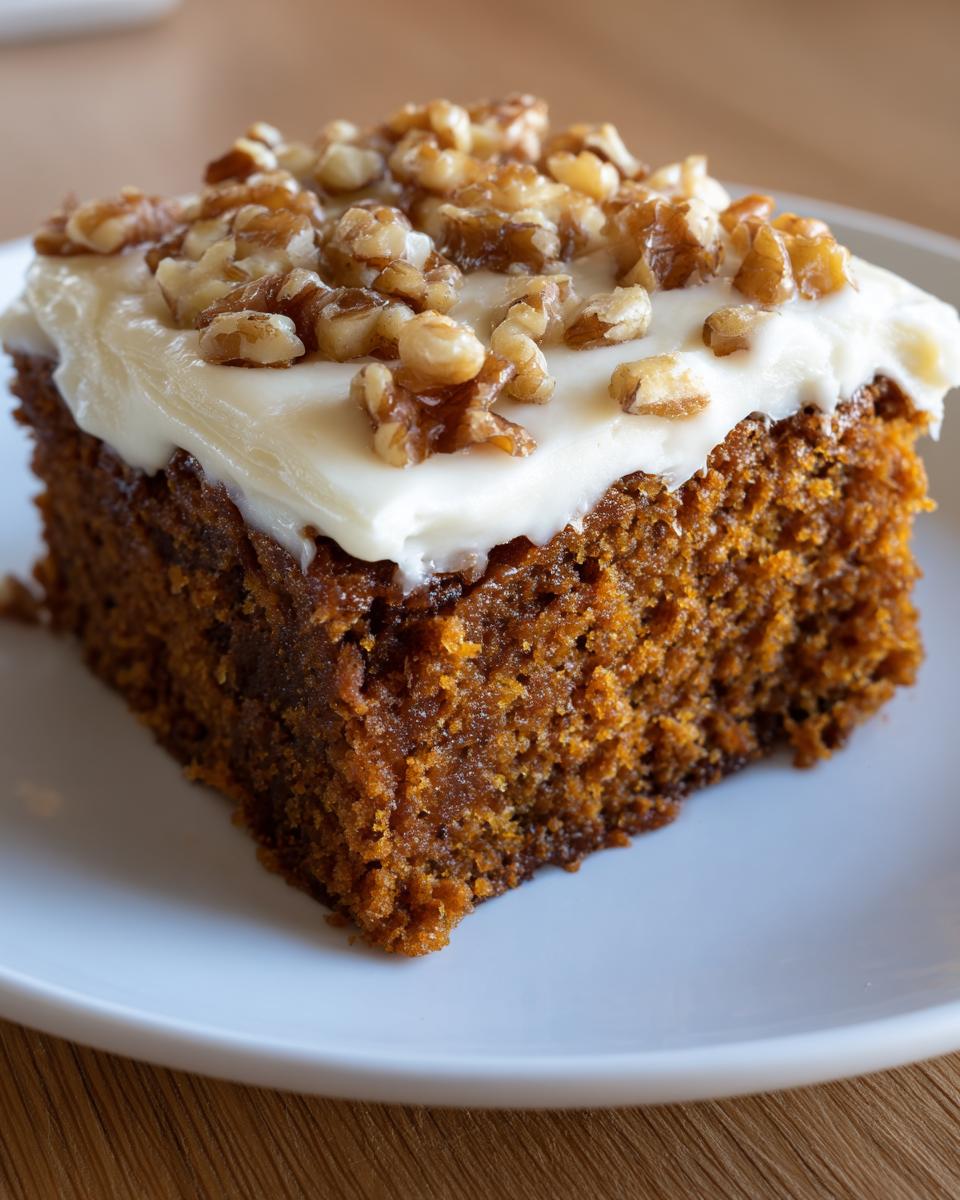
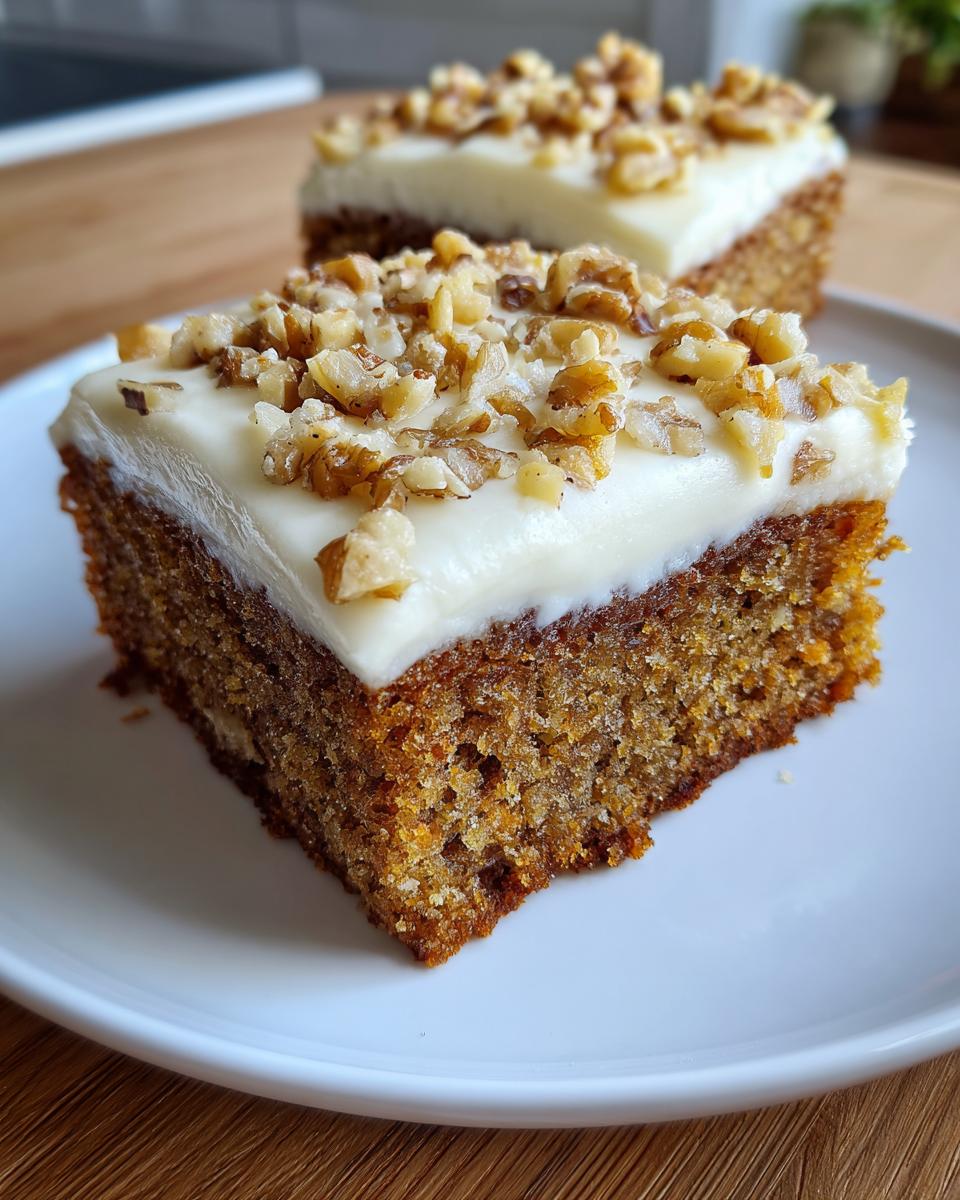
These Banana Walnut Bars are a delightful, nutty take on a classic quick bread, perfect for a satisfying homemade snack or dessert.
Ingredients
- 1 cup all-purpose flour
- 1/2 cup rolled oats
- 1/2 cup brown sugar
- 1/4 teaspoon salt
- 1/2 teaspoon baking soda
- 1/2 cup unsalted butter (melted)
- 1/2 cup mashed ripe banana
- 1/3 cup chopped walnuts
- 1 egg
- 1 teaspoon vanilla extract
- 1/4 cup cream cheese (for topping)
- 1/4 cup powdered sugar (for topping)
- 1/4 cup chopped walnuts (optional, for topping)
Instructions
- Preheat your oven to 350°F (175°C). Line a 9×9 inch pan with parchment paper.
- In a medium bowl, whisk together the flour, rolled oats, brown sugar, salt, and baking soda for the bars.
- In a separate bowl, combine the melted butter, mashed banana, egg, and vanilla extract.
- Pour the wet ingredients into the dry ingredients. Mix until just combined. Do not overmix.
- Fold in the 1/3 cup of chopped walnuts.
- Spread the batter evenly into the prepared pan.
- Bake for 20 to 25 minutes, or until a toothpick inserted into the center comes out clean. Let the bars cool completely in the pan.
- Prepare the topping: Beat the cream cheese and powdered sugar together until smooth.
- Spread the cream cheese frosting evenly over the cooled bars.
- If desired, sprinkle the remaining 1/4 cup of chopped walnuts over the frosting.
- Cut into squares and serve your nutty dessert.
Notes
- Use very ripe bananas for the best flavor and moisture in your bars.
- Ensure the bars are completely cool before applying the cream cheese topping; otherwise, the frosting will melt.
- Prep Time: 15 minutes
- Cook Time: 25 minutes
- Category: Dessert
- Method: Baking
- Cuisine: American
Nutrition
- Serving Size: 1 bar
- Calories: 250 (estimated)
- Sugar: 18g (estimated)
- Sodium: 100mg (estimated)
- Fat: 14g (estimated)
- Saturated Fat: 7g (estimated)
- Unsaturated Fat: 7g (estimated)
- Trans Fat: 0g
- Carbohydrates: 30g (estimated)
- Fiber: 2g (estimated)
- Protein: 4g (estimated)
- Cholesterol: 35mg (estimated)