Skip to content
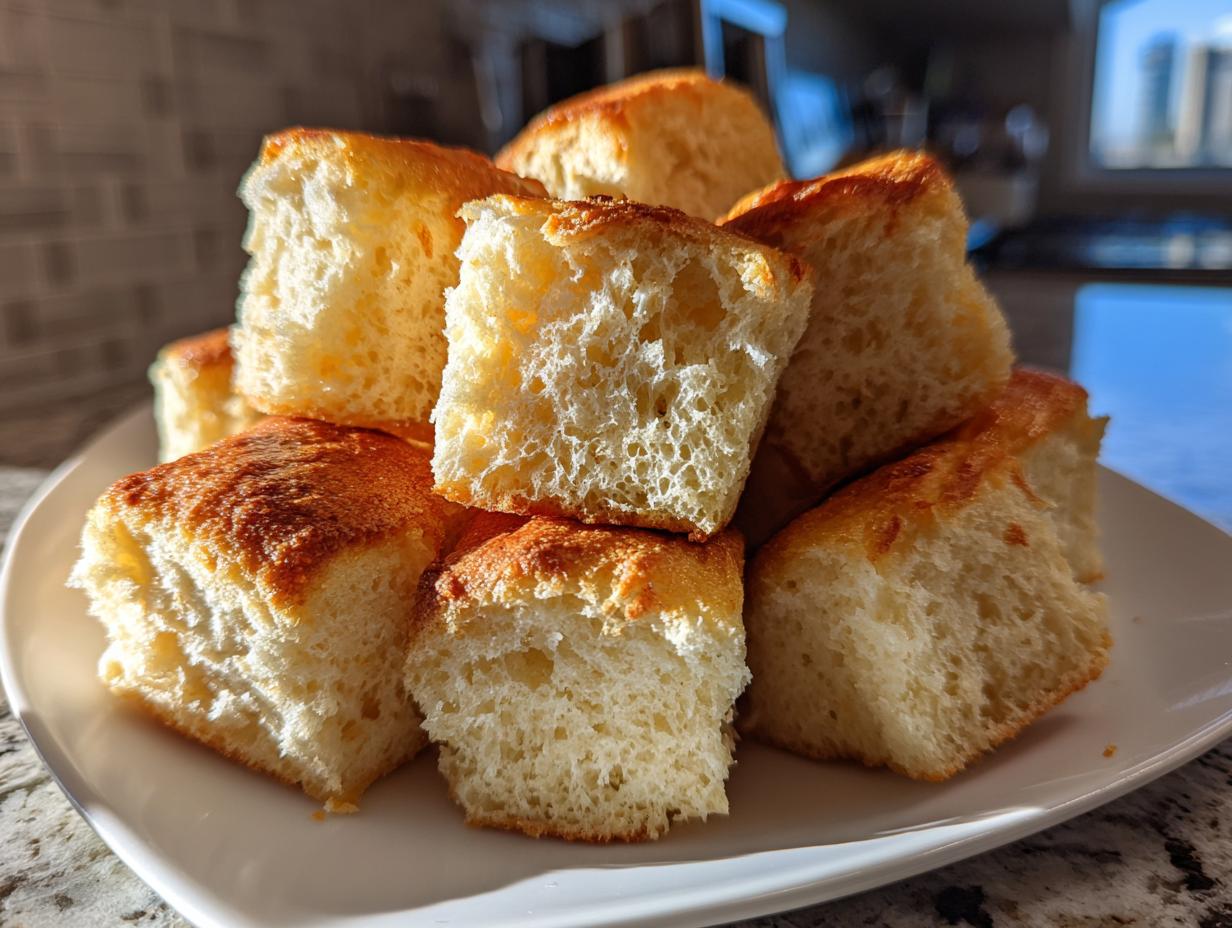
Sweet Baked Dough Cubes are the answer when you need something truly satisfying but don’t have hours to spend messing around in the kitchen! I’m Anna Kowalska, and I share tried-and-true homemade recipes that you and your family will love—everything is made with heart and flavor, I promise you that. I know you’re busy, so I focus on recipes that deliver massive payoff without demanding your entire day.
If you ever find yourself staring into the pantry wondering how to turn a few simple staples into an absolute treat for an afternoon slump or a sudden craving, this is the recipe you need in your back pocket. We’re talking about something soft, slightly sweet, and perfectly portioned!
That’s why I’m thrilled to share this recipe for Sweet Baked Dough Cubes. They are the definition of low-effort, high-reward baking, and they come together faster than you can decide what movie to watch!
Jump to:
Why You Will Love These Sweet Baked Dough Cubes
Honestly, these little bites are my go-to when I need a baking win fast. They use ingredients I always have on hand, so there’s never a mad dash to the store. Plus, the cleanup is ridiculously easy! You’ll see exactly why these Sweet Baked Dough Cubes make such a great snack or dessert for busy families.
- Prep time is lightning fast—we’re talking about 15 minutes before they hit the oven!
- They are perfectly bite-sized, which means you can’t really overeat them… well, maybe you can, but it feels less guilty!
- The ingredient list is short and sweet; no complicated techniques needed here.
- They bake up light and fluffy, making them wonderfully satisfying.
Equipment Needed for Your Sweet Baked Dough Cubes
You don’t need a whole arsenal of fancy gadgets for this recipe, which is another reason I love it so much. Just the basics will get you going in under 30 minutes total. Grab these few things, wipe down your counter, and we’re ready to roll!
Key Tools for Perfect Sweet Baked Dough Cubes
Precision matters when we are cutting these small, even though the recipe is simple overall. Make sure you have a good quality, sturdy baking sheet—one that is rimmed so nothing slides off when you move it. You’ll also need a sharp knife for clean cuts and a good set of dry measuring cups. We need accurate flour measurement for these Sweet Baked Dough Cubes to keep them from getting dense!
Gathering Ingredients for Sweet Baked Dough Cubes
The absolute best part about this recipe, besides how quickly it comes together, is that you probably already have everything you need sitting in your pantry or fridge right now. Seriously, no exotic spices or hard-to-find items required! When I developed this recipe, my goal was pure accessibility. These Sweet Baked Dough Cubes rely on the fundamentals of good baking—flour, fat, sugar, and binder.
Because the ingredient list is so short, the quality of what you use really shines through in the final product. Don’t skimp on the butter, trust me on that one! Before we get to the list itself, let’s talk about what I look for specifically in those four main components.
Ingredient Specifications and Clarity
For the best texture in your Sweet Baked Dough Cubes, pay attention to how these ingredients are prepped. We aren’t doing anything too wild, but details matter! Make sure your butter is softened—not melted, but soft enough that you can easily press your finger into it without it feeling hard. That’s crucial for proper mixing later on.
For the flour, use all-purpose, and please, please spoon and level it into your measuring cup rather than scooping directly from the bag. Over-measuring flour is the fastest way to turn these light treats into little hockey pucks! And when it comes to eggs, always use large eggs; anything smaller throws off the wet-to-dry ratio in these simple Sweet Baked Dough Cubes.
Ingredients Table for Sweet Baked Dough Cubes
Here is what you need to pull out before we start mixing the dough for your Sweet Baked Dough Cubes. Get everything measured and ready to go!
[PLACEHOLDER FOR INGREDIENT TABLE]
Preparing the Dough for Sweet Baked Dough Cubes
Now we get to the fun part—making the actual dough! Since this recipe is so simple, the mixing process is really where we build all the structure for those perfect little Sweet Baked Dough Cubes. We start by creaming the softened butter and sugar together. I use my stand mixer for this because it saves my arm, but honestly, a good sturdy wooden spoon works just fine if you’re willing to put in a little elbow grease!
You need to beat that butter and sugar until it looks pale, light, and fluffy—this takes a few minutes. This creaming process is vital because it whips tiny air pockets into the fat, and those pockets are what give our final cubes that light, slightly melt-in-your-mouth quality instead of being heavy. Don’t rush this stage; it’s the foundation!
Next, we add the eggs, one at a time, making sure each one is fully incorporated before adding the next. Scrape down the sides of the bowl often! Once those eggs are mixed in, it smells wonderfully sweet already. Now, for the dry ingredients—the flour. I whisk the flour together separately first, just to make sure everything is distributed evenly.
I always add the flour mixture to the wet ingredients in two batches. Mix on low speed, or gently fold by hand, just until the flour disappears. My biggest piece of advice for any tender baked treat, especially these Sweet Baked Dough Cubes, is to stop mixing the second you see the last streak of flour vanish. Overmixing develops the gluten in the flour, and that’s how you end up with tough, chewy dough instead of soft, tender cubes. We want soft, happy dough!
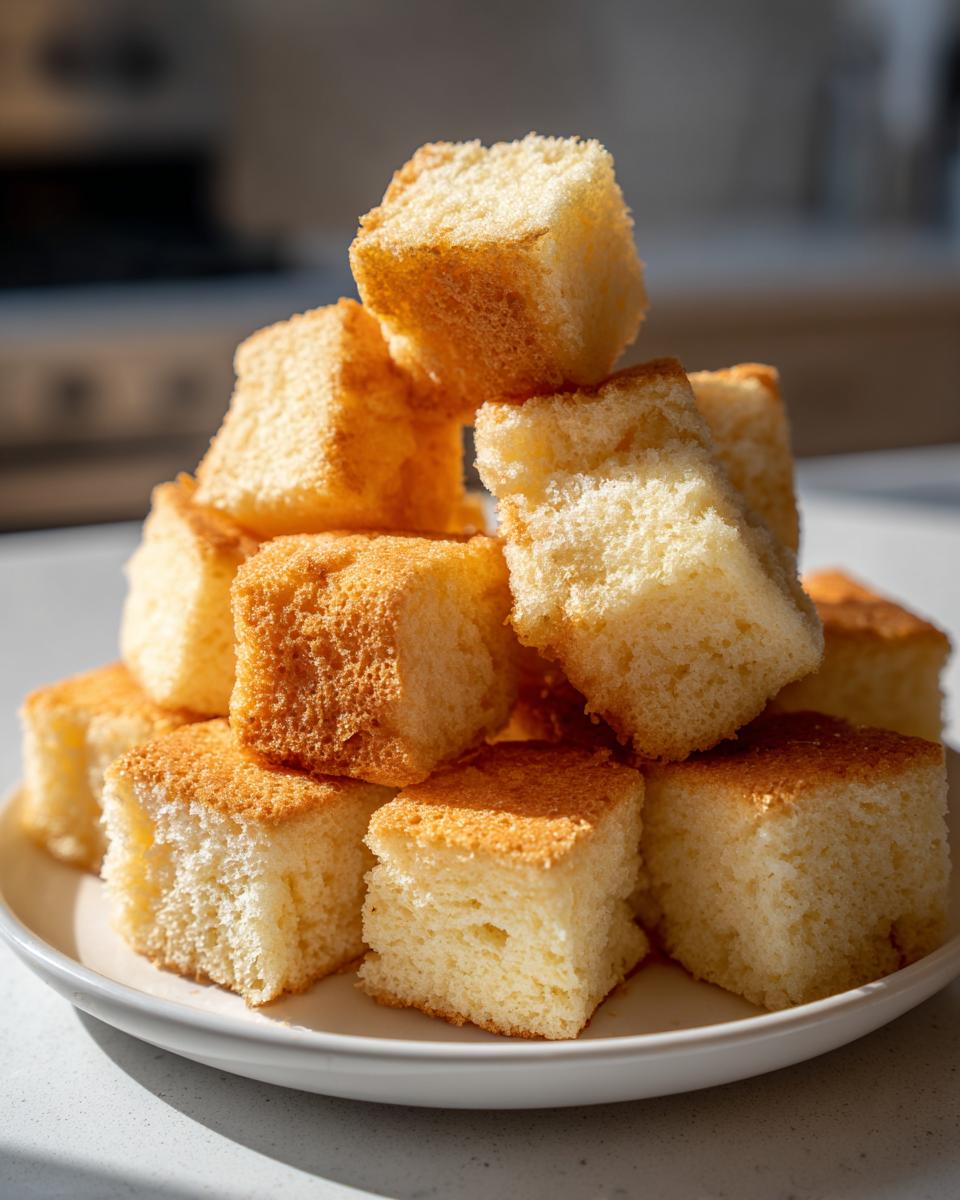
Step-by-Step Instructions to Bake Sweet Baked Dough Cubes
Okay, we have our perfect, tender dough ready to go. This part is almost therapeutic because you are just turning that beautiful mass into little squares ready for the oven magic. Remember, we are aiming for about 24 perfect little bites, so keep your cuts even!
First things first: get your oven preheating! Set that temperature to 350 degrees Fahrenheit (that’s about 175 Celsius). You want the oven nice and hot when these little guys go in so they puff up beautifully right away. While it’s heating, let’s shape them up.
Shaping and Cutting Your Sweet Baked Dough Cubes
Take your dough—it should be soft but manageable, not sticky anymore—and turn it out onto a lightly floured surface. If it feels too sticky after mixing, just dust your hands lightly; avoid adding too much extra flour, or they will dry out!
I usually try to gently pat or roll the dough out into a rough square or rectangle shape that is about one inch thick. You don’t need a rolling pin if the dough is relaxed enough; your hands work great! Once you have a nice, even thickness across the dough, take your sharp knife and cut straight lines down to create uniform squares. Aim for pieces about 1 inch by 1 inch. If they aren’t perfectly square, don’t stress! As long as they are roughly uniform, they will bake evenly, which is the main goal for these Sweet Baked Dough Cubes.
Carefully arrange these cubes onto your prepared, rimmed baking sheet. Give them just a tiny bit of space between each one—maybe half an inch—because they will spread out just a little bit as they bake. We don’t want them merging into one giant dough sheet!
Baking Time and Temperature for Sweet Baked Dough Cubes
Once your oven is fully preheated to 350°F, gently slide that baking sheet onto the middle rack. Now, set your timer for 10 minutes. This recipe is fast, but we need to watch them closely!
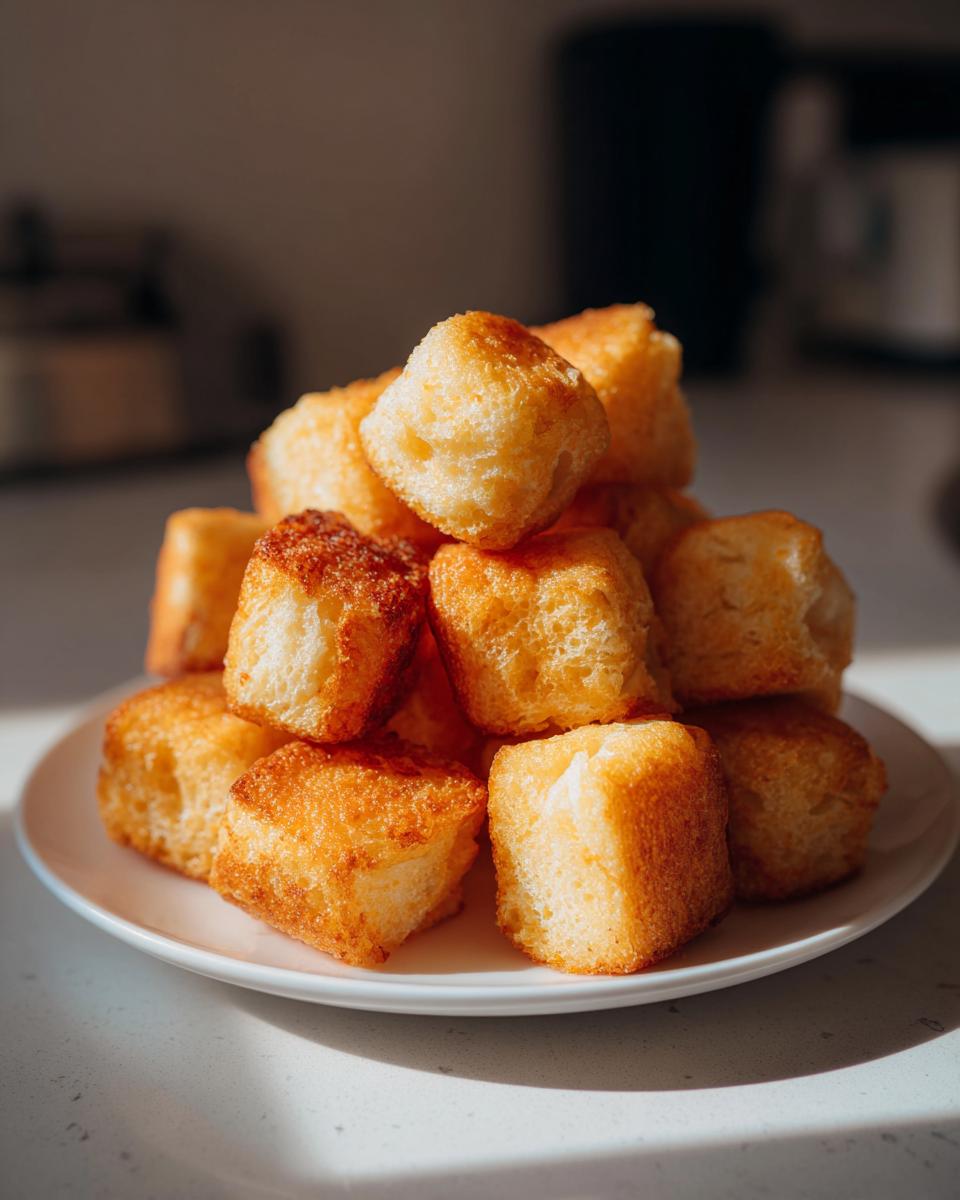
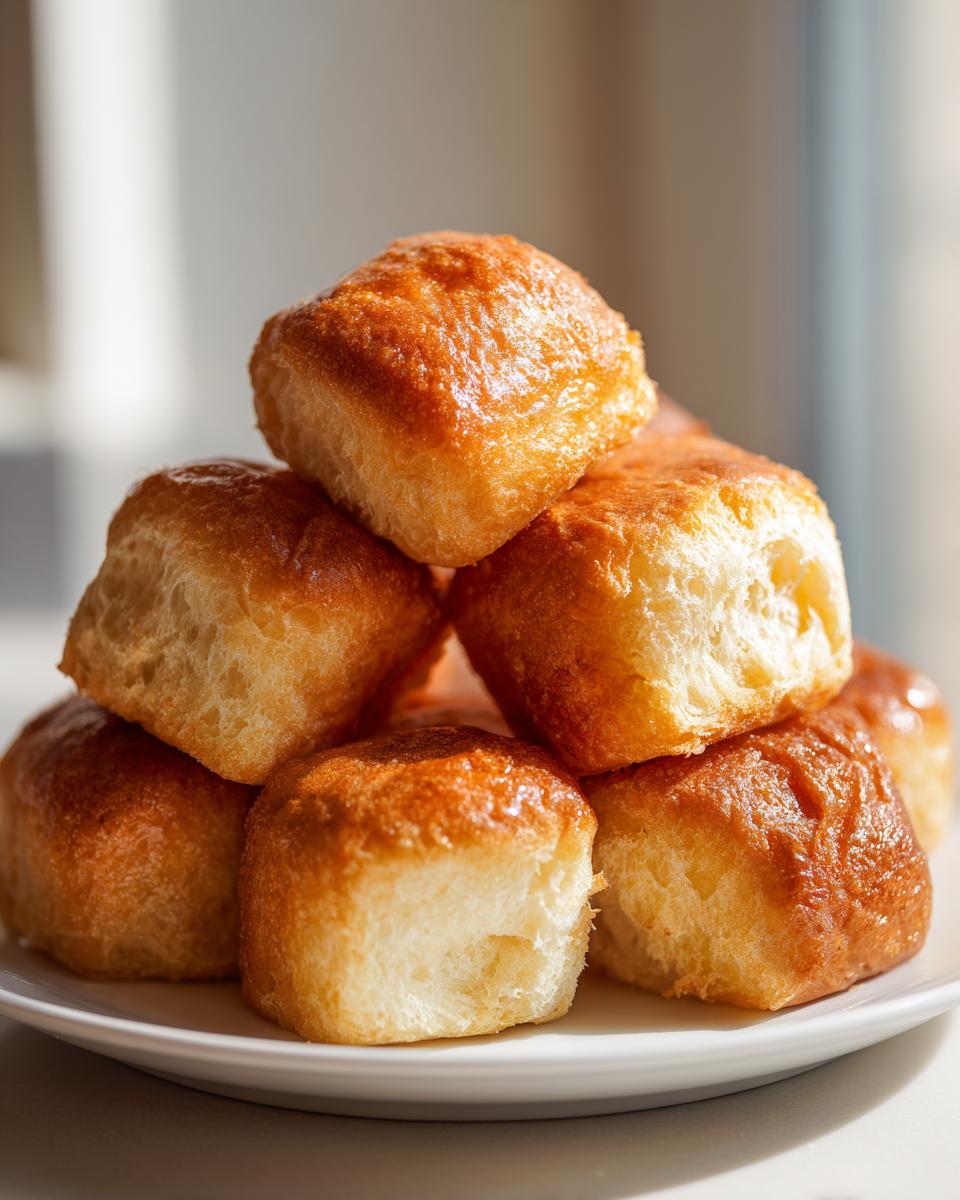
Around the 10-minute mark, check on your Sweet Baked Dough Cubes. You are looking for a specific visual cue: the edges should start to turn a very light, pale gold color. They shouldn’t be deep brown; we want them soft, so light gold is the target! If the tops still look pale and doughy, let them bake for another 2 to 3 minutes and check again. Sometimes the bottoms brown faster, so if you notice that, you can carefully rotate the pan halfway through the cooking process.
Total baking time usually lands right around 12 minutes, but always trust your eyes! When they look beautifully light golden and feel firm but springy to the touch (don’t poke too hard!), pull the sheet out. Let the Sweet Baked Dough Cubes cool right on the pan for about five minutes before transferring them to a wire rack to finish cooling completely. That initial rest helps them set up perfectly.
Tips for Success with Your Baked Dough Bites
Because this recipe is so streamlined, success really hinges on avoiding a couple of common pitfalls. The biggest mistake people make is adding too much flour when they are cutting or handling the dough. If you find the dough is sticking to your hands or the counter, resist the urge to dump more flour in! Instead, lightly grease your hands or use a little bit of oil on your hands.
Also, remember that oven calibration is key. If your oven runs hot, you might find your bites are browned too quickly on the outside while staying raw inside. If this happens, lower your temperature by about 15 degrees and add two extra minutes to the baking time. Finally, make sure those cubes are uniform in size; uneven pieces simply won’t cook at the same rate, leading to some being crunchy and others being underdone.
Storing and Serving Your Sweet Baked Dough Cubes
These little bites are best eaten the day they are made, when they are still wonderfully soft and tender. But let’s be real—they are so good you might actually have leftovers! If you do, we need to make sure we store them correctly so they don’t turn stale. The key to keeping your Sweet Baked Dough Cubes fresh is containment!
Once they are completely cool—and I mean fully cool, or you’ll steam them into sogginess—transfer them into an airtight container. They should keep nicely at room temperature for about two days. If you need them to last longer, the fridge works, but I’d only do that for three or four days max, as the cold can sometimes dry them out a bit faster. They are fantastic served plain, dusted lightly with powdered sugar if you want a little extra sweetness! For more quick baking ideas, check out my recipe for quick and simple fairy cakes.
Storage and Reheating Details Table
Here’s a quick reference guide for keeping your Sweet Baked Dough Cubes perfect:
[PLACEHOLDER FOR STORAGE AND REHEATING TABLE]
Frequently Asked Questions About Sweet Baked Dough Cubes
I always get questions when I post a recipe this simple—people worry they’re missing a secret step! Here are a few things readers often ask me about making these Sweet Baked Dough Cubes successfully.
Q1. Can I use self-rising flour instead of all-purpose flour?
Oh, I wouldn’t recommend it for this recipe. Since we control the leavening agent ourselves (or rather, don’t add much!), adding pre-mixed leavening can make these cubes puff up too fast and then collapse, leaving you with a dense center. Stick to plain all-purpose flour unless you’re ready to experiment! Understanding the role of leavening agents in baking is important; you can read more about the science behind leavening agents.
Q2. My dough was too sticky to cut into neat squares. What went wrong?
This is almost always due to measuring the flour incorrectly! Remember my tip: spoon and level! If you scoop directly, you pack in too much flour. If your dough is sticky, work quickly with lightly floured hands rather than adding more flour directly to the main batch. That’s the secret to tender Sweet Baked Dough Cubes! If you are looking for other simple baked goods, you might enjoy my recipe for Grandma’s Old Fashioned Tea Cakes.
Q3. Can I add cinnamon or vanilla extract for flavor?
Absolutely! This recipe is a fantastic base for small additions. If you want a little warmth, try mixing about a teaspoon of ground cinnamon into your dry ingredients. A half teaspoon of vanilla extract added right after the eggs will also boost the overall sweet snack flavor beautifully.
Q4. How long can I keep these bite-size treats fresh?
If stored correctly in an airtight container at room temperature, they stay great for two days. They are really best on day one, though, when they are at their fluffiest. If you need to make a big batch for later, it’s better to freeze them unglazed after they cool completely. For more quick dessert ideas, check out my desserts section.
Share Your Experience Making Sweet Baked Dough Cubes
I truly hope these simple baked treats bring a little joy to your day! If you tried this recipe, please let me know how it went down in your kitchen. Did you dust them with sugar or leave them plain? Drop a comment below and give the recipe a star rating so other folks know these are worth the quick effort!
Print
Amazing 12 minute Sweet Baked Dough Cubes
- Total Time: 27 minutes
- Yield: 24 cubes
- Diet: Vegetarian
Description
Sweet Baked Dough Cubes are simple, bite-sized treats perfect for snacking. This recipe uses basic ingredients to create a light, slightly sweet baked item.
Ingredients
- Flour
- Butter
- Sugar
- Eggs
Instructions
- Cut the dough into uniform cubes.
- Bake the dough cubes until they achieve a light golden color.
Notes
- Fun bite-size shape.
- Prep Time: 15 minutes
- Cook Time: 12 minutes
- Category: Dessert
- Method: Baking
- Cuisine: American
Nutrition
- Serving Size: 1 cube
- Calories: 110
- Sugar: 5g
- Sodium: 50mg
- Fat: 6g
- Saturated Fat: 3.5g
- Unsaturated Fat: 2.5g
- Trans Fat: 0g
- Carbohydrates: 12g
- Fiber: 0.5g
- Protein: 2g
- Cholesterol: 20mg