Skip to content
There’s nothing quite like the smell of fresh baking filling the kitchen on a quiet Tuesday afternoon. That sweet, warm vanilla scent is my favorite kind of comfort food, and today, I’m sharing my secret weapon for when you need a fast, satisfying treat: Baked Vanilla Dough Twists. I’m Anna Kowalska, and here I share tried-and-true homemade recipes that you and your family will love. Everything here is made with heart and flavor, because in my kitchen, we believe even the simplest things deserve to taste amazing.
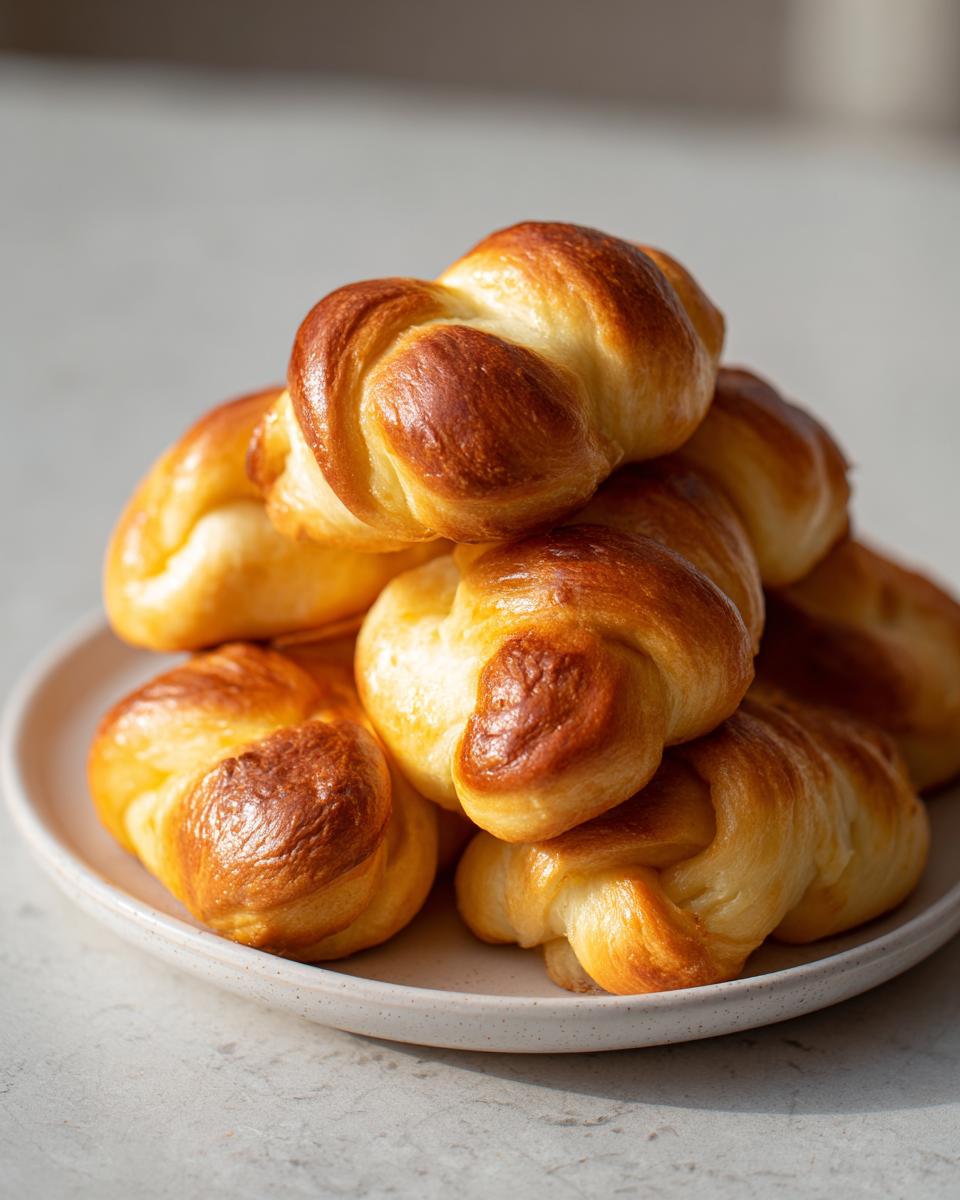
These little twists come together so quickly—honestly, they are faster than ordering takeout! They have that perfect balance: a tender interior wrapped in a lightly crisp, sweet shell. If you’ve been searching for a simple vanilla dessert that doesn’t require a mixer or hours of rising time, stop right now. You’ve found it. Get ready to fall in love with these easy Baked Vanilla Dough Twists!
Jump to:
Gathering Ingredients for Your Baked Vanilla Dough Twists
The beauty of these Baked Vanilla Dough Twists is that they rely on pantry staples you probably already have on hand. We aren’t messing around with complicated yeast mixtures here; this is quick dough magic! Before you start heating anything, take a moment to gather everything listed below. Having your mise en place ready means the whole process moves smoothly from start to finish.
Don’t skip measuring precisely, especially the flour, because dough consistency is key to getting those perfect twists.
| Ingredient | Amount Needed |
| Flour | As directed below |
| Water | As directed below |
| Butter | As directed below |
| Sugar | As directed below |
| Salt | A pinch |
| Eggs | As directed below |
| Vanilla Extract | As directed below |
Essential Components for Baked Vanilla Dough Twists
When you start combining things in the saucepan, make sure the butter is cut into pieces so it melts quickly along with the water, sugar, and salt. For the flour, you’ll add it all at once to create that initial dough mass. The eggs need to be at room temperature if you can manage it, as they incorporate much better into the slightly cooled dough base.
Ingredient Notes and Substitutions for Baked Vanilla Dough Twists
If you’re out of regular sugar, you can use an equal amount of granulated sugar, though the molasses in brown sugar adds a wonderful depth of flavor to these sweet dough treats. For the vanilla extract, use the best quality you have because that is where a lot of the flavor comes from! Since this recipe is vegetarian, all the ingredients listed are safe, but obviously, you wouldn’t substitute the eggs with anything that isn’t an egg replacement if you were vegan.
Preparing the Dough Base for Baked Vanilla Dough Twists
This is where we build the structure for our Baked Vanilla Dough Twists! Since this dough is cooked briefly on the stove, it’s super fast, but you have to pay attention so nothing burns. The beginning steps create a rich, buttery foundation that locks in flavor before we even think about shaping.
Creating the Initial Dough Mixture
Grab a small saucepan—nothing too big, we aren’t making soup! Combine your water, a good chunk of butter, sugar, and a tiny dash of salt. Set it over medium heat. You need to stir this gently until everything is completely dissolved. You’ll know it’s ready when it looks clear and glossy, not gritty at the bottom. Don’t let it boil vigorously; we just want dissolution here, trust me!
Incorporating Flour and Cooling the Dough
Once dissolved, dump all your measured flour in immediately! Stir hard and fast with a wooden spoon until the mixture pulls away from the sides of the pan and forms one big, shaggy ball of dough. It’ll look messy for a second, but keep working it. Now, this next step is crucial for our vanilla dessert: take the pan off the heat and let that dough cool for about five minutes. If it’s too hot when you add the eggs, you’ll end up with sweet dough scrambled eggs, and nobody wants that mess!
Finishing and Shaping Your Baked Vanilla Dough Twists
Once that dough ball has cooled down just enough—warm to the touch, but not hot enough to cook an egg—it’s time to bring in the flavor and binder! This next part transforms that cooked flour base into a pliable dough perfect for shaping our Baked Vanilla Dough Twists. Remember, we are aiming for a smooth, slightly tacky dough that holds its shape beautifully.
Mixing in Eggs and Vanilla Extract
Crack your room-temperature eggs into the slightly cooled dough mass. Now, work them in. You might need to switch to using your hands here because the spoon won’t cut it anymore. Squeeze and fold the eggs into the dough until they are fully absorbed. It might look a little messy at first, but keep folding until it comes together again. Once the eggs are in, drizzle in that beautiful vanilla extract. Mix just until you can’t see any streaks of white or yellow left. We don’t want to overwork it now!
Technique for Shaping Perfect Baked Vanilla Dough Twists
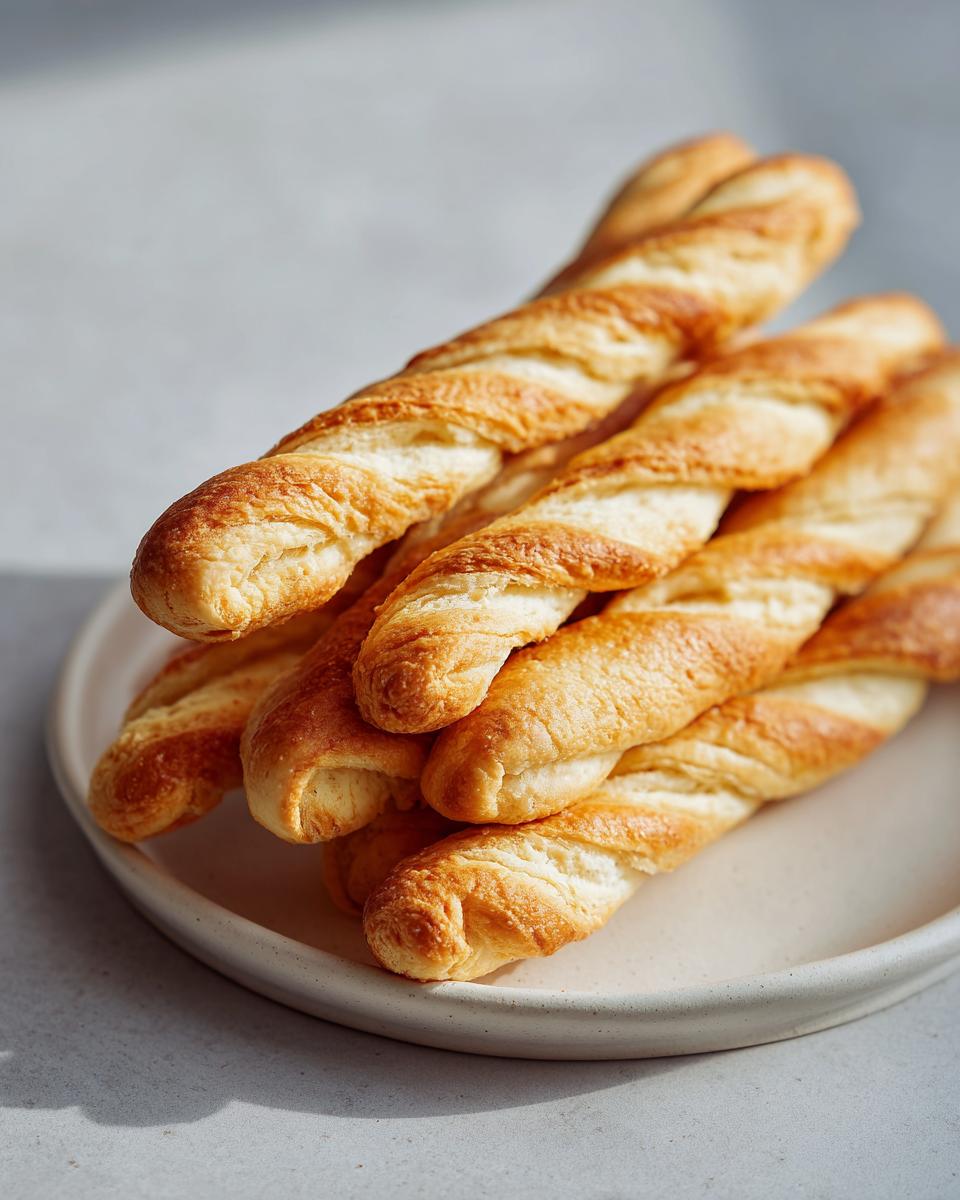
Now for the fun part! Take a small piece of dough—about the size of a large walnut—and roll it between your palms into a rope, maybe six or seven inches long. Don’t make the ropes too thick, or the center won’t bake evenly. Take your rope and gently cross the ends over each other once to make a simple twist. Pinch the ends together firmly so they don’t unravel in the oven. Place these shaped sweet dough twists onto your prepared baking sheet. If you find the dough tearing, it means it cooled too much; just warm it slightly in your hands for a second!
Baking Instructions for a Crisp Finish
We are so close to enjoying these fantastic Baked Vanilla Dough Twists! First things first, make sure your oven is preheated. I like to run mine a little hotter than most recipes call for—around 375 degrees Fahrenheit (or 190 Celsius) works perfectly for me. This higher heat helps set the outside quickly, giving us that light crispness we are aiming for. Oven temperature accuracy is important for baked goods.
Place your shaped dough twists on a baking sheet lined with parchment paper. You want about an inch between each one, as they puff up just a little bit. Pop them into the hot oven and set a timer for about 12 to 15 minutes. You’re looking for a beautiful, pale golden color on the surface. They shouldn’t be dark brown; we want that gentle hue that signals a tender interior. When they look lightly set and feel firm when you gently tap them, they are ready to come out! For more baking tips, check out my zucchini bread recipe for comparison.
Why You Will Love This Easy Baked Vanilla Dough Twists Recipe
Seriously, these Baked Vanilla Dough Twists are going to become a staple in your rotation. They are uncomplicated, fast, and deliver maximum cozy flavor with minimal effort. You truly can’t beat a homemade vanilla dessert that comes together in under an hour!
- Super fast prep time—ready for the oven in about 20 minutes!
- Uses simple, accessible pantry ingredients.
- Delivers a wonderfully satisfying texture: crisp outside, soft inside.
- Makes a perfect batch of 12 for sharing (or hoarding!).
Equipment Needed for Making Baked Vanilla Dough Twists
You don’t need a massive kitchen full of fancy gadgets to make these Baked Vanilla Dough Twists, which is part of why I love them so much! Most of what you need is probably already sitting in your drawers. Having the right tools just makes the process smoother, especially when you are working with a slightly sticky dough like this one.
- A small to medium saucepan for heating the initial mixture.
- A sturdy wooden spoon or silicone spatula for mixing the dough when it’s hot.
- Mixing bowls—one for the initial heating and one larger one for incorporating the eggs later.
- A rolling surface or clean countertop for shaping the ropes.
- A baking sheet, preferably lined with parchment paper or a silicone mat for easy cleanup.
- Measuring cups and spoons—accuracy matters when dealing with quick doughs!
Storing and Reheating Your Homemade Baked Vanilla Dough Twists
If you manage to have any of these delicious Baked Vanilla Dough Twists left over—which is a major achievement, by the way—you want to make sure you store them correctly so they keep that wonderful texture. Since these are a cooked dough and not heavily glazed, they are pretty sturdy, but humidity is the enemy of crispness! You really want to avoid putting them in an airtight container right away, especially if you dusted them with powdered sugar.
The best way to keep them fresh is at room temperature, but make sure they are completely cooled before storing. If you prefer them warm, reheating is super simple, and it brings back that fresh-from-the-oven delight. Don’t try to freeze these; the texture really suffers when thawed. For more simple sweet treats, check out my recipe for baked pears.
| Storage Method | Duration | Reheating Tip |
| Airtight Container (Room Temp) | Up to 3 days | A few minutes in a 300°F oven. |
| Loose Paper Bag (Room Temp) | 1-2 days | Microwave for 10 seconds if you need them soft instantly. |
| Freezing | Not Recommended | The texture gets spongy quickly. |
Frequently Asked Questions About Baked Vanilla Dough Twists
I get so many questions about these Baked Vanilla Dough Twists because they are so versatile, but people sometimes worry about messing up the quick dough process. Don’t stress! Here are the answers to the most common things I hear from fellow bakers.
Can I make the dough ahead of time for Baked Vanilla Dough Twists?
You absolutely can prepare the dough base before you add the eggs and vanilla. Once you have that initial cooked dough ball, wrap it tightly in plastic wrap and pop it in the fridge for up to two days. When you’re ready to bake, let the dough sit on the counter for about 30 minutes to warm up slightly, then proceed with mixing in the eggs and vanilla as usual. It makes weekend baking so much easier!
What is the best way to achieve a crisp exterior on my Baked Vanilla Dough Twists?
The crisp exterior comes down to two things, in my experience. First, make sure your oven is fully preheated to 375°F—don’t open the door early! Second, when you are rolling your ropes, try to make them slightly thinner than you think you should. Thinner ropes bake faster and dry out just enough on the outside while staying tender inside. A light dusting of powdered sugar after cooling helps too, but the heat is the real secret weapon for that light crunch on these sweet dough treats. Understanding the science behind dough hydration can also help with texture; look into general dough hydration principles.
Are there simple flavor variations for these sweet dough twists?
Oh, yes! These vanilla dessert twists are a fantastic base for experimentation. If you want to jazz them up without changing the core recipe, try these easy additions when you mix in the vanilla: add a teaspoon of fresh lemon or orange zest right in with the eggs, or maybe a quarter teaspoon of ground cardamom or nutmeg along with the flour. It completely changes the profile while keeping the same wonderful texture! If you enjoy citrus flavors, you might also like my recipe for cranberry orange gin smash.
Sharing Your Baked Vanilla Dough Twists Experience
Now that you’ve got your own batch of these wonderful Baked Vanilla Dough Twists cooling on the rack, I just have to know how they turned out for you! Honestly, watching you create something so simple and delicious in your own kitchen is the best part of sharing these recipes.
Did you dust them with powdered sugar like I suggested? Or maybe you tried one of those flavor swaps I mentioned? Don’t be shy! Head down to the comments below and tell me what you thought. A quick star rating lets me know if this recipe is officially making the family favorites list at your house, too. And if you snapped a picture of your beautiful twists, tag me on social media! I absolutely love seeing your homemade creations. Happy baking, friends!
Print
5 Amazing Baked Vanilla Dough Twists
- Total Time: 35 minutes
- Yield: 12 twists
- Diet: Vegetarian
Description
Enjoy these Sweet Baked Vanilla Dough Twists, a simple yet satisfying homemade treat.
Ingredients
- Flour
- Water
- Butter
- Sugar
- Salt
- Eggs
- Vanilla extract
Instructions
- Combine water, butter, sugar, and salt in a saucepan and heat until dissolved.
- Stir in flour until a dough forms.
- Remove from heat and allow the dough to cool slightly.
- Mix in the eggs and vanilla extract.
- Shape the dough into twists.
- Bake the twists until the outside is lightly crisp.
Notes
- Dust with powdered sugar if desired.
- Prep Time: 20 minutes
- Cook Time: 15 minutes
- Category: Dessert
- Method: Baking
- Cuisine: American
Nutrition
- Serving Size: 1 twist
- Calories: 180
- Sugar: 8g
- Sodium: 120mg
- Fat: 7g
- Saturated Fat: 4g
- Unsaturated Fat: 3g
- Trans Fat: 0g
- Carbohydrates: 25g
- Fiber: 1g
- Protein: 4g
- Cholesterol: 35mg