Skip to content
When you’re racing out the door but still need a breakfast that actually fills you up, you absolutely need these Banana Oat Pancakes in your life. Seriously, we’re talking about a hearty, wholesome meal that comes together faster than waiting for the toast to pop. I’m Anna Kowalska, and here I share tried-and-true homemade recipes that you and your family will love—everything is made with heart and flavor, because who has time for complicated cooking on a Tuesday morning?
I developed this recipe because my mornings were chaos. I needed something quick, something that didn’t rely on processed white flour, and something my picky eaters would actually devour. These are naturally sweet, packed with fiber from the oats, and they bake up beautifully golden brown in minutes. I promise this recipe will transform your weekday breakfast routine.
Jump to:
Gathering What You Need for Banana Oat Pancakes
Okay, so the best part about these Banana Oat Pancakes is that the ingredient list is super short. You probably have most of this stuff sitting in your pantry right now! I always lay everything out before I start mixing—it makes the whole process so smooth, and you won’t forget that pinch of salt that makes all the difference.
If you’re ready to whip up a batch, grab your measuring cups and let’s check the list. Trust me, having these few simple things on hand means a delicious, healthy breakfast is just minutes away.
Essential Ingredients for Banana Oat Pancakes
For the best flavor and texture, pay attention to these details:
- One-half cup of oat flour. This is the base!
- One small banana, and I mean *very* ripe—the browner the better for sweetness.
- One cup of coconut milk. If you don’t have coconut milk, regular milk works fine, but I love the richness the coconut adds.
- One teaspoon of coconut oil, melted.
- One-half teaspoon of baking soda. This gives them that little lift!
- A tiny pinch of salt. Don’t skip this; it wakes up the banana flavor.
Equipment Needed for Perfect Banana Oat Pancakes
You don’t need any fancy gadgets for this recipe, which is why I love it for busy mornings. You’ll want:
- A medium mixing bowl for the wet stuff.
- A separate bowl or just use a whisk for combining everything.
- A fork or a potato masher for getting that banana nice and smooth.
- A sturdy non-stick pan or griddle.
- A rubber spatula for flipping.
Step-by-Step Guide: Making Your Banana Oat Pancakes
This process is so fast, I swear, you’ll be sitting down to eat before your coffee has even cooled off. The key here, just like with any pancake, is not to fuss with the batter too much once the flour goes in. We want fluffy, tender pancakes, not tough little hockey pucks!
Combining the Wet Ingredients
First things first, grab that very ripe banana. You want it practically brown on the peel—that means maximum sweetness and it will mash up like butter. Put it right into your mixing bowl and mash it thoroughly with a fork until there aren’t many big lumps left. I like a few small ones, honestly, for texture, but you do you!
Next, pour in the cup of coconut milk and the teaspoon of melted coconut oil. Whisk this together until it looks uniform and creamy. Since the oil is melted, it incorporates nicely into the milk. This is the sweet, moist base for our entire breakfast, so make sure it’s well combined before moving on to the dry stuff.
Mixing the Dry Components into Banana Oat Pancakes Batter
Now, take your oat flour, baking soda, and that essential pinch of salt, and dump them right into the wet mixture. Here is where you need to listen closely: Mix it until everything is *just combined*. I mean it! You’ll still see a few streaks of flour, and that is totally okay—in fact, it’s perfect for these Banana Oat Pancakes.
If you overmix oat flour batter, it gets really gummy and dense, and we definitely don’t want that texture. A few quick folds with a spatula should do the trick. Stop mixing the second you don’t see any dry pockets of flour. Trust your gut on this one; five seconds of mixing after everything looks mostly incorporated is usually plenty.
Cooking Your Banana Oat Pancakes to Golden Perfection
Get your pan or griddle heating up over medium heat. You don’t want it scorching hot, or the outside will burn before the inside cooks, especially since these are a bit heartier than regular flour pancakes. Give it a very light grease—a tiny bit of butter or oil on a paper towel is usually enough.
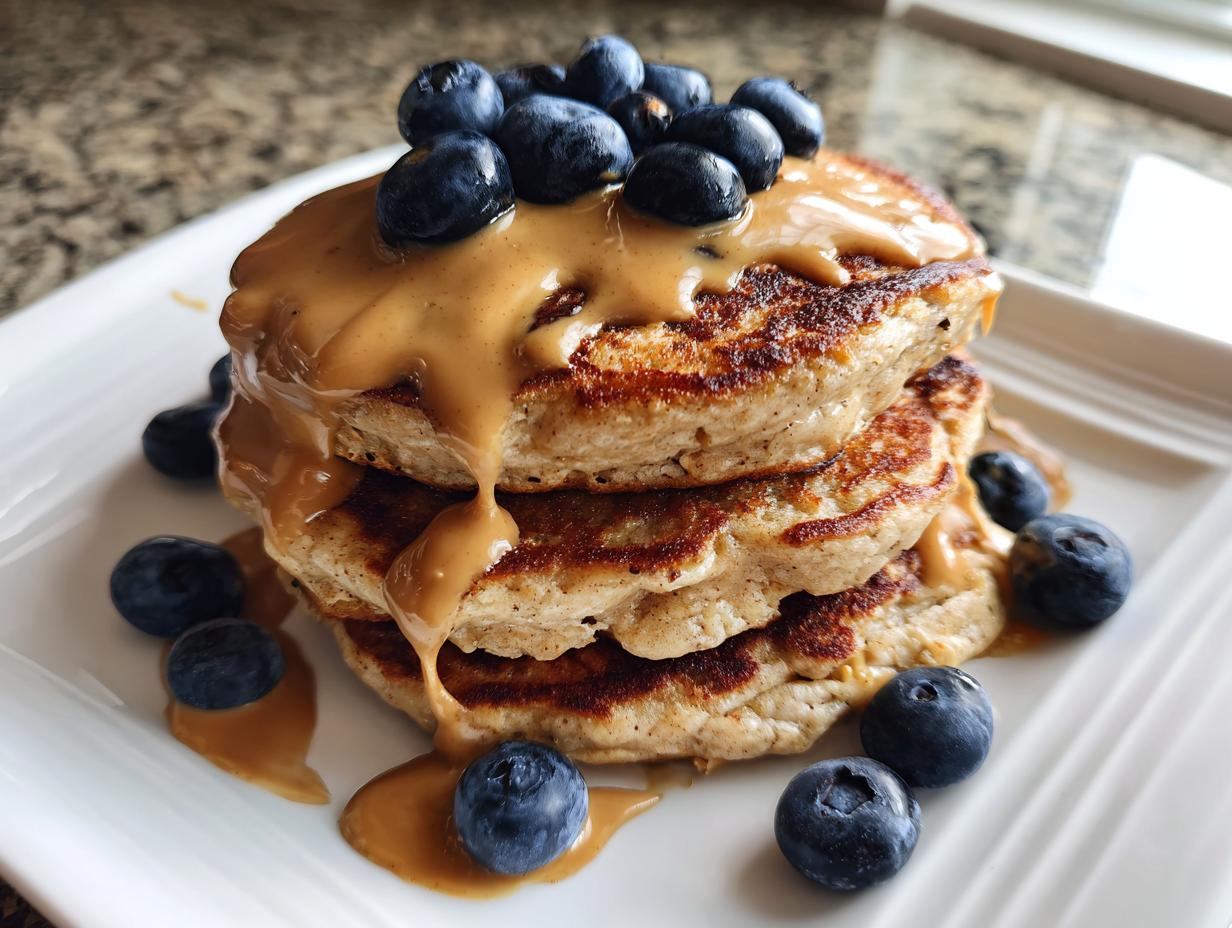
Using a tablespoon measure, dollop about two tablespoons of batter onto the hot surface for each pancake. Keep them small so they are easy to flip! Now, watch them like a hawk. You’re waiting for two things: you’ll see little bubbles start to pop up all over the surface, and the edges of your Banana Oat Pancakes will start to look dry and set. That’s your cue! Slide that spatula underneath, flip them over with confidence, and cook the second side until it’s a beautiful, deep golden brown. They usually only take about two minutes per side.
Tips for Achieving Expert-Level Banana Oat Pancakes
Even though these are designed to be super easy, a few little tricks can take your Banana Oat Pancakes from “good” to “I can’t believe these are so healthy!” I learned these things the hard way, usually by ending up with a slightly gummy first batch. But once you know the secrets, you’ll nail it every single time. It’s all about respecting the ingredients!
Choosing the Best Banana for Your Banana Oat Pancakes
Listen, you cannot cheat on the banana ripeness here. If you use a yellow banana, your pancakes will taste okay, but they won’t be *amazing*. You need that banana to be covered in brown spots—practically black! Why? Because as the banana ripens, the starches turn into pure sugar. That intense sweetness means I don’t have to add any refined sugar to the batter, and it gives the Banana Oat Pancakes that incredible, almost caramelized flavor when they hit the hot pan. Plus, super ripe bananas mash up smoother, which is half the battle.
Adjusting Batter Consistency
Sometimes my bananas are giant, and sometimes they are tiny, so the wet-to-dry ratio can get a little wonky. That’s fine! This batter is forgiving. If you mix everything and it looks like thick paste—almost like cookie dough—just whisk in another tablespoon or two of coconut milk until it pours slowly off your spoon. If it looks too runny, like water, add just one more teaspoon of oat flour at a time until it thickens up slightly. Remember, you don’t want it thin like crepe batter; it needs enough body to hold that banana shape on the griddle!
Serving Suggestions for Your Healthy Pancakes
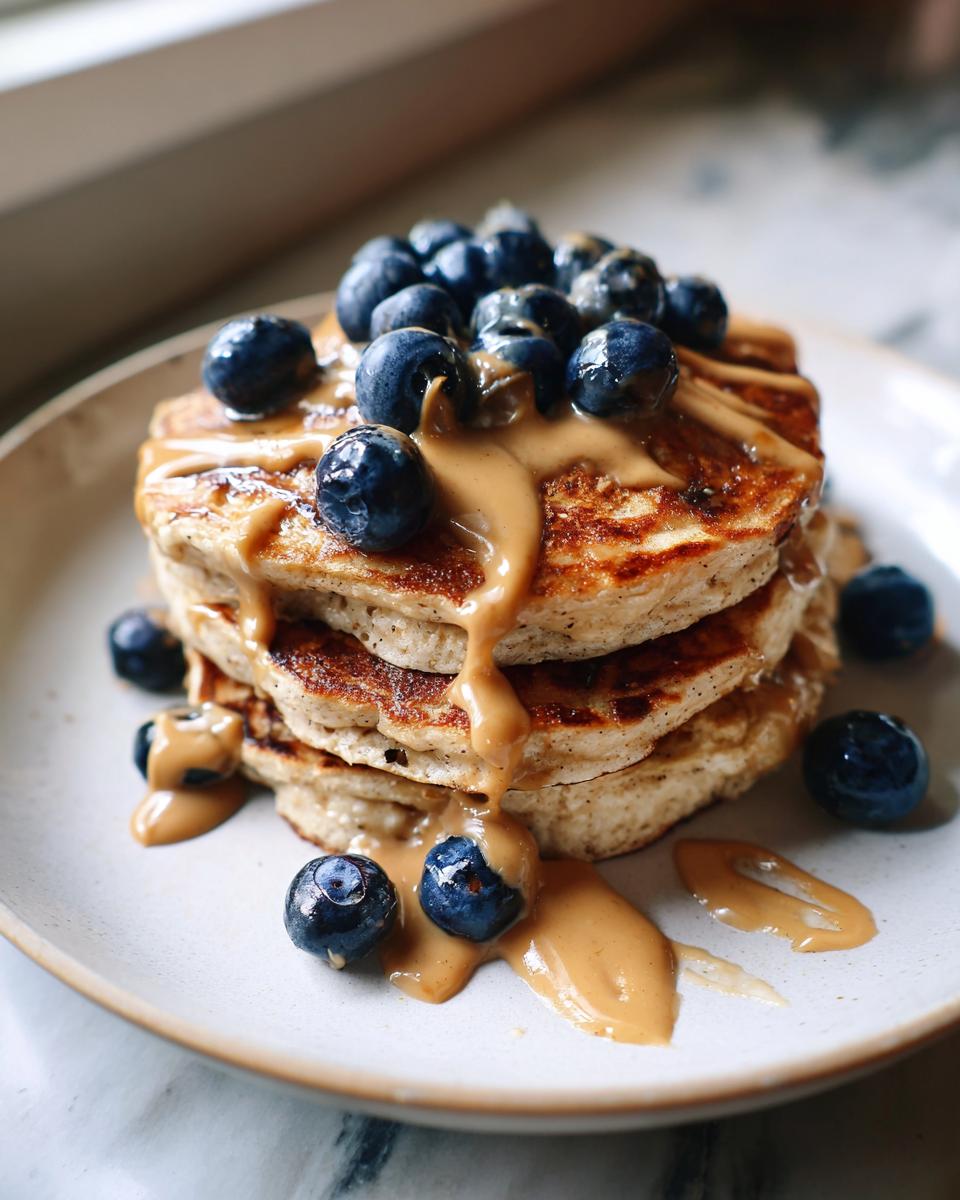
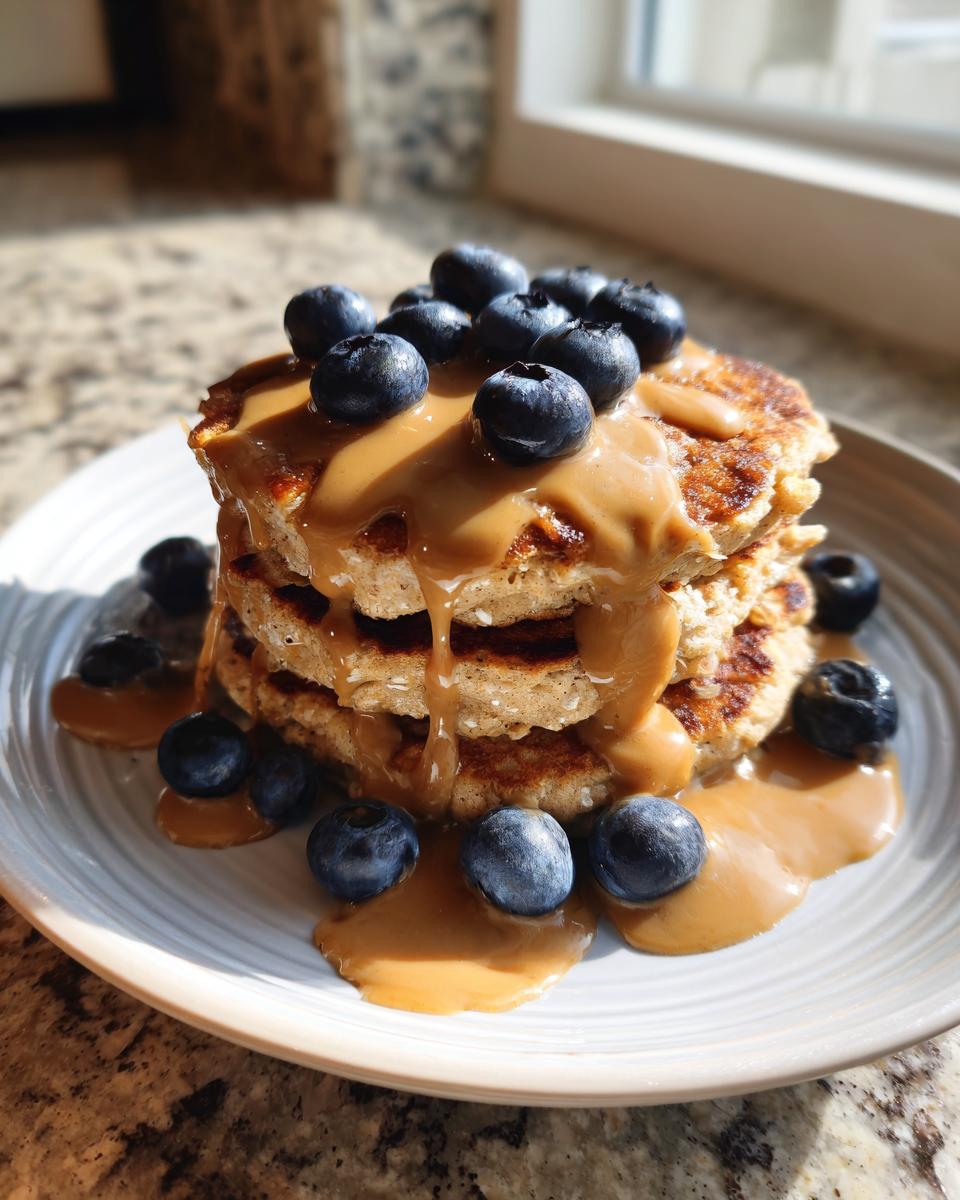
Since these pancakes are already packed with natural sweetness from the banana, you don’t need to drown them in sugary syrup to make them taste special. My family loves keeping the toppings wholesome and colorful. This way, we get a little extra nutrition in every bite, and it looks beautiful on the plate, which is important when serving little ones!
It’s all about balance. A little fat, a little fruit, and maybe a tiny drizzle of pure sweetness make for a perfect stack. Seriously, the texture of the oat pancake holds up beautifully under heavier toppings.
Simple Topping Combinations
Here are a few go-to combinations that we rotate through almost weekly:
- A generous spoonful of creamy peanut butter spread right on top. It melts slightly and adds wonderful protein.
- A handful of fresh berries—blueberries or sliced strawberries are my favorites. They add a nice, bright tartness.
- A very light drizzle of pure maple syrup. Just a touch for that classic pancake flavor.
- A sprinkle of chopped walnuts or pecans if you have some on hand for an added crunch.
Storing and Reheating Your Banana Oat Pancakes
Even though these are so quick, sometimes you just can’t eat all eight pancakes in one go. Don’t throw leftovers away! These freeze beautifully, and having a stack ready for a busy morning is a lifesaver. The key is making sure they are completely cooled before you wrap them up; moisture trapped inside creates soggy pancakes the next day.
If you’re just chilling them for a couple of days, the fridge is fine, but for longer storage, the freezer is your best friend. It keeps the texture much better, honestly.
Proper Storage Methods
Once your pancakes are completely cool—and I mean room temperature cool—you need to stack them correctly to prevent sticking. I always put a small square of wax paper or parchment paper between each pancake before I stack them up. Then, place the entire stack into a heavy-duty freezer bag or an airtight container. They’ll keep well in the refrigerator for about three days. For the freezer, they are good for up to three months!
Reheating Leftover Pancakes
Reheating is super simple, but you have to be gentle so they don’t dry out. You can use the microwave, but only if you’re in a huge rush—about 20 seconds usually does the trick. My preferred method is the toaster oven or a regular oven set low, around 300 degrees Fahrenheit. Pop them on a baking sheet for about five minutes. This warms them through gently and actually brings back a little bit of that fresh-off-the-griddle crispness to the edges. Delicious!
| Storage Location | Maximum Time | Preparation Note |
|---|---|---|
| Refrigerator | 3 Days | Airtight container, stacked with parchment paper |
| Freezer | Up to 3 Months | Wrap individually or stack with parchment, then freeze in a sealed bag |
Frequently Asked Questions About Banana Oat Pancakes
I get so many questions about tweaking this recipe, and that’s wonderful! It means you’re making them often. These healthy pancakes are really versatile, but sometimes you have to make small swaps based on what you have on hand. Here are the top three things people ask me when they are trying to get their easy breakfast just right.
Can I use whole wheat flour instead of oat flour?
You absolutely can substitute whole wheat flour for the oat flour, but be prepared for a texture change! Oat flour creates a slightly softer, more tender crumb because it lacks the strong gluten structure of wheat flour. If you use whole wheat, your pancakes will be a bit denser and chewier. I recommend only swapping out half the oat flour for whole wheat the first time you try it, just to see how you like the bite. It’s a great way to boost the fiber content even more!
How can I make these pancakes sweeter without added refined sugar?
That’s my favorite area to talk about! Since we use very ripe bananas, they provide a lot of natural sweetness already. If you still want a little more punch, don’t reach for the white sugar. Instead, try adding a teaspoon of pure maple syrup or a tablespoon of unsweetened applesauce right into the wet ingredients when you mix everything together. Both of those additions keep the pancakes moist while boosting the sweetness level naturally. Cinnamon also helps trick your brain into thinking things are sweeter than they are!
What is the best way to mash the banana?
Honestly, the best way is the way that gets the job done fastest for you, especially when you are trying to make a quick breakfast! I usually use a sturdy fork right in a small bowl. Press down hard and twist a bit until you break up all the large chunks. If you are making a big batch, a potato masher works wonders. If you are really in a rush, you can pulse it once or twice in a food processor, but stop immediately! You don’t want a liquid puree; you want a thick, slightly chunky mash to give those pancakes some body.
Estimated Nutritional Data for Banana Oat Pancakes
Now, I’m not a nutritionist, so please take these numbers with a grain of salt—or maybe a pinch of baking soda! These figures are just rough estimates based on the ingredients listed, assuming you use standard coconut milk and average banana size. Since we are focusing on simple, wholesome ingredients, these are generally a fantastic, filling choice for a healthy breakfast.
These estimates are calculated for the entire yield (about 8 small pancakes), divided into four servings of two pancakes each. Your exact values will change based on the size of your banana and the specific brand of milk you use, of course!
| Nutrient | Per Serving (2 Pancakes) |
|---|---|
| Calories | Approx. 180 kcal |
| Fat | Approx. 7g |
| Carbohydrates | Approx. 26g |
| Protein | Approx. 5g |
| Fiber | Approx. 4g |
Disclaimer: These are estimates only and should not replace professional nutritional advice. Read more here.
Share Your Banana Oat Pancakes Experience
I put my heart into making sure these Banana Oat Pancakes work perfectly for your busy mornings. If you made them and loved that quick, hearty breakfast, please let me know! Drop a comment below telling me how they turned out for you, give the recipe a quick rating, and share this favorite with a friend who needs an easier breakfast routine!
Print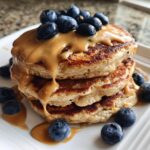
Amazing 8-Ingredient Banana Oat Pancakes
- Total Time: 15 minutes
- Yield: About 8 small pancakes 1x
- Diet: Vegetarian
Description
Banana Oat Pancakes. These simple pancakes use oat flour for a hearty breakfast. They are quick to make and taste great with your favorite toppings.
Ingredients
- 1/2 cup oat flour
- 1 small banana, mashed
- 1 cup coconut milk
- 1 teaspoon coconut oil, melted
- 1/2 teaspoon baking soda
- A pinch of salt
Instructions
- Combine mashed banana, coconut milk, and melted coconut oil. Mix well.
- Add the oat flour, baking soda, and salt to the wet ingredients. Mix until everything is just combined. Do not overmix.
- Heat a pan over medium heat. Grease lightly if needed.
- Pour about 2 tablespoons of batter per pancake onto the hot pan.
- Cook until bubbles form on the surface and the edges look set. Flip and cook the other side until golden brown.
- Serve immediately topped with peanut butter and berries.
Notes
- Use very ripe bananas for the best flavor and sweetness.
- Adjust coconut milk quantity if the batter seems too thick or too thin.
- These pancakes work well for a quick weeknight breakfast.
- Prep Time: 5 minutes
- Cook Time: 10 minutes
- Category: Breakfast
- Method: Pan-Frying
- Cuisine: American
Nutrition
- Serving Size: 2 pancakes
- Calories: Estimate needed
- Sugar: Estimate needed
- Sodium: Estimate needed
- Fat: Estimate needed
- Saturated Fat: Estimate needed
- Unsaturated Fat: Estimate needed
- Trans Fat: Estimate needed
- Carbohydrates: Estimate needed
- Fiber: Estimate needed
- Protein: Estimate needed
- Cholesterol: Estimate needed