Skip to content
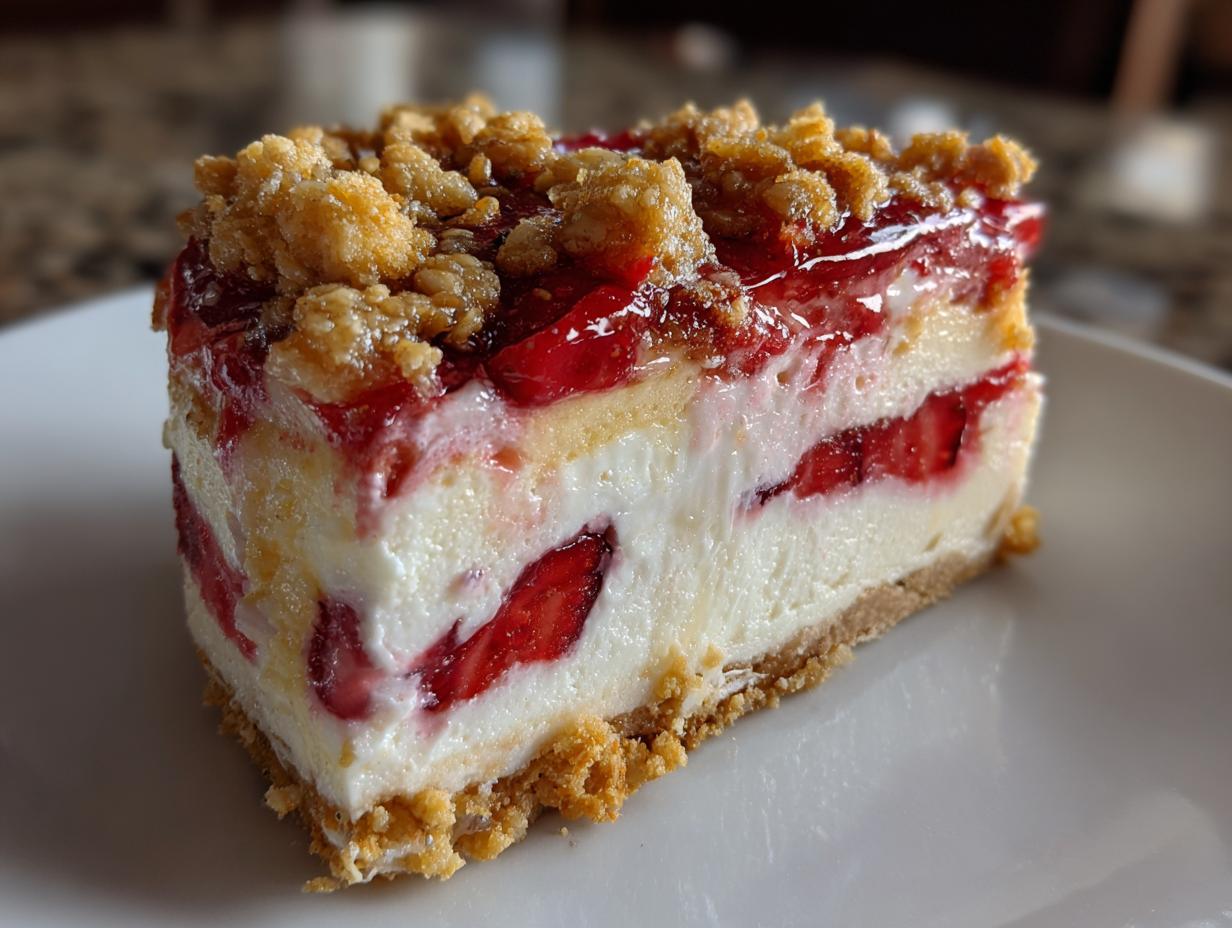
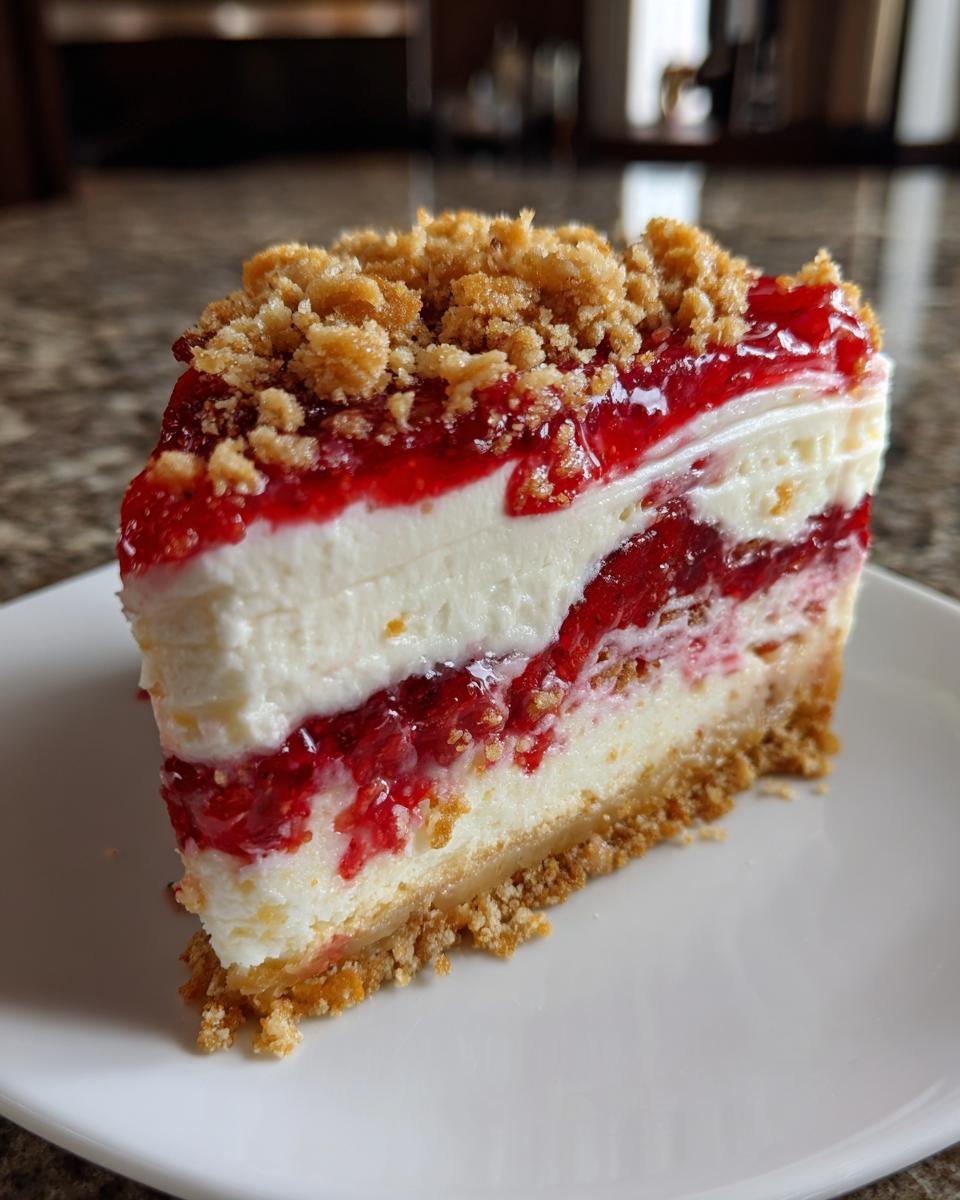
If you’ve been searching high and low for that perfect balance between creamy, dreamy filling and that irresistible, salty-sweet crunch, then your search is over! I’m Anna Kowalska, and here I share tried-and-true homemade recipes that you and your family will love—everything is made with heart and flavor. I’ve spent years tweaking dessert recipes, and trust me, perfecting the texture is everything. That’s why I’m so excited to share my secrets for the Best Berrylicious Strawberry Crunch Cheesecake. This isn’t your typical heavy, dense cake; this one is light, bright, and absolutely bursting with fresh berry flavor, all thanks to a few simple tricks I learned along the way.
This no-bake wonder is the showstopper for any summer gathering or just a Tuesday night when you need a little joy. We’re skipping the oven, which keeps things cool, but we’re not skipping on flavor or texture, I promise!
Why This Best Berrylicious Strawberry Crunch Cheesecake Recipe Stands Out
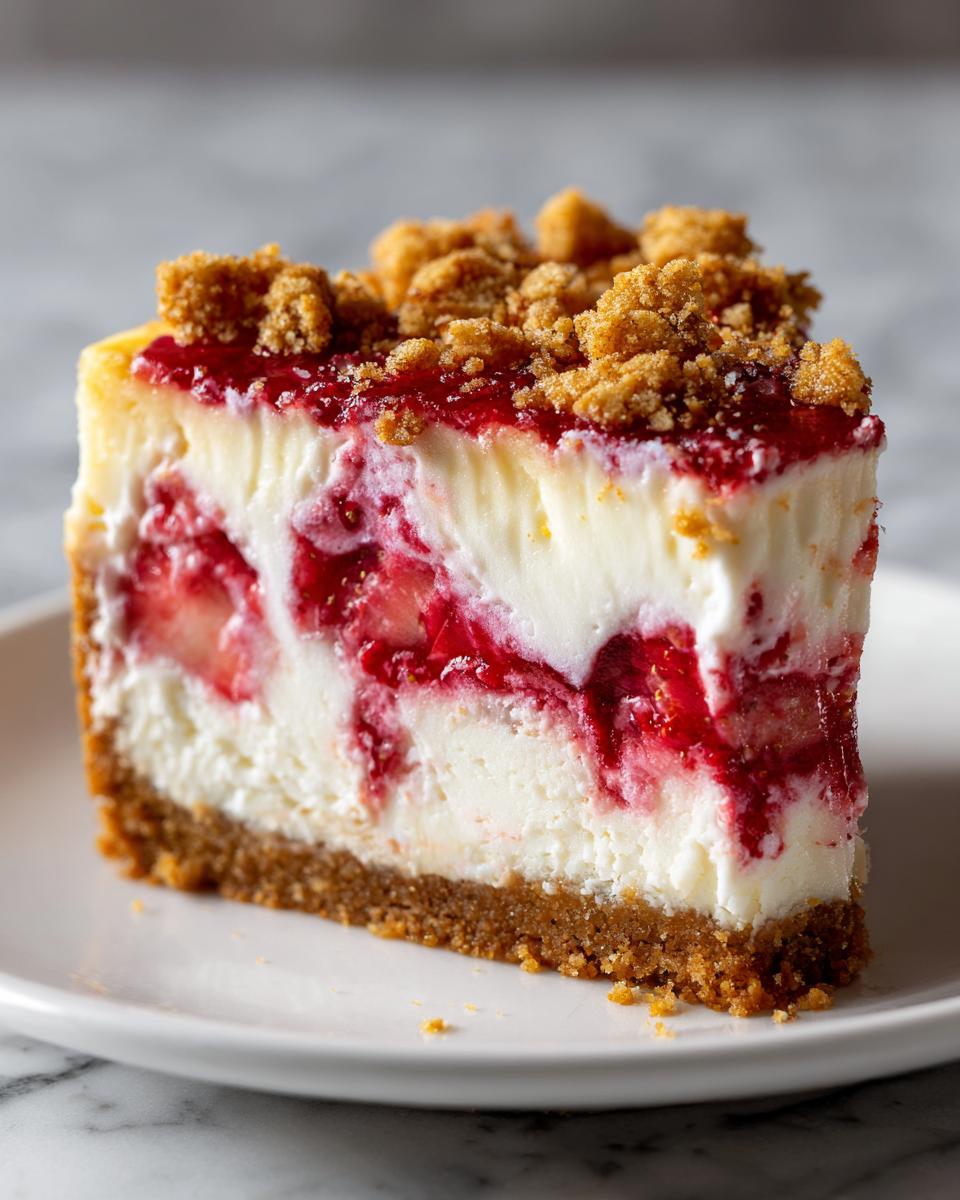
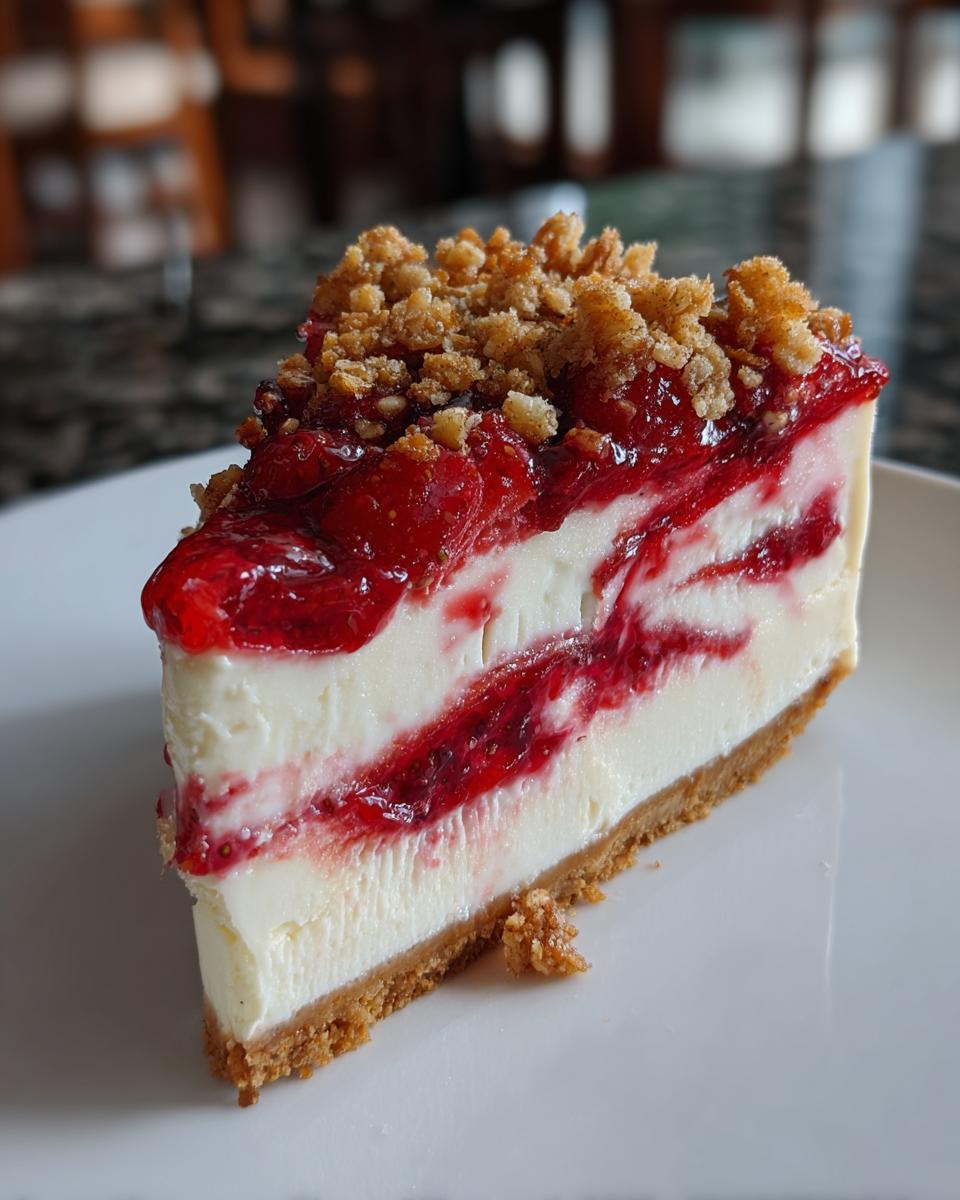
What makes this Best Berrylicious Strawberry Crunch Cheesecake truly unforgettable is the texture contrast. Most cheesecakes nail the creamy part, but they lack that exciting element. My recipe layers three distinct textures: the buttery, slightly salty vanilla cookie crust, the silky-smooth, barely-sweetened cream cheese filling, and that signature crunchy topping. The freeze-dried strawberries in the crunch layer are the real game-changer; they intensify that strawberry punch without adding extra liquid that could ruin the set. It’s all about building layers of flavor and crunch that make every single bite interesting.
Jump to:
The Essential Components for Best Berrylicious Strawberry Crunch Cheesecake
Okay, let’s talk ingredients! Because this is a no-bake recipe, the quality and preparation of what goes in really matter. If you use ingredients that are too cold or too wet, you’ll end up with a soupy mess, and nobody wants that! When I gather my supplies, I separate them into four main groups. This keeps my assembly line moving fast when it’s time to put it all together. Remember, even though this is easy, it needs the right building blocks.
Building the Vanilla Cookie Crust Base
For the crust, we need that classic vanilla cookie flavor—think Nilla Wafers or even good quality graham crackers if you’re feeling traditional. You need butter to bind it all up, and just a tiny bit of sugar to help it crisp up nicely when it chills. Make sure your butter is melted but not hot when you mix it in, or you’ll melt your cookies into dust before they even hit the pan!
Crafting the Creamy Filling
This is where the magic happens, and temperature is critical here. Your cream cheese absolutely has to be softened—and I mean *truly* soft, like room temperature soft. That’s the secret to avoiding those annoying little lumps! We use granulated sugar for sweetness, lemon juice to cut through the richness, and vanilla for depth. The real lift comes from heavy whipping cream whipped separately to stiff peaks. That’s what keeps the filling light and airy instead of heavy!
Preparing the Sweet Strawberry Layer
We use fresh strawberries here, cooked down just slightly with sugar and lemon. Cooking them gently concentrates that gorgeous berry flavor. If you want an extra-firm layer—especially if you live somewhere humid—you can add a little unflavored gelatin. I only use it when I’m making the cake ahead of time, otherwise, the fresh puree sets up just fine on its own!
Creating the Signature Strawberry Crunch Topping
This topping is what makes it “crunch!” We take more crushed vanilla cookies, but here’s where we bring in the secret weapon: freeze-dried strawberries. You crush those right up with the cookies and a little more melted butter. The freeze-dried fruit explodes with flavor when you bite into it, giving you that intense strawberry hit without making the crunch soggy. Don’t skip this step!
Equipment Required for Best Berrylicious Strawberry Crunch Cheesecake Success
Since this is a no-bake dessert, we don’t need the oven, but we do need a few key tools to make sure everything comes together smoothly. Don’t worry; you likely have most of this stuff already! Having everything ready before you start mixing means you can move fast when the cream cheese is perfectly soft.
- A 9-inch springform pan—this is non-negotiable for easy release!
- A sturdy electric mixer (handheld or stand mixer) for the filling.
- A medium saucepan for cooking down the strawberries.
- A food processor or sturdy zip-top bag and rolling pin for crushing cookies.
- A rubber spatula for gently folding ingredients.
Step-by-Step: Making the Best Berrylicious Strawberry Crunch Cheesecake
Alright, now for the fun part—putting this beautiful dessert together! We need to move with a little purpose here, especially once the cream cheese is out, but don’t panic. I’ll walk you through exactly where to slow down and where to speed up to guarantee that perfect texture. Following these steps, especially our three big tips, will make sure you get that magazine-worthy result!
Tip 1: Perfecting the Crust Foundation
First things first, the base! In a bowl, mix up your crushed vanilla cookies, the melted butter, the three tablespoons of sugar, and that teaspoon of vanilla. You want it to look like wet sand—just moist enough to hold together when you squeeze a bit. Now, press this mixture firmly into the bottom of your 9-inch springform pan. Use the bottom of a measuring cup to really pack it down tight; a loose crust crumbles when you slice it later! Once it’s packed, pop that pan into the fridge to chill for a good 20 minutes. My first big tip is about timing: Make sure your cream cheese is fully room temperature before you even start the crust. Cold cream cheese means lumps, and we are aiming for silkiness!
Tip 2: Achieving the Ideal Cheesecake Filling Texture
While the crust chills, let’s tackle the filling. Beat your softened cream cheese and one cup of sugar until it’s completely smooth—no lumps allowed! Then mix in the lemon juice and vanilla. Now for the heavy cream. You need to whip that cream separately until it holds stiff peaks—it should look like shaving cream. Here’s Tip Number Two: When you add the whipped cream to the cream cheese mixture, fold it in gently using a rubber spatula. Don’t stir or beat it! Folding keeps all those lovely air bubbles trapped inside, which is what makes the no-bake filling so light and fluffy instead of dense. Once that’s combined, we move to the strawberry swirl.
Next, cook your strawberries, sugar, and lemon juice until they soften up a bit. If you like a smoother swirl, blend half of that mixture. If you’re using gelatin, stir it in now while it’s warm. Now, spread half your filling over that nice chilled crust. Spoon half the strawberry mix over the top, and use a knife to swirl them together lightly—don’t overmix, or you lose the layers! Repeat with the remaining filling and strawberry mix. Back into the fridge it goes for a quick 30-minute set.
Tip 3: Assembling and Setting the Best Berrylicious Strawberry Crunch Cheesecake
While that’s setting up, quickly make your crunch topping by mixing the crushed cookies, the crushed freeze-dried strawberries, and the last bit of melted butter. Once that 30 minutes is up, you should be able to gently sprinkle and press that crunch mixture onto the edges of the cheesecake. Don’t cover the whole top; we want that beautiful swirl visible! And here is Tip Number Three, perhaps the most important for a no-bake recipe: You must chill this cheesecake for a minimum of 4 hours, but honestly, overnight is always best. This allows the filling to firm up completely and the flavors to meld. If you cut it early, it will weep!
Tips for the Best Berrylicious Strawberry Crunch Cheesecake Results
I learned a few things the hard way over the years making this berry cheesecake, so let me save you some trouble! Always use the full 24 ounces of cream cheese called for; trying to stretch it makes the final texture weak. If you’re worried about the filling being too sweet, just hold back a little sugar from the cream cheese mixture and add it to the strawberry layer instead—that brightens everything up beautifully.
Also, when you whip that heavy cream, go for stiff peaks! If you stop too soon, you’ll have runny cream mixed into your filling, and it won’t set right. This recipe is designed to be firm enough to slice cleanly without a water bath, but only if you respect the chilling time. Trust me on the overnight chill; it’s worth the wait for the perfect slice! For more dessert inspiration, check out my collection of desserts.
Storing and Serving Your Cheesecake
This beautiful berry cheesecake is definitely best served cold! Since it’s a no-bake recipe, we want to keep that filling firm and refreshing. It’s a dessert that actually tastes better the next day once all those strawberry flavors have had time to really sink into the cream cheese layer. You don’t need to reheat anything, of course, but chilling is everything!
Storage and Reheating Instructions for Best Berrylicious Strawberry Crunch Cheesecake
Keep the cheesecake stored tightly covered in the refrigerator. It holds up wonderfully for about four days, which is great for leftovers! Make sure you keep it away from strong smells, though, as cream cheese can absorb odors easily. When you are ready to serve, just pull it out of the fridge about 10 minutes beforehand. That small amount of time takes the chill off just enough so the filling is perfectly creamy but still firm enough to hold its shape when sliced.
| Storage Method | Duration |
|---|---|
| Refrigerated (Covered) | Up to 4 days |
| Freezer (Airtight) | Up to 1 month |
Frequently Asked Questions About Your Best Berrylicious Strawberry Crunch Cheesecake
I get so many questions about this recipe because everyone wants that perfect crunch! Here are some of the things folks ask me most often when they are getting ready to bake their own strawberry crunch cheesecake.
Can I use a different type of cookie for the crust?
You absolutely can swap out the cookies, but you need to be careful about the flavor profile. Vanilla wafers are my favorite because they are mild and let the strawberry shine. If you use Oreos, make sure you scrape out the creamy filling first, or the crust will be too sweet and throw off the balance of the whole no-bake cheesecake. Gingersnaps are interesting but can overpower the berries, so test that out first! For tips on achieving perfect cookie texture in general, you might find resources on cookie crusts helpful.
Why is chilling time so important for this recipe?
Chilling time is non-negotiable for any good no-bake cheesecake, but especially this one! Because we aren’t using heat to set the structure, we rely entirely on the cold temperature to firm up the heavy cream and cream cheese mixture. If you cut it early, the filling will slump, and your beautiful layers will smear everywhere. Giving it that full 4 hours—or better yet, overnight—ensures you get those clean, perfect slices every time.
How do I ensure my strawberry layer is perfectly set?
If you are making this berry cheesecake on a really hot or humid day, that optional packet of gelatin is your best friend. If you skip the gelatin, make sure you cook your fresh strawberries down until they are quite thick—you don’t want watery puree. When you swirl it, keep your knife strokes shallow, only going about an inch deep into the filling so you don’t disturb the crust or the main body of the cream cheese layer underneath. If you are interested in learning more about the science behind setting agents like gelatin, check out this information on gelatin in desserts.
Share Your Best Berrylicious Strawberry Crunch Cheesecake Experience
I truly hope this recipe brings as much joy to your kitchen as it does to mine. Now that you know the secrets to that perfect crunch and creamy filling, I want to hear all about it! Did you use fresh raspberries instead? Did you chill it overnight? Drop a comment below and let me know how your Best Berrylicious Strawberry Crunch Cheesecake turned out. Don’t forget to leave a rating so others can find this winner! If you are looking for other great no-bake ideas, see my no-bake cheesecake recipe.
Print
Best Berrylicious Strawberry Crunch Cheesecake: 3 Great Tips
- Total Time: 4 hours 45 minutes
- Yield: 10 servings 1x
- Diet: Vegetarian
Description
Make the Best Berrylicious Strawberry Crunch Cheesecake with three key tips for an unforgettable dessert. This recipe creates a creamy cheesecake with a crunchy topping and a sweet strawberry layer.
Ingredients
- 2 cups crushed vanilla cookies or graham crackers
- 1/2 cup unsalted butter, melted
- 3 tablespoons granulated sugar
- 1 teaspoon vanilla extract
- 24 oz cream cheese, softened
- 1 cup granulated sugar
- 1 tablespoon fresh lemon juice
- 1 teaspoon vanilla extract
- 1 cup heavy whipping cream
- 2 cups fresh strawberries, hulled and sliced
- 1/4 cup granulated sugar
- 1 tablespoon lemon juice
- 1 envelope unflavored gelatin (optional)
- 1 cup crushed vanilla sandwich cookies
- 2 tablespoons freeze-dried strawberries, crushed
- 1 tablespoon butter, melted
Instructions
- Combine the crushed cookies, melted butter, sugar, and vanilla for the crust. Press this mixture firmly into the bottom of a 9-inch springform pan. Chill the crust for 20 minutes.
- Beat the softened cream cheese and sugar until smooth. Mix in the lemon juice and vanilla extract. Fold the whipped heavy cream into the mixture gently.
- Cook the sliced strawberries, sugar, and lemon juice over medium heat for 5 to 7 minutes. Blend half the mixture if you want a smoother texture. If using gelatin, dissolve it in cold water, then stir it into the warm strawberry mix.
- Spread half the cheesecake filling over the chilled crust. Add half the strawberry mixture, swirling it lightly. Repeat with the remaining filling and strawberry mixture. Chill the cake for 30 minutes.
- Mix the crushed vanilla cookies, crushed freeze-dried strawberries, and melted butter for the topping. Sprinkle this mixture around the edges of the partially set cheesecake and press lightly. Refrigerate the cheesecake for a minimum of 4 hours or overnight before serving.
Notes
- Room temperature cream cheese results in a smoother filling.
- Whip the heavy cream to stiff peaks for a light cheesecake texture.
- Chilling for at least 4 hours allows the cheesecake to set properly.
- Prep Time: 30 minutes
- Cook Time: 15 minutes
- Category: Dessert
- Method: No Bake/Chilled
- Cuisine: American
Nutrition
- Serving Size: 1 slice
- Calories: Estimate needed
- Sugar: Estimate needed
- Sodium: Estimate needed
- Fat: Estimate needed
- Saturated Fat: Estimate needed
- Unsaturated Fat: Estimate needed
- Trans Fat: Estimate needed
- Carbohydrates: Estimate needed
- Fiber: Estimate needed
- Protein: Estimate needed
- Cholesterol: Estimate needed