Skip to content
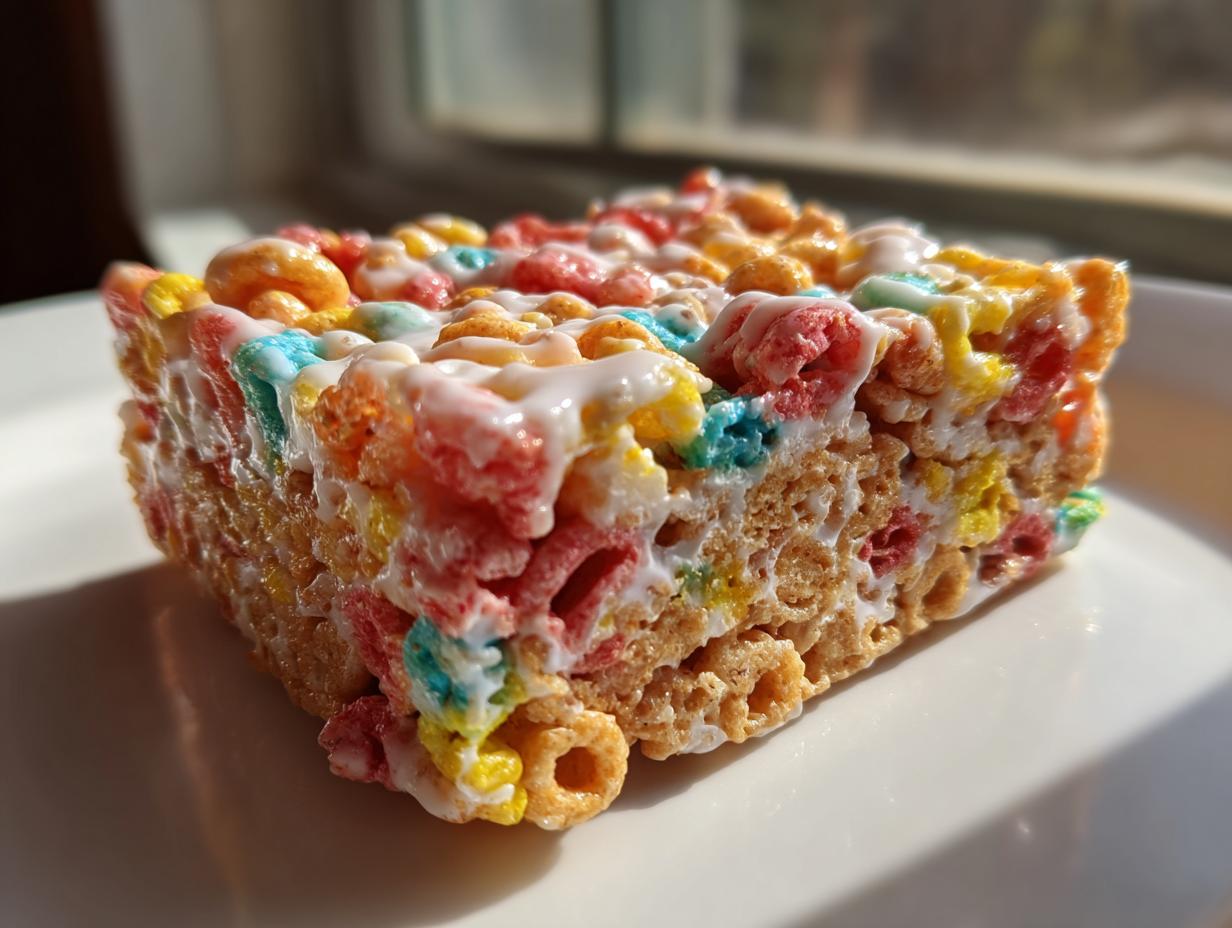
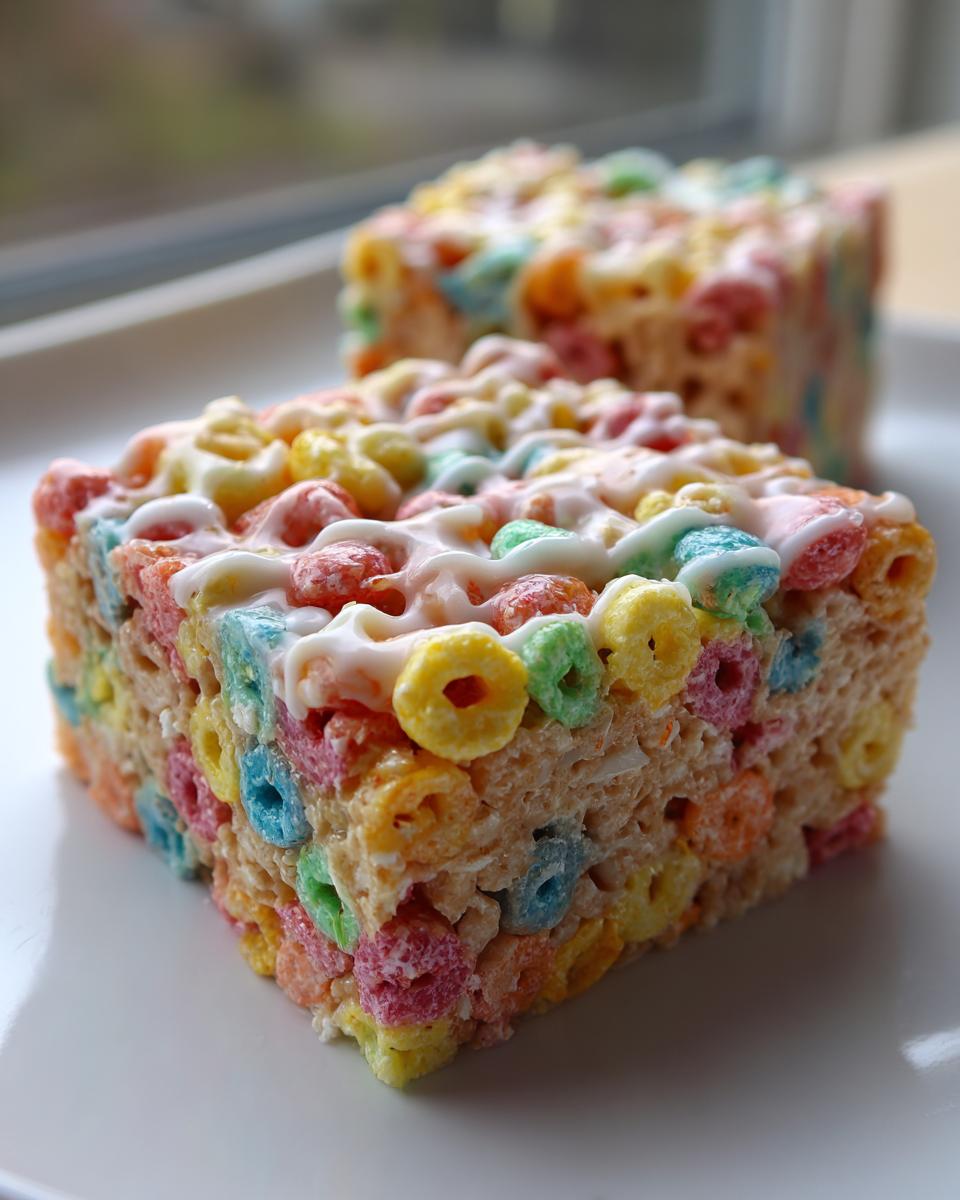
If you need a snack that screams fun but takes less than 15 minutes of active work, then these colorful cereal bars are about to become your new best friend. Seriously, who doesn’t love something bright, sweet, and wonderfully chewy without ever turning on the oven? I’m Anna Kowalska, and here I share tried-and-true homemade recipes that you and your family will love—everything is made with heart and flavor, I promise!
When I started sharing my kitchen experiments online, I realized that simple, reliable recipes were what people craved most. I test every single batch until it’s perfect, ensuring you get that guaranteed win every time you pull out your mixing bowl. That’s why these no-bake treats are always a hit; they deliver maximum joy with minimal fuss. Forget complicated steps; we are aiming for easy, delicious, and undeniably cheerful results!
Jump to:
Why You Will Love These Colorful Cereal Bars
This recipe is pure magic because it requires zero oven time—seriously, no preheating needed! They come together faster than you can decide what movie to watch. Plus, the beautiful mix of colors makes these colorful cereal bars look like they took hours of careful candy-making when they really didn’t. They are the perfect sweet treat for busy afternoons or last-minute potlucks. Trust me, they are always the first thing to disappear!
Ease of Preparation for Colorful Cereal Bars
The best part, hands down, is that this is a no-bake situation. You are literally just melting a few things on the stovetop and mixing. We are talking about five minutes of actual cooking time! You just melt, stir, and press. It’s so quick that even if you decide you need a snack five minutes ago, you can have these ready to chill.
Kid-Friendly Appeal
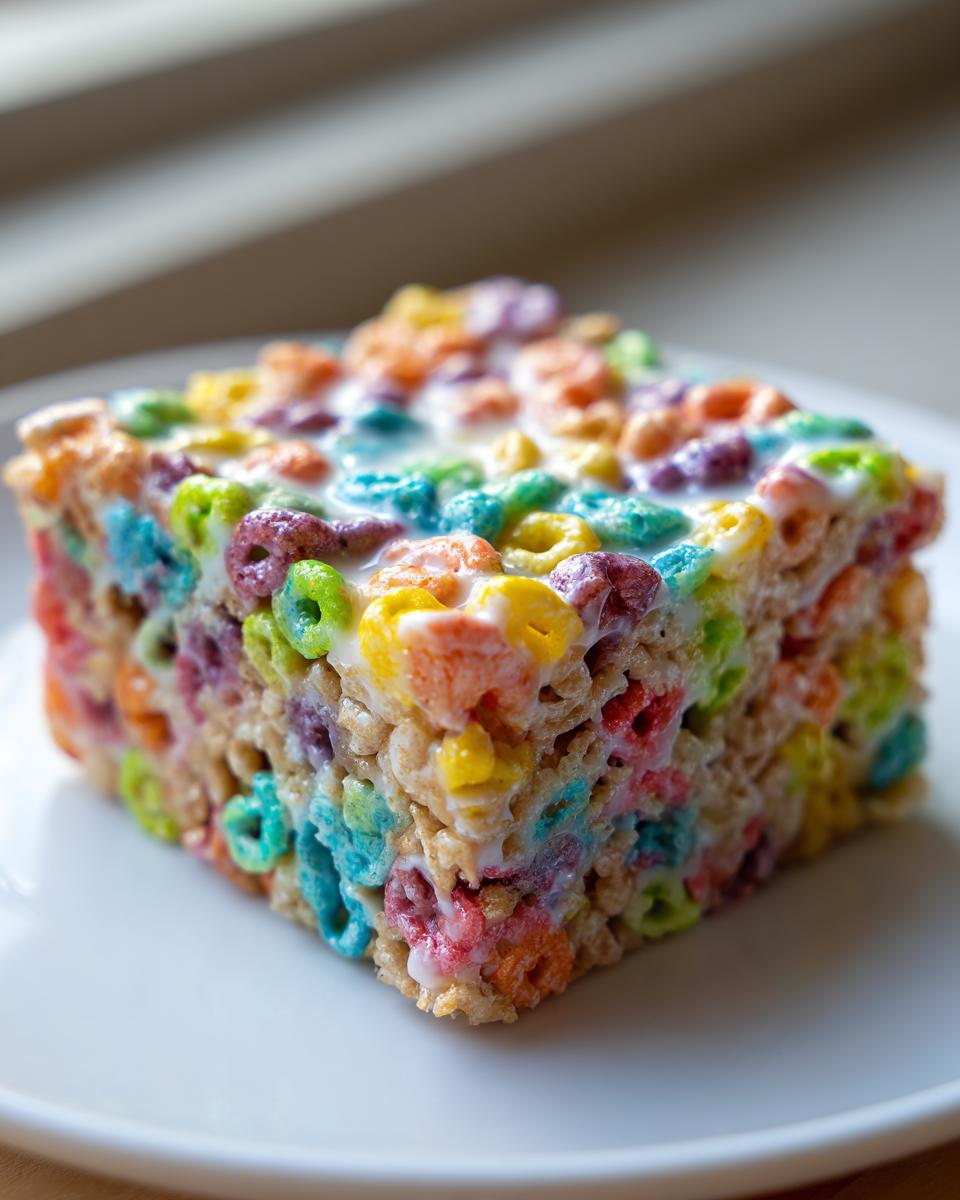
My little ones go absolutely bonkers for these. It’s the colors, obviously! The naturally colored oat shapes look like tiny rainbows stuck together with sweet vanilla goodness. They taste sweet but not overly sugary, and they have that perfect chewiness that kids adore. They are sturdy enough for lunchboxes but soft enough to eat mess-free.
Assembling Your Colorful Cereal Bars Ingredients
Okay, time to gather our supplies! Since these bars rely on the syrup setting just right, precision matters here. Don’t eyeball the sugar or the syrup, or you might end up with a sticky mess instead of a perfect bar. Let’s look at what we need for the crunch and the binding glaze.
Dry Ingredients for Colorful Cereal Bars
We need a two-part crunch situation. Make sure you grab those toasted oat cereal shapes that have all the fun, natural colors mixed in—that’s where the “colorful” really comes from! Then, mix that with the crisp rice cereal. We’re aiming for four cups of the colored oats and two cups of the rice cereal.
The Binding Vanilla Glaze Components
This is the sticky magic! You’ll need light corn syrup—don’t swap this out yet, we’ll talk about it later—and granulated sugar. For the fat, we need four tablespoons of unsalted butter, so make sure it’s the real stuff. Finally, a teaspoon of good vanilla flavoring to make that glaze smell heavenly.
Essential Equipment for No-Bake Success
Even though we aren’t baking, we still need the right tools to make sure everything sets up beautifully. Having these things ready saves so much time when the hot syrup is waiting! You absolutely need a large heat-safe saucepan for making the glaze mixture. Don’t try to do this in a thin pot, or you risk scorching the sugar.
You’ll also need a large mixing bowl, obviously, but here’s a tip: grab a rubber spatula and make sure it’s well-buttered before you start folding the syrup into the cereal. Finally, have that 9 x 13 inch baking dish ready to go. Butter it lightly or line it with parchment if you’re worried about sticking!
Step-by-Step Instructions for Perfect Colorful Cereal Bars
Alright, let’s get down to business! Making these colorful cereal bars is truly straightforward, but timing is everything since the syrup cools down fast. I’ve broken it down into three simple phases. Remember, we’re aiming for chewy and bright, not hard and dense, so pay attention to those little details!
Preparing the Base Cereal Mix
First things first, get your 9×13 dish buttered up. You don’t want to be scrambling for that later! Once your dish is ready, take your large mixing bowl. Dump in the four cups of the naturally colored oat shapes and the two cups of crisp rice cereal. Give those a quick toss with your hands just to introduce them to each other. That’s it for the dry stuff right now—set the bowl aside somewhere safe where it won’t get knocked over!
Creating the Smooth Vanilla Glaze
Now for the stovetop action. Over medium heat, combine your corn syrup, sugar, and butter in that heavy saucepan. This is where you need to be patient and stir constantly. You are waiting for the butter to completely disappear and the mixture to just start showing tiny bubbles around the edges—this usually takes about four minutes. Watch it like a hawk! As soon as you see those bubbles, pull the whole pan off the heat immediately. If you let it boil for too long, your bars will set like concrete. Stir in that vanilla flavoring right away until everything looks smooth and glossy.
Combining and Pressing the Colorful Cereal Bars
This is the critical moment! Pour that hot, sweet vanilla glaze right over your cereal mixture in the large bowl. Now, using a buttered spatula—and I mean *buttered*—gently fold everything together. You want to coat every single piece of cereal, but don’t go crazy mixing! Overmixing develops gluten and makes them tough. Once everything is just coated, transfer it to your prepared dish. Here’s the secret tip: press it down lightly. Just enough so it stays in an even layer. If you feel like you’re pushing too hard, you’re pushing too hard! Let them set at room temperature for about half an hour until they are firm enough to slice.
Tips for Making the Best Colorful Cereal Bars
I’ve made these bars dozens of times now, and trust me, I’ve learned a few things the hard way—like the time I pressed them down so hard they could have chipped a tooth! To get those perfect, satisfyingly chewy colorful cereal bars every time, you have to respect the ingredients and the mixing. It’s all about being gentle when it counts.
Achieving the Right Chewiness
The number one mistake people make is thinking they need to pack these bars down like concrete in the pan. Don’t do it! You want them tender so they bend a little when you pick them up. After you pour the syrup over the cereal, use a spatula that you’ve lightly greased with butter or spray. Just lightly skim the surface and nudge the mixture into an even layer. If you use your hands, make sure they are well-buttered, but even then, just use the flat of your palm to gently settle it. If you press too firmly, you squeeze out all the air, and they become dense and hard instead of light and chewy.
Ingredient Temperature Considerations
Speaking of butter, temperature really matters when you are creating that glaze base. Make sure your four tablespoons of butter are soft enough to incorporate easily into the syrup mixture when you start heating it. If you throw hard, cold butter in, it takes forever to melt, and you end up overcooking your corn syrup waiting for the butter to catch up. We want everything melting smoothly and quickly so we can get it off the heat before it starts to set up prematurely!
Storing and Serving Your Sweet Treat
These bars are best enjoyed the day they are made, but luckily, they hold up really well for quick snacks later in the week. Since they are no-bake, we have to be mindful of how we store them so they don’t get stale or sticky. If you are planning ahead, making a big batch of these colorful cereal bars is a great idea for easy grab-and-go treats!
Storage and Freshness of Colorful Cereal Bars
The absolute best way to keep them fresh is in an airtight container. You can layer them, but use parchment paper or wax paper between the layers so they don’t stick together and ruin that pretty top surface. Keep the container right on the counter at room temperature. Do not put them in the fridge! Chilling them can sometimes make the syrup seize up and turn your chewy bar into something closer to brittle. They should stay perfectly soft and fresh for three or four days this way.
Frequently Asked Questions About Colorful Cereal Bars
Can I Substitute the Corn Syrup in Colorful Cereal Bars
This is the question I get asked most often! Corn syrup is crucial here because it keeps the sugar crystals from forming, which is what makes the glaze smooth and chewy instead of grainy. If you absolutely must substitute, you can try using golden syrup or honey, but you need to adjust the amount slightly, maybe using a bit less because they are often sweeter. However, be warned: the texture might change slightly. For the best results, stick to the light corn syrup for that classic, bendable bar. For more information on sugar crystallization, you can check out resources on sugar crystallization.
How long do these no-bake bars last
These sweet treats are surprisingly resilient! If you store them correctly, they stay wonderfully fresh for about three to four days. The key is an airtight container at room temperature—never the fridge, remember? If you need them to last longer than that, you can actually freeze them! Wrap individual bars tightly in plastic wrap, and then place them in a freezer-safe bag. They’ll last a couple of months, and you just let them thaw on the counter for an hour before serving.
Why are my bars too hard
Oh, that’s the dreaded concrete effect! This almost always happens for one of two reasons. First, you might have cooked the syrup mixture for too long, letting it reach a hard-ball stage instead of just simmering lightly. Second, and this is more common, you pressed the mixture into the pan way too firmly. You want to gently nudge the cereal into an even layer; you don’t want to compact it. If you press too hard, you remove all the air, and your bars turn into little hockey pucks! If you are interested in learning more about candy making stages, you might find resources on the candy making temperature guide helpful.
Commitment to Quality and Trust
When I share a recipe like these no-bake bars, I want you to know that I’ve sweated the small stuff so you don’t have to worry. For me, trust in the kitchen starts with ingredient awareness. I always look closely at labels, especially on things like the colored oat cereal, to make sure those bright colors are coming from natural sources, as the recipe suggests.
Also, safety first when dealing with that hot syrup! My absolute rule is never to walk away from the stovetop when the sugar and corn syrup are bubbling. If you feel the mixture getting too hot too fast, pull the pan off the burner instantly—it’s much easier to put it back on than to try and salvage scorched sugar. Knowing you are using quality ingredients handled safely is what makes sharing these treats so rewarding. If you are looking for more tips on kitchen safety, checking out general kitchen food safety guidelines is always a good idea.
Share Your Homemade Creations
I truly hope you give these a try soon! They are so much fun to make and even better to eat. Did they turn out chewy? Did the kids love the colors? Let me know how it went!
Drop a comment below and tell me your favorite way to enjoy a sweet treat. I read every single one, and I love hearing from you all!
Print
5 Amazing colorful cereal bars secrets
- Total Time: 45 minutes
- Yield: 12 bars 1x
- Diet: Vegetarian
Description
Easy no-bake colorful cereal bars featuring crisp cereal bound with a smooth vanilla glaze, creating a chewy, kid-friendly snack.
Ingredients
- 4 cups toasted oat cereal with naturally colored oat shapes
- 2 cups crisp rice cereal
- 1 1/4 cups light corn syrup
- 1 1/4 cups granulated sugar
- 4 tablespoons unsalted butter
- 1 teaspoon vanilla flavoring
Instructions
- Lightly butter a 9 x 13 inch baking dish and set aside.
- In a large heat-safe saucepan over medium heat, add corn syrup, sugar, and butter.
- Stir constantly until the butter melts and the mixture just begins to bubble, about 4 minutes.
- Remove from heat and immediately stir in the vanilla flavoring until smooth.
- In a large bowl, combine the toasted oat cereal and crisp rice cereal.
- Pour the hot syrup evenly over the cereal mixture.
- Using a buttered spatula, gently fold until all cereal is evenly coated.
- Transfer the mixture to the prepared baking dish and press gently into an even layer without compacting too firmly.
- Let set at room temperature for 30 minutes until firm.
- Cut into 12 even bars and serve.
Notes
- Press the cereal mixture lightly to keep the bars chewy rather than dense.
- Prep Time: 10 minutes
- Cook Time: 5 minutes
- Category: Dessert
- Method: No-Bake
- Cuisine: American
Nutrition
- Serving Size: 1 bar
- Calories: 210
- Sugar: Unknown
- Sodium: Unknown
- Fat: 5 g
- Saturated Fat: Unknown
- Unsaturated Fat: Unknown
- Trans Fat: Unknown
- Carbohydrates: 40 g
- Fiber: Unknown
- Protein: 2 g
- Cholesterol: Unknown