Skip to content
When I think about simple, satisfying desserts, my mind immediately goes to perfect cake balls. Hi there! I’m Anna Kowalska, and here I share tried-and-true homemade recipes that you and your family will love. Everything I share is made with heart and flavor, built on years of experience wrestling with recipes until they’re just right. I grew up watching my mother turn everyday ingredients into something spectacular, and that’s the spirit I bring to my own kitchen every single day. We’re talking about treats so easy, you’ll wonder why you haven’t made them sooner!
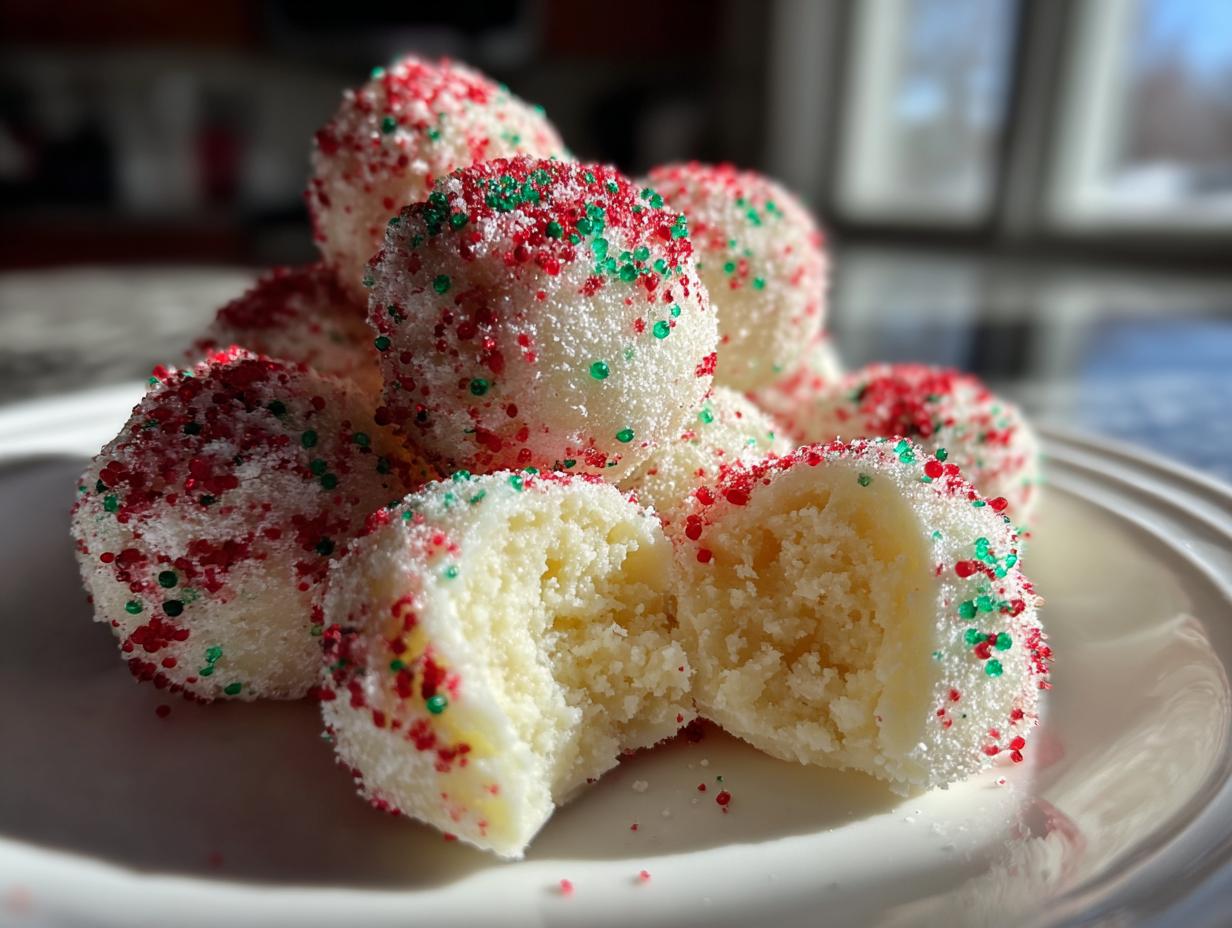
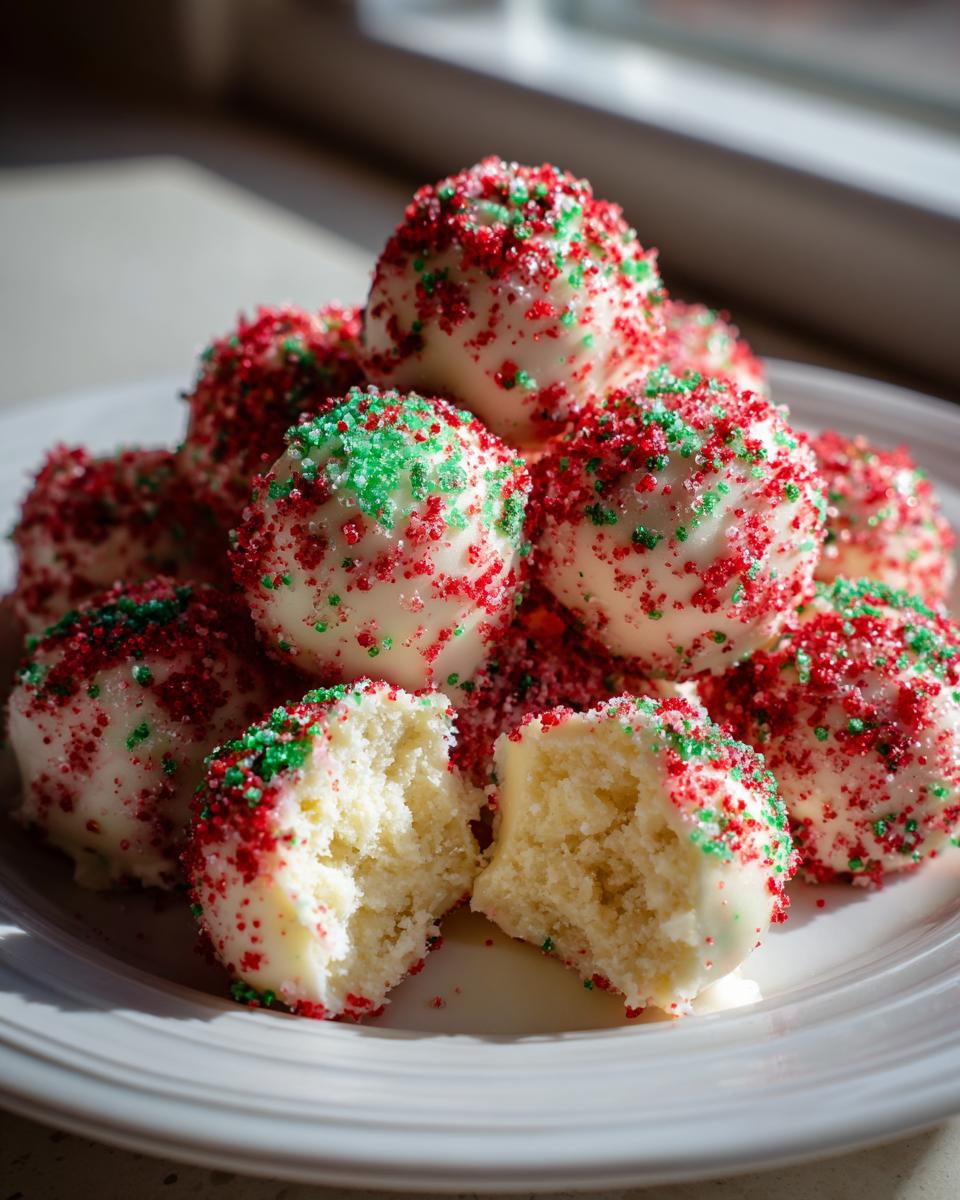
This specific recipe for vanilla cake balls, coated in shiny white chocolate and covered in festive sprinkles, is my go-to when I need a guaranteed crowd-pleaser without having to turn on the oven. Seriously, these are almost too easy, which is why I trust them for last-minute gatherings. I’ve made hundreds of these over the years for school parties and holiday cookie swaps, so I know exactly what works and what doesn’t.
No heading needs to be written for the introduction.
Jump to:
Why You’ll Love These Simple Cake Balls
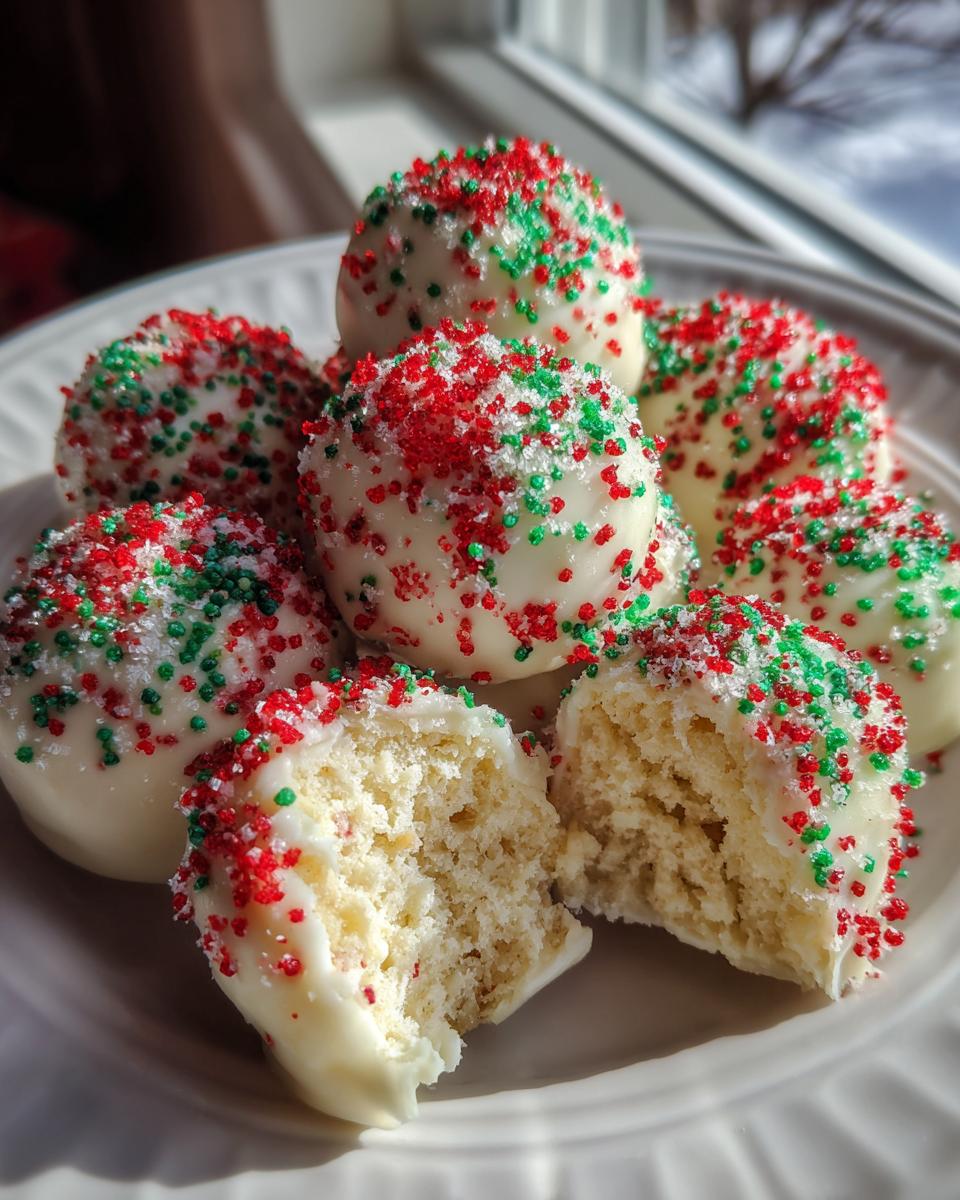
If you’re looking for a dessert that tastes incredibly rich but requires zero baking skill, you have found your match! These cake balls are famous in my circle because they are ridiculously soft inside. We’re talking about a creamy vanilla center that just melts in your mouth, all wrapped up in a crisp, sweet white chocolate shell.
They look like they took hours of fussy work, but trust me, they come together faster than most cookies. They are perfectly bite-sized, which means portion control is easy (or impossible, depending on how you look at it!). They are always the first thing gone at any party, guaranteed.
Quick Preparation and Minimal Effort
The best part about this whole operation? It’s entirely no-bake! You don’t have to worry about oven temperatures or whether your cake has risen properly. We start with pre-made vanilla snack cakes, which is my little shortcut for pure convenience.
You just crumble, mix, roll, and dip. With only about 20 minutes of active prep time, you can have 48 gorgeous little treats ready for the freezer in under an hour. It’s the perfect recipe when unexpected guests drop by, or when you just need a sweet fix without the fuss of actual baking.
Essential Ingredients for Perfect Cake Balls
When we talk about making amazing cake balls, the ingredient list is short, but every item plays a huge role in that fantastic texture and flavor. Don’t try to skimp here; quality ingredients make all the difference in these no-bake beauties. You’ll need just a few things to get started, but pay attention to the texture we’re aiming for!
I always keep these items stocked just in case I decide on a sudden baking whim. It’s so simple, which is why I love it so much. You don’t need fancy flours or specialty extracts, just the basics done right.
Understanding the Core Components
The secret to that unbelievably soft center isn’t actually cake from scratch; it’s those pre-made vanilla snack cakes! They are already perfectly moist and sweet, which saves so much time. You’ll need two full boxes, so that’s ten cakes total. These crumble beautifully.
The second key player is the cream cheese. It has to be fully softened—I mean, room temperature soft so it blends in without leaving any lumps. When you mix that cream cheese into the cake crumbs, it acts like the perfect binder, creating that signature dense, fudgy texture that makes these cake balls so addictive. It’s what turns dry crumbs into a perfect dough.
Coating and Decoration Choices
For the coating, you absolutely need white candy melts. They melt smoother than regular white chocolate chips and give you that nice, hard shell we want. I always melt a full 16 ounces because I like a generous dip.
If the coating seems too thick when you start dipping, don’t panic! A tiny bit of vegetable shortening stirred in makes it luxuriously smooth. For the festive look, I use red and green sanding sugar—it adds that necessary crunch and sparkle. And for those nice little pops of color, I melt a small amount of red candy melts separately to drizzle on top. That combination of creamy center, smooth white shell, and sparkly sugar is just perfection.
Equipment Needed for Making Cake Balls
You don’t need a huge arsenal of fancy tools for this recipe, which I love! It keeps the cleanup manageable. Before you even start crumbling those cakes, gather up your essentials so everything flows smoothly when it’s time to mix.
First up, you’ll need a nice big bowl—one you can really get your hands into when mixing that cake and cream cheese. A small cookie scoop is non-negotiable for me; it ensures all your little spheres are the exact same size, which helps them freeze and coat evenly. And please, make sure you have a baking sheet ready to go that you can line with waxed paper. That paper is your best friend for non-stick heaven!
Step-by-Step Instructions for Homemade Cake Balls
Okay, now for the fun part! Making these festive cake balls is truly a simple process once you have everything lined up. We’re moving fast here, so have your mixing bowl ready and your baking sheet lined with waxed paper before you start crumbling.
Creating the Smooth Cake Base
First things first: take those two boxes of vanilla snack cakes and crumble them up right into your large bowl. I mean *everything*—the cake and the filling. You want fine crumbs, but a few slightly larger bits are fine since we’re mixing in the cream cheese next. Make sure your 8 ounces of cream cheese is super soft; if it’s cold, it won’t mix right!
Add the softened cream cheese to the crumbs. Now, you can use a hand mixer, but honestly, I just dig my hands in there. You need to mix, press, and knead until it’s completely smooth. There shouldn’t be any streaks of white cream cheese showing—it should look like one uniform, slightly sticky dough. Once it’s perfect, grab a small cookie scoop. This is my trick for consistency! Scoop out the dough and gently roll it between your palms into smooth, one-inch balls. Place these little beauties onto your prepared sheet.
Chilling and Melting the Coating
This next step is crucial for stability: we need to freeze the balls! Pop that entire tray into the freezer for a solid 15 to 20 minutes. They don’t need to be rock hard, but they need to be cold so they don’t fall apart when they hit the warm chocolate. While they chill, melt your white candy melts. Put the 16 ounces in a microwave-safe bowl and heat on high for one minute. Stir it well, even if it looks fine! Then, continue heating in short 15-second bursts, stirring thoroughly after each interval, until it’s silky smooth. If it feels stiff, stir in just a tiny bit of vegetable shortening—it thins it out perfectly for dipping!
Dipping, Decorating, and Setting the Cake Balls
Pull your cold cake balls out of the freezer. Working quickly is key here! Drop one ball into the smooth melted coating. Use a fork or a dipping tool to turn it completely, ensuring it’s covered. Lift it out and gently tap the fork against the side of the bowl to let all that excess coating drip off. You want a thin, even layer, not a big glob!
Place the dipped ball back onto the waxed paper. Here’s your window of opportunity: immediately sprinkle on your sanding sugar or drizzle those reserved melted red candy melts on top before the coating sets. If you wait too long, the decorations won’t stick! Once they are all decorated, move the tray carefully into the refrigerator. Let them sit there for about one hour until that white chocolate shell is completely firm to the touch. Then you can transfer them to an airtight container!
Tips for Success When Making Cake Balls
I’ve made enough of these to know exactly where things can go wrong, so let me save you some trouble! Getting these little cake balls perfect every time is all about managing temperature and consistency. Don’t rush the freezing step, and don’t overheat your coating—those are my two biggest rules.
Also, make sure you are using the right kind of chocolate coating. Candy melts are formulated to set up firm and shiny, which is what we want for that beautiful presentation. If you try to use standard chocolate chips, they often seize up or stay soft, which is just frustrating!
Achieving a Glossy White Chocolate Finish
The key to that professional, glossy look on your white chocolate coating is making sure it is perfectly smooth before you dip anything. If your melted coating looks thick or drags when you stir it, that’s when you add that tiny bit of vegetable shortening. Seriously, a teaspoon is often enough! This thins the coating just enough so that when you pull the ball out and tap off the excess, you get a thin, even layer instead of a thick, bumpy shell. If the coating gets too thick while you work, just pop the bowl back in the microwave for 10 seconds to loosen it up again. This attention to the melt consistency is what separates okay cake balls from absolutely stunning ones!
Serving Suggestions for These Treats
These little vanilla treats are so versatile! Because they are already bite-sized, they look fantastic piled high on a tiered platter for holiday parties. They are perfect for setting out on a dessert table—no forks required, which everyone appreciates.
I often use them as festive little take-home gifts tied up in clear cellophane bags with a nice ribbon. Since they use cream cheese, they look beautiful next to brighter desserts like lemon bars or dark chocolate truffles. They’re easy to transport, too, which makes them my go-to for potlucks!
Storing Your Delicious Cake Balls Properly
You’ve put in the work to make these incredible cake balls, so you need to store them right to keep that center creamy and the coating crisp! The good news is that they keep well, thanks to the cream cheese and the protective chocolate shell. The most important rule is airtight storage—no air getting in to dry them out or pick up fridge smells.
I find they actually taste even better the day after I make them once the flavors have settled. Just remember, these aren’t cookies; they have that wonderful, soft interior that needs a little protection. You can certainly make a huge batch ahead of time for big events!
Storage and Shelf Life Guide
When you stack your finished cake balls in a container, you absolutely must put a layer of waxed paper between the layers. If you don’t, the chocolate coating will stick to the layer above it, and you’ll end up with messy, half-naked balls when you try to lift them out. Trust me on the waxed paper!
They should be stored in the refrigerator—that’s where they stay firmest. They’ll keep beautifully for about a week this way. If you need to keep them longer, the freezer is your best friend, wrapped tightly in plastic wrap first, then foil. They taste great straight from the fridge, but if you freeze them, let them sit on the counter for about 20 minutes before serving.
Since these are no-bake and coated in candy melts, reheating isn’t really a thing—they are best enjoyed cool or slightly chilled. Proper storage techniques help maintain texture.
Here’s a quick look at how long they last:
| Storage Location | Approximate Shelf Life | Reheating/Serving Note |
|---|---|---|
| Refrigerator (Airtight) | Up to 7 days | Serve chilled for best coating firmness. |
| Freezer (Wrapped) | Up to 2 months | Thaw at room temperature for 20 minutes before eating. |
Frequently Asked Questions About Cake Balls
I get so many messages asking for clarification on these little treats, and that’s totally fine! These cake balls are so easy, but a small detail can sometimes throw things off. Here are the most common questions I get about texture and ingredients.
Can I substitute the cream cheese in these Cake Balls?
This is a tough one! The cream cheese is what provides that incredible, creamy binder that makes these cake balls so fudgy. If you absolutely must substitute, you could try using mascarpone cheese, which is very similar in texture, though it might be slightly richer. I wouldn’t recommend using butter or frosting, though, because the moisture and density will change completely, and you might end up with a crumbly mess instead of a smooth dough.
How long does it take for the coating to set?
This depends on how cold your balls are when they go in! If they are straight from a 20-minute freeze, the white chocolate coating will start to firm up in about 10 to 15 minutes just sitting on the counter. However, for that hard, crack-free shell you want, you need to refrigerate them for a full hour. Setting is fast; hardening properly takes time in the cold!
Why are my cake balls crumbling during dipping?
Nine times out of ten, this means your cake mixture wasn’t combined well enough, or your balls weren’t cold enough. If you didn’t knead the cream cheese in thoroughly, the dry crumbs won’t hold together. If they still crumble when you try to roll them, put the whole batch back in the freezer for another 10 minutes. If they are cold, they should hold their shape much better when you dip them in the coating.
Nutritional Information Disclaimer
I want to be upfront with you all: the nutrition facts I share for these wonderful cake balls are just an estimate. Since brands of candy melts and snack cakes vary widely in their sugar and fat content, your final numbers might look a little different. Use this chart as a general guide only! USDA food composition data can offer more detailed comparisons.
| Component | Estimated Value Per Ball |
|---|---|
| Serving Size | 1 cake ball |
| Calories | 120 |
| Fat | 6 g |
| Carbohydrates | 16 g |
| Protein | 1 g |

48 Amazing Cake Balls Blissfully Easy
- Total Time: 40 minutes
- Yield: 48 cake balls 1x
- Diet: Vegetarian
Description
Make soft, creamy vanilla cake balls coated in white chocolate with festive sprinkles for a simple, crowd-pleasing dessert. These bite-sized treats use vanilla snack cakes and cream cheese for a rich center.
Ingredients
- Two 5-count boxes vanilla snack cakes
- 8 ounces cream cheese, room temperature
- 16 ounces white candy melts
- 1/4 cup red candy melts, melted
- Red and green colored sanding sugar
Instructions
- Line a baking sheet with waxed paper.
- Crumble the snack cakes into a large bowl. Add cream cheese and mix until smooth and fully combined.
- Using a small cookie scoop, portion the mixture into 1-inch balls and roll them into smooth spheres.
- Freeze the cake balls for 15–20 minutes for easier coating.
- Place white candy melts in a microwave-safe bowl. Heat on high for 1 minute, stir, then continue in 15-second intervals, stirring until smooth. Stir in up to 1 tablespoon vegetable shortening if too thick.
- Dip each cake ball into the melted white chocolate, tapping off excess. Place on prepared baking sheet.
- Immediately decorate with colored sanding sugar or drizzle with red candy melts using a piping bag.
- Refrigerate for about 1 hour until firm. Store in an airtight container with waxed paper between layers.
Notes
- Ensure the candy coating is smooth and fully melted for an even, glossy finish.
- Prep Time: 20 minutes
- Cook Time: 20 minutes
- Category: Dessert
- Method: No Bake
- Cuisine: American
Nutrition
- Serving Size: 1 cake ball
- Calories: 120
- Sugar: Unknown
- Sodium: Unknown
- Fat: 6 g
- Saturated Fat: Unknown
- Unsaturated Fat: Unknown
- Trans Fat: Unknown
- Carbohydrates: 16 g
- Fiber: Unknown
- Protein: 1 g
- Cholesterol: Unknown