Skip to content
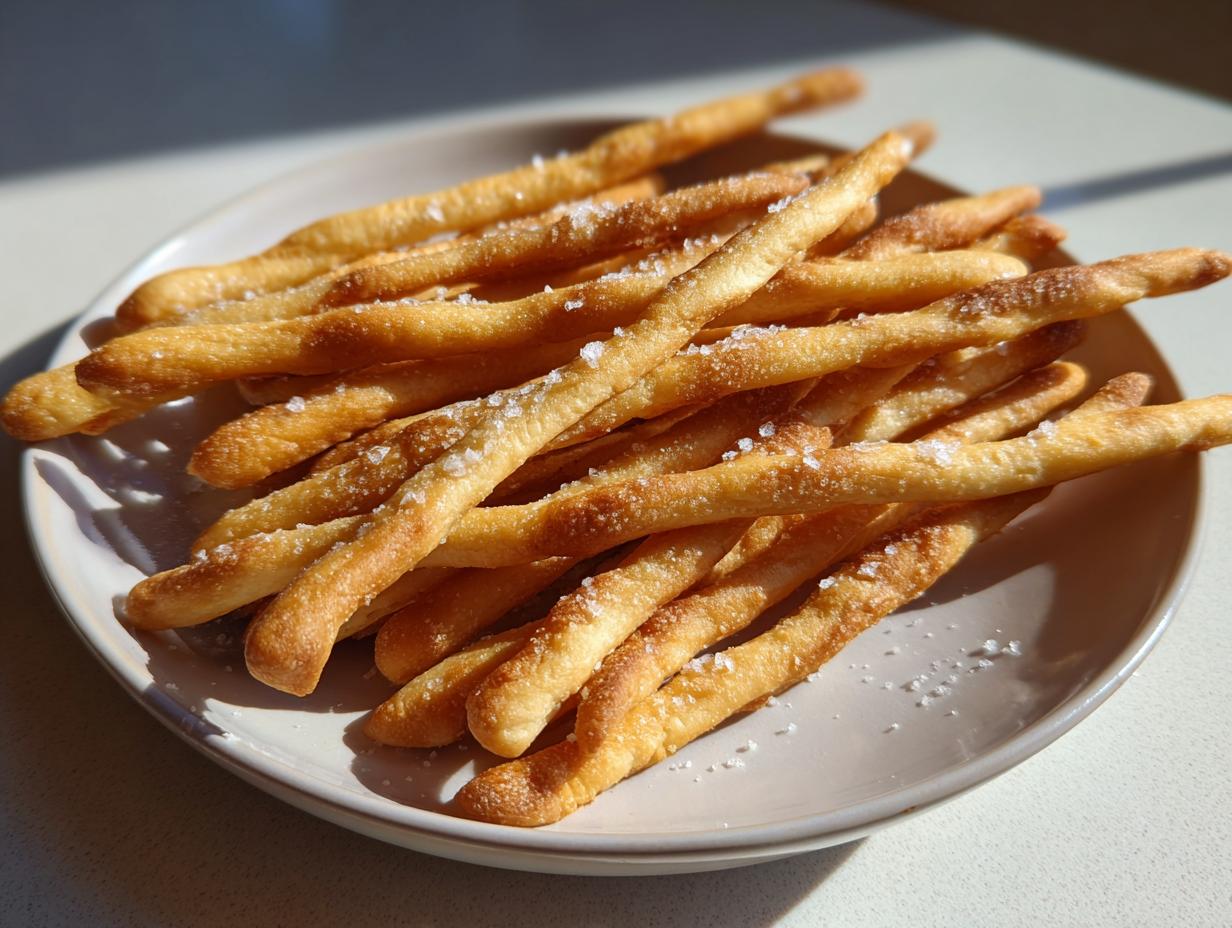
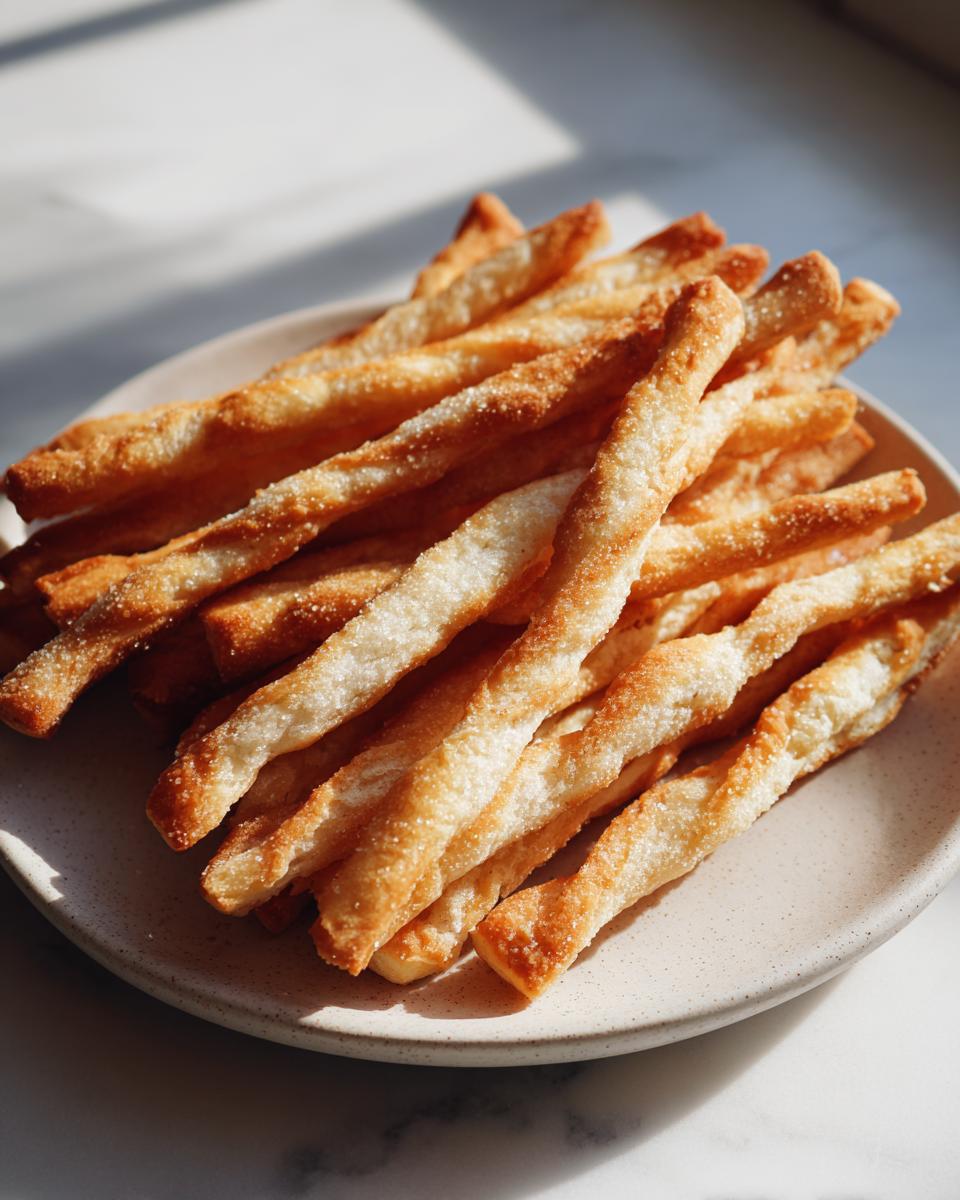
When I think about the perfect crunch, my mind immediately goes to Grissini (Italian Breadsticks). There’s something so satisfying about snapping one of these slender sticks—it’s the sound of pure, homemade success! I’m Anna Kowalska, and here I share tried-and-true homemade recipes that you and your family will love. Everything I post here, including this recipe, is made with heart and flavor, rooted in a lifetime of kitchen experience. Forget those stale, store-bought tubes; we’re going to master the texture that only careful resting and rolling can achieve.
This recipe for Grissini (Italian Breadsticks) is the one that finally gave me that authentic, shatteringly crisp result every single time. I learned early on that these aren’t just quick sticks; they require a little patience with the dough temperature, which is where my experience really comes into play. Trust me when I say that cold dough is your best friend for rolling them thin enough to bake up perfectly crisp.
Jump to:
Essential Components for Your Grissini (Italian Breadsticks) Recipe
You can’t rush perfection, especially when aiming for that signature snap of homemade Grissini (Italian Breadsticks). The ingredient list looks simple, but the quality and type of flour really matter here. We are building a dough that needs to be sturdy enough to roll thin but tender enough to eat easily. I always lay out my ingredients before I even start warming the liquids, just to make sure nothing gets forgotten mid-mix.
The choice between olive oil and butter is yours, but both need careful handling to integrate correctly with the dry components. Pay close attention to the yeast—it needs just the right temperature to wake up and do its job before we chill everything down later.
Detailed Ingredient Breakdown for Grissini
Here’s what you need to gather for the best Grissini batch ever. Remember, precision helps immensely with these thin sticks!
- Bread Flour: We need that higher protein content for structure, about 2 1/2 cups.
- Whole Wheat Flour: Just a small amount, 1/2 cup, to give a little depth of flavor.
- Fine Grain Salt: Measure this carefully—1 1/2 teaspoons is what I use.
- Instant Yeast: One standard packet works perfectly here.
- Fat: You’ll need either 1/3 cup of good extra-virgin olive oil OR 1/4 cup of unsalted butter, cut into small cubes.
- Liquid: Either 3/4 cup of milk or water; make sure it’s lukewarm!
Necessary Tools for Making Expert Grissini
Making incredible Grissini isn’t just about the dough; it’s about having the right setup to handle it. Since we need to rest and chill the dough for the best texture, having good covers is essential. Don’t worry; you probably have everything you need already!
Equipment List for Perfect Italian Breadsticks
- A sturdy mixing bowl for combining the dry ingredients.
- A small saucepan to warm the liquids gently.
- Plastic wrap to keep the dough from forming a skin while resting.
- Plenty of large baking sheets for arranging the rolled sticks.
- A rolling pin, though I often just use my hands for the final stretch!
Step-by-Step Guide to Perfect Grissini (Italian Breadsticks)
Okay, this is where the magic happens, but you have to respect the timeline! If you rush the resting and chilling, your Grissini won’t roll out thin enough. I know the total time looks long, but most of it is just hands-off waiting, which is perfect for making coffee or prepping your dips. Follow these steps, and you’ll have hundreds of crispy sticks!
Mixing and Initial Dough Formation
First things first: get your dry ingredients acquainted. Whisk together your bread flour, whole wheat flour, salt, and that instant yeast in a medium bowl. Whisking is important—it helps distribute everything evenly, especially the tiny yeast granules. Next, in a small saucepan, gently heat your olive oil (or butter) and milk or water. You only want it lukewarm, about 115 degrees. If it’s too hot, you’ll kill the yeast! Stir that warm liquid right into your flour mixture until a shaggy dough starts to form. Don’t overmix yet; just bring it together.
Kneading and Temperature Control for Grissini
Turn that shaggy mess out onto a lightly floured counter. Knead this dough for a solid three minutes. It won’t feel perfect yet, but it’s getting there. Now, cover it up—I just use the bowl turned upside down—and let it rest for 15 minutes. This lets the gluten relax a bit. After the rest, knead it for another three minutes until it looks smoother. Shape it into a nice ball, rub a tiny bit of olive oil all over it, and pop it back into the oiled bowl. Cover it tightly with plastic wrap and let it sit in a warm spot for 30 minutes. This is the first proof. But here’s the real secret to great Grissini texture: move the covered bowl to the refrigerator for at least one full hour, or until it’s nice and cold!
Shaping and Preparing Your Italian Breadsticks for Baking
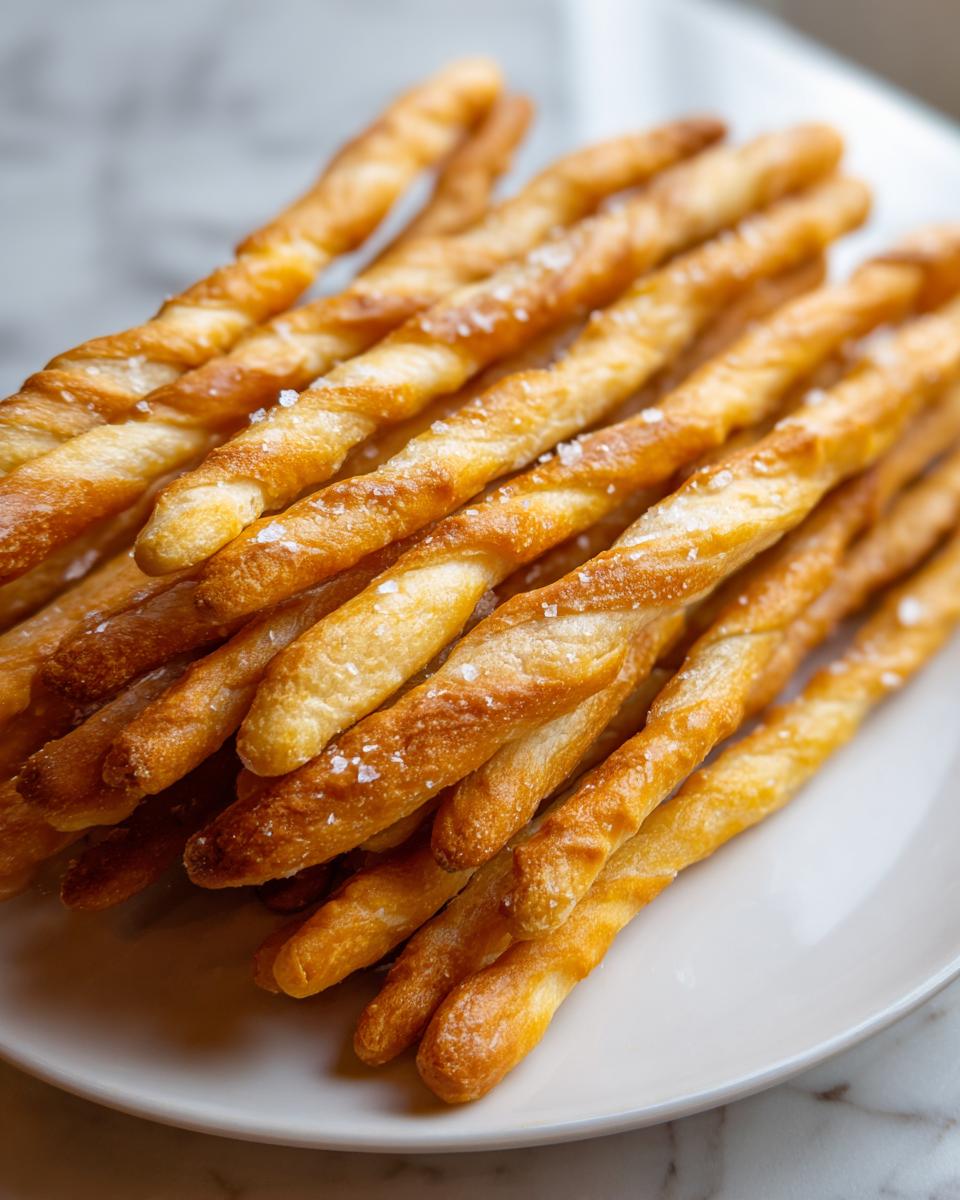
Time to preheat that oven to 350°F, making sure you place your racks in the top and bottom thirds. Now for the fun, albeit slightly tedious, part! Take the cold dough out. Cut off small pieces—I aim for about 7 grams each, which is roughly the size of a large marble. Cover the rest of the dough so it doesn’t dry out while you work. Roll each small piece between your palms or on the counter into pencil-thin strips. They need to be about 1/8-inch thick. If a piece springs back on you, just set it aside for five minutes to relax, then roll it again. They should look almost ridiculously thin!
Baking the Crispy Grissini to Golden Perfection
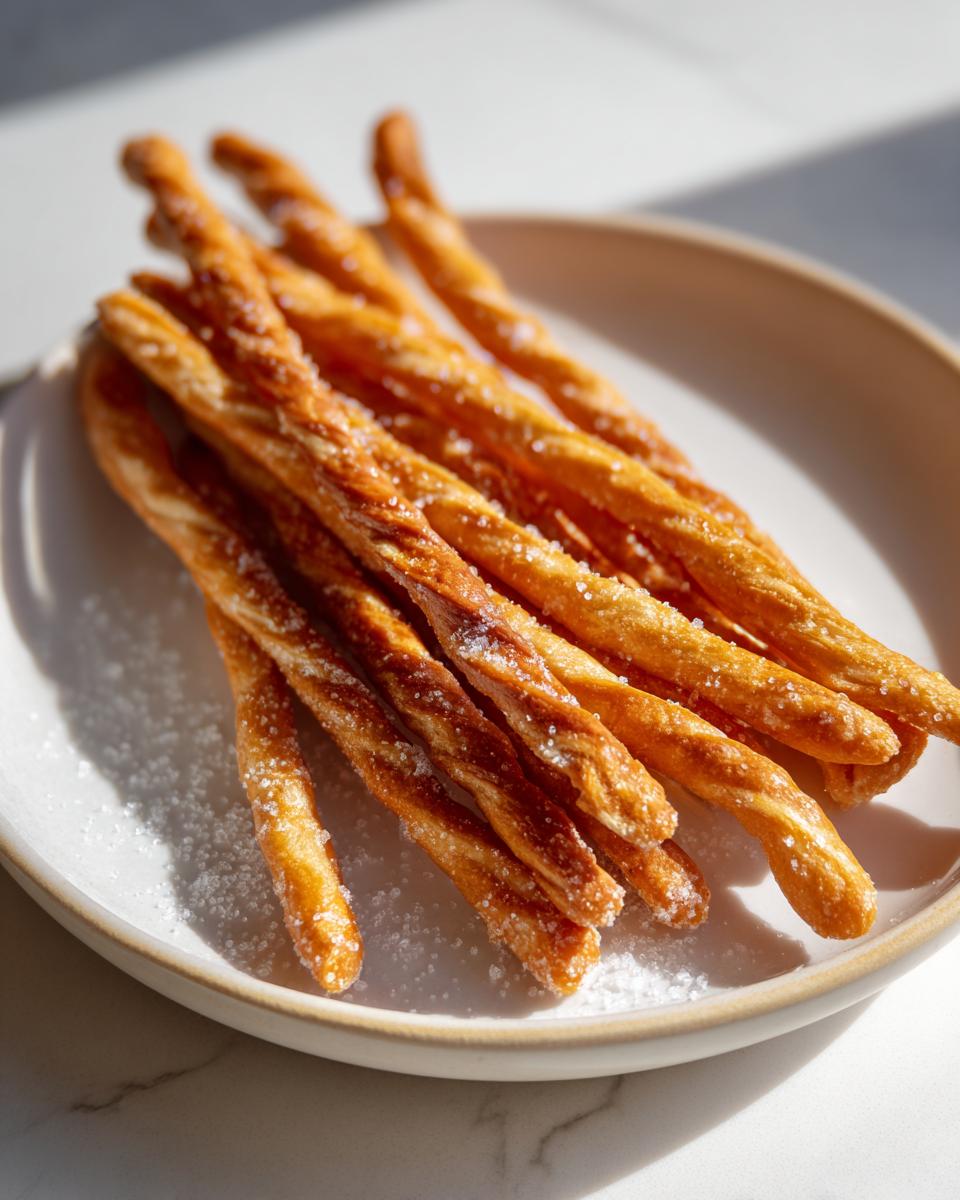
Arrange those delicate strips directly onto your baking sheets. You can place them fairly close together since they don’t spread much. Now, bake them for 13 to 15 minutes. This is crucial: halfway through baking, gently rotate the pans. While you’re rotating, give the pan a little shake—this helps flip the sticks over slightly so they color evenly on all sides. You want them golden brown all over. Keep repeating this process until every last beautiful piece of dough is baked and crispy!
Tips for Success with Homemade Grissini
I’ve definitely made my share of floppy, chewy breadsticks that just refuse to snap. Don’t let that happen to you! The secret to truly spectacular Grissini comes down to managing moisture and dough tension. If you follow a few key pointers, you’ll bypass the common pitfalls immediately. Remember, these are meant to be brittle, not soft like dinner rolls!
My biggest piece of advice, which I learned the hard way, is that you cannot be shy when rolling them thin. If you think they look thin enough, roll them a little more. Thinness equals crispness, plain and simple. Also, don’t pull them out of the oven just because they are turning gold on top; they need that baking time to drive out all the internal moisture.
Achieving Maximum Crispness in Your Grissini
The chilling step is non-negotiable if you want pencil-thin Grissini. Cold dough is stiff dough, and it resists stretching, which allows you to roll it thinner without tearing or it snapping back immediately. If you skip the cold rest, you’ll end up with thicker, softer sticks, which, while still tasty, aren’t the real deal.
When you bake them, don’t be afraid to let them go the full 15 minutes, or even 16 if your kitchen is humid. They should feel completely dry and sound hollow when you tap them. If you notice any stickiness or softness after they cool for five minutes, pop the whole batch back into the oven for another three minutes. That final blast of dry heat ensures a perfect, satisfying crunch every single time.
Serving Suggestions for Your Italian Breadsticks
Once you have that huge pile of perfectly crunchy Grissini, the real fun begins: eating them! I always make way too many because they disappear so fast when company comes over. They are fantastic on their own, of course, but they really shine when paired with simple, fresh flavors. Since they are so neutral and crisp, they act as the perfect vehicle for all sorts of dips and spreads.
I love setting out a big basket when we have friends over for casual dinners. It feels so much nicer than having store-bought crackers lying around. The main thing is to keep the pairings light so the breadsticks themselves remain the star!
Pairing Ideas for Homemade Grissini
- Soft Cheeses: Think creamy whipped ricotta seasoned with lemon zest and black pepper, or a simple dollop of fresh goat cheese.
- Dips: Homemade hummus or a bright white bean dip are perfect for dipping.
- Salads and Soups: These are incredible crumbled over a big bowl of Minestrone soup instead of croutons, or simply served alongside a crisp Caesar salad instead of dinner rolls.
- Cured Meats: If you aren’t worried about keeping it strictly non-alcoholic, a thinly sliced prosciutto wrapped around the stick is classic!
Storage and Reheating Instructions for Grissini
So you’ve baked seven dozen beautiful, crispy Grissini! Congratulations! Now, the biggest challenge is keeping them that way. Humidity is the enemy of crispness, so you need a good storage plan. If you notice they’ve softened up the next day—which happens easily if they are left on the counter—don’t panic. A quick trip back to the oven revives them instantly. My rule of thumb is always to store them while they are still slightly warm from the cooling rack, but only if you are eating them the same day.
Keeping Your Grissini Fresh and Crunchy
For longer storage, you must use an airtight container. Plastic zipper bags work fine, but a true cannister with a tight seal is even better. I usually wait until they are completely cool—at least an hour on the rack—before sealing them up. If you store them warm, the condensation inside the container will make them soggy!
If your Grissini have lost their snap, reviving them is so easy. Just spread them out on a baking sheet and pop them back into a 300°F oven for about 3 to 5 minutes. Watch them closely! They should crisp right back up. Here’s a quick reference for keeping track:
| Condition | Storage Method | Revival Time |
|---|---|---|
| Freshly Baked & Cool | Airtight Container | N/A |
| Slightly Softened | Airtight Container | 3-5 minutes at 300°F |
Frequently Asked Questions About Grissini
I get so many messages asking about the process, especially when readers are trying to get that perfect snap. Baking Grissini involves a few specific steps, and sometimes skipping one seems like a harmless shortcut, but it can change the final texture entirely! I’ve gathered the most common questions I get from folks trying this recipe for the first time. Don’t worry if your first batch isn’t perfect; that’s how we learn!
Common Questions About Making Grissini (Italian Breadsticks)
Q1. Can I skip the chilling time in the refrigerator?
Oh, please don’t! That cold rest is absolutely critical for making good Grissini. If you skip it, the dough will be too warm and relaxed, and you won’t be able to roll those sticks thin enough without them tearing or immediately shrinking back. Cold dough rolls thin!
Q2. What if I don’t have bread flour? Can I use all-purpose?
You certainly can, but you might notice a slight difference in the final crispness. Bread flour has more protein, which gives the dough the structure needed to hold that thin shape during rolling and baking. All-purpose works, but your sticks might be a bit softer.
Q3. How do I know if my Grissini are baked enough?
They need to be fully dry. If they look golden but still feel slightly soft to the touch when you tap them, they need more time. Bake them until they are a deep golden brown and sound hollow when you tap two sticks together. If they are still pale, they won’t be crispy!
Q4. Can I add herbs or seeds to my Italian Breadsticks?
Yes, absolutely! This is a wonderful way to customize them. You can mix dried rosemary or fennel seeds right in with the dry ingredients, or, even better, brush the rolled-out sticks with a tiny bit of olive oil and sprinkle coarse sea salt or sesame seeds on top right before they go into the oven.
Share Your Experience Making Grissini
Now that you have the secrets to perfectly crisp Grissini, I’d love to hear how they turned out for you and your family! Did they snap just right? Drop a comment below and let me know your favorite way to serve them. Your feedback helps everyone bake with confidence!
Print
Amazing Grissini: 1 Sure Trick
- Total Time: 2 hrs 15 mins
- Yield: 7 dozen 1x
- Diet: Vegetarian
Description
Grissini (Italian Breadsticks) are thin, crispy breadsticks perfect for snacking or serving alongside meals. This recipe guides you to make homemade versions with a satisfying crunch.
Ingredients
- 2 1/2 cups / 310 g bread flour
- 1/2 cup / 65 g whole wheat flour
- 1 1/2 teaspoons / 10 g fine grain salt
- one packet / 7 g instant yeast
- 1/3 cup / 60 g extra-virgin olive oil OR 1/4 cup / 60 g unsalted butter, cut into small cubes
- 3/4 cup / 180 ml / 180 g milk OR water
Instructions
- Whisk together the flours, salt, and instant yeast in a medium bowl.
- Combine the olive oil (or butter) and water in a small saucepan. Heat this mixture until lukewarm or 115°F.
- Stir the warm liquid into the flour mixture. When the dough comes together, turn it out onto a counter.
- Knead the dough for three minutes. Cover the dough and let it rest for 15 minutes.
- Knead the dough for another 3 minutes. Shape it into a ball, rub it with a little olive oil, and return it to the bowl.
- Cover the bowl with plastic wrap. Let the dough rest in a warm place for 30 minutes.
- Move the dough to the refrigerator for one hour or until cold.
- Preheat your oven to 350°F. Place racks in the top and bottom third of the oven.
- Start shaping the grissini. Cut small pieces of dough, about 7 g each, approximately 3/4-inch size. Cover the remaining dough to prevent drying.
- Roll the small dough pieces into pencil-thin strips, about 1/8-inch thick. If a piece resists rolling, set it aside for a few minutes to relax before continuing.
- Arrange the strips directly on baking sheets. You do not need much space between each piece.
- Bake for 13-15 minutes, rotating once, until the grissini are golden and crispy. Gently shake the pan during rotation to color the tops and bottoms.
- Repeat this process until you use all the dough.
Notes
- Makes 7 dozen.
- Serves 28.
- Prep Time: 2 hrs
- Cook Time: 15 mins
- Category: Bread
- Method: Baking
- Cuisine: Italian
Nutrition
- Serving Size: 1 stick (estimated)
- Calories: Information not provided
- Sugar: Information not provided
- Sodium: Information not provided
- Fat: Information not provided
- Saturated Fat: Information not provided
- Unsaturated Fat: Information not provided
- Trans Fat: Information not provided
- Carbohydrates: Information not provided
- Fiber: Information not provided
- Protein: Information not provided
- Cholesterol: Information not provided