Skip to content
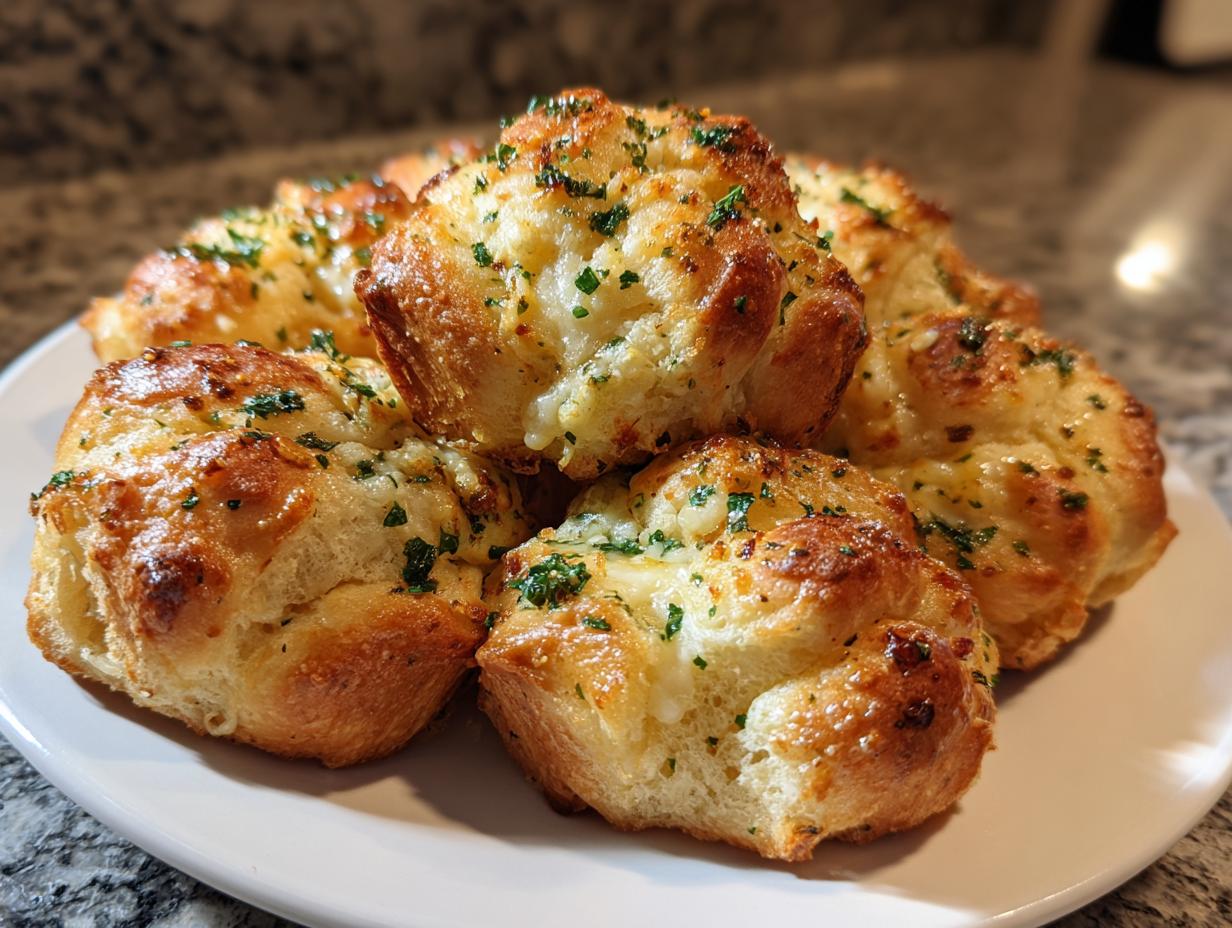
If you’re anything like me, you probably think bread should be soft, satisfying, and totally smothered in garlic butter. That’s where Homemade Garlic Knots come in! I’m Anna Kowalska, and here I share tried-and-true homemade recipes that you and your family will love. Everything I put up here is made with heart and flavor, and these knots are proof of that philosophy.
I remember trying to make these for the first time for a big family dinner, and I was so nervous they wouldn’t turn out right. But trust me, this recipe is foolproof! These soft, flavorful garlic knots make a perfect snack, appetizer, or side dish—they disappear fast, so maybe plan on doubling the batch if you have hungry people around.
Forget those dry, sad little rolls you get at the pizza place. We’re making something that actually tastes like it was made with love right in your own kitchen. Let’s get started on the dough!
Jump to:
Gathering What You Need for Homemade Garlic Knots
Before we dive into the magic of making dough, let’s make sure our kitchen station is ready to go. Having the right tools on hand makes the whole process smoother, especially when you’re working with yeast dough. You don’t need a commercial bakery setup, but a few key items really help things along.
The first thing I always grab is my trusty stand mixer. It has a dough hook attachment that makes kneading a breeze. If you don’t have a mixer, don’t panic! Your hands are your best tools sometimes, and I’ll show you how to manage that in the kneading section. Just make sure you have enough counter space for that kneading!
You’ll also need a couple of large, clean bowls—one for the initial yeast proofing and a bigger one for the main dough rise. And please, make sure you have good, sturdy baking sheets. We line ours with parchment paper, which is a total lifesaver for cleanup later. Always have parchment ready!
Essential Equipment for Perfect Homemade Garlic Knots
- Stand mixer with a dough hook attachment (or just strong arms for hand kneading).
- Large mixing bowls for rising the dough.
- Measuring cups and spoons—especially crucial for the water temperature!
- A sharp knife or bench scraper for dividing the dough evenly.
- Two standard-sized baking sheets.
- Parchment paper or silicone baking mats for lining the sheets.
- A silicone pastry brush for slathering on that glorious garlic butter.
Precise Ingredients for Flavorful Homemade Garlic Knots
Okay, this is where the magic really starts. For homemade garlic knots, precision matters, especially with the water temperature and the flour measurements. Trust me on this: don’t eyeball the flour. It changes everything!
When we talk about water, it needs to be warm, not hot. We are waking up the yeast, not putting it to sleep! Aim for that sweet spot between 100 and 110 degrees Fahrenheit. If you don’t have a thermometer, it should feel comfortably warm to your wrist, like a nice bath, but not hot enough to sting. Understanding the ideal temperature for yeast activation is key to fluffy results.
For the flour, use the scoop-and-level method or weigh it if you can—it makes a huge difference in texture. We want these knots soft and fluffy, not dense little rocks!
Dough Components for Homemade Garlic Knots
These are the building blocks of our soft dough:
| Component | Amount | Notes |
|---|---|---|
| Warm Water | 1 and 1/3 cups (320ml) | Must be 100–110°F (38–43°C) |
| Instant Yeast | 2 and 1/4 teaspoons (7g) | The instant kind works best here! |
| Granulated Sugar | 1 Tablespoon (13g) | Feeds the yeast beautifully. |
| Olive Oil or Melted Butter | 3 Tablespoons (45ml) or 43g | Adds richness to the dough base. |
| Salt & Garlic Powder | 1 teaspoon salt, 1/2 teaspoon garlic powder | Flavor right into the dough! |
| All-Purpose Flour | 3 and 1/2 cups (about 450g) | Plus extra for dusting later. |
The Flavorful Garlic Butter Topping Ingredients
This is the part that makes your kitchen smell absolutely incredible. You need the melted butter to be warm so it soaks right into the hot knots after baking.
| Component | Amount | Preparation Note |
|---|---|---|
| Unsalted Butter | 5 Tablespoons (71g) | Melted, reserved for post-bake brushing. |
| Garlic | 3 cloves, minced OR 1/2 teaspoon garlic powder | Your choice! Fresh is best, but powder is quick. |
| Seasoning | 1 teaspoon Italian seasoning, 1/4 teaspoon salt | For that classic savory punch. |
| Optional Freshness | 1/4 cup chopped fresh parsley | Stirred in at the very end for color. |
| Optional Cheese | 2 Tablespoons grated Parmesan cheese | Sprinkle this on while the knots are still hot! |
Step-by-Step Mastery: Making Your Homemade Garlic Knots
This dough comes together surprisingly fast, but the waiting part is the hardest! We need patience for the yeast to do its job, but don’t worry, I have a trick for those cold days when your kitchen just won’t cooperate.
Activating the Yeast and Mixing the Homemade Garlic Knots Dough
First things first: grab your stand mixer bowl, the one you’ll use with the dough hook, and whisk together that warm water, the instant yeast, and the tablespoon of sugar. Give it a gentle stir, cover the bowl with a clean dish towel, and just let it sit for about five minutes. You are looking for foam! If it gets foamy and bubbly on top, that yeast is alive and ready to work its magic.
Once you see that foam, toss in the olive oil (or butter), the salt, and the garlic powder that goes *into* the dough. Then, start adding your flour slowly. I add about half first, beat it for just 15 seconds, and then add the rest. This keeps the mixer from getting overloaded right away. It will look shaggy, and that’s totally fine at this stage.
Kneading and First Rise for Your Homemade Garlic Knots
Now we knead! If you’re using the mixer, switch to the dough hook and let it run on low speed for a full five minutes. If you’re doing this by hand, turn it out onto a lightly floured surface and knead with purpose for five minutes. The goal here is a soft dough that’s just a little bit tacky—sticky enough to feel moist, but it shouldn’t glue itself to your fingers.
If it feels too sticky, add flour just one teaspoon at a time. You are looking for that slow bounce-back when you poke it with a finger, or you can try the windowpane test—stretch a small piece until it’s thin enough to see light through without tearing. Once it passes the test, grease up a large bowl, toss the dough in so it’s coated, cover it tight, and let it rise for one to two hours until it’s doubled. Seriously, if it’s cold in your house, try the oven trick: heat the oven to 150 degrees, turn it off, stick the bowl inside, and keep the door cracked open a tiny bit to keep it cozy. It speeds things up!
Shaping and Second Rest for Optimal Homemade Garlic Knots
When that dough has puffed up beautifully, punch it down gently to deflate all those lovely gases. Turn it out onto your counter and shape it into a long log, about 16 inches long and 5 inches wide. Now, take your bench scraper or sharp knife and cut that log into 16 even strips. Don’t stress about perfection here; they are homemade, after all!
Take one strip and roll it out between your palms until you have about an 8-inch rope. Then, tie that rope into a simple knot. It might look a little clumsy at first, but just tuck the ends under to secure it. Arrange all 16 knots on your parchment-lined baking sheets, making sure they have a little breathing room. Cover them loosely and let them rest again for 30 to 45 minutes. This second rest lets them puff up slightly before baking, which is key for a soft interior.
Baking and Finishing Your Homemade Garlic Knots
Right before that second rest is up, go ahead and preheat your oven to 400 degrees Fahrenheit. While it’s heating, mix up your topping: melt that 5 tablespoons of butter and stir in the minced garlic (or powder), the Italian seasoning, and that last pinch of salt. Brush this mixture generously all over the resting knots.
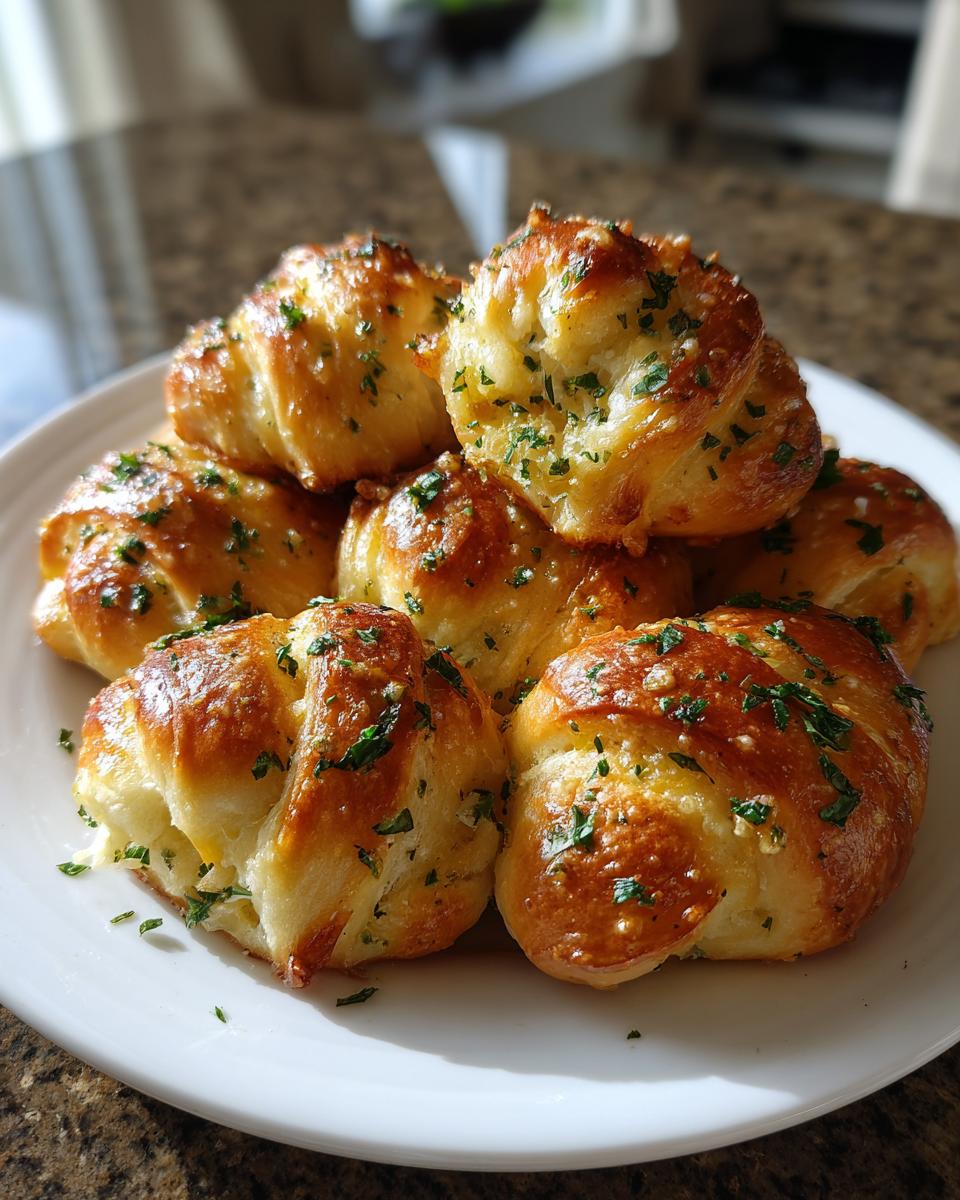
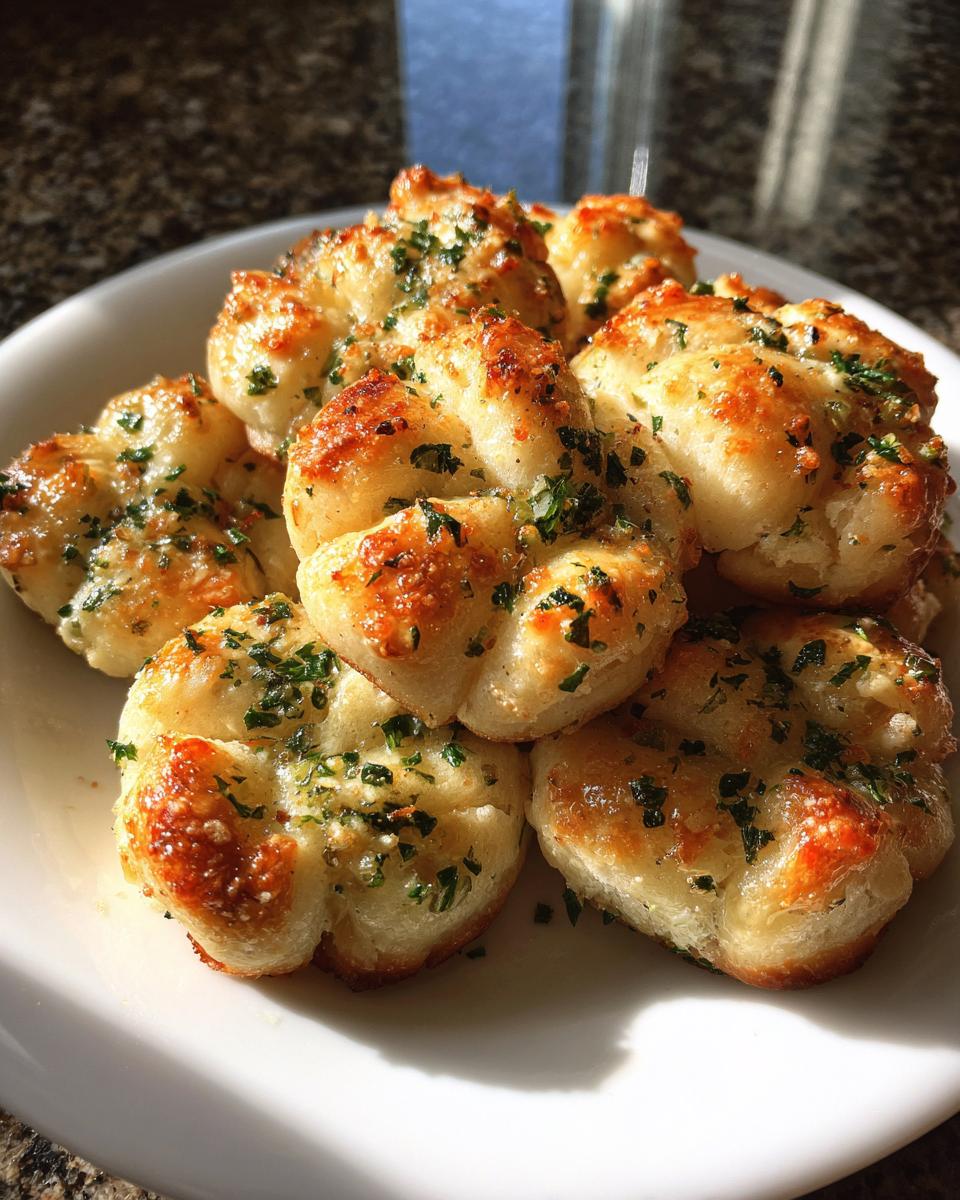
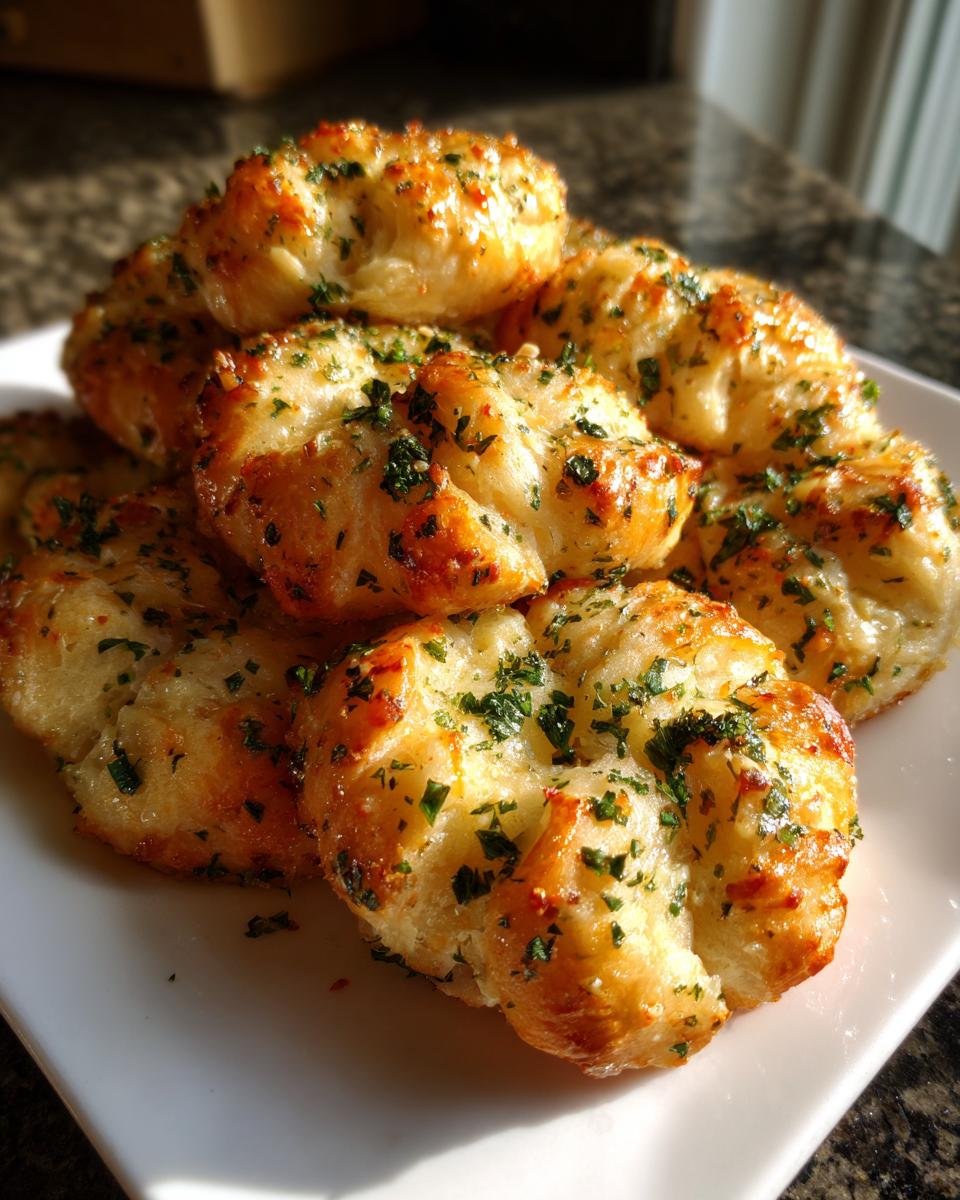
Bake them for about 20 to 23 minutes. Watch them closely—you want golden brown tops, not dark brown! As soon as they come out of the oven, while they are piping hot, brush on that remaining garlic butter. That second coating really locks in the moisture and flavor. If you’re using Parmesan or parsley, sprinkle it on right now so it sticks to the melted butter. Serve them warm with your favorite marinara sauce! If you need a great sauce recipe, check out this spaghetti bolognese recipe for inspiration.
Tips for Success with Your Homemade Garlic Knots
I’ve learned a few things over the years of making these knots, and I want to save you any heartache! The biggest hurdle is usually the stickiness of the dough during kneading. Remember, tacky is good, but sticky is bad. If you keep adding flour to fix the stickiness, you’ll end up with tough knots. Resist the urge! Just keep kneading; sometimes the dough needs that five minutes to hydrate properly.
For that perfect golden crust, make sure your oven is fully preheated to 400 degrees before they go in. Also, don’t skip that second rest period after shaping. Those little puffs are what give you that soft, airy interior when you bite in. A quick brush of butter right after they come out locks everything in so they stay moist for days!
Storage and Reheating Instructions for Homemade Garlic Knots
Nobody wants leftovers to go stale, but these knots are so good you might actually have some! For short-term storage, just keep them covered tightly at room temperature. They usually stay perfectly soft for up to two days. If you need to keep them longer, the fridge is the place to go, but they might firm up a bit there.
If you know you won’t get to them within a week, freezing is your best bet. They freeze like a dream! Make sure they are completely cooled before you wrap them up tight. When you’re ready to eat them later, just thaw them on the counter first. Trust me, they are worth the wait!
| Storage Method | Duration | Preparation |
|---|---|---|
| Room Temperature (Covered) | Up to 2 days | Keep tightly covered to maintain softness. |
| Refrigerated | Up to 1 week | Store in an airtight container. |
| Freezer | Up to 3 months | Cool completely, wrap tightly before freezing. |
Frequently Asked Questions About Homemade Garlic Knots
You all ask the best questions when you try this recipe! I’ve pulled together a few of the most common things people wonder about when making these soft, flavorful garlic knots at home.
Q1. Can I use bread flour instead of all-purpose flour?
You absolutely can! Bread flour has a higher protein content, which means your homemade garlic knots might end up slightly chewier, which some folks actually prefer! Just watch the water absorption; you might need a tiny bit more liquid, or the dough might feel firmer initially.
Q2. I don’t have instant yeast; can I use active dry yeast?
Yes, you can substitute active dry yeast, but you must proof it first with the warm water and sugar, just like I mentioned in step one. You need to let it sit for about 5 to 10 minutes until it’s really foamy before adding the rest of the ingredients. If it doesn’t foam, your yeast is dead, so ditch it and start over!
Q3. Can I prepare the dough ahead of time? I want fresh garlic bread tomorrow.
That’s a great make-ahead option! You can let the dough rise slowly in the refrigerator overnight after the first rise (step 4). Just punch it down, oil the bowl, cover it tightly, and stick it in the fridge for up to 24 hours. Let it warm up on the counter for about 30 minutes before shaping and baking!
Q4. My knots didn’t puff up much during the second rest. What went wrong?
Usually, that means the room was too cold, or you didn’t let the dough rest long enough after tying them. The second rest is crucial for that airy texture. If you’re in a hurry, try the oven trick I mentioned in the notes section!
Understanding the Nutrition in Your Homemade Garlic Knots
I always get asked about the nutrition because, let’s be honest, these are so easy to eat way more than one of! Keep in mind that these values are just estimates based on the ingredients listed, especially since the Parmesan and parsley are optional. If you use less butter in the topping, your fat content will drop.
But look at that protein count! You get a nice little boost from the flour and cheese. They make a fantastic side dish that fills you up without weighing you down too much. Enjoy them guilt-free!
| Nutrient | Estimated Value (Per 1 Knot) |
|---|---|
| Calories | Approx. 150 |
| Fat | Approx. 7g |
| Saturated Fat | Approx. 4g |
| Carbohydrates | Approx. 19g |
| Protein | Approx. 3g |
| Sodium | Approx. 150mg |
Disclaimer: These are estimated nutritional values calculated based on standard ingredient databases. Actual values may vary depending on specific brands and optional additions like Parmesan cheese. For more general dietary information, you can consult resources like the Mayo Clinic nutrition basics.
Share Your Delicious Homemade Garlic Knots Experience
That’s it! You’ve made the softest, garliest knots imaginable. I truly hope these bring as much joy and incredible smells to your house as they do mine. Please tell me how they turned out! Leave a star rating below, or drop a comment telling me if you used fresh garlic or the powder. I love seeing your creations!
Print
16 Amazing Homemade Garlic Knots Today
- Total Time: 2 hours 55 minutes
- Yield: 16 knots 1x
- Diet: Vegetarian
Description
Homemade Garlic Knots. Anna Kowalska shares tried-and-true homemade recipes that you and your family will love, everything made with heart and flavor. These soft, flavorful garlic knots make a perfect snack, appetizer, or side dish.
Ingredients
- 1 and 1/3 cups (320ml) warm water (100–110°F, 38–43°C)
- 2 and 1/4 teaspoons (7g) instant yeast
- 1 Tablespoon (13g) granulated sugar
- 3 Tablespoons (45ml) olive oil or (43g) melted butter
- 1 teaspoon salt
- 1/2 teaspoon garlic powder
- 3 and 1/2 cups (about 450g) all-purpose flour, plus more for dusting
- 5 Tablespoons (71g) unsalted butter, melted (for topping)
- 3 garlic cloves, minced; or 1/2 teaspoon garlic powder (for topping)
- 1 teaspoon Italian seasoning
- 1/4 teaspoon salt (for topping)
- 1/4 cup grated Parmesan cheese (optional)
- 2 Tablespoons chopped fresh parsley (optional)
Instructions
- Whisk the warm water, yeast, and granulated sugar in a stand mixer bowl fitted with a dough hook or paddle attachment. Cover and rest for 5 minutes.
- Add the olive oil (or butter), salt, garlic powder, and half of the flour. Beat for 15 seconds, then add the remaining flour. Beat on low speed for 2 minutes.
- Knead the dough: Keep in the mixer (switch to dough hook if needed) and beat for 5 full minutes, or knead by hand for 5 full minutes on a lightly floured surface. Add flour one teaspoon at a time if the dough is too sticky, aiming for a soft, slightly tacky dough. Check readiness with a finger poke (slow bounce back) or the windowpane test.
- Lightly grease a large bowl. Place the dough in the bowl, turning to coat. Cover and allow to rise at room temperature for 1–2 hours, until doubled in size. For a warm rise, use the turned-off oven method described in the notes.
- Punch the dough down to release air. On a lightly floured surface, shape the dough into a 16×5-inch log. Slice into 16 1-inch strips. Roll each strip into an 8-inch rope and tie it into a knot. Arrange knots on 2 parchment-lined baking sheets.
- Lightly cover the knots and let them rest for 30 to 45 minutes to puff slightly.
- Preheat your oven to 400°F (204°C) near the end of the rest time.
- Make the topping: Stir together the melted butter, garlic, Italian seasoning, and salt. Brush this mixture onto the knots, reserving some for later.
- Bake for 20–23 minutes, or until the tops are golden brown.
- Remove from the oven and brush the warm knots with the remaining garlic butter. Sprinkle with Parmesan cheese and/or parsley, if using.
- Serve immediately, plain or with marinara sauce.
Notes
- The recipe yields soft, flavorful garlic knots suitable as a snack, appetizer, or side dish.
- For a warm environment on a cold day, heat the oven to 150°F (66°C), turn it off, place the dough inside, and keep the door slightly ajar. After 30 minutes, close the door to trap the heat. Remove when doubled.
- Store leftover baked knots covered at room temperature for up to 2 days or refrigerated for up to 1 week. Freeze cooled knots for up to 3 months. Thaw on the counter before reheating.
- Prep Time: 30 minutes
- Cook Time: 25 minutes
- Category: Bread
- Method: Baking
- Cuisine: Italian-American
Nutrition
- Serving Size: 1 knot
- Calories: Approx. 150
- Sugar: Approx. 1g
- Sodium: Approx. 150mg
- Fat: Approx. 7g
- Saturated Fat: Approx. 4g
- Unsaturated Fat: Approx. 3g
- Trans Fat: 0g
- Carbohydrates: Approx. 19g
- Fiber: Approx. 1g
- Protein: Approx. 3g
- Cholesterol: Approx. 15mg