Skip to content
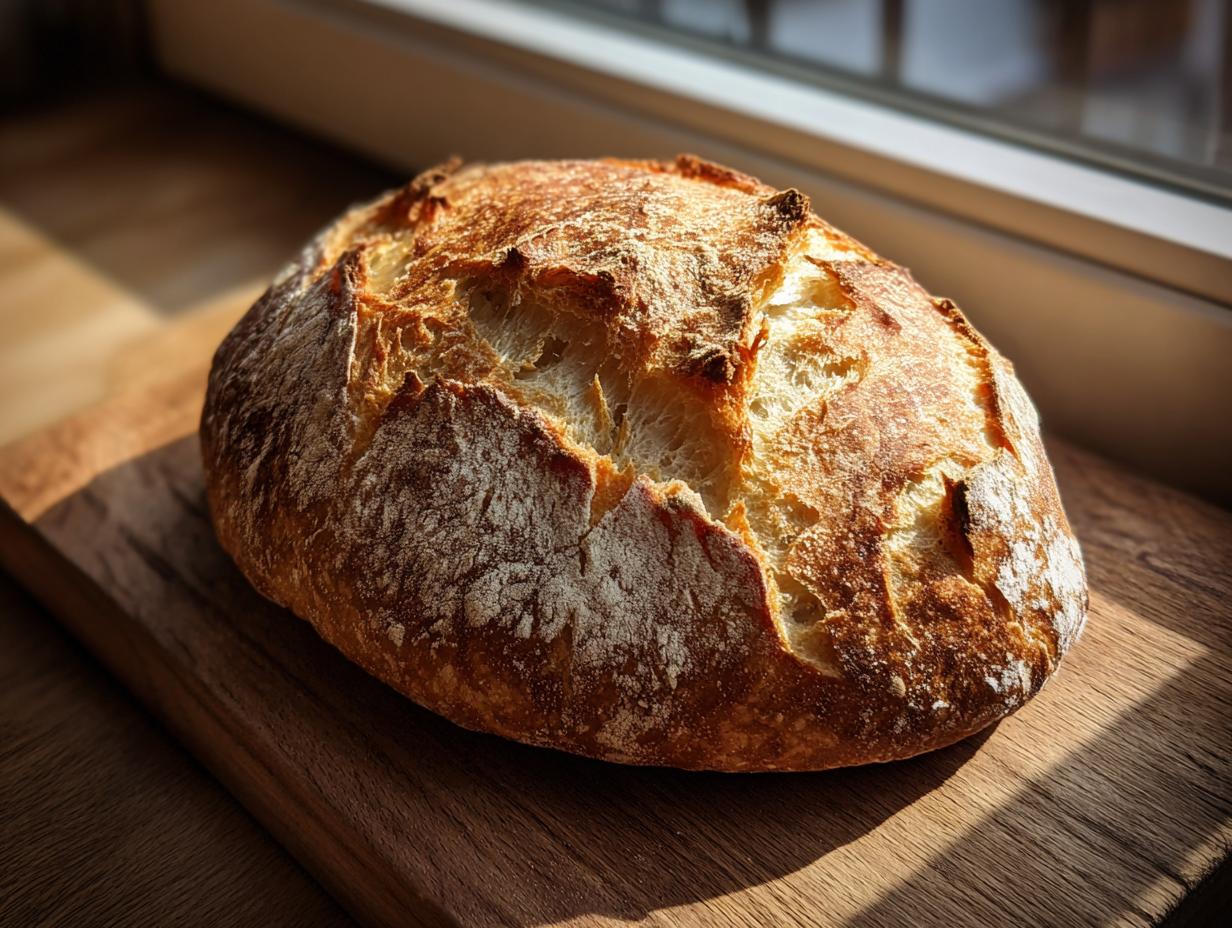
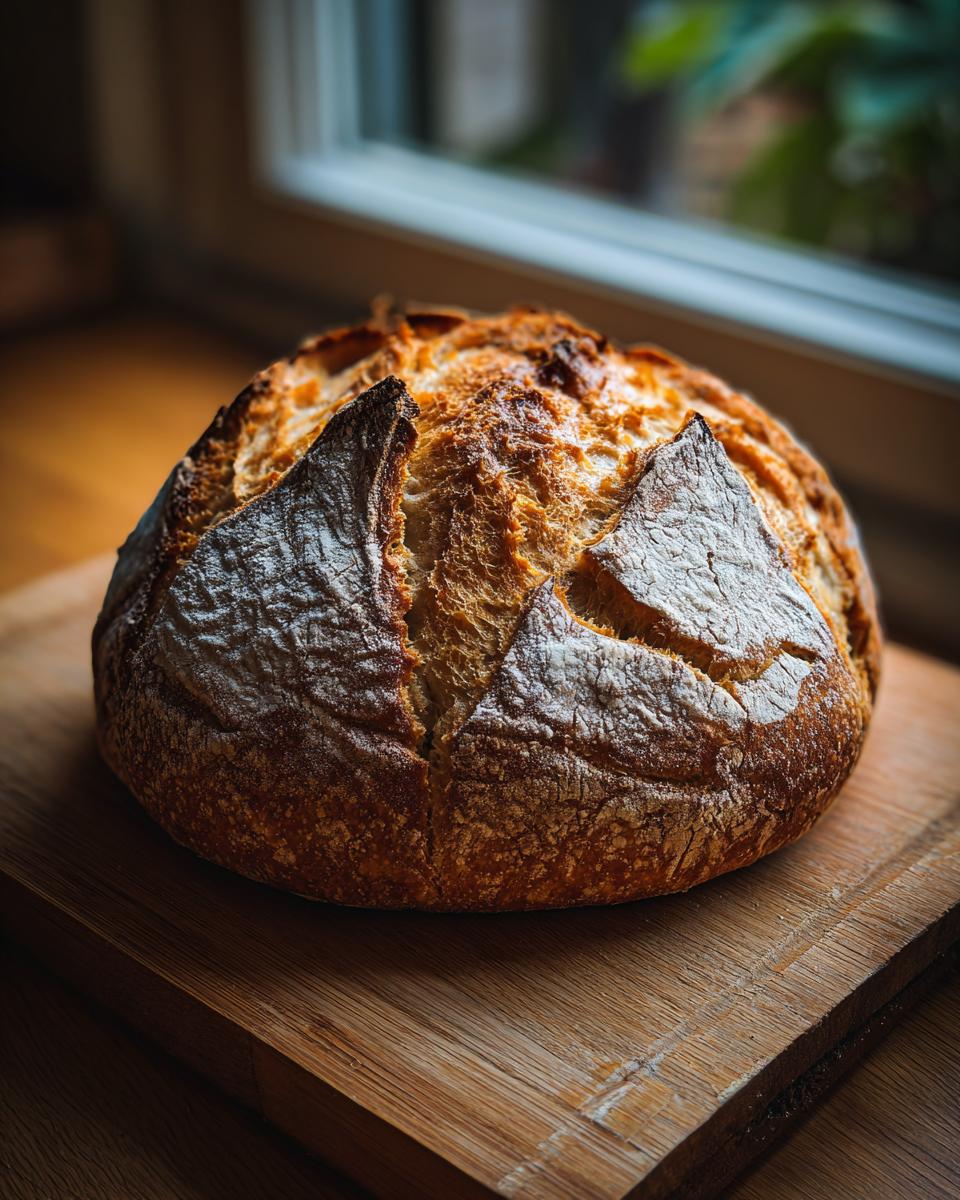
If you think baking incredible bread has to involve complicated steps or a mountain of salt, let me stop you right there! Making Italian Tuscan Bread, or Pane Toscano, is all about embracing simplicity and tradition. This bread is famous for a reason—it’s naturally salt-free, which lets the pure flavor of the wheat shine through. That’s exactly what I, Anna Kowalska, love to share here. I bring you tried-and-true homemade recipes that you and your family will absolutely love, because everything I share is made with heart and flavor. This particular loaf teaches you patience, rewarding you with that signature crisp crust and soft interior that only a long, slow fermentation can provide. It’s truly stunning how much flavor develops from just flour, water, yeast, and oil!
Jump to:
Gathering Ingredients for Your Italian Tuscan Bread, or Pane Toscano
When you commit to making real Italian Tuscan Bread, or Pane Toscano, you quickly realize how few things you actually need. That’s the beauty of it! We aren’t messing around with added salt here, so the quality of your flour really matters. I always use a good all-purpose or bread flour that has decent protein content; it helps build that strong structure during that long rest period. Make sure your yeast is fresh, too, because this recipe relies heavily on it for all its rise and flavor development.
Don’t stress if the ingredient list looks short. Those few items are working overtime to create something magnificent. Just gather them up, measure carefully, and we can get that initial soak started!
Essential List for Italian Tuscan Bread, or Pane Toscano
This list is the heart of your Pane Toscano. Stick to these amounts, and you’ll be golden:
- 2 teaspoons dry yeast
- 500 ml water
- 270 g flour (for the initial soak)
- 500 g flour (for the final mix)
- 1 tablespoon olive oil
- A little flour for dusting
Equipment Needed for Baking
You don’t need fancy machinery for this Italian classic, but you do need a few sturdy pieces. Grab a couple of large mixing bowls—one for the initial soak and one for the final rise. You’ll definitely want some plastic wrap or a clean kitchen towel to cover your dough. A good, sturdy baking sheet is essential, and don’t forget a small, oven-safe metal tray to hold the water for steam!
Step-by-Step Instructions for Perfect Italian Tuscan Bread, or Pane Toscano
This is where the magic happens, and honestly, most of the work is done by time itself! Making truly authentic Italian Tuscan Bread, or Pane Toscano, requires us to slow down. We are relying on a long, cool fermentation to develop all that wonderful, complex flavor that salt usually provides. Don’t rush the first step—it’s the foundation of everything good that follows. Once that initial stage is done, the mixing goes quickly, but remember to be gentle when you handle the dough later on so you don’t deflate all that lovely air we’ve encouraged.
Initial Fermentation: Building Flavor in Your Italian Tuscan Bread, or Pane Toscano
First things first: grab your yeast and whisk it right into the 500 ml of lukewarm water in a big bowl. Let that sit for a minute until it looks a little foamy. Now, stir in the first measure of flour—that 270 grams. Mix it until it’s just combined into a thick batter. Here’s the crucial part for your Pane Toscano: cover that bowl tightly with plastic wrap, but poke two or three small holes in the top. This lets the gases escape while keeping the moisture in. Let this sit at room temperature for a full 8 to 9 hours, or just leave it overnight on the counter. It’s going to look bubbly and smell slightly tangy the next morning—that’s success!
Developing the Dough Structure
When you wake up, take that bubbly starter and add the rest of the flour—that big 500 grams. Mix it until it starts coming together. Next, drizzle in that tablespoon of olive oil. Now, turn everything out onto a lightly floured surface and just work it with your hands. You don’t need to aggressively knead it like a pizza dough; just fold and press until it feels smooth, maybe five minutes of work. Pop it back into the oiled bowl, cover it with a clean towel, and let it rest again for 2 to 3 hours until it’s doubled, or even tripled, in size. Wow, the yeast is working hard!
Shaping and Final Proofing of the Loaf
Once it’s puffed up nicely, give the dough a very gentle punch down—don’t deflate it completely! Turn it out onto your counter and shape it gently into a nice round or oval loaf. You want to keep all those air bubbles inside. Now, grab a clean bowl, line it with a towel, and dust that towel generously with flour. Place your shaped loaf smooth-side down into the lined bowl. Cover it again and let it proof for two more hours. It should look puffy and feel light before it goes into the heat.
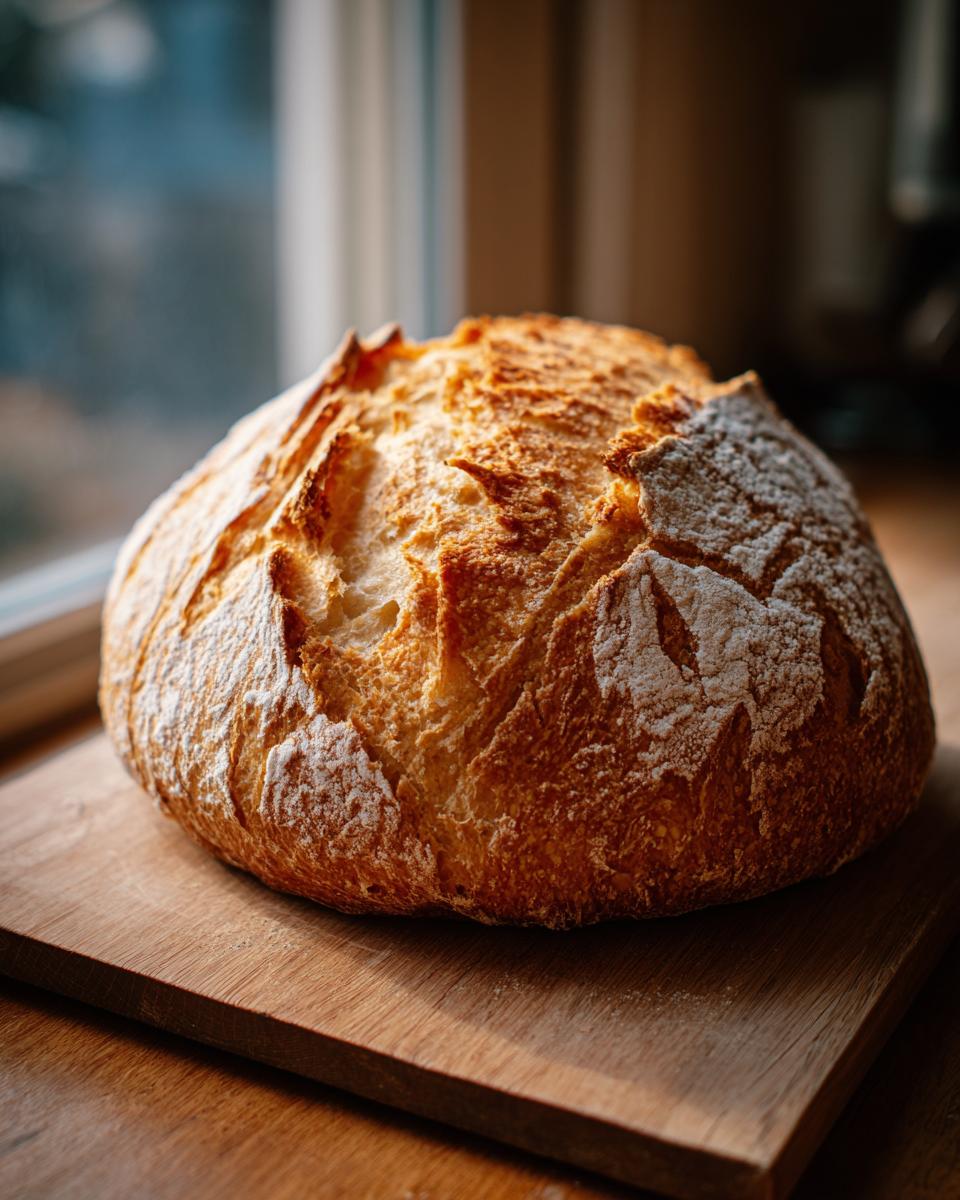
Baking Your Italian Tuscan Bread, or Pane Toscano to Perfection
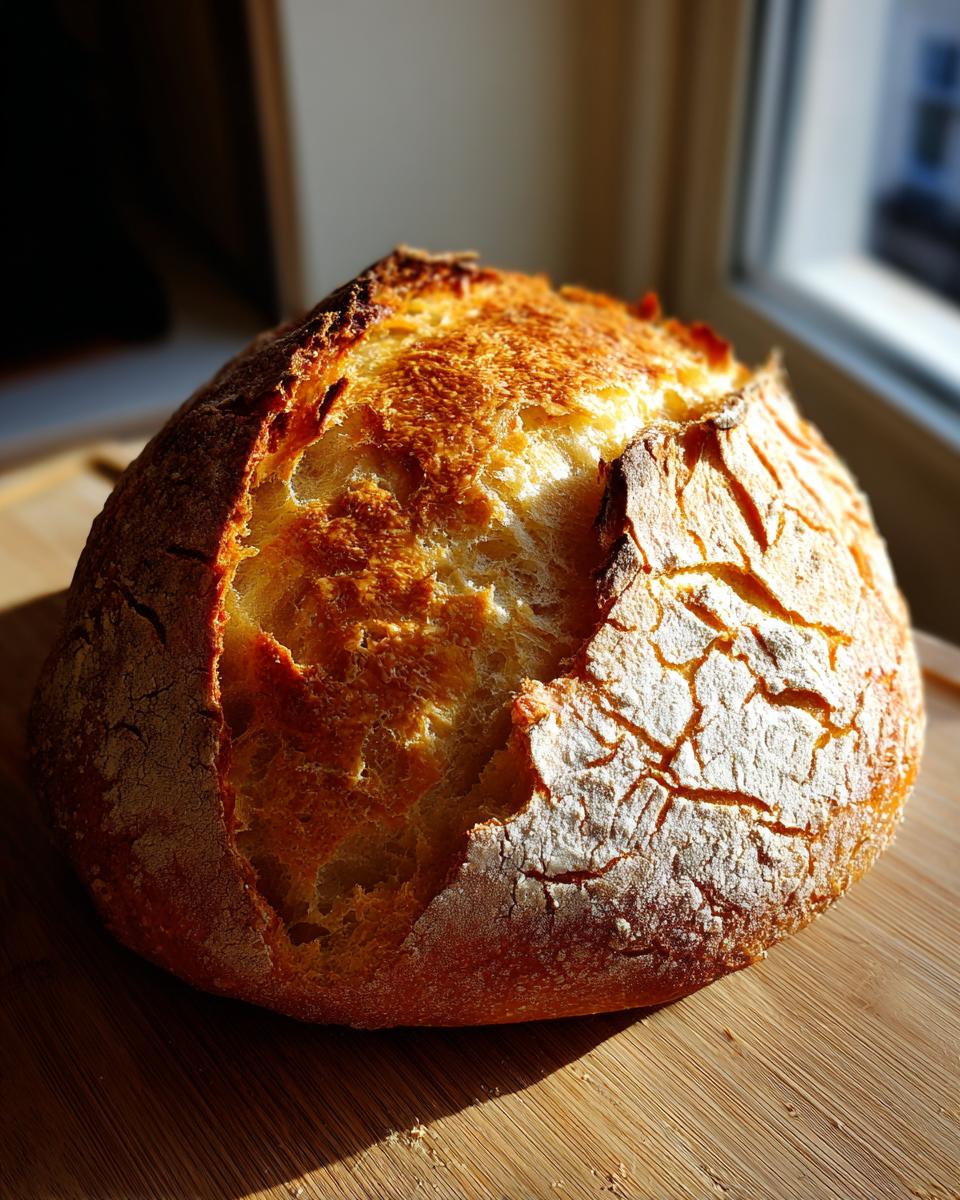
Preheat your oven way up high to 220 degrees C. Put a small, empty metal tray on the floor of the oven while it heats up—this is for our steam! Once hot, carefully turn your dough out onto a baking sheet, remove the towel, and score the top with a sharp knife—a few long slashes work beautifully. Slide the bread in, and immediately and carefully pour half a glass of water into that hot tray on the bottom, then shut the door fast! That steam is essential for that incredible crust on your Italian Tuscan Bread, or Pane Toscano. Bake for 20 minutes, then pull out the water tray, drop the temperature to 200 degrees C, and bake for 15 more minutes until it’s deeply golden brown and sounds hollow when you tap the bottom.
Tips for Success When Making Italian Tuscan Bread, or Pane Toscano
Baking this beautiful Italian Tuscan Bread, or Pane Toscano is mostly about trusting the process, especially that long, slow fermentation. My biggest piece of advice, learned over many early mornings watching the dough, is about the feel. When you knead the final dough, don’t worry if it feels a little sticky at first; that olive oil will help bring it together. If it feels too dry during the final proof, just spritz the towel covering it with a little water—humidity is your friend for a good rise!
When you score the top before baking, use a sharp knife and make decisive cuts. They should be about half an inch deep. This controls where the bread expands under the heat, preventing blowouts elsewhere. And please, don’t skip the steam step! That initial blast of moisture keeps the crust soft long enough for the loaf to reach its maximum oven spring.
Finally, cooling is non-negotiable for the best Pane Toscano. Wrap that hot loaf right away in a clean kitchen towel while it cools on a rack. This traps just enough ambient moisture to keep the crust from hardening too quickly while the inside settles. Resist cutting into it for at least an hour, or you’ll end up with a gummy center!
Serving Suggestions for This Classic Bread
Since Italian Tuscan Bread, or Pane Toscano is naturally salt-free, it’s the perfect vehicle for showcasing other strong flavors. It shines when served simply! My favorite way to eat it is toasted lightly and drizzled with a really high-quality, peppery olive oil. Think about dipping it into a rich, homemade tomato sauce—the bread soaks up all that flavor beautifully without adding extra saltiness. This soup would be a perfect pairing.
It’s also wonderful alongside strong cheeses, like Pecorino Toscano, or even spread with homemade jams or honey. It truly lets whatever you pair it with take center stage!
Understanding the Nutrition of Your Italian Tuscan Bread, or Pane Toscano
Because we are baking true Italian Tuscan Bread, or Pane Toscano, the nutritional profile is wonderfully simple. We skip the sodium entirely, which is a huge win for many of us watching our intake! This means the majority of the calories are coming straight from the carbohydrates in the flour, balanced by the small amount of fat from the olive oil. Learning about the ingredients we use is always important.
Since this recipe relies on time and not additives, the macronutrient breakdown is very straightforward. Please remember that since this is a homemade recipe, the exact figures can shift slightly based on the specific type of flour you end up using. The values below are just estimates, but they give you a good idea of what you’re enjoying when you slice into this beautiful loaf!
| Nutrient | Estimated Value Per Slice |
|---|---|
| Calories | Estimate needed |
| Sugar | Estimate needed |
| Sodium | Very Low (Traditional recipe is salt-free) |
| Fat | Estimate needed |
| Carbohydrates | Estimate needed |
| Protein | Estimate needed |
Storing and Reheating Your Homemade Italian Tuscan Bread, or Pane Toscano
You did it! You baked the perfect loaf of Italian Tuscan Bread, or Pane Toscano. Now we have to make sure we keep it nice! The absolute most important rule for storage is that it must cool completely before you wrap it up. If you wrap it while it’s still warm, all that trapped steam turns into condensation, and you end up with a soggy crust—and nobody wants that on their beautiful crusty bread!
Once it’s totally cool, wrap it tightly in plastic wrap or put it in an airtight bag. This keeps the interior soft while protecting it from the air. If you’re not eating it within two days, I highly recommend slicing it and freezing it. It freezes like a dream! For other quick recipes, check out my easy section.
To bring that amazing crust back to life on your Pane Toscano, you have to use heat and steam again! Don’t just microwave it; that just makes it chewy. Take your slice or half-loaf, spritz the crust lightly with water, and pop it right into a 350-degree oven for about 5 to 8 minutes. It comes out tasting almost freshly baked. It’s the best trick for reviving this classic loaf.
| Storage Method | Duration | Best Practice |
|---|---|---|
| Countertop (Room Temp) | 1-2 Days | Wrap tightly in plastic or bag once completely cool. |
| Freezer | Up to 2 Months | Slice first, wrap tightly in foil, then a freezer bag. |
| Reheating | 5-8 Minutes | Spritz with water and bake at 350°F (175°C). |
Reader Feedback and Connecting About Your Italian Tuscan Bread, or Pane Toscano
I truly hope you loved the process of making this beautiful, traditional Italian Tuscan Bread, or Pane Toscano! It’s such a rewarding bake. I’m always so eager to hear how your long fermentation turned out. Did you enjoy the salt-free flavor? Please leave a comment below, tell me how your loaf scored, and share a picture if you can. Happy baking, everyone!
Print
Stunning 8-Hour Italian Tuscan Bread Magic
- Total Time: 11 hours 5 minutes (includes long fermentation)
- Yield: 1 loaf 1x
- Diet: Vegetarian
Description
Italian Tuscan Bread, or Pane Toscano, is a traditional, salt-free bread known for its simple flavor and satisfying crust. Anna Kowalska shares this tried-and-true homemade recipe that you and your family will love, made with heart and flavor.
Ingredients
- 2 teaspoons dry yeast
- 500 ml water
- 270 g flour
- 500 g flour
- 1 tablespoon olive oil
- A little flour for dusting
Instructions
- Combine 2 teaspoons of dry yeast with 500 ml of water in a large bowl. Whisk the mixture.
- Add 270 g of flour and mix well.
- Cover the bowl with cling film. Poke two or three holes in the film to allow yeast gases to escape. Let this mixture ferment at room temperature for 8-9 hours, or overnight.
- The next day, add the remaining 500 g of flour to the fermented mixture and mix well with a spoon or spatula.
- Pour in one tablespoon of olive oil. Knead the dough with your hands until smooth on a work surface.
- Return the dough to the bowl. Cover it with a towel and let it rise at room temperature for 2-3 hours, or until its volume increases 2-3 times.
- Knead the dough once more on the table. Shape it into a round or oval loaf.
- Line a clean bowl with a towel and dust it lightly with flour. Place the dough smooth side down in the prepared bowl. Cover with a towel and let it prove for two hours, or until the dough doubles in size.
- Preheat your oven to 220 degrees C. Place a small tray on the oven floor.
- Carefully turn the dough out onto a baking sheet. Remove the towel.
- Score the top of the bread with a knife.
- Place the bread in the preheated oven. Quickly pour half a glass of water into the small tray on the oven floor. Close the door immediately. Bake for 20 minutes.
- After 20 minutes, remove the water tray. Reduce the oven temperature to 200 degrees C. Bake for another 15 minutes.
- Continue baking if necessary until the bread browns evenly on all sides. The bottom should sound hollow when tapped.
- Wrap the hot bread in a towel and allow it to cool completely before slicing and serving.
Notes
- Enjoy!
- Prep Time: 30 minutes
- Cook Time: 35 minutes
- Category: Bread
- Method: Baking
- Cuisine: Italian
Nutrition
- Serving Size: 1 slice
- Calories: Estimate needed
- Sugar: Estimate needed
- Sodium: Very Low (Traditional recipe is salt-free)
- Fat: Estimate needed
- Saturated Fat: Estimate needed
- Unsaturated Fat: Estimate needed
- Trans Fat: Estimate needed
- Carbohydrates: Estimate needed
- Fiber: Estimate needed
- Protein: Estimate needed
- Cholesterol: Estimate needed