Skip to content
Oh, you are going to LOVE this Keto Crème Brûlée! I’ve always been a sucker for that delicate, creamy custard with that crackly, caramelized sugar topping – it just feels so fancy, right? But when I started watching my carb intake, I thought that was a dessert I’d have to wave goodbye to. Turns out, nope! We can totally have our cake (or, well, crème brûlée!) and eat it too. This recipe makes it so achievable, giving you that super rich, velvety texture and that satisfying crunch without all the sugar. I’m Anna Kowalska, and here at my little corner of the internet, I love sharing recipes that are just bursting with flavor, the kind that feel special but are totally doable for you and your family. This Keto Crème Brûlée? It’s made with heart, just like everything else I share, proving that low-carb can be incredibly decadent!
Jump to:
Why You’ll Love This Keto Crème Brûlée
Seriously, this Keto Crème Brûlée is a game-changer! You’re going to adore how it brings that elegant restaurant dessert right into your own kitchen. Imagine digging into that super rich and creamy custard, knowing you’re doing it without all the sugar – pure bliss! It’s absolutely perfect for when you want something a little special, whether it’s a fancy dinner party or just treating yourself on a Tuesday. And the best part? It looks and tastes totally impressive, but it’s actually so simple to whip up. You’ll be amazed at how easy it is to get these incredible results!
- Get that fancy restaurant-quality dessert right at home.
- Savor a luxuriously rich and creamy custard, totally sugar-free!
- It’s the perfect make-ahead treat for special occasions or just because.
- You’ll be shocked at how simple it is to make something so impressive.
Essential Ingredients for Keto Crème Brûlée
Alright, let’s talk about what makes this Keto Crème Brûlée absolutely sing! We’re keeping things simple but focusing on quality, because that’s where the magic happens, right? First up, we need four large egg yolks. These are the backbone of our custard, giving it that gorgeous, rich texture and beautiful golden color. Make sure they’re fresh – it really does make a difference!
Then, we’ve got the flavor star: one teaspoon of pure vanilla extract. Don’t skimp here; a good quality vanilla makes all the difference in a dessert like this. For that luxurious, velvety creaminess that’s key to any great crème brûlée, we’re using two cups of heavy whipping cream. This is where we get that decadent mouthfeel without any of the carbs. Now, for the sweetening, and this is where we go keto-friendly. We’ll need five tablespoons of a good low-calorie natural sweetener, like Swerve® or erythritol. Make sure you divide this up as we’ll use some in the custard and some for that crackly topping. Using quality ingredients here ensures your Keto Crème Brûlée is not just low-carb but truly delicious!
Ingredient Clarity and Notes
When you’re grabbing your sweetener, just a little heads-up: different brands can have varying levels of sweetness and might clump a bit differently. For the custard itself, I like to use a granulated sweetener so it dissolves easily. For the topping, you want something that will caramelize nicely. If you’re unsure, check the package instructions, but generally, erythritol or a blend works beautifully for that satisfying crack. And remember, using large eggs is pretty standard, but if yours are on the smaller side, you might want to add an extra yolk just to ensure that perfect custard consistency for your Keto Crème Brûlée.
Step-by-Step Guide to Making Keto Crème Brûlée
Alright, let’s get down to business and make some magic happen! Making this Keto Crème Brûlée is actually a really rewarding process, and I promise, it’s not as intimidating as it might sound. We’re going to walk through it together, step by step, so you end up with that gorgeous, creamy dessert with that perfectly crackly top. So grab your whisk and let’s get started!
Preparing the Custard Base
First things first, let’s get that oven preheating to 325 degrees Fahrenheit (165 degrees C). You want it nice and ready for our custards. In a medium bowl, whisk together your lovely egg yolks and that pure vanilla extract. Just give it a good whisk until everything is combined and looks smooth – no need to go crazy here, just get it nicely blended. Now, grab a saucepan and pour in your heavy whipping cream along with one tablespoon of your low-calorie sweetener. We’re going to heat this mixture gently over medium heat. Keep whisking it constantly! You’ll know it’s ready when you see it just starting to simmer around the edges. Don’t let it boil, just a gentle simmer is perfect. Once it’s simmering, take it off the heat. Slowly, and I mean *slowly*, start pouring in your egg yolk mixture while whisking like a madwoman! This gradual addition and constant whisking is super important to temper the eggs and prevent them from scrambling. Keep whisking until it’s all beautifully combined and super smooth.
Baking and Setting the Custard
Now for the gentle baking part. Carefully divide that luscious custard mixture evenly among your four ramekins. Pop those ramekins into a larger glass baking dish. This dish is going to act as our water bath, which is key for that super smooth, even texture. Carefully pour hot water into the baking dish, making sure it comes about halfway up the sides of your ramekins. This water bath protects the delicate custard from direct heat, preventing it from getting rubbery or cracking. Place the whole setup gently onto the middle rack of your preheated oven. Let them bake for about 30 minutes. You’ll know they’re ready when the edges are set, but the center still has a little bit of a wobble, like Jell-O. Don’t overbake them, or they’ll get tough!
Achieving the Perfect Caramelized Topping
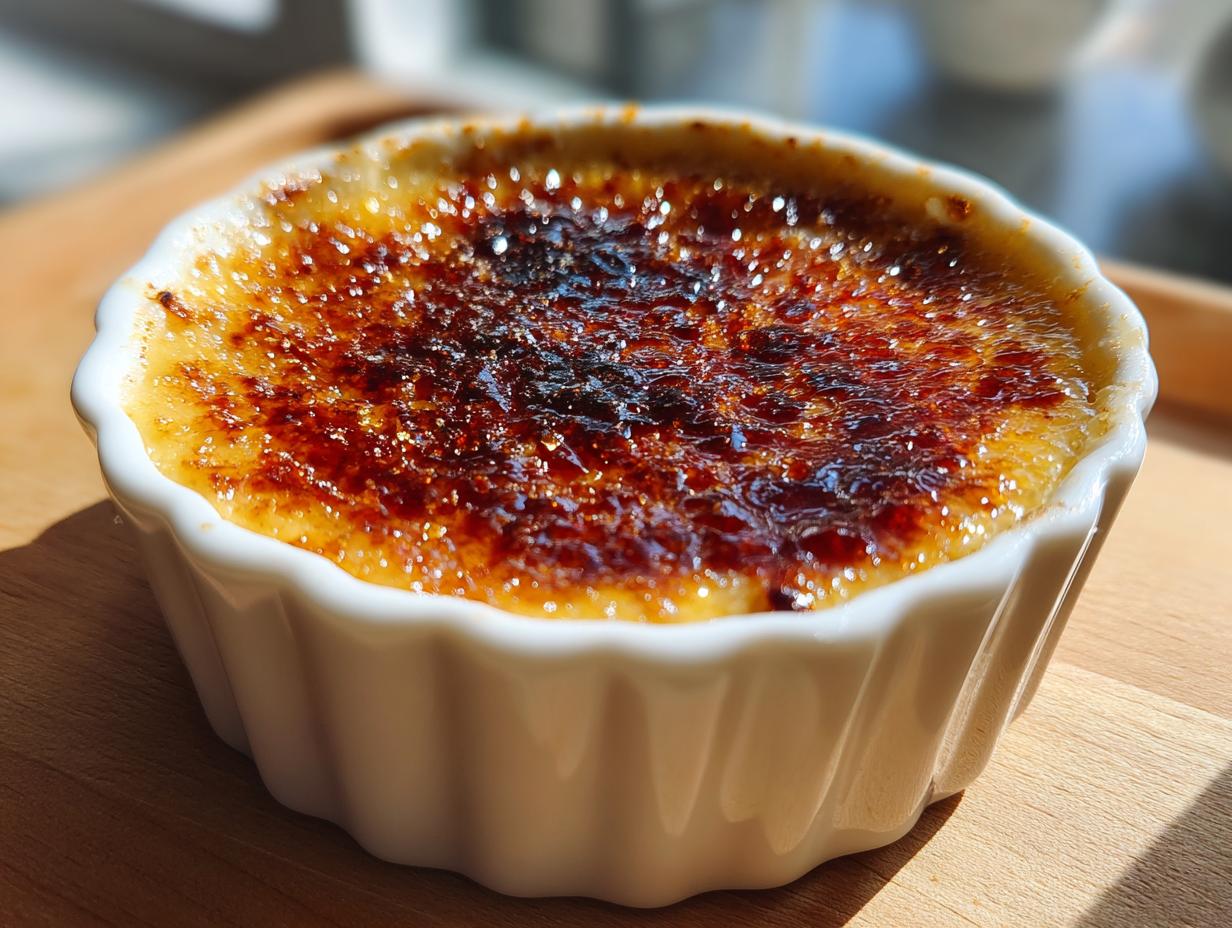
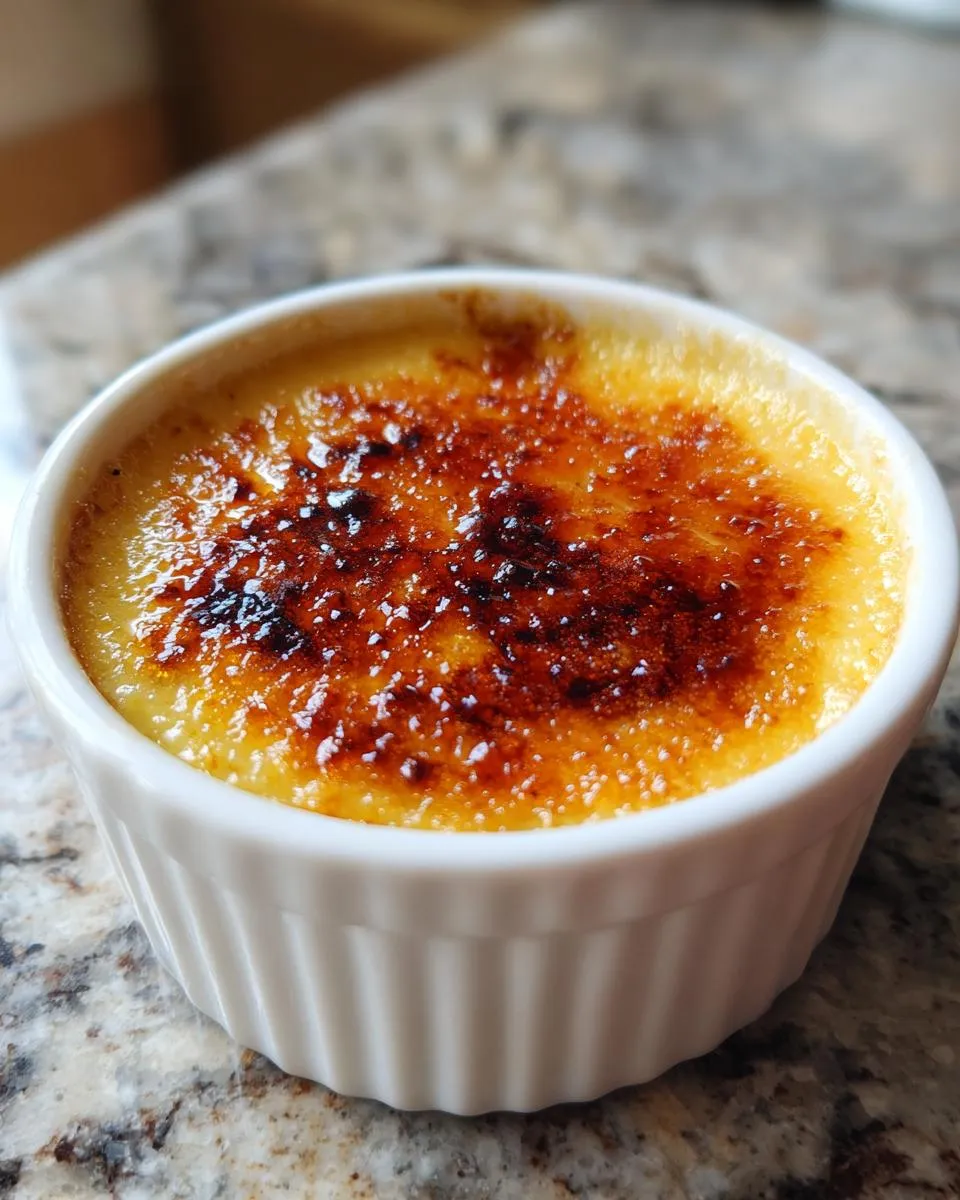
This is the fun part – the crackly topping! Once your custards are out of the oven and have chilled for a bit (you can pop them in the fridge for about 10 minutes to help them set up a little more), it’s time to torch them. Sprinkle about a tablespoon of your remaining low-calorie sweetener evenly over the top of each chilled crème brûlée. Now, grab your culinary torch! Hold it a few inches away from the sugar and move it around continuously. You want to heat the sweetener until it melts and turns a beautiful golden-brown, creating that signature crackly crust. It happens pretty fast, usually in about 30 seconds per ramekin, so keep an eye on it! Be careful not to burn it, or it’ll taste bitter. Let it sit for just a few minutes to harden up. That satisfying crack when you tap it with your spoon? Pure dessert heaven!
Tips for the Best Keto Crème Brûlée
Okay, so you want your Keto Crème Brûlée to be absolutely perfect, right? Trust me, a few little tricks can make all the difference between good and *gorgeous*. First off, don’t rush that heating of the cream and sweetener. Gentle heat and constant whisking are your best friends here; it prevents the eggs from scrambling and ensures that super smooth, velvety custard we’re going for. If you see it starting to boil, pull it off the heat immediately! And that water bath? It’s non-negotiable for even baking. Make sure the water comes up about halfway on the ramekins – it’s like a cozy hug for your custards, keeping them from getting tough or watery. When you torch that topping, keep the flame moving! It’s easy to scorch one spot, so a steady sweep will give you that beautiful, even golden-brown crust. And if your torch isn’t cutting it, don’t despair! You can carefully broil it for a minute or two, but watch it like a hawk – broilers are fierce!
Frequently Asked Questions about Keto Crème Brûlée
Got questions about whipping up this fabulous Keto Crème Brûlée? I’ve got answers! It’s my goal to make this recipe totally foolproof for you.
Can I make Keto Crème Brûlée ahead of time? Absolutely! You can totally make the custards up to a day in advance. Just bake them, let them cool, and then cover them with plastic wrap (press it right onto the surface to prevent a skin from forming) and pop them in the fridge. Then, right before serving, sprinkle on your sweetener and torch away! It’s perfect for guests.
What kind of low-calorie sweetener works best for the topping? For that beautiful, crackly caramelization on top of your Keto Crème Brûlée, you want a sweetener that’s going to melt and brown well. Erythritol or a blend that contains erythritol usually works like a charm. Some allulose products can also caramelize nicely. Just be aware that some sweeteners might not brown as intensely as regular sugar, so keep an eye on it when you torch!
What can I do if my custard curdles? Oops! If your custard looks a little lumpy or curdled, don’t panic. Sometimes this happens if the heat is too high when tempering the eggs. Your best bet is to try straining the mixture through a fine-mesh sieve *before* you bake it. This will catch any little bits of cooked egg and should still give you a nice, smooth Keto Crème Brûlée.
Is it possible to make Keto Crème Brûlée without a culinary torch? Yes, you can! It won’t be quite the same dramatic effect, but you can carefully place your ramekins under a preheated broiler for just a minute or two. Keep the oven door slightly ajar and watch it *constantly* – it goes from perfectly caramelized to burnt in seconds! You can also try heating the sweetener in a small saucepan until melted and carefully spooning it over the custard, but the torch is really the easiest and most reliable way for that classic crack.
Storing and Reheating Your Keto Crème Brûlée
So, you have some leftover Keto Crème Brûlée? Lucky you! To keep it tasting its absolute best, cover each ramekin tightly with plastic wrap, making sure the wrap actually touches the surface of the custard. This helps prevent a skin from forming. Pop them into the refrigerator, and they should stay delicious for about 2 to 3 days. Now, reheating isn’t really a thing for crème brûlée since the magic is in that cold, creamy custard and the crisp topping. If you’ve made them ahead and haven’t torched them yet, just store them covered in the fridge. Then, when you’re ready to serve, sprinkle on your sweetener and torch them right before you eat. That way, you get that perfect crackly crust every time!
Approximate Nutritional Information for Keto Crème Brûlée
Now, I always like to give you a little heads-up on the numbers, though remember these are just estimates and can totally vary depending on the exact brands and amounts you use for your Keto Crème Brûlée. It’s pretty amazing that we can enjoy something this rich and creamy while keeping things low-carb!
| Nutrient | Amount |
|---|---|
| Serving Size | 1 serving |
| Calories | 466 |
| Fat | 48g |
| Saturated Fat | 29g |
| Carbohydrates | 17g |
| Protein | 5g |
| Cholesterol | 368mg |
| Sugar | 0g |
| Sodium | 53mg |
Share Your Keto Crème Brûlée Creations!
I just *love* hearing from you all! Did you make this delicious Keto Crème Brûlée? Did it turn out perfectly? I’d be absolutely thrilled if you’d share your thoughts, tips, or even a photo in the comments below. Your feedback helps everyone bake with more confidence!
Print
Amazing Keto Crème Brûlée 4 Ways
- Total Time: 55 minutes
- Yield: 4 servings 1x
- Diet: Low Calorie
Description
Keto Crème Brûlée is a rich and creamy dessert that fits a low-carb lifestyle. This recipe offers a classic custard base with a perfectly caramelized sugar topping, made with a low-calorie sweetener.
Ingredients
- 4 egg yolks
- 1 teaspoon vanilla extract
- 2 cups heavy whipping cream
- 5 tablespoons low-calorie natural sweetener (such as Swerve®), divided
Instructions
- Preheat oven to 325 degrees F (165 degrees C).
- Whisk egg yolks and vanilla extract in a bowl until combined.
- Pour heavy whipping cream and 1 tablespoon sweetener into a saucepan. Heat, whisking continuously, over medium heat until it starts to simmer.
- Remove from heat. Gradually add egg yolk mixture, whisking continuously, until well combined.
- Divide mixture evenly between 4 ramekins. Place ramekins in a glass baking dish. Pour in enough hot water to come halfway up the sides of the dish.
- Bake on the middle rack until set, about 30 minutes.
- Sprinkle 1 tablespoon sweetener over each crème brûlée. Use a culinary torch to heat sweetener until caramelized, about 30 seconds.
- Refrigerate until set, about 10 minutes.
Notes
- Ensure the water bath comes halfway up the sides of the ramekins for even baking.
- Use a culinary torch for the best caramelization.
- Prep Time: 15 minutes
- Cook Time: 30 minutes
- Category: Dessert
- Method: Baking and Torching
- Cuisine: French
Nutrition
- Serving Size: 1 serving
- Calories: 466
- Sugar: 0g
- Sodium: 53mg
- Fat: 48g
- Saturated Fat: 29g
- Unsaturated Fat: N/A
- Trans Fat: N/A
- Carbohydrates: 17g
- Fiber: N/A
- Protein: 5g
- Cholesterol: 368mg