Skip to content
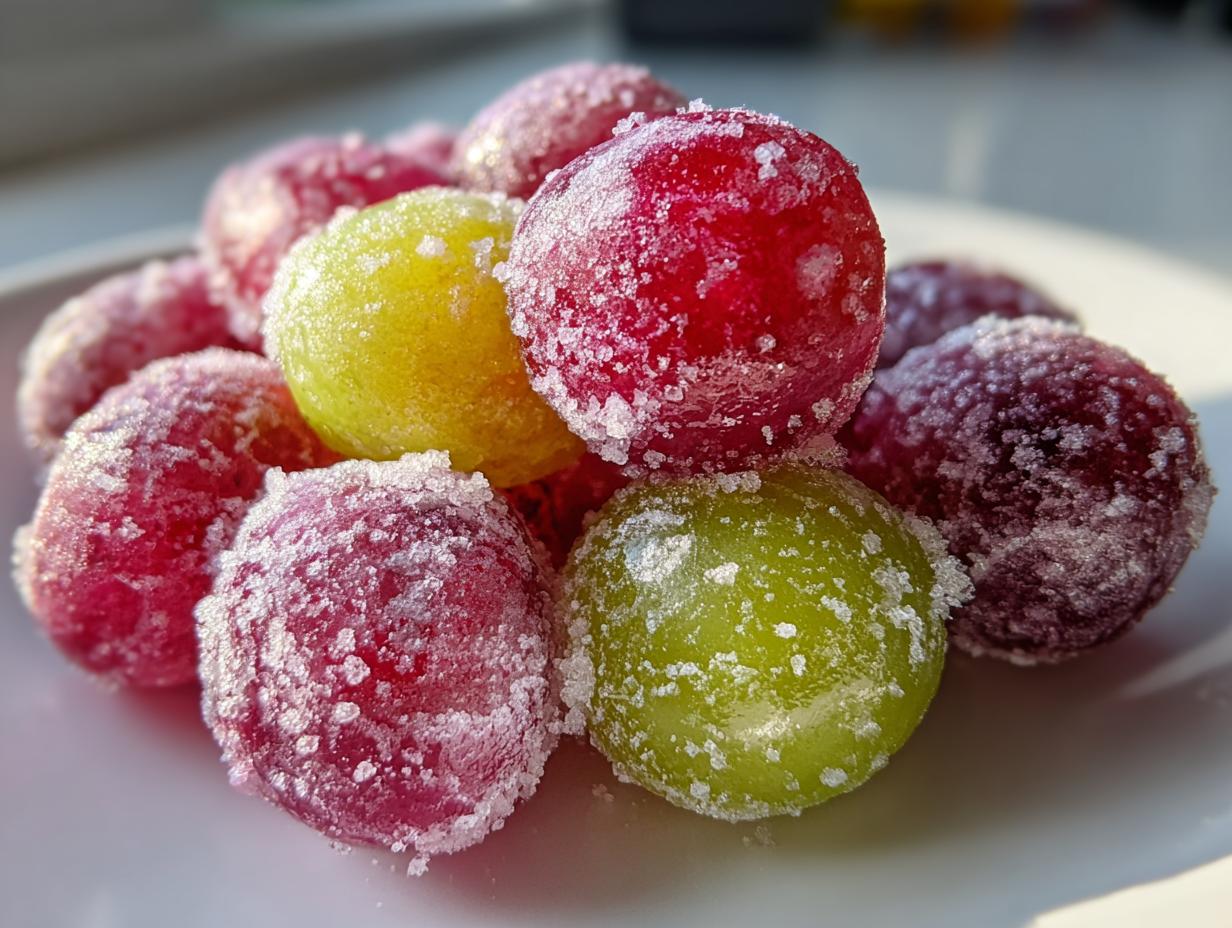
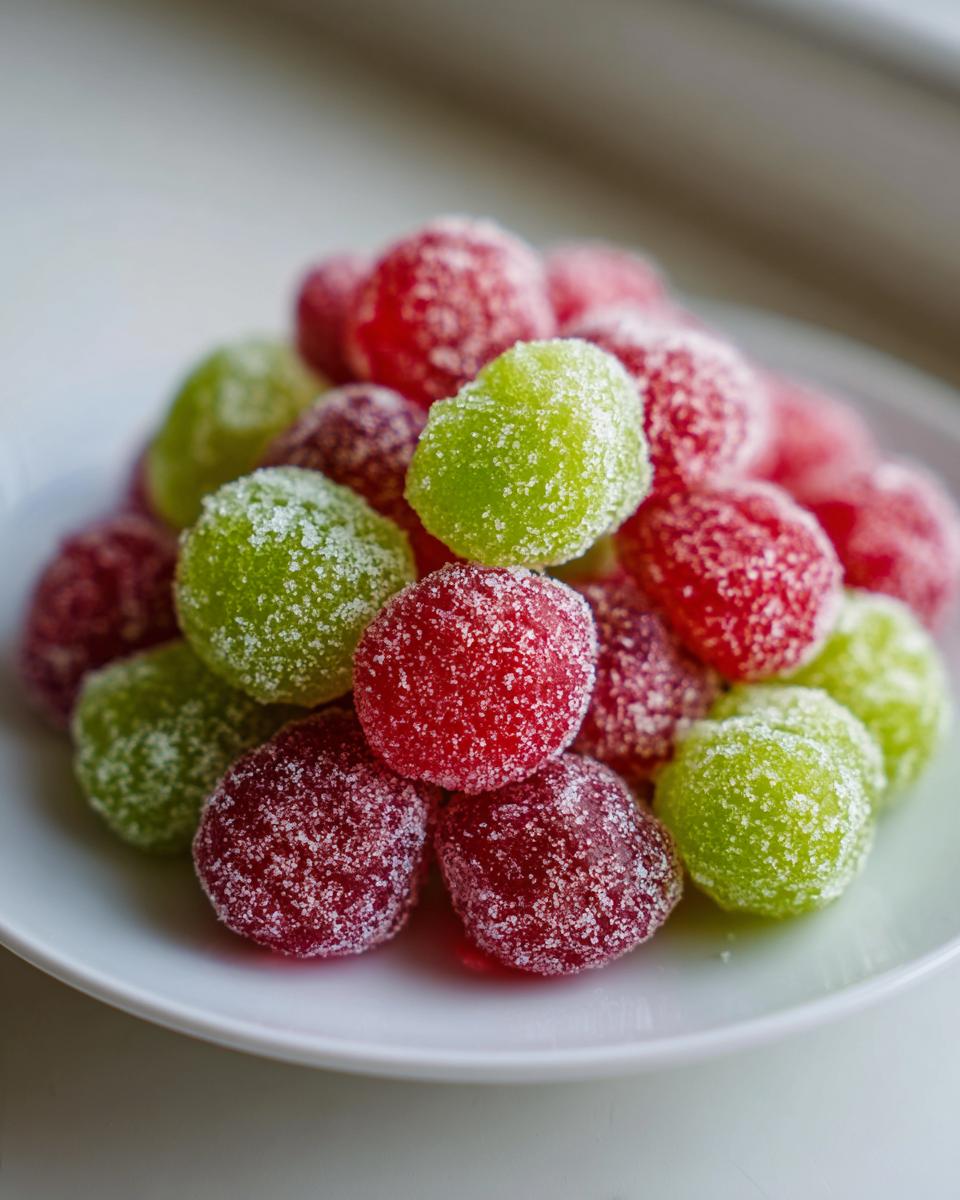
Kool-Aid Grapes! Wow, when I first stumbled upon this idea, I thought it was pure genius. Honestly, sometimes plain fruit just doesn’t cut it, especially when you’re trying to get the kids to eat something healthy but still want that fun, exciting factor. That’s where this little trick comes in. I’m Anna Kowalska, and here I share tried-and-true homemade recipes that you and your family will absolutely love. Everything I put on this site is made with heart and flavor, because that’s how food should be, right?
My kitchen has always been the center of our home, a place where simple ingredients turn into something special with just a little bit of creativity. I remember making the first batch of these so vividly; the color explosion in the bag was just unbelievable! It transformed a simple bowl of green grapes into something that felt like a party snack. These Kool-Aid Grapes are proof that you don’t need complicated steps or fancy equipment to bring a burst of cheer to your table. They are quick, they are tangy, and trust me, they disappear fast!
Jump to:
Gathering What You Need for Kool-Aid Grapes
You won’t believe how little you need to make these amazing frozen treats! Seriously, this recipe is perfect for those last-minute snack cravings or when you have a crowd coming over and need something cheerful fast. We are keeping this super simple, which is my favorite way to cook for my family. The magic of these Kool-Aid Grapes relies on just two main components, but the quality really matters, especially with the fruit.
Don’t skip the initial freezing step for the grapes, even though it feels like an extra hassle. It’s absolutely vital for getting those stems off cleanly later, which makes the whole process so much less messy. Once you have your fruit ready, you just need the colorful powder to do its job. If you’ve got a few different flavors on hand, even better—you can make a rainbow!
Essential Ingredients for Perfect Kool-Aid Grapes
When it comes to measurements here, precision isn’t as scary as baking, but you still need to follow the ratios so the coating sticks just right. We need enough powder to coat every single grape without it clumping up into a sticky mess. My tip is always to use a little less Kool-Aid mix than you think you need for the first batch; you can always add more!
Here is exactly what you’ll need to gather before you start transforming those plain grapes into vibrant, tangy delights:
- 6 oz Kool-Aid mix (Choose your favorite flavor! Cherry and Grape are classic choices.)
- 3 lbs Green grapes (Make sure they are firm and seedless!)
Step-by-Step Guide: How to Make Kool-Aid Grapes
Okay, now that we have all our supplies ready, let’s get down to the fun part—turning those regular grapes into dazzling, flavor-packed snacks! This process is mostly waiting, but the active steps are so fast you’ll be done in minutes. I promise you, the payoff when you bite into that tangy, icy snap is worth every second of chilling time. We are going to walk through this together so your batch of Kool-Aid Grapes turns out perfectly vibrant and evenly coated.
Initial Freezing and Prepping the Grapes
This first chill is the secret weapon for easy cleanup later! You need to get your green grapes into the freezer for a full hour. Not longer, not shorter—one hour is the sweet spot. Why? Because when they are partially frozen, they get firm enough that the stems practically fall off when you wiggle them. If you wait too long and they become rock solid, the stems are a nightmare to remove!
Once that hour is up, pull them out and work quickly. Twist off all those stems. Next, this is another crucial step: rinse the grapes under cool water. Yes, you read that right! We wash off any lingering dust or residue that might stop the Kool-Aid powder from sticking properly. Then, gently pat them dry with a paper towel. You don’t want them dripping wet, just not soaking, before we move to the flavor coating stage.
Coating Your Grapes for Maximum Flavor in Kool-Aid Grapes
This is where the color show begins! Grab your Ziploc bags—one for each flavor you decided to use. I usually divide my 3 pounds of grapes evenly among three or four bags so I get a nice variety of colors. Now, take one bag and sprinkle in the dry Kool-Aid mix. Don’t dump it all in at once; try to sprinkle about a third of the required mix into the bag.
Seal the bag tightly, making sure you push out most of the air. Now, shake, shake, shake! You need to get every single one of those Kool-Aid Grapes coated evenly. It might look powdery at first, but keep shaking until the powder seems to adhere to the damp surface of the grapes. If you notice any grapes are still mostly bare, open the bag, add a tiny bit more mix, and shake again until they look uniformly colored. This even coating is what makes the final product so beautiful.
The Final Freeze for Your Kool-Aid Grapes
Once every grape is looking gorgeous and coated, it’s time for the long nap. Line a sturdy baking sheet with parchment paper. This is important because if you don’t use parchment, they will absolutely stick together in one giant frozen clump! Spread your coated grapes out in a single layer across the tray. Make sure they aren’t touching too much, or they’ll freeze into clusters.
Pop that tray into the freezer. Now, this part requires patience, my friends. You need to let these glorious Kool-Aid Grapes freeze completely for a full 24 hours. If you try to eat them after just 6 or 8 hours, they’ll still be mushy in the middle. After 24 hours, they should be perfectly frozen—icy, firm, and ready to deliver that fantastic sweet and tangy crunch! They are officially ready when they feel hard as little frozen marbles.
Why You Will Love These Kool-Aid Grapes
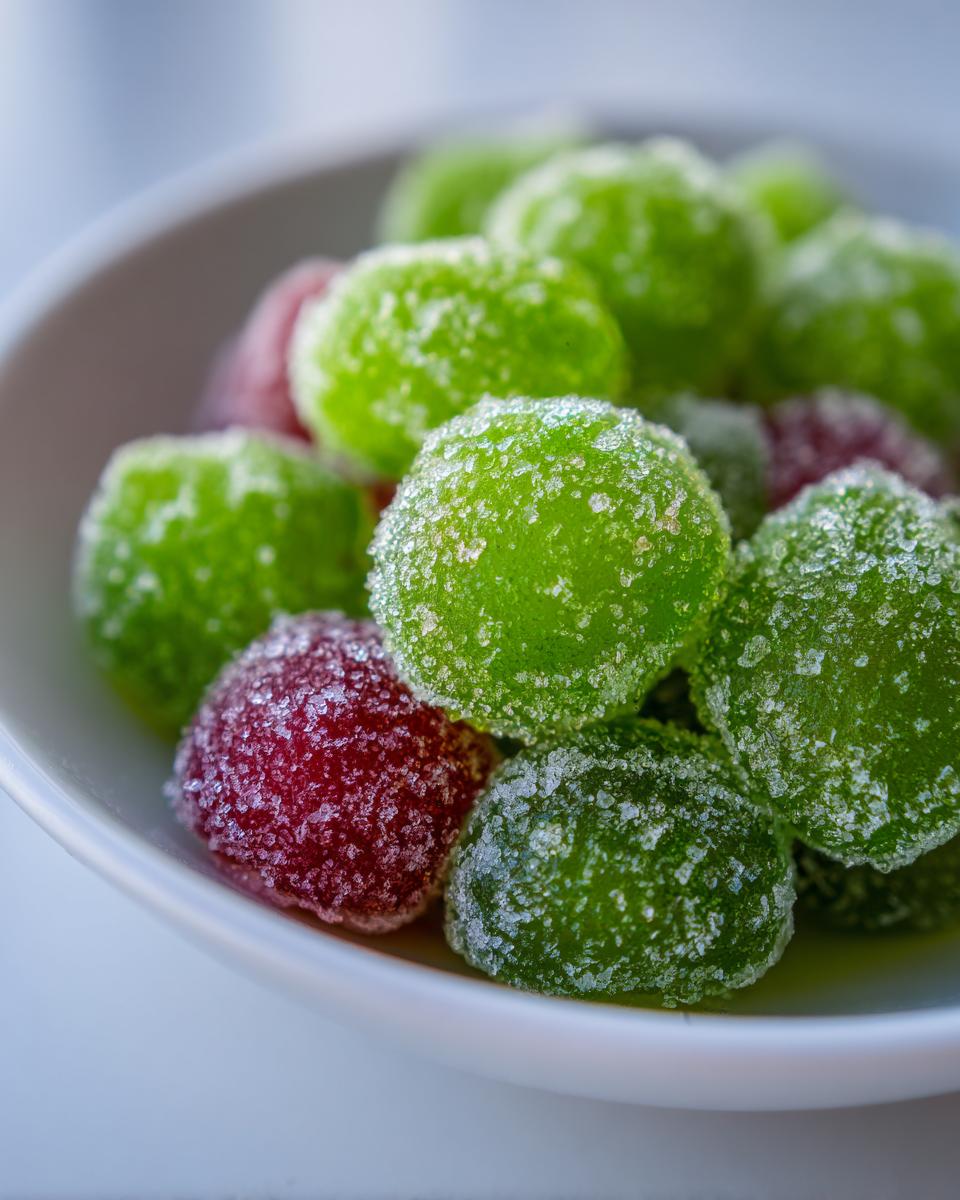
Honestly, these aren’t just a snack; they are an experience! If you’re tired of the same old fruit bowl routine, you need this recipe in your life. They are ridiculously easy to prepare, which is a huge win for busy days. Plus, the visual appeal is unmatched—they look like little jewels scattered across the plate. Here’s why I keep making these:
- The flavor hits that perfect sweet spot with just a hint of tartness.
- The cheerful, vibrant colors make eating fruit fun for even the pickiest eaters.
- Prepping your Kool-Aid Grapes is so quick; most of the time is just waiting for the freezer to do the heavy lifting.
- They feel way more special than plain grapes, but they use simple pantry staples.
Tips for Expertly Prepared Kool-Aid Grapes
Even though this recipe is wonderfully simple, a few little tricks can take your frozen snack from good to absolutely phenomenal. The biggest pitfall I hear about is the powder not sticking, or the grapes turning into one giant frozen blob. Don’t let that happen to you! The key to perfect Kool-Aid Grapes lies in managing moisture at every stage of the process.
Remember that initial hour of freezing? If your grapes are too warm when they go into the bag, the moisture on the surface will dissolve the Kool-Aid too quickly, creating a sticky syrup instead of a dry coating. Work fast when you take them out of that first chill! Also, make sure your Ziploc bag is heavy-duty. Thin bags tend to tear when you shake them vigorously, and nobody wants a brightly colored powder explosion all over their counter!
Ingredient Substitutions for Your Kool-Aid Grapes
Now, what if you only have red grapes, or maybe you’re out of the standard green ones? You can absolutely use red or purple grapes for your Kool-Aid Grapes! Just know that if you use red grapes with red Kool-Aid (like Cherry or Tropical Punch), the final color might look a little murky instead of bright. For the best visual pop, stick to green grapes if you’re using darker flavors.
For the Kool-Aid mix itself, you must use the powdered drink mix—no sugar-free versions, please! The sugar in the regular mix helps create that slightly tacky surface needed for adhesion during the initial coating phase. If you want to try a different flavor profile, try mixing a packet of Lemon-Lime with a tiny pinch of cinnamon for a surprise zest! Just remember, the ratio of 6 oz mix to 3 lbs of grapes is your starting point for success. For more fun snack ideas, check out this recipe for Peanut Butter Cup Cookies.
Frequently Asked Questions About Frozen Kool-Aid Grapes
I get so many questions about these fun little snacks once people try them! It’s natural to wonder about the best way to store or serve them, especially since they are a frozen, coated fruit. I’ve gathered the most common things folks ask me when they are making their first batch of frozen Kool-Aid grapes.
Q1. How long do these Kool-Aid Grapes last in the freezer?
Once they are fully frozen for that 24-hour period, they keep really well! I recommend eating them within about three weeks for the best texture. After that, the coating can sometimes start to dry out slightly, though they are still perfectly safe to eat. Just keep them in that sealed Ziploc bag away from the freezer door so they stay nice and cold!
Q2. Can I use sugar-free Kool-Aid mix when I make my Kool-Aid Grapes?
Oh, I really advise against using the sugar-free versions if you can help it! The regular mix has enough sugar content to create that slight tackiness on the grape surface, which is essential for getting the powder to stick evenly during the shake. If you use sugar-free, the powder tends to just slide right off, and you end up with a bowl of flavored dust instead of coated Kool-Aid Grapes.
Q3. My grapes are sticking together in one big lump. What went wrong?
That’s usually because you skipped the parchment paper on the baking sheet for the final freeze! Or, maybe you didn’t spread them out in a single layer initially. If they stick, don’t panic! You can usually break them apart gently with your hands once they are fully frozen. Next time, use that parchment paper—it’s your best friend for making sure your frozen Kool-Aid grapes stay separate and easy to grab. If you are looking for other easy frozen treats, you might enjoy our recipe for Frozen Yogurt Berry Bark.
Q4. Are these grapes too sour or too sweet?
It really depends on the flavor you choose! Flavors like Cherry or Tropical Punch tend to be sweeter, while something like Green Apple or Grape gives you that nice little tang you asked for. They are definitely sweeter than plain fruit, but the freezing process mutes the flavor intensity a little, giving you that perfect sweet-tang balance. For more information on the science behind freezing fruit, you can check out resources on USDA food safety guidelines for freezing.
Storing and Serving Your Sweet and Tangy Snack
Once your beautiful Kool-Aid Grapes have passed that 24-hour freezing marathon, the main job is done! Serving them is simple—just pull them straight from the freezer. They are best eaten cold and icy, so don’t let them sit out too long before you serve them up. Since this is a frozen treat, we definitely don’t want to reheat them; they’ll just turn into soggy, sweet juice!
Storage is key to keeping that lovely coating intact. Make sure you transfer them from the parchment-lined baking sheet into a really good, airtight container or a heavy-duty freezer bag. Squeezing out as much air as possible prevents freezer burn and keeps that colorful powder looking cheerful. They are perfect for grabbing straight from the freezer whenever you need a quick, colorful bite. If you are interested in other quick snacks, check out our recipe for Pizza Cupcakes.
| Storage Method | Duration | Notes |
|---|---|---|
| Airtight Freezer Container | Up to 3 Weeks | Best for maintaining coating texture. |
| Heavy-Duty Ziploc Bag | Up to 2 Weeks | Ensure all air is pressed out before sealing. |

Amazing 24-hour Kool-Aid Grapes
- Total Time: 25 hours
- Yield: Varies based on grape quantity
- Diet: Vegetarian
Description
Enjoy these sweet and tangy Kool-Aid Grapes, a fun, colorful frozen treat perfect for sharing. They are quick to make and offer a cheerful twist on plain fruit.
Ingredients
- 6 oz Kool-Aid mix
- 3 lbs Green grapes
Instructions
- Freeze your grapes for one hour initially.
- Twist off the stems easily while the grapes are still frozen.
- Place the grapes in a colander and rinse them with cool water.
- Divide the grapes into separate ziplock bags, one for each Kool-Aid flavor.
- Add Kool-Aid to each bag, seal it, and shake to coat the grapes evenly.
- Line a baking sheet with parchment paper and spread the coated grapes onto it.
- Freeze the grapes for 24 hours. They are ready to eat once fully frozen.
Notes
- The flavor presents sweetness with a slight tang.
- The resulting color always looks cheerful.
- This is a simple snack that feels more enjoyable than plain fruit.
- It is quick and easy to prepare, great for sharing with others.
- Prep Time: 1 hour
- Cook Time: 0 minutes
- Category: Snack
- Method: Freezing
- Cuisine: American
Nutrition
- Serving Size: Varies
- Calories: 52kcal
- Sugar: 12g
- Sodium: N/A
- Fat: N/A
- Saturated Fat: N/A
- Unsaturated Fat: N/A
- Trans Fat: N/A
- Carbohydrates: 14g
- Fiber: N/A
- Protein: 1g
- Cholesterol: N/A