Skip to content
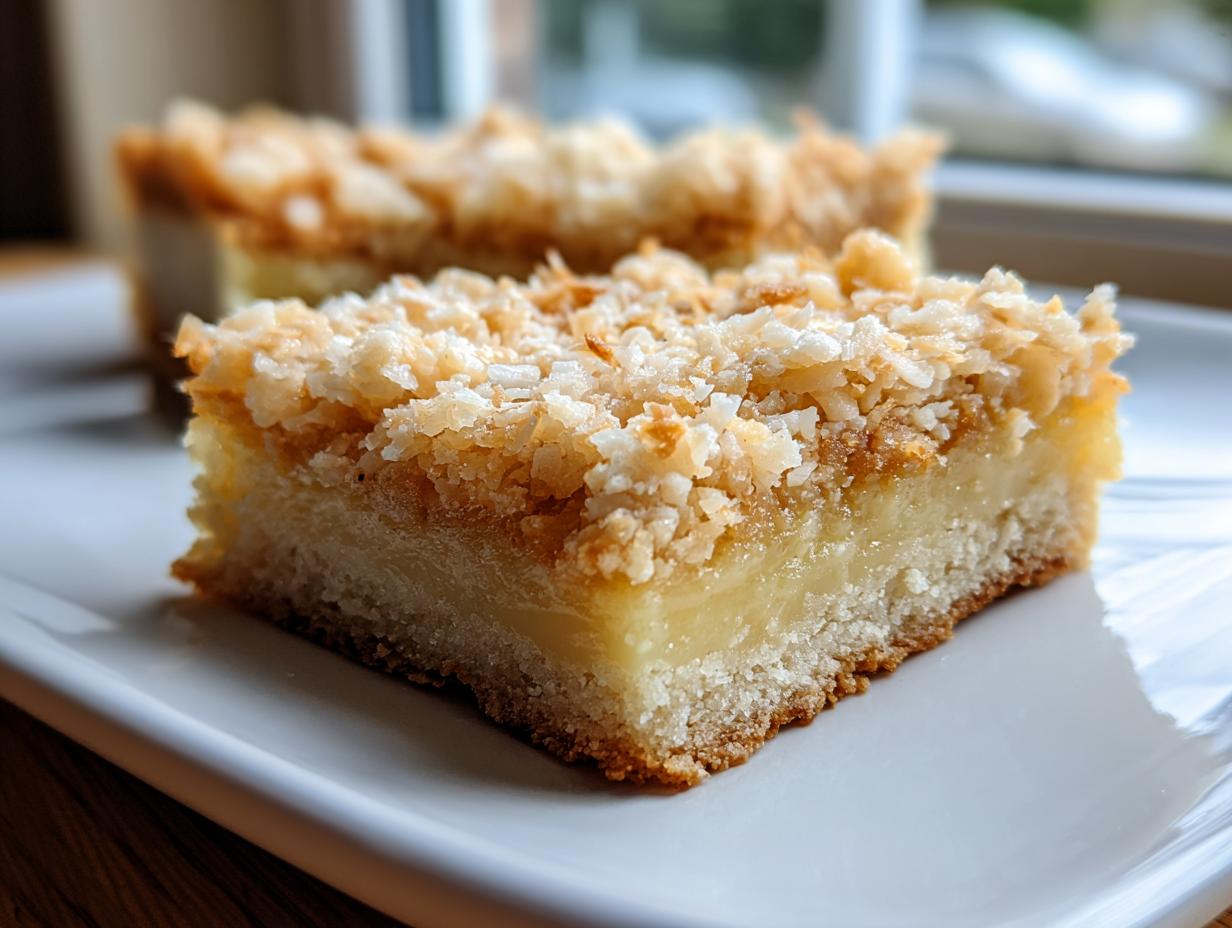
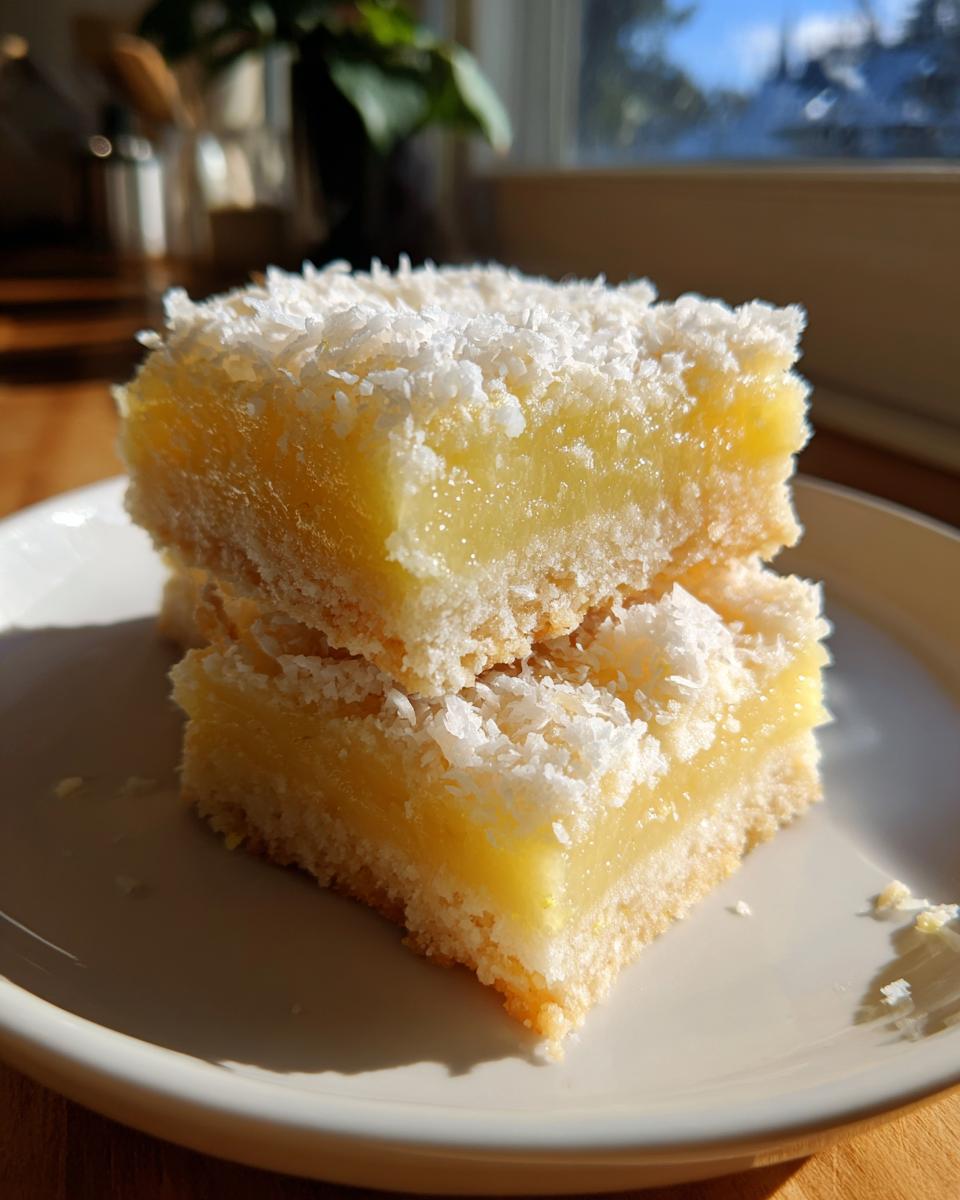
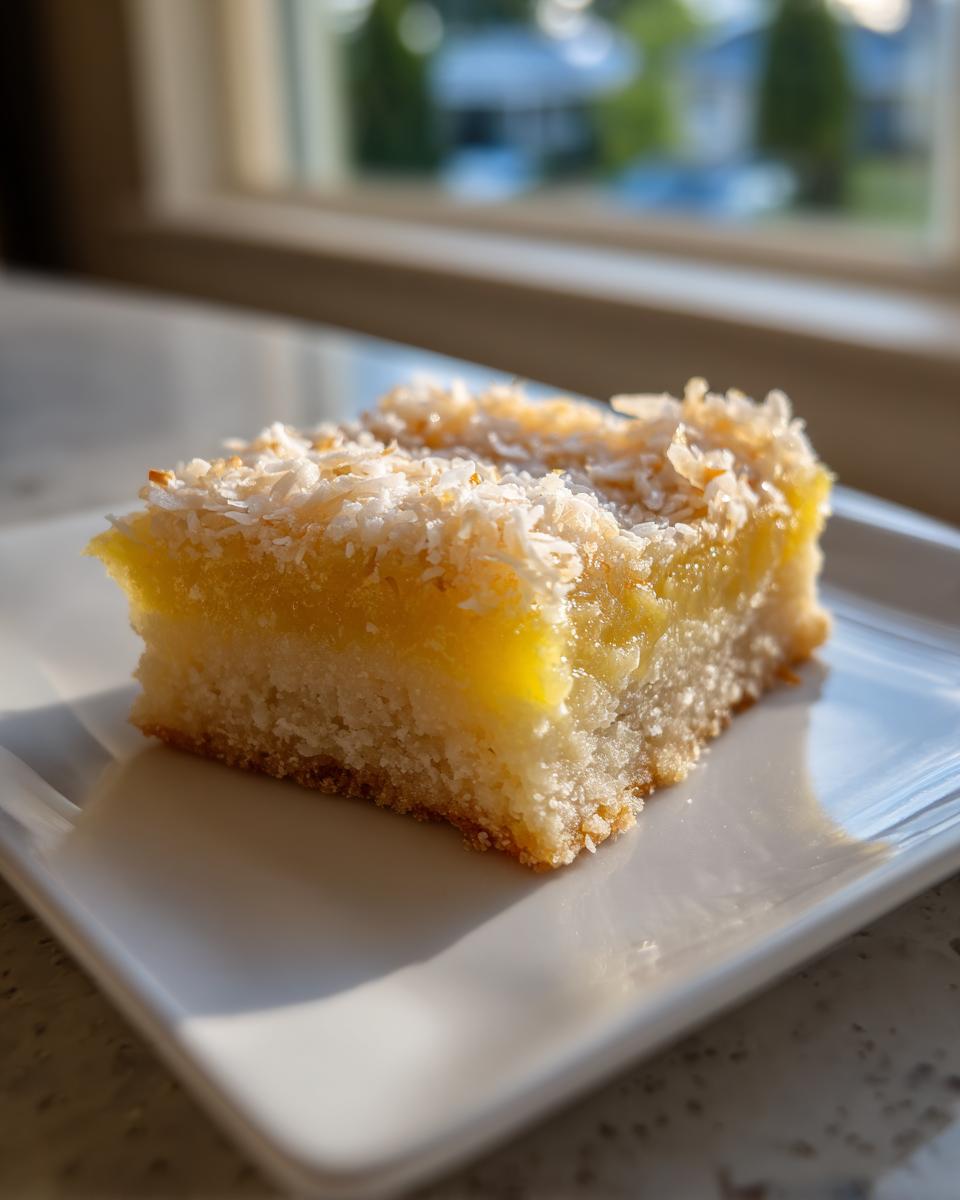
If you are craving something bright, zesty, and incredibly satisfying without turning on your oven, then you absolutely need these Lemon Coconut Bars in your life right now! I’m Anna Kowalska, and here I share tried-and-true homemade recipes that you and your family will love, because everything I make is done with heart and flavor. Seriously, these bars scream summer sunshine but taste amazing any time of year. They are the perfect solution when you need a refreshing, dairy-free dessert that comes together faster than you can say “citrus zing.” We’re using a simple almond flour base that sets up beautifully in the freezer, making these Lemon Coconut Bars a total winner for busy weeknights.
Jump to:
Why You Will Love These Lemon Coconut Bars
Honestly, these Lemon Coconut Bars are a game-changer when you need a quick treat. The best part? There’s zero baking involved! We’re talking about a bright, tart lemon layer that just sings against the rich, chewy coconut topping. It’s such a fantastic texture contrast. The base is made from almond flour, which gives it a nutty depth and keeps things wonderfully gluten-free, plus it makes these bars completely vegan and dairy-free, which is a huge bonus for everyone.
They come together in about 15 minutes of active time, and then the freezer does all the hard work. It’s the ultimate easy-to-make, refreshing dessert that satisfies that citrus craving perfectly.
Quick Prep and No-Bake Method
If you’re like me and sometimes dread pulling out the stand mixer for a complicated bake, this recipe is your hero. Since there’s no oven time, you skip the preheating fuss and the cleanup that comes with it. You just mix three things for the base, press it down, and then blend the filling ingredients right in the blender or food processor.
The real magic here is the freezing technique. We chill the base first, pour on the lemon layer, and then freeze the whole thing until it’s perfectly solid. It means you can whip these up in the afternoon and have them ready to serve after dinner. So convenient!
Essential Ingredients for Perfect Lemon Coconut Bars
To make these stunning Lemon Coconut Bars, you don’t need a ton of fancy stuff, but the quality of what you do use really matters, especially since we aren’t baking! We need three distinct sections—the base, the zingy lemon layer, and the sweet top. Pay close attention to the measurements, especially for the fats and liquids, because that’s what keeps these no-bake treats from getting too soft or crumbly. Trust me, getting the base right is half the battle!
Here is exactly what you’ll need to gather before you start pressing anything:
| Component | Ingredient | Amount |
|---|---|---|
| Base Layer | Almond Flour | 1\u00bc cups |
| Base Layer | Coconut Oil (softened) | \u00bc cup |
| Base Layer | Maple Syrup | 3 tbsp |
| Lemon Layer | Coconut Cream | \u00bd cup |
| Lemon Layer | Lemon Juice (fresh!) | \u00bc cup |
| Lemon Layer | Maple Syrup | 2 tbsp |
| Top Layer | Shredded Coconut | 1 cup |
Notes for Base Layer Ingredients
For that sturdy, satisfying crust, your ingredients need to cooperate. Almond flour is the star here, so measure it correctly—spoon it lightly into the measuring cup and level it off, don’t pack it down! The coconut oil must be softened, not melted. If it’s too liquid, your base will never set properly in the freezer. Think of the texture of room-temperature butter; that’s what you’re aiming for. And please, use real maple syrup! The flavor is crucial here; those artificial pancake syrups just won’t give you the depth we need for these wonderful Lemon Coconut Bars.
Notes for Lemon and Coconut Topping
When it comes to the lemon layer, fresh lemon juice is non-negotiable. Bottled juice just tastes flat against the sweetness of the coconut cream. You want that bright, sharp tang to cut through the richness. Make sure you’re using thick coconut cream from a chilled can—scoop out the solid white part that rises to the top. This gives the filling its creamy structure without needing any heavy dairy. Finally, use unsweetened shredded coconut for the top layer; we already have enough sweetness from the maple syrup!
Equipment Needed for Your Lemon Coconut Bars
You don’t need much for this no-fuss recipe. Grab your 8×8 inch square pan, and make sure you have parchment paper ready to line it—this saves your sanity later! A blender or a small food processor is essential for getting that lemon filling perfectly smooth. Lastly, have a sturdy spatula on hand for spreading and scraping down the sides.
Step-by-Step Instructions to Make Lemon Coconut Bars
Okay, now for the fun part! Making these Lemon Coconut Bars is really just a sequence of mixing, chilling, and layering. Since we aren’t baking, timing those freeze steps is super important. You want everything to set up nicely so you get those beautiful clean layers when you slice them later. Follow these steps closely, especially when pressing that base, and you’ll have gourmet-tasting treats with minimal effort!
Preparing the Almond Flour Base
First things first, you need to set up your stage. Line that 8×8 inch pan with parchment paper, leaving some overhang on the sides. This overhang acts like little handles later when you lift the whole block out—trust me, you want those handles!
In a bowl, mix up your base ingredients: the almond flour, the softened coconut oil, and the maple syrup. Mix it until it looks like wet sand. Now comes the most important physical part: press this mixture firmly into the bottom of your prepared pan. I mean *firmly*. I use the bottom of a flat glass or a measuring cup to really compact it down; you don’t want any loose spots that crumble when you try to cut them later. Once it’s packed tight and even, pop that pan into the freezer for about 20 minutes. This initial chill is what locks that base into place so it can handle the wet lemon layer.
Crafting the Bright Lemon Filling
While your base is getting nice and cold, it’s time to make the filling sing! You’re going to combine the coconut cream, the fresh lemon juice, and the remaining maple syrup in your blender or food processor. You need to blend this until it is completely smooth. I always stop mine, scrape down the sides with a spatula, and give it one more quick pulse. You don’t want any lumps of coconut cream floating around; we are aiming for a creamy, pourable custard texture here.
Assembling and Freezing the Lemon Coconut Bars
Once that base is rock solid from its 20-minute chill, pull it out. Carefully pour that beautiful lemon mixture right over the top. Use your spatula to gently spread it out evenly so it reaches all the corners. This layer needs to be perfect because it sets the stage for the top layer.
Next, sprinkle that full cup of shredded coconut evenly over the wet lemon layer. Try not to press the coconut down too hard; you want it to sit nicely on top. Now, get the whole thing back into the freezer! This is where the real waiting happens. You need to let these Lemon Coconut Bars freeze for a good two hours, or until the entire block is completely firm to the touch. Don’t rush this part, or they’ll smear when you try to cut them.
When the time is up, lift the whole frozen slab out of the pan using those parchment paper handles. Place it on a cutting board. Take a large, sharp knife—wiping it with a hot, damp cloth between cuts helps immensely—and slice through the frozen block into nine equal bars. Serve them chilled, and enjoy that incredible texture contrast!
Tips for Success Making Lemon Coconut Bars
These Lemon Coconut Bars are so easy, but there are two spots where people sometimes get a little messy, and I want to save you the trouble! First, that base layer has to be completely frozen before you even think about pouring the lemon filling on top. If it’s even slightly soft, the filling will melt into it, and you’ll lose that beautiful defined layer we worked so hard for. Give it the full 20 minutes—no sneaking it out early!
Second, cutting them requires a little technique, since they are served frozen. Don’t use a dull knife! Grab your sharpest, largest knife and wipe it clean with a hot, damp towel between every single cut. This prevents the coconut and lemon filling from dragging or sticking to the blade. A clean cut makes these Lemon Coconut Bars look professional!
Storing and Serving Your Chilled Lemon Coconut Bars
Because these Lemon Coconut Bars rely on coconut cream and chilling to hold their structure, storage is key! The good news is that they keep beautifully, making them perfect for making ahead of time for parties or when you just want a cool, zesty snack waiting in the fridge. Remember, they are best served straight from that cold environment.
The recipe note says to store leftovers in the refrigerator, and that’s exactly what I do. I stack them in an airtight container, making sure to place a small sheet of parchment paper between the layers so the sticky coconut tops don’t fuse together. They usually stay fantastic for about five days this way. When you’re ready to enjoy one of these amazing Lemon Coconut Bars, let it sit out on the counter for just five minutes before biting in—it softens the base just enough. Here’s a quick reference for keeping them fresh:
| Storage Location | Container Type | Estimated Freshness |
|---|---|---|
| Refrigerator | Airtight Container | Up to 5 days |
| Freezer | Freezer-Safe Container | Up to 1 month (for longer storage) |
| Serving Temp | Chilled | 5 minutes on counter before serving |
Frequently Asked Questions About Lemon Coconut Bars
I get so many questions about these bright and chewy Lemon Coconut Bars! Since they are no-bake, people worry about getting the texture just right. Don’t stress; they are very forgiving if you follow the freezing cues. Here are a few things folks ask me most often about making these delightful citrus treats.
Can I Substitute the Almond Flour in This Recipe?
That’s a great question, especially if you have nut allergies! The integrity of the base relies heavily on those fats in the almond flour. If you absolutely must substitute, you could try using finely ground sunflower seeds or oat flour, but you might need to slightly increase the coconut oil to help it bind. Just know that the flavor won’t be *exactly* the same as these incredible Lemon Coconut Bars because almond flour has a unique richness. It’s best to stick with the almond flour if you can! Almond flour is a fantastic ingredient in many desserts.
How Do I Know When These Lemon Coconut Bars Are Firm Enough?
This is the most crucial part for achieving clean slices! You need to check both layers. After you pour the lemon layer and sprinkle the coconut, the whole thing goes in for a long freeze—about two hours. You’ll know they are firm enough when you press gently on the coconut topping and feel zero give or squishiness. The entire block should feel rock solid, like a frozen brick. If you try to cut them when they are even slightly soft, the lemon layer will smear everywhere, and you won’t get those beautiful dairy free lemon bars you were hoping for!
Nutritional Estimates for Lemon Coconut Bars
I always keep an eye on what we’re eating, even with delicious treats like these Lemon Coconut Bars! Since these are no-bake and use natural sweeteners like maple syrup, the nutrition profile is actually quite lovely compared to traditional baked lemon bars. Remember, these estimates are based on the recipe yielding 9 bars, and the actual numbers can shift slightly depending on the exact brand of coconut cream or oil you use. But this gives you a fantastic starting point for tracking your macros! Tracking macros can be easier when you have satisfying treats like this.
Here’s a breakdown of what you can generally expect in one serving. I love that they have a decent amount of healthy fat from the coconut and nuts, keeping you satisfied!
| Nutrient | Amount Per Bar |
|---|---|
| Calories | 250 |
| Fat | 18g |
| Carbohydrates | 22g |
| Protein | 4g |
| Sugar | 15g |
| Fiber | 4g |

9 Amazing Lemon Coconut Bars No Bake
- Total Time: 2 hours 35 minutes
- Yield: 9 bars
- Diet: Vegan
Description
These Lemon Coconut Bars offer a bright, citrusy flavor with a rich, chewy coconut topping and a simple almond flour base. Enjoy this refreshing, easy-to-make dessert.
Ingredients
- Base Layer: 1¼ cups almond flour
- Base Layer: ¼ cup coconut oil, softened
- Base Layer: 3 tbsp maple syrup
- Lemon Layer: ½ cup coconut cream
- Lemon Layer: ¼ cup lemon juice
- Lemon Layer: 2 tbsp maple syrup
- Top Layer: 1 cup shredded coconut
Instructions
- Line an 8×8 inch pan with parchment paper.
- Mix the base ingredients.
- Press the base mixture firmly into the prepared pan.
- Freeze the base for 20 minutes.
- Blend the lemon layer ingredients until the mixture is smooth.
- Spread the lemon mixture evenly over the frozen base.
- Sprinkle the shredded coconut on top of the lemon layer.
- Freeze the bars for 2 hours, or until completely firm.
- Remove the pan from the freezer.
- Cut the frozen block into individual bars.
- Serve the Lemon Coconut Bars chilled.
Notes
- Store leftovers in the refrigerator.
- Prep Time: 15 minutes
- Cook Time: 0 minutes
- Category: Dessert
- Method: No-Bake, Freezing
- Cuisine: American
Nutrition
- Serving Size: 1 bar
- Calories: 250
- Sugar: 15g
- Sodium: 10mg
- Fat: 18g
- Saturated Fat: 12g
- Unsaturated Fat: 6g
- Trans Fat: 0g
- Carbohydrates: 22g
- Fiber: 4g
- Protein: 4g
- Cholesterol: 0mg