Skip to content
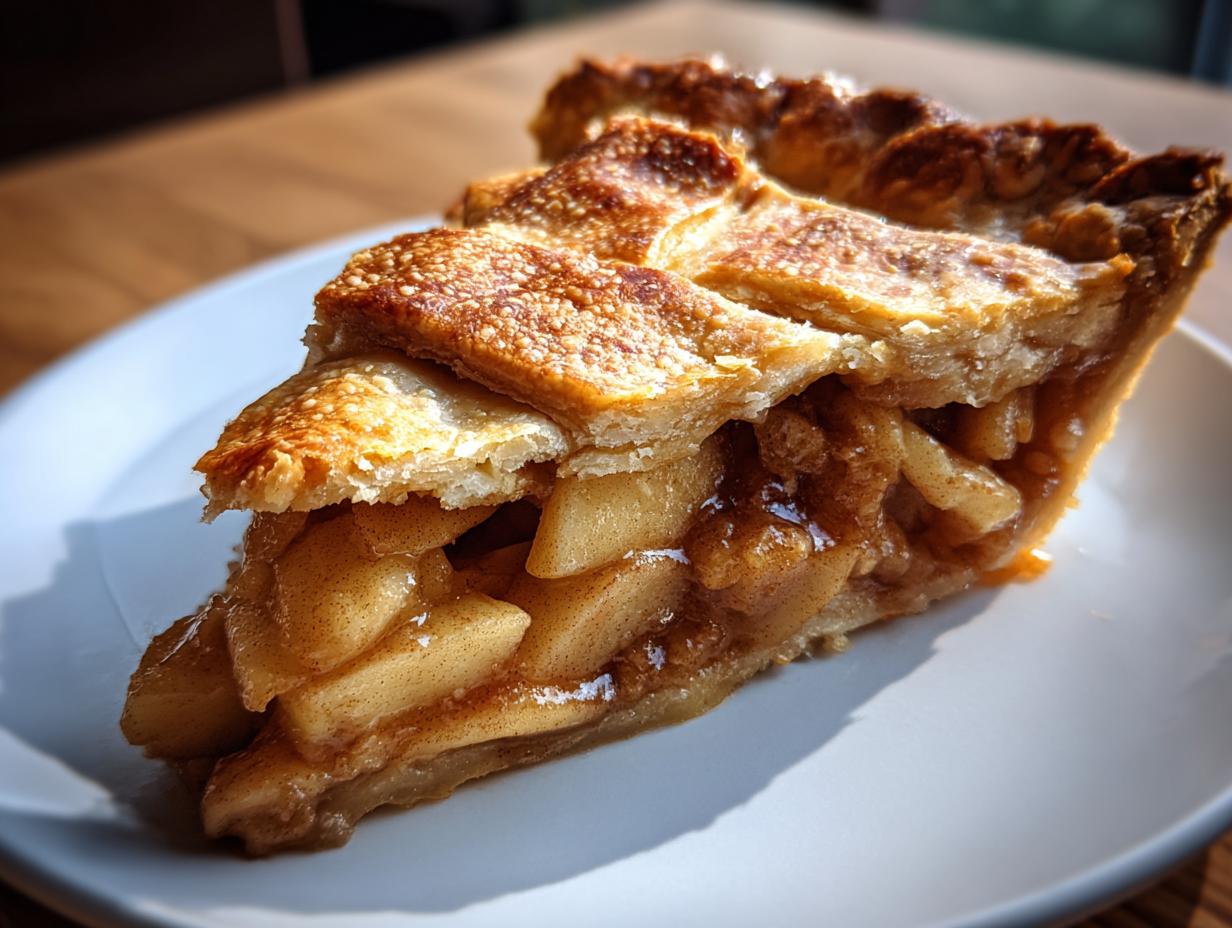
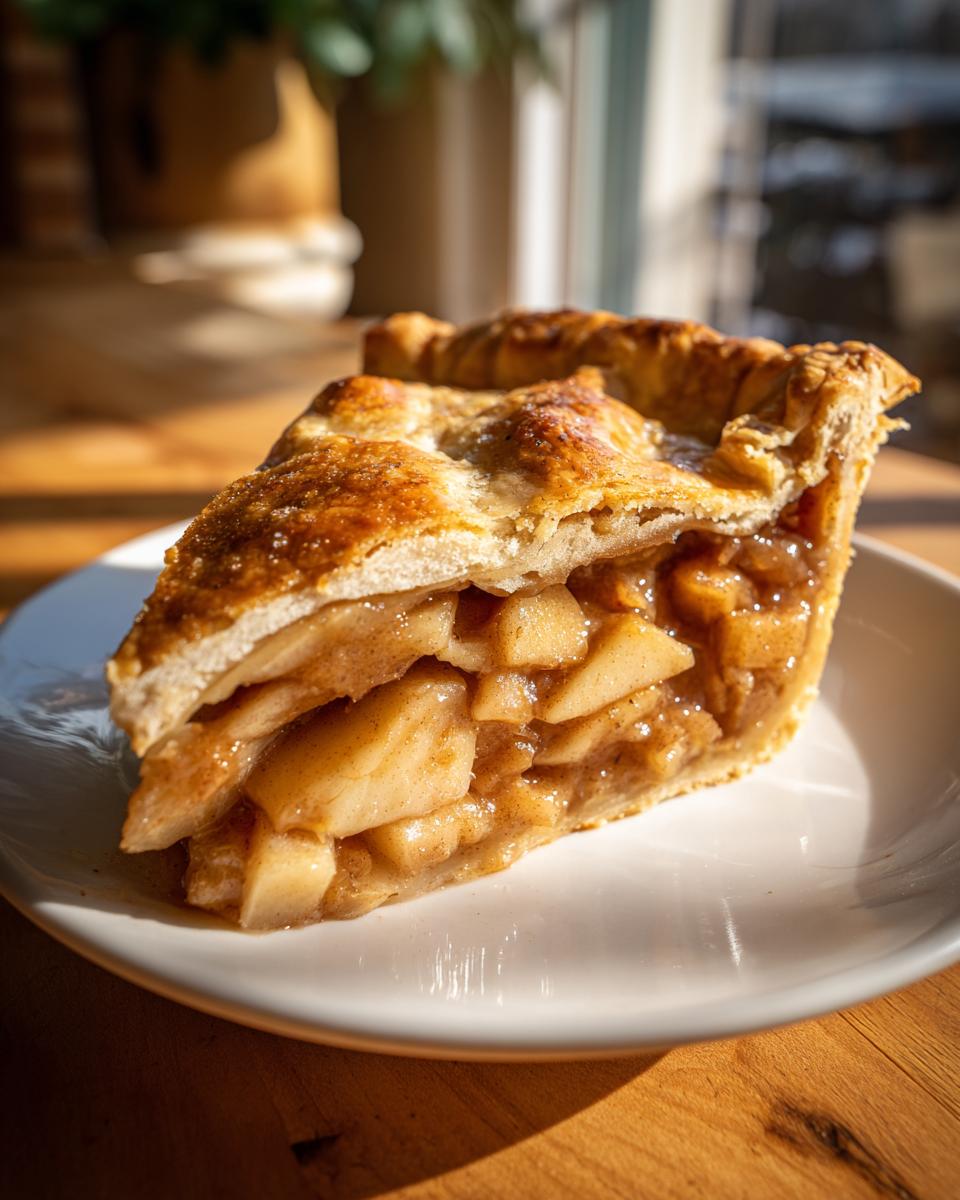
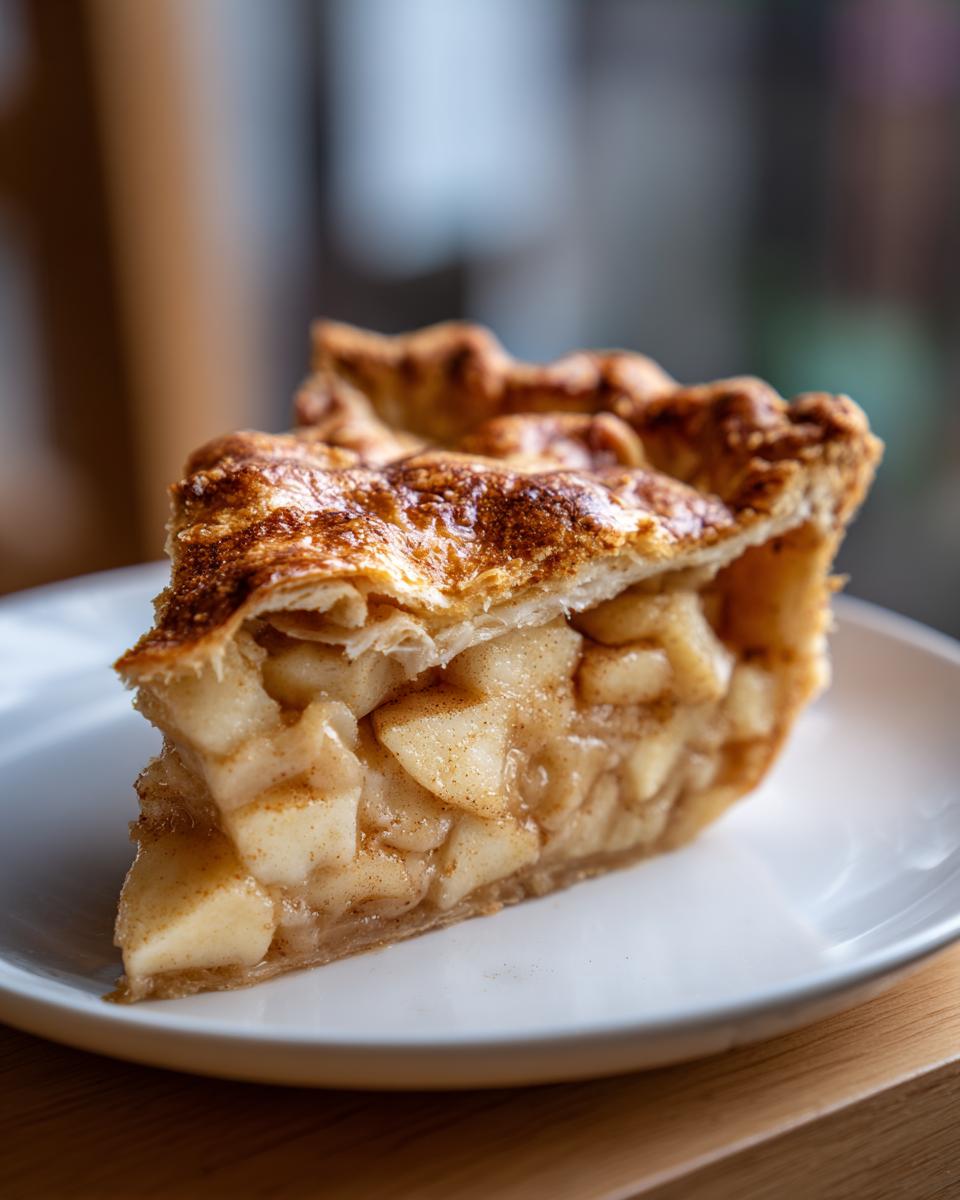
Oh, apple pie! It’s one of those desserts that just screams comfort, right? For the longest time, I felt like I had to choose between indulging in a classic slice or sticking to my healthier eating goals. That’s why I was so thrilled when I finally perfected this No-Sugar Apple Pie. You know, I’m Anna Kowalska, and here I share tried-and-true homemade recipes that you and your family will love. For me, it’s all about making sure everything is made with heart and flavor, even when we’re cutting back on sugar. I remember trying to make pies for my kids when they were little, and feeling a pang of guilt with every spoonful of sugar. It felt like a culinary puzzle I just couldn’t solve until I discovered the magic of using ingredients like unsweetened apple juice concentrate and letting the natural sweetness of the fruit shine. This recipe is my personal triumph over that dessert dilemma, proving that you absolutely *can* have that warm, spiced apple pie goodness without all the added sugar!
Jump to:
Why This No-Sugar Apple Pie Is a Must-Try
You might think “no-sugar” means “no taste,” but trust me, this pie is here to change your mind! It’s the perfect way to enjoy that classic apple pie comfort without all the extra sugar. Here’s why you’ll love it:
- Deliciously Guilt-Free Flavor: Seriously, you won’t miss the sugar! The natural sweetness from the apples and the unsweetened apple juice concentrate, paired with that warm cinnamon hug, is just divine. It tastes like the real deal, but you get to feel good about serving it.
- Simple Ingredients, Big Taste: No fancy stuff here! We’re using pantry staples that you probably already have. It’s amazing how these simple ingredients come together to create such a rich, satisfying apple pie flavor.
- Perfect for Any Occasion: Whether it’s a holiday feast, a casual family dinner, or just a Tuesday night craving, this pie fits right in. It’s comforting, familiar, and always a crowd-pleaser, no matter the reason.
Gathering Your Ingredients for No-Sugar Apple Pie
Alright, let’s get down to what you’ll need for this amazing No-Sugar Apple Pie. Don’t worry, it’s all pretty straightforward stuff you can find at your local grocery store. The magic really happens with how we use these simple ingredients to get that wonderful apple pie flavor without any added sugar. It’s all about letting the fruit do the heavy lifting, and a few little tricks from my kitchen to yours!
Essential No-Sugar Apple Pie Ingredients
Here’s your shopping list. Make sure you have everything ready to go before you start mixing!
| Ingredient | Amount | Notes |
| Unbaked Pie Crusts | 2 (9-inch) | Store-bought or your favorite homemade recipe. |
| Unsweetened Apple Juice Concentrate | 1 (12 fluid ounce) can, thawed | This is our secret weapon for sweetness! |
| Cornstarch | 3 tablespoons | To get that perfect thick filling. |
| Ground Cinnamon | 1 tablespoon | For that classic warm spice. |
| Green Apples | 6 cups, sliced | About 6-7 medium apples, thinly sliced. |
Ingredient Notes and Substitutions
That unsweetened apple juice concentrate is super important here. It brings a lovely natural sweetness and a bit of that apple flavor without any added sugar. If you absolutely can’t find it, you *could* try using about 1.5 cups of unsweetened apple cider and cooking it down a bit to concentrate it, but it’s not quite the same. For the apples, green varieties like Granny Smith are fantastic because they’re a bit tart and hold their shape well when baked. You could mix in a few sweeter apples if you like, but make sure they’re firm!
Crafting Your Perfect No-Sugar Apple Pie: Step-by-Step
Okay, now for the fun part – actually making this delicious No-Sugar Apple Pie! Don’t let pie-making intimidate you; it’s really quite straightforward, especially with this recipe. We’re going to build that gorgeous, comforting apple filling and then get it all tucked into a flaky crust. Just follow along, and you’ll have a beautiful pie that tastes like pure autumn magic.
Preparing the Filling for Your No-Sugar Apple Pie
First things first, let’s get that amazing apple filling going. In a small bowl, whisk together about 1/3 cup of that thawed, unsweetened apple juice concentrate with the cornstarch and cinnamon. Make sure there are no little lumps of cornstarch hiding in there – give it a good stir until it’s smooth. Set that little bowl of goodness aside for a moment.
Now, grab a big saucepan. Pour in the rest of the apple juice concentrate and add your nicely sliced green apples. We’re going to simmer these together over medium heat. You want the apples to get tender, but not mushy, you know? About 10 minutes should do the trick. Give them a gentle stir now and then. Once the apples are tender, it’s time to thicken things up! Pour in that cornstarch mixture you set aside earlier. Keep stirring and simmering for another minute or two. You’ll see it start to get nice and thick, coating the apples beautifully. It should look glossy and have that wonderfully spiced apple scent filling your kitchen. Once it’s thickened, take it off the heat. That’s your gorgeous, naturally sweet apple pie filling!
Assembling and Baking the No-Sugar Apple Pie
Now that your filling is ready, let’s put this pie together! Make sure your oven is preheated to 350 degrees F (175 degrees C). You’ll need your pie plate with the bottom crust already in it. Spoon that warm, thick apple mixture right into the crust. Try to spread it out evenly. Don’t worry if it looks really full; it’ll settle down a bit as it bakes.
Next, carefully place the top crust over the filling. Now, we need to seal the deal! Press the edges of the top and bottom crusts together to seal them. You can then flute the edges however you like – a simple fork press works great, or you can get fancy with your fingers! Remember to cut a few slits or vents in the top crust. This is super important so that steam can escape while it’s baking, otherwise, you might end up with a soggy bottom or a burst crust. Once it’s all sealed and vented, pop that pie into your preheated oven. Let it bake for about 45 minutes, or until you see that crust turn a beautiful, golden brown. The filling should be bubbly around the edges. If the crust starts looking a little too brown before the filling is bubbly, you can always loosely tent a piece of aluminum foil over the top. Once it’s golden and bubbly, carefully take it out and let it cool on a wire rack. This cooling part is tough, I know, but it lets the filling set up perfectly!
Tips for Achieving the Best No-Sugar Apple Pie
Making a great No-Sugar Apple Pie is totally doable, and a few little tricks can make all the difference. You want that perfect balance of tender apples, a thick, flavorful filling, and a crust that’s just golden and flaky, right? Here are my go-to tips that have saved me more than once!
Choosing the Right Apples for Your No-Sugar Apple Pie
The apple choice is crucial here! Since we’re not adding sugar, we need apples that have a good flavor and texture on their own. I really love using green apples, like Granny Smith, because they have that wonderful tartness that cuts through the sweetness of the apple juice concentrate so nicely. Plus, they hold their shape really well when they bake, so you don’t end up with mush. If you like a slightly sweeter pie, you can mix in some Fuji or Honeycrisp apples, but just make sure they’re firm. Avoid apples that get really soft and mealy when cooked, or your filling might turn into applesauce!
Achieving a Golden-Brown Crust
Nobody wants a pale, sad pie crust! For that perfect golden-brown finish on your No-Sugar Apple Pie, make sure your oven is fully preheated to 350°F (175°C). If you’re using a store-bought crust, they usually bake up beautifully. If you’re making your own, ensure you’ve got enough fat in there for flakiness. A little trick I love is to brush the top crust lightly with a tiny bit of milk or even just an egg wash (one egg beaten with a tablespoon of water) before baking. It gives the crust a lovely sheen and helps it brown up beautifully. And remember that aluminum foil trick I mentioned? If the edges start getting too dark before the center is done, just loosely tent a piece of foil over the edges to protect them while the rest of the pie finishes baking.
Frequently Asked Questions About No-Sugar Apple Pie
Got questions about whipping up this delightful No-Sugar Apple Pie? I totally get it! Sometimes baking without sugar can feel a little different, but this recipe is designed to be super forgiving and just plain delicious. Let’s clear up any little worries you might have!
Can I use other fruits in this No-Sugar Apple Pie?
Oh, absolutely! While green apples are my go-to for their tartness and texture, you can totally play around with other fruits. Pears work wonderfully and add a lovely sweetness. You could even try a mix of apples and berries, though berries might add more moisture, so keep an eye on that. Just make sure your fruit is firm and holds up well to baking!
How do I know if my No-Sugar Apple Pie filling is thick enough?
This is a great question! When you’re simmering the filling after adding the cornstarch mixture, you’re looking for it to get nice and glossy. It should coat the back of a spoon really well, and you shouldn’t see any watery liquid running off. If you drag your finger through the thickened mixture on the spoon, the line should hold its shape for a second or two. It’ll thicken up even more as it cools, so don’t worry if it seems a *little* loose right off the heat.
What makes this No-Sugar Apple Pie “no-sugar”?
That’s the million-dollar question, right? This No-Sugar Apple Pie gets its sweetness entirely from the natural sugars found in the fruit itself – the apples and the unsweetened apple juice concentrate. We’re not adding any granulated sugar, brown sugar, honey, or maple syrup. So, while there are natural sugars present in the ingredients, there are no *added* sugars, making it a fantastic option if you’re trying to cut back! For more information on understanding sugar content in foods, you can check out resources from the American Heart Association.
Storing and Reheating Your Delicious No-Sugar Apple Pie
So you’ve made a gorgeous No-Sugar Apple Pie, and there are a few slices left – lucky you! Or maybe you’re just planning ahead. Storing and reheating this beauty is super simple, and it means you can enjoy that comforting apple goodness whenever the craving strikes. We want to keep it tasting just as amazing as when it was fresh out of the oven, so here’s how I do it.
Storing Leftover No-Sugar Apple Pie
Once your pie has cooled down completely (this is important to prevent sogginess!), you can store any leftovers. The best way to keep it fresh is to cover it well. You can use plastic wrap, aluminum foil, or pop it into an airtight container. It’ll keep nicely at room temperature for about two days. If you want it to last longer, pop it into the refrigerator. It should be good in the fridge for up to 4-5 days. Just remember, refrigeration can sometimes dry out the crust a little, but we’ve got a fix for that!
Reheating Your No-Sugar Apple Pie to Perfection
Want that warm, cozy pie experience again? Reheating is easy peasy! The best way to warm up a slice of No-Sugar Apple Pie and keep that crust from getting sad is in the oven. Just pop a slice onto a baking sheet and warm it in a moderate oven, around 300-325°F (150-160°C), for about 10-15 minutes. This gently warms the filling and crisps up the crust beautifully. If you’re in a real hurry, you can use the microwave, but know that the crust might lose some of its crispness. Just a quick zap for 30-60 seconds should do the trick!
Understanding the Nutrition of Your No-Sugar Apple Pie
It’s always good to have an idea of what’s in your delicious No-Sugar Apple Pie, right? While this recipe skips added sugars, remember that fruits and their juices naturally contain sugars. These numbers are just estimates, of course, and can vary a bit depending on the exact ingredients you use! For more detailed nutritional information on apples, you can refer to the USDA FoodData Central.
Estimated Nutritional Values Per Serving
Here’s a general idea of what you’re getting in one slice:
| Nutrient | Amount |
| Calories | 307 kcal |
| Fat | 11g |
| Carbohydrates | 52g |
| Protein | 2g |
| Fiber | 3g |

Delicious No-Sugar Apple Pie: Taste Triumph
- Total Time: 70 minutes
- Yield: 8 servings 1x
- Diet: Vegetarian
Description
Enjoy this No-Sugar Apple Pie, a healthier twist on a classic dessert. It’s made with simple ingredients and a touch of cinnamon for a delightful flavor.
Ingredients
- 2 (9 inch) pie crusts
- 1 (12 fluid ounce) can unsweetened apple juice concentrate, thawed
- 3 tablespoons cornstarch
- 1 tablespoon ground cinnamon
- 6 cups sliced green apples
Instructions
- Preheat the oven to 350 degrees F (175 degrees C).
- Whisk 1/3 cup apple juice concentrate together with cornstarch and cinnamon in a small bowl. Set aside.
- Simmer apples with remaining apple juice concentrate in a large saucepan until apples are tender, about 10 minutes. Stir in cornstarch mixture and continue to simmer until thickened. Remove from heat.
- Spoon apple mixture into pastry-lined pie plate. Cover with top crust. Seal and flute edges. Cut steam vents in top.
- Bake in the preheated oven until crust is golden brown, about 45 minutes.
- Prep Time: 15 minutes
- Cook Time: 55 minutes
- Category: Dessert
- Method: Baking
- Cuisine: American
Nutrition
- Serving Size: 1 slice
- Calories: 307 kcal
- Sugar: 30g
- Sodium: 218mg
- Fat: 11g
- Saturated Fat: 2g
- Carbohydrates: 52g
- Fiber: 3g
- Protein: 2g