Skip to content
No heading needs to be written for the introduction.
If you’re like me, sometimes you just need a warm, comforting treat without all the fuss of deep frying. That’s why I’m so excited to share these incredible Oven-Baked Dough Balls with you today. Forget complicated steps; these are designed for maximum flavor with minimal effort. I’m Anna Kowalska, and here I share tried-and-true homemade recipes that you and your family will love. Everything I post is made with heart and flavor, and these baked dough balls truly capture that spirit—they are simple, tender, and perfectly golden right out of the oven.
We are leaning into the magic of baking here, which means less mess and a much easier cleanup. Seriously, these Oven-Baked Dough Balls are going to become your new favorite weeknight dessert. They come together in under 30 minutes total, which is just unbelievable for something that tastes this good!
Jump to:
Why You Will Love These Oven-Baked Dough Balls
Honestly, these are my secret weapon when I need a sweet fix fast. They deliver that satisfying, doughy texture we all crave, but without heating up a giant pot of oil. It’s pure baking bliss, and you can have them ready before the craving even passes!
Here is why these Oven-Baked Dough Balls should hit your baking schedule this week:
- They are incredibly fast—seriously fast.
- The clean-up is ridiculously easy compared to frying.
- They taste like a hug in dough form!
Quick Preparation and Cooking Times
You cannot beat the speed here. We’re looking at only 15 minutes of prep time. That’s just enough time to mix everything up before popping them into the oven. And then, the magic happens in just about 12 minutes of baking. Total time? Less than half an hour. Wow!
Simple Ingredients for Delicious Oven-Baked Dough Balls
You won’t need any specialty store trips for this recipe, I promise. Every single thing you need for these Oven-Baked Dough Balls is probably already sitting in your pantry right now. Flour, milk, butter, sugar—the basics that make comfort food taste like perfection. It just proves you don’t need fancy stuff for amazing flavor.
Assembling Your Oven-Baked Dough Balls Ingredients
Okay, let’s talk about what goes into these incredible little treats. Since these are so simple, the quality of what you put in really shines through. I always grab my mixing bowl first and make sure I have all my components measured out before I even turn the oven on. It keeps me organized, which is key when we are moving this fast!
These Oven-Baked Dough Balls rely on pantry staples, which is just one more reason why I love them so much. You don’t have to run to the store on a whim; you can whip these up right now! We need just a few things to create that perfect, slightly sweet dough base.
Required Ingredients for Perfect Oven-Baked Dough Balls
Here is the list. Don’t skip the preparation notes—they really help the dough come together smoothly, trust me!
| Ingredient | Amount (Approximate) | Preparation Note |
|---|---|---|
| Flour | 2 cups | All-purpose, lightly spooned and leveled |
| Milk | 1/2 cup | Room temperature |
| Butter | 1/4 cup | Melted |
| Sugar | 2 tablespoons | Granulated |
| Salt | 1/2 teaspoon | Fine grain |
| Eggs | 1 large | Lightly beaten |
Step-by-Step Instructions for Oven-Baked Dough Balls
This is where the real fun begins! Even though the ingredient list is short, the method is what turns simple flour into something magical. I always tell folks that baking is just chemistry you can eat, but these Oven-Baked Dough Balls are so forgiving. Just follow these steps, and you’ll have a pan full of golden goodness coming out of your oven in no time.
Mixing the Dough Base for Oven-Baked Dough Balls
First things first, grab your large bowl. We’re going to combine all the dry stuff together. Whisk your flour, sugar, and salt until they are really well acquainted. This step is important because it distributes the salt and sugar evenly, so you don’t end up with one super-sweet bite and one salty one.
Now for the wet ingredients. In a separate, smaller bowl—or even a large measuring cup—whisk your lightly beaten egg, room temperature milk, and the melted butter together. Make sure the butter isn’t scorching hot, or you might scramble that egg! Oops!
Slowly pour the wet mixture into the dry ingredients. Mix gently with a wooden spoon or spatula—don’t use an electric mixer here! We just want to combine everything until a shaggy, slightly sticky dough forms. If it seems too wet, add just a tiny bit more flour, one tablespoon at a time. Remember, this dough is meant to be soft; it’s not like bread dough, so don’t overwork it trying to make it stiff!
Shaping and Preparing for Baking
Before we roll, make sure your oven is preheated to 375 degrees Fahrenheit (about 190 Celsius). This ensures they start baking immediately and don’t spread out too much. Next, line a baking sheet with parchment paper. Trust me on this one; it prevents sticking better than grease and flour ever could for these soft little doughs.
Now, take a tablespoon or a small cookie scoop if you have one, and portion out the dough. Roll each portion gently between your palms to form a smooth, uniform ball. Uniformity is key for even baking, which helps us hit that “golden” mark at the same time!
Place the shaped Oven-Baked Dough Balls onto your prepared sheet, leaving about two inches between them. They will puff up a little bit while they bake, so give them space to breathe!
Baking Your Oven-Baked Dough Balls to Golden Perfection
Carefully slide the tray into the preheated oven. We are looking for speed here! Keep an eye on them after the 10-minute mark. The goal is “lightly golden,” not deep brown. They should look set on top and have a beautiful, pale golden hue around the edges.
Usually, 12 minutes is the sweet spot for these Oven-Baked Dough Balls. If they look pale but feel firm when you gently tap the top, they are done. Pull them out right away. Over-baking is the enemy of soft dough balls!
Tips for Achieving Expert Level Oven-Baked Dough Balls
Even though this recipe is super simple, a few little tricks can take your Oven-Baked Dough Balls from good to absolutely unforgettable. I’ve made enough batches of these to know exactly where things can go sideways if you rush the process. Pay attention to the temperature of your ingredients, and you’ll avoid all the common hiccups!
Ingredient Temperature Matters for Your Dough Balls
When mixing up the dough, the temperature of your milk is actually more important than you might think. If the milk is too icy cold, it chills that melted butter right away, which can make the dough seize up a bit and result in a tougher texture. We want everything to incorporate smoothly! This concept of ingredient temperature is crucial in many baking recipes.
Similarly, make sure your egg isn’t straight from the fridge. Room temperature ingredients blend into a cohesive batter much faster. This means you mix less, and when you mix less, you develop less gluten, which keeps our dough balls tender and light—exactly what we want!
Achieving Consistent Size in Your Oven-Baked Dough Balls
If you notice some of your Oven-Baked Dough Balls are burnt while others are still raw in the middle, it’s almost always a size issue. They need to bake evenly, so they need to be the same size! I highly recommend using a small cookie scoop, like the one used for melon balls, to portion out the dough.
If you don’t have a scoop, use a small kitchen scale. Weighing each lump of dough—aiming for about 30 grams each—is the ultimate pro move for uniformity. This guarantees that every single one of these delicious Oven-Baked Dough Balls hits that perfect golden color at the exact same time. For more baking tips on achieving perfect results, you can check out general resources on accurate flour measurement.
Serving Suggestions for Your Baked Dessert
Once these delightful dough balls come out of the oven, the temptation to eat them immediately is real, but give them just five minutes to cool slightly on the pan. They are best served warm, not piping hot, so you can actually taste all that buttery goodness!
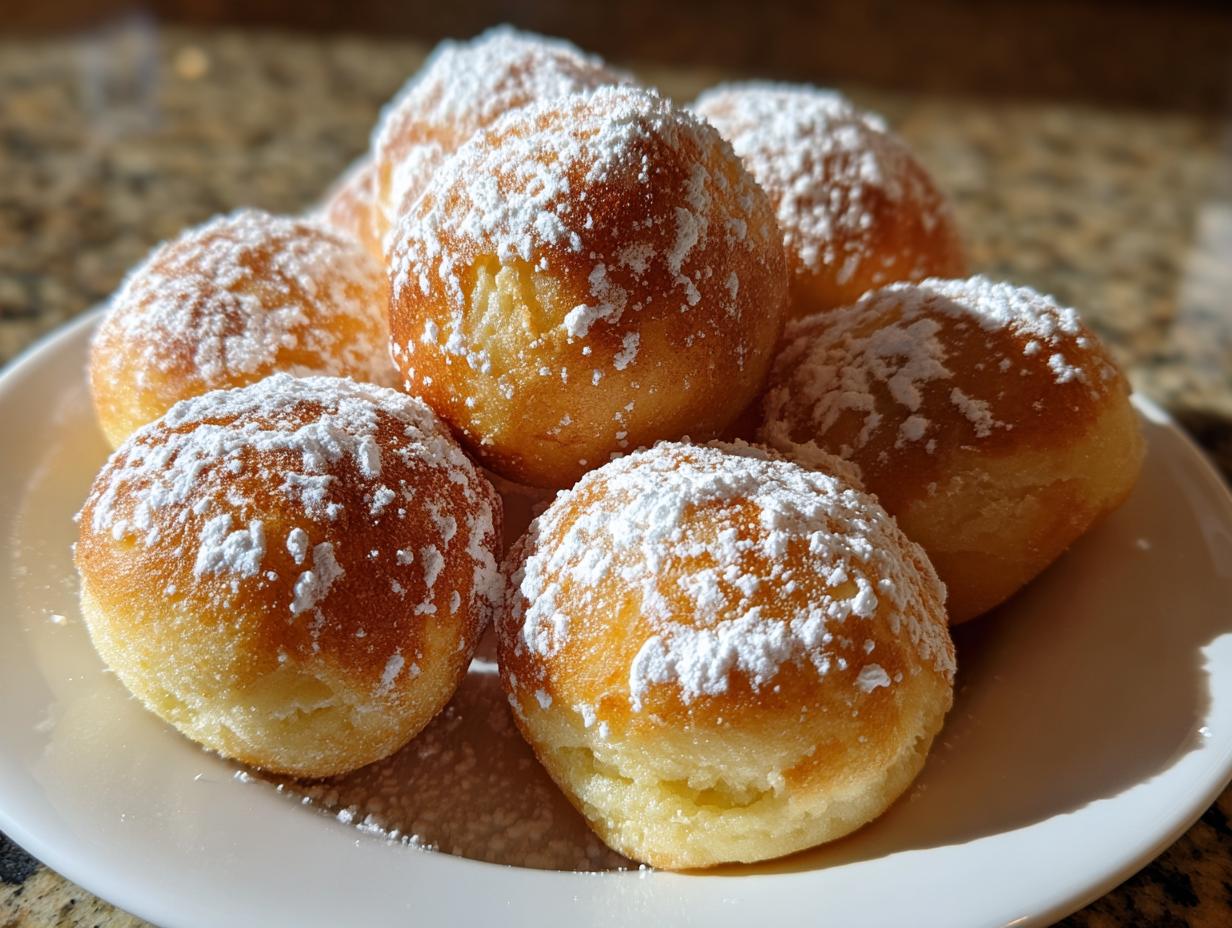
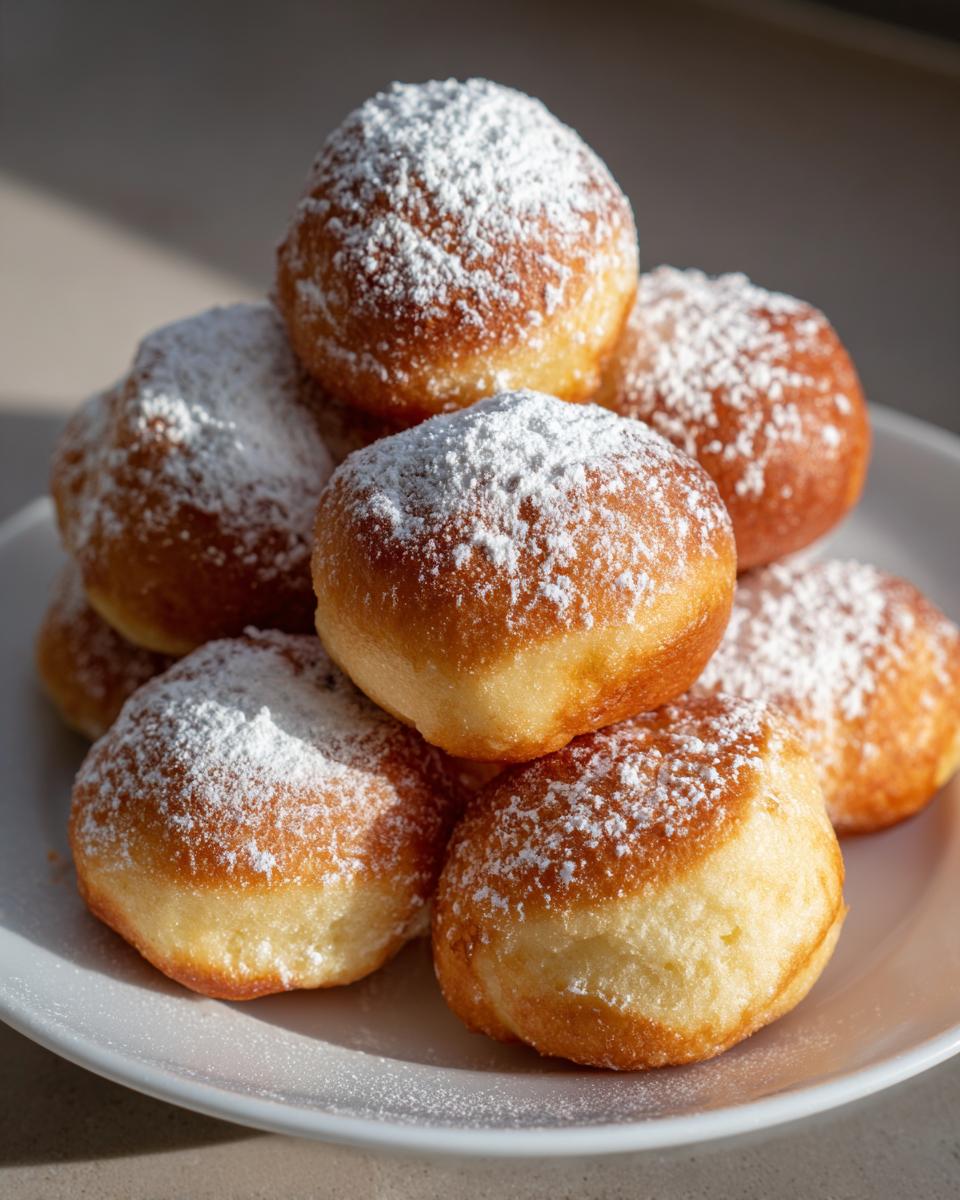
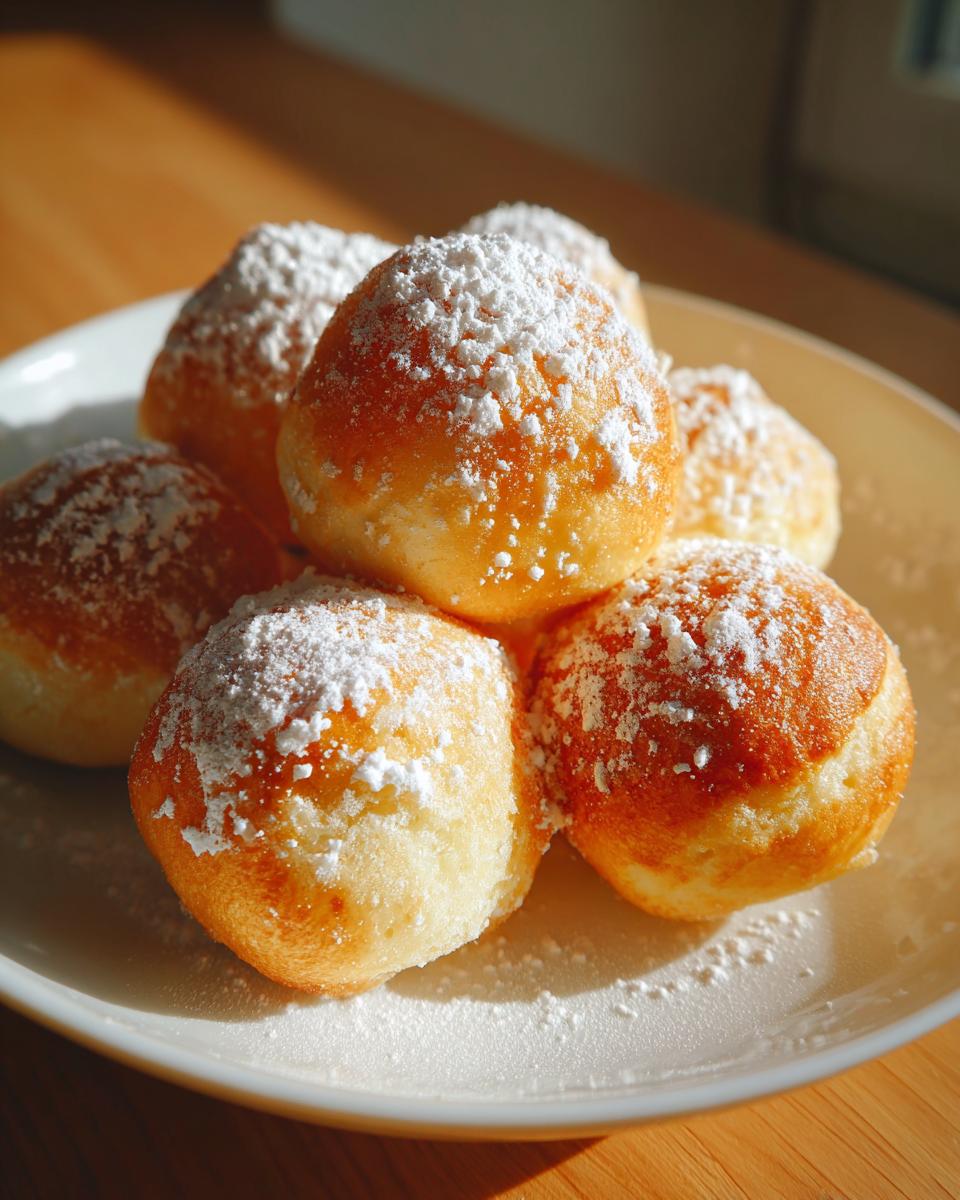
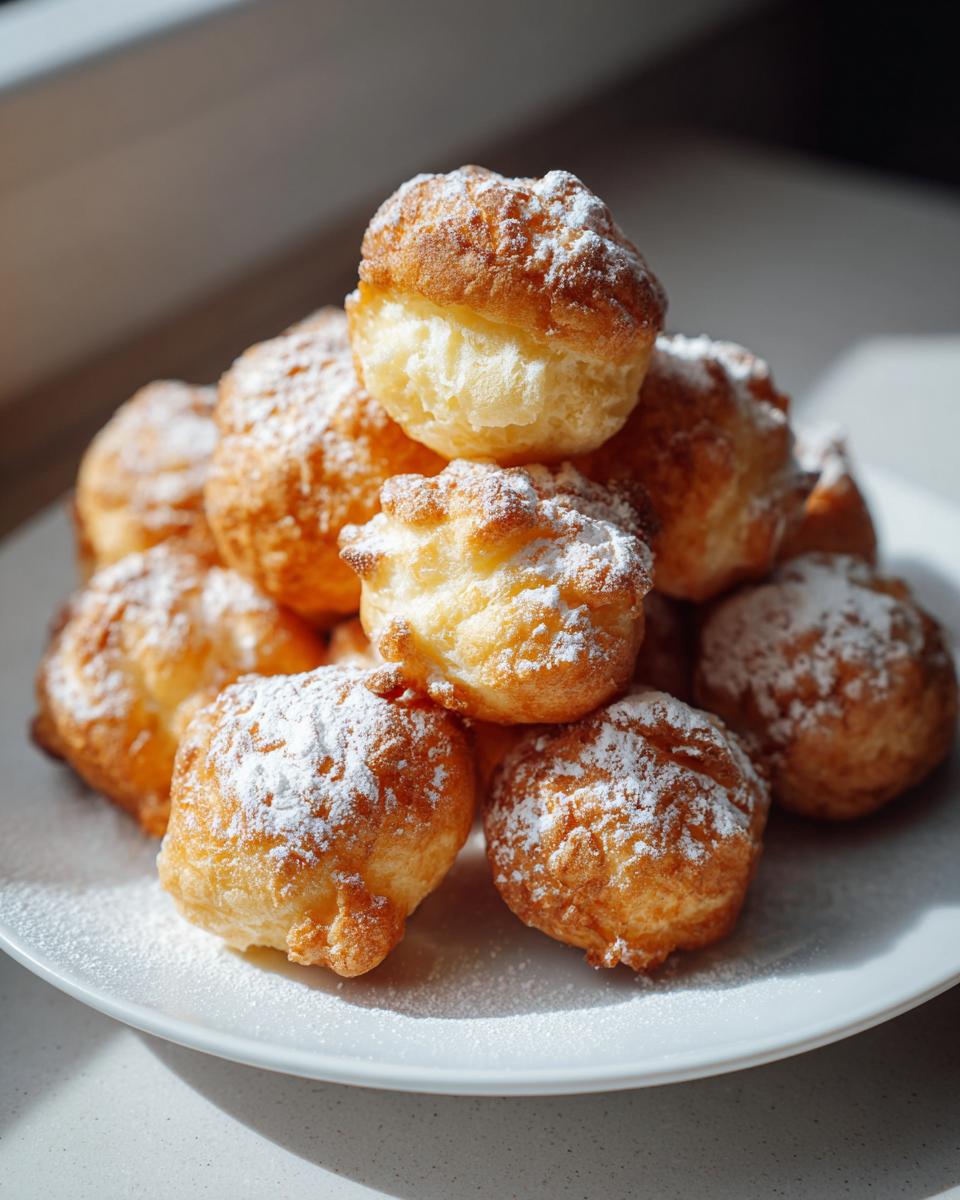
The absolute classic way to serve them, as noted in my own little recipe card secrets, is with a generous dusting of powdered sugar. Just grab a small sifter and lightly shower them until they look like they’ve had a fresh snowfall. It adds just the right touch of extra sweetness!
If you’re feeling a little fancier, though, try dipping them into melted chocolate—white or dark, it’s your call! Or, for a real treat, serve them alongside a small bowl of warm caramel sauce for dipping. They are perfect for sharing, but honestly, I don’t judge if you keep the whole batch to yourself. If you love sweet dips, you might enjoy my recipe for easy caramel apple cheesecake dip.
Storing Leftover Oven-Baked Dough Balls
It’s a rare day when I actually have leftovers of these little beauties, but if you manage to save some of your Oven-Baked Dough Balls, you want to treat them right so they don’t get stale! The key is airtight storage. Even though they are baked, that soft texture can disappear quickly if exposed to air.
Don’t worry about reheating them; it’s super easy to bring back that fresh-from-the-oven feel. Just a quick zap will do the trick. Here’s how I keep them fresh for a couple of days:
| Storage Method | Duration | Reheating Tip |
|---|---|---|
| Airtight Container (Room Temp) | Up to 2 days | Microwave for 10 seconds |
| Freezer (Airtight Bag) | Up to 1 month | Thaw slightly, then 20 seconds in microwave |
If you freeze them, give them a quick 30-minute thaw on the counter before reheating. It makes a huge difference in texture!
Understanding the Nutrition of Oven-Baked Dough Balls
I always like to give you a little peek at what you’re enjoying, even with simple recipes like these Oven-Baked Dough Balls. Since we are using basic pantry items, the nutrition profile is pretty straightforward—a nice little treat that isn’t overly heavy. Remember, these are estimates based on the ingredients listed, and they can change depending on how much sugar or butter you decide to use in your own kitchen!
This baked dessert is certainly satisfying without being loaded down with fat, especially since we skipped the deep fryer. It’s a sweet comfort that fits nicely into a balanced diet. Here is a breakdown of what one dough ball typically contains:
| Nutrient | Amount (Approximate) |
|---|---|
| Calories | 150 |
| Sugar | 5g |
| Fat | 6g |
| Protein | 4g |
Enjoying these sparingly, perhaps with a cup of coffee, makes them a perfect afternoon indulgence! If you are looking for other simple baked treats, check out my recipe for baked pears.
Frequently Asked Questions About Oven-Baked Dough Balls
I get so many questions about these simple treats! It’s wonderful to see so many people trying out these Oven-Baked Dough Balls because they are truly foolproof. Here are some of the most common things folks ask me when they are getting ready to bake them for the first time. I hope these little bits of advice help you out!
Can I use a different type of flour in these Oven-Baked Dough Balls?
That’s a great question about substitutions! For the best results—meaning that slightly chewy but tender texture—I highly recommend sticking with all-purpose flour. If you absolutely must substitute, whole wheat pastry flour might work in a pinch, but only substitute about half the required amount. Regular whole wheat flour is too heavy and will absorb too much liquid, resulting in a dense, dry ball rather than a fluffy one. Stick to the white stuff for this recipe!
What is the best way to prevent my Oven-Baked Dough Balls from sticking to the pan?
I talked about this a bit earlier, but it bears repeating because nobody wants to scrape dough off a baking sheet! The number one way to ensure these Oven-Baked Dough Balls release perfectly is by using parchment paper. Don’t skip it! If you don’t have parchment, you need to grease the pan generously with butter or cooking spray and then dust the entire surface lightly with flour. Make sure you tap out all the excess flour so you don’t end up with a thick, baked crust on the bottom of your dough.
Can I skip beating the egg?
Please don’t! The egg is a binder, and beating it lightly first helps it incorporate evenly with the milk and butter. If you just drop a whole, unmixed egg in, you risk getting streaks of cooked egg white in your final product. We want everything smooth for those perfect Oven-Baked Dough Balls!
Share Your Homemade Oven-Baked Dough Balls Experience
I put so much heart into sharing these simple recipes with you, and I truly love hearing about your results! When you make these Oven-Baked Dough Balls, please come back and tell me how they turned out. Did you use the powdered sugar dusting, or try a dip? Leave a rating below so others know how much you enjoyed this easy baked dessert! If you are looking for other quick recipes, check out my quick and easy recipes section.
Print
Amazing 15-Min Oven-Baked Dough Balls
- Total Time: 27 minutes
- Yield: 12 dough balls
- Diet: Vegetarian
Description
Simple Oven-Baked Dough Balls. These are easy to make and bake to a light golden color.
Ingredients
- Flour
- Milk
- Butter
- Sugar
- Salt
- Eggs
Instructions
- Mix ingredients into dough.
- Roll into balls.
- Bake until lightly golden.
Notes
- Sprinkle with powdered sugar before serving.
- Prep Time: 15 minutes
- Cook Time: 12 minutes
- Category: Dessert
- Method: Baking
- Cuisine: American
Nutrition
- Serving Size: 1 dough ball
- Calories: 150
- Sugar: 5g
- Sodium: 100mg
- Fat: 6g
- Saturated Fat: 3g
- Unsaturated Fat: 3g
- Trans Fat: 0g
- Carbohydrates: 20g
- Fiber: 1g
- Protein: 4g
- Cholesterol: 30mg