Skip to content

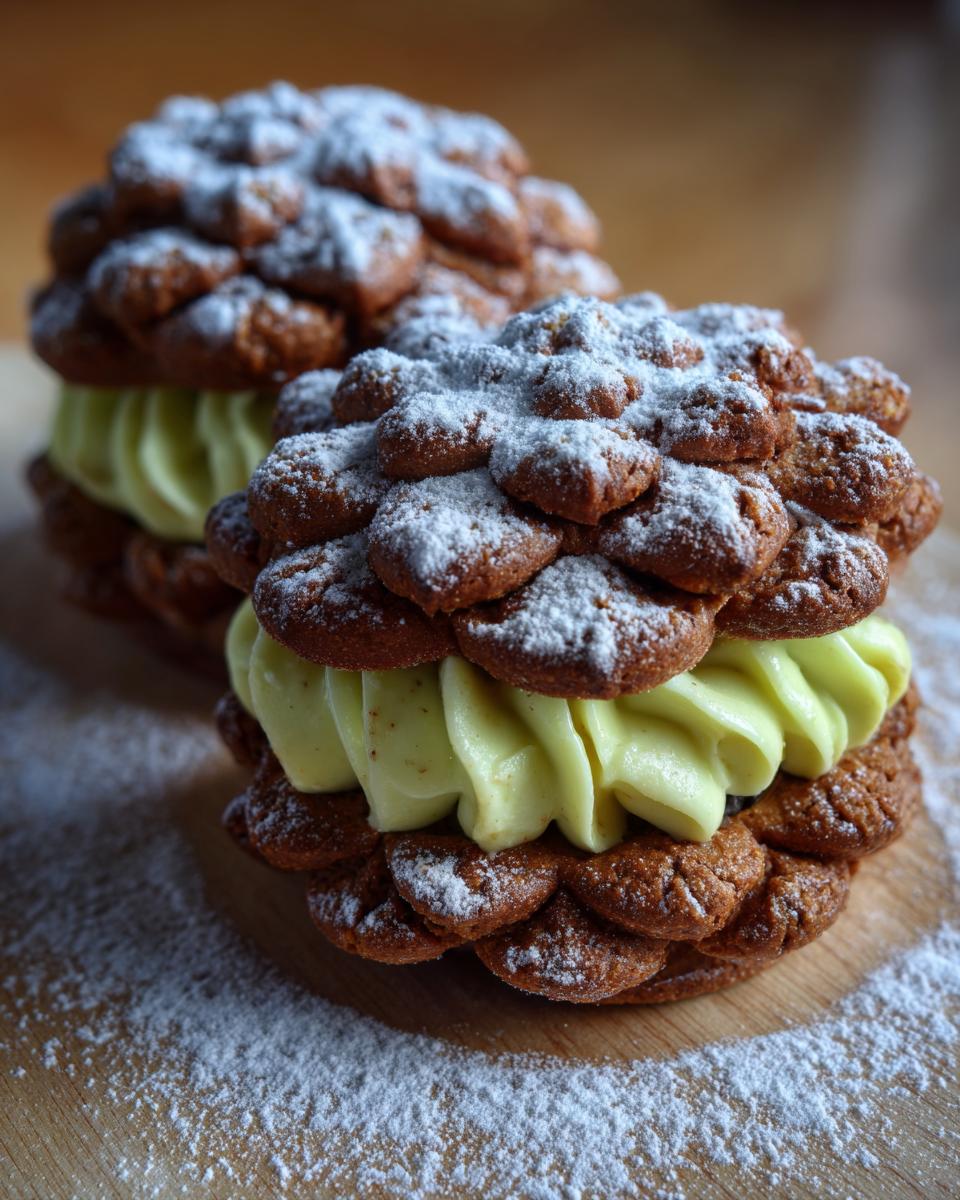
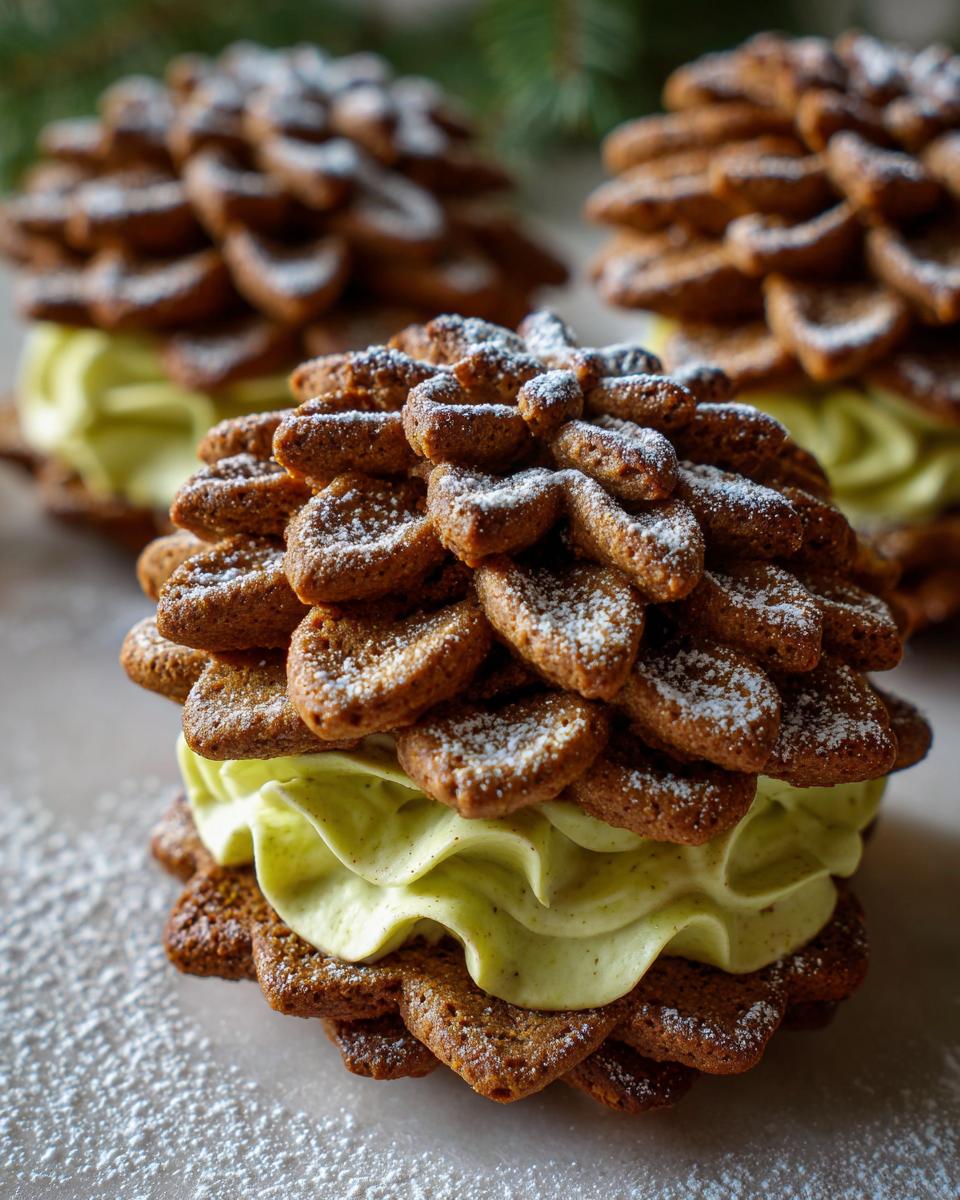
When you see beautiful, detailed Pinecone Cookies sitting on a platter, you might think they require a professional pastry chef, right? Wrong! I’m Anna Kowalska, and here I share tried-and-true homemade recipes that you and your family will love. Everything I post is made with heart and flavor, and these cookies are proof that you can create true holiday magic right in your own kitchen.
I remember seeing these incredible 3D cookies years ago and thinking they were impossible. It took many messy, sticky attempts, but I finally cracked the code on making these stunning, gingerbread-spiced beauties filled with the most wonderful pistachio buttercream. This recipe is all about technique, not complicated baking skills. We’re going to use a special mold, yes, but the payoff—those intricate, snowy-dusted pinecones—is absolutely worth it.
Forget dry, dull holiday cookies. These Pinecone Cookies deliver intense spice balanced perfectly by that salty, nutty filling. Get your mold ready; we’re about to bake something truly show-stopping!
Jump to:
Assembling Your Ingredients for Perfect Pinecone Cookies
Okay, gather everything up before you start mixing, because when we get to the molding step, things move fast! These cookies rely on the right balance of wet and dry ingredients to hold that beautiful shape. Don’t skimp on the spices—that’s where the deep gingerbread flavor comes from. I organized the list below so you can check things off easily. Trust me, having everything ready makes the whole process so much smoother.
For the absolute clearest view of what you need, I like to keep the cookie dough parts separate from the filling ingredients. It just helps keep the focus right!
Dry Components and Spices for Pinecone Cookies
- 5 cups all-purpose flour plus more to bring to consistency/kneading
- 1 teaspoon baking soda
- 1 teaspoon salt
- 2 tablespoons ground ginger (This is the star, don’t be shy!)
- 1 tablespoon ground cinnamon
- 1 teaspoon ground nutmeg
- 1 teaspoon ground cloves
Wet Ingredients and Molasses Base
- 1 cup unsalted butter melted
- 1 cup granulated sugar
- 1 1/4 cups molasses unsulfured (Make sure it’s unsulfured for the best flavor!)
- 2 eggs slightly beaten
Components for Lightly Salted Pistachio Buttercream
- 1/2 cup unsalted butter (softened for the filling)
- 1/3 cup pistachio paste (This gives it that incredible color and flavor)
- 4 cups confectioners’ sugar
- Milk or cream to thin
- 1/2 teaspoon fine grain sea salt (Don’t skip this—it balances the sweetness!)
- 3 tablespoons ground pistachios for sprinkling
Mastering the Art of Pinecone Cookies Preparation
Now for the fun part, but also the part where you need to be a little gentle! These gingerbread cookies are sturdy, but if you treat the dough too roughly, they end up tough. We’re aiming for that beautiful 3D look, so pay close attention to the mixing and the molding steps. It takes a little practice, but honestly, the first one always comes out wonky, and that’s totally normal!
Creating the Gingerbread Dough for Pinecone Cookies
First, we mix the dry stuff—flour, soda, salt, and all those warm spices—ginger, cinnamon, nutmeg, and cloves. Whisk them up good so they are evenly distributed. In another bowl, use your stand mixer to blend that melted butter, sugar, molasses, and your slightly beaten eggs until they look happy together.
Next, add about four cups of your dry mix into the wet ingredients and mix only until it just comes together. Then, start adding the rest of that flour mix, a little at a time, mixing on low speed. You want to keep adding flour until the dough is firm and it’s just not sticky anymore. Stop when it barely cleans the sides of the bowl. Turn it out onto a lightly floured surface and knead it just a couple of times—literally just enough to bring it into a smooth ball. Overworking the dough here is what makes them tough later, so be quick!
Technique for Pressing and Releasing Dough from the Mold
This is where the magic happens! Grab your cooking spray and really coat that mold well. Take a small piece of dough and press it firmly into every little crevice of the mold cavity until it’s packed in tight. Once filled, carefully remove the dough and weigh it. That weight is your magic number!
Now, roll the rest of your dough into balls that match that weight. Take one ball, flatten it slightly, and press it into the mold again, letting the dough happily overflow the edges a bit. Use your finger to gently push those overflowing edges back in toward the center—this defines those crisp pinecone edges. To get it out, don’t pull! You have to whack the tip edge of the mold hard against your counter or work surface. It should pop right out onto your surface. Use a large spatula underneath for support to carefully transfer it to your parchment-lined baking sheet. Remember what I said? You’ll need to re-grease the mold every single time. Don’t worry if the first one is a mess; just keep practicing that press and whack!
Baking and Achieving the Right Texture
Before we bake, put those molded cookies in the freezer for about 10 minutes. That chill time is crucial; it helps them hold their shape perfectly when they hit the heat. Preheat your oven to 375°F.
Bake them for 12 minutes if you like a softer, chewier middle—you know, the kind that melts in your mouth—or push it to 16 minutes if you want a crispier cookie that lasts longer. Watch the edges; a light golden brown and that wonderful gingerbread smell mean they are ready. Let them cool completely on a wire rack before you even think about touching them.
Preparing the Lightly Salted Pistachio Buttercream Filling
While those cookies are chilling out, let’s make that incredible filling. Get your softened butter and the pistachio paste beating together until they are nicely combined. Then, start adding your four cups of powdered sugar slowly, using low speed so it doesn’t explode everywhere. Once it’s mostly mixed, start adding milk or cream just a tiny bit at a time until the frosting is thin enough to pipe but still looks sturdy.
The final flavor punch comes from that sea salt—beat it in on high speed along with a little extra air until the buttercream is light and that pale, lovely yellow-green color. Cover it with a damp towel while you finish the cookies so the top doesn’t crust over.
Assembling Your Final Pinecone Cookies
Once the cookies are totally cool, take your sieve and dust them generously with powdered sugar for that perfect snowy look. Now, load your buttercream into a piping bag fitted with a closed star tip. Pipe thick, gorgeous swirls onto the flat side of one pinecone cookie—think of it like filling a sandwich!
Sprinkle those swirls lightly with your ground pistachios for texture, and then gently top it with a second pinecone cookie. Press just enough so the filling squishes out a little bit around the middle. That’s it! You’ve made a masterpiece!
Why You Will Love Making Pinecone Cookies
I know the molding part looks intimidating, but once you get past that initial hurdle, this recipe is actually a joy to work with. Seriously, these aren’t just cookies; they are little edible sculptures! Here’s why I think you’re going to be obsessed with making these Pinecone Cookies every holiday season.
- They Look Like They Took Days: The visual wow factor here is huge. People will actually ask if you bought these from a fancy bakery. That 3D detail from the mold looks so professional, even though the actual assembly is quite fast once the cookies are baked.
- The Flavor Combination is Unexpected: Gingerbread is classic, but pairing that warm, strong ginger and spice with a sweet, slightly savory pistachio buttercream is just genius. That little bit of sea salt in the filling cuts through the sugar perfectly.
- Great for Making Ahead: The cookies themselves keep beautifully, and the filling holds up well in the fridge. You can bake these a few days before your party and just assemble them the night before. No last-minute panic required!
- The Snowy Finish is So Easy: That final dusting of powdered sugar takes two seconds but completely transforms the look, giving them that perfect, fresh-from-the-woods appearance. It’s the easiest decoration trick ever.
Essential Equipment for Your Pinecone Cookies Project
You can’t make these 3D wonders without having the right tools ready to go. I learned the hard way that trying to jam dough into a mold with your fingers just doesn’t cut it! Having these specific items on hand will make the molding process so much less frustrating. Think of this as gathering your specialized baking artillery!
- The Pinecone Cookie Mold: This is non-negotiable for getting the signature look. Make sure yours is made of sturdy metal or durable silicone.
- A Good Electric Mixer: You need the power for creaming the buttercream properly, and it makes mixing that thick dough much easier than hand mixing.
- Large Cookie Spatula: I mean a really wide, sturdy one. You need this to support the entire cookie when you lift it out of the mold and move it to the baking sheet. Don’t try to use a thin turner; you’ll break the pinecone tip!
- Piping Bag and Closed Star Tip: The closed star tip (like an Ateco 822 or similar) helps create those beautiful, defined ridges when you pipe the pistachio buttercream filling.
- Fine Mesh Sieve: This is essential for dusting the baked cookies evenly with powdered sugar to get that beautiful “snowfall” effect.
- Parchment Paper: Always line your baking sheets. This dough can sometimes stick, and parchment gives you the best insurance policy.
Tips for Success When Molding Pinecone Cookies
Look, I won’t lie, the first few cookies you pull out of that mold might look a little sad. That’s okay! This specialized technique requires a couple of little secrets that my testing taught me. Once you nail the dough handling and the mold prep, you’ll be cranking out perfect pinecones like a pro. We want flavor, not just looks, and that means treating the dough gently.
Dough Handling and Mold Care for Pinecone Cookies
The biggest mistake people make is overworking the dough after the flour is added. Remember how I said to knead it just a couple of times on the counter? Don’t be tempted to knead it into submission! If you work that gluten too much before it even hits the mold, you end up with a cookie that tastes more like a hockey puck than a piece of spiced heaven. Keep the kneading minimal; the mold does all the shaping work for you.
Now, let’s talk about your mold. These molds—especially the wooden ones—need respect! After you whack the cookie out and it’s on the sheet, you need to clean the mold immediately. Don’t let that molasses-heavy dough dry in there. Just rinse it gently under warm tap water. Use a soft brush, like a pastry brush, to get into those little grooves and clear out all the dough bits. Dry it thoroughly right away so it doesn’t warp. Before you put it away, rub a tiny bit of olive oil over the wood. This keeps the wood from drying out and ensures the next time you use it, the dough slides out like it’s on ice!
Frequently Asked Questions About Pinecone Cookies
I know you might have a few questions swirling around, especially since these aren’t your standard drop cookies! It’s natural to wonder about the logistics of 3D baking. Here are the things people ask me most often before they dive into their first batch of Pinecone Cookies.
Can I make Pinecone Cookies without the special mold?
Honestly, the whole point of this recipe is that stunning, detailed 3D pinecone shape, which the mold provides perfectly. If you absolutely cannot find a mold, you can still make a fantastic gingerbread cookie! Just roll the dough into small logs and use a sharp knife or the back of a fork to carve overlapping scale patterns into the dough before baking. They won’t be 3D, but they will still taste like that wonderful spiced molasses and pair perfectly with the pistachio filling.
How should I store leftover Pistachio Buttercream for my Pinecone Cookies?
The buttercream is pretty hardy because of all that sugar, but you want to keep that fresh pistachio flavor bright. Store any leftover filling in an airtight container in the refrigerator. It will firm up quite a bit in there. Before you use it again—maybe for cupcakes next week—just let it sit on the counter for about 30 minutes and give it a quick whisk by hand to bring back that lovely, pipeable fluffiness.
Are the spices in the Pinecone Cookies recipe too strong?
That’s a great question, especially since we use two tablespoons of ginger! Because we balance that strong ginger with the sweetness of the molasses and sugar, and then pair it with the rich, slightly salty pistachio filling, the spice level ends up being perfectly warm—not overwhelming. It’s definitely a ginger-forward cookie, which is why it feels so festive, but it’s not sharp or biting. It tastes like a true holiday gingerbread! If you are interested in learning more about the history of gingerbread, you can check out resources on gingerbread history.
Storing and Reheating Your Finished Pinecone Cookies
Once you’ve assembled these beauties, you want to make sure they stay looking and tasting perfect until you serve them. Since these are gingerbread-based, the cookies themselves are quite sturdy, but the pistachio buttercream changes things a little bit. I always prefer to assemble them the day before a big event, but they can certainly last longer if you store the components separately!
The key is keeping the air away from the cookies so they don’t get stale and keeping the filling cool so it doesn’t get messy. Here is my go-to guide for keeping your Pinecone Cookies in top shape:
| Component | Storage Method | Maximum Time Frame |
|---|---|---|
| Unfilled, Baked Cookies | Airtight container at room temperature | Up to 10 days |
| Pistachio Buttercream Filling | Airtight container in the refrigerator | Up to 5 days |
| Assembled Cookies (Room Temp) | A single layer in an airtight container, separated by parchment | 1-2 days (Best eaten quickly) |
| Assembled Cookies (Refrigerated) | Airtight container, allow to warm slightly before serving | Up to 4 days |
If you assemble them and store them in the fridge, just pull them out about 30 minutes before you plan to serve them. That lets the buttercream soften just enough so it’s creamy again, but it won’t slide right off the cookie when you pick it up. They don’t need reheating, of course, but the slight warming makes the whole sandwich taste better! For other great holiday baking ideas, check out my recipe for Pecan Pie Cookies.
Share Your Beautiful Pinecone Cookies Creations
I truly hope you had as much fun making these striking Pinecone Cookies as I do every single time I pull them out of the oven. Seeing that detailed texture emerge from the mold just never gets old! Now that you’ve got your snowy, spiced cookies filled with that incredible pistachio cream, I really want to see what you created.
Did your first cookie release pop out perfectly, or did you have to give the mold a good motivational whack like I did? Don’t keep that stunning holiday baking triumph a secret! Drop a rating below so other bakers know just how rewarding this recipe is. And please, take a picture of your finished pinecones—especially that snowy dusting—and share it on social media. Tag me so I can cheer you on and see how these beautiful treats look on your holiday table! If you are looking for more savory holiday sides, perhaps you’d enjoy my recipe for Green Bean and Bacon Casserole.
Print
5 Amazing Pinecone Cookies Secrets
- Total Time: 1 hour 1 minute
- Yield: Varies based on mold size
- Diet: Vegetarian
Description
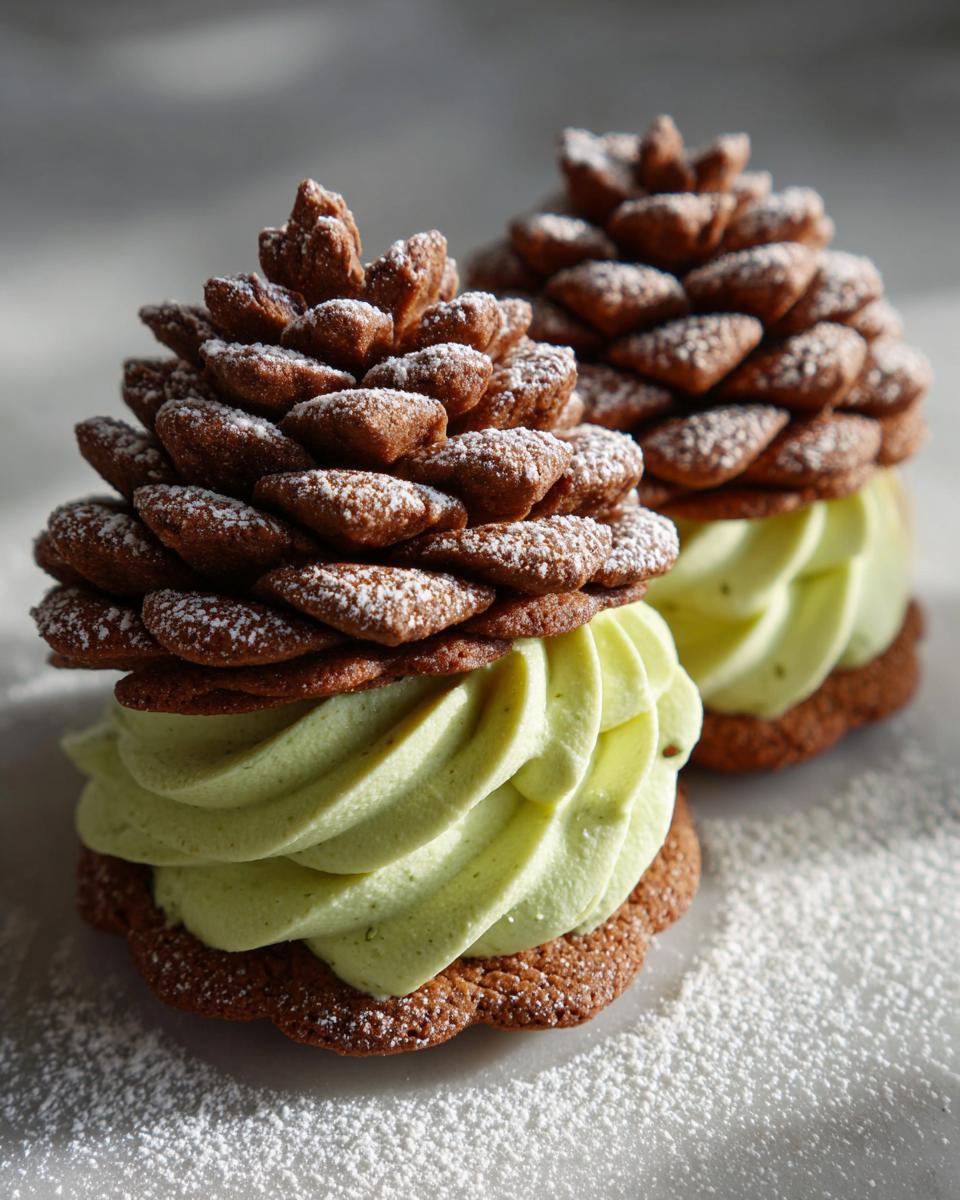
Pinecone Cookies are beautiful, 3D gingerbread cookies shaped like pinecones, filled with a lightly salted pistachio buttercream. These cookies require a special mold for their detailed appearance.
Ingredients
- 5 cups all-purpose flour plus more to bring to consistency/kneading
- 1 teaspoon baking soda
- 1 teaspoon salt
- 2 tablespoons ground ginger
- 1 tablespoon ground cinnamon
- 1 teaspoon ground nutmeg
- 1 teaspoon ground cloves
- 1 cup unsalted butter melted
- 1 cup granulated sugar
- 1 1/4 cups molasses unsulfured
- 2 eggs slightly beaten
- Cooking spray to grease mold
- Powdered sugar for dusting
- 1/2 cup unsalted butter (for buttercream)
- 1/3 cup pistachio paste
- 4 cups confectioners’ sugar
- Milk or cream to thin
- 1/2 teaspoon fine grain sea salt
- 3 tablespoons ground pistachios for sprinkling
Instructions
- For the cookies: In a large bowl, whisk together the flour, soda, salt, and spices.
- In an electric mixer with the paddle attachment, combine the melted butter, sugar, molasses, and eggs. Mix well.
- Add four cups of the flour mixture and mix until just combined. Add extra flour while mixing on low until a firm, non-sticky dough forms.
- Turn dough onto a lightly floured surface and knead briefly.
- Oil the cookie mold with cooking spray. Press small pieces of dough into the mold cavity until evenly filled.
- Remove the dough from the mold and weigh it. Portion the remaining dough into balls matching that weight.
- Re-grease the mold. Flatten a dough ball and press it into the cavity, letting it slightly overflow the edges.
- Use a finger to push the overflowing edges back to define the pinecone shape edges.
- Whack the mold hard on a work surface at the pinecone tip edge until the dough loosens and falls out onto the work surface.
- Transfer the cookie carefully to a parchment-lined baking sheet using a large cookie spatula for support.
- Re-grease the mold and repeat the process with remaining dough.
- Chill molded cookies in the freezer for 10 minutes.
- Preheat oven to 375°F.
- Bake for 12 minutes for soft middles or 16 minutes for crisp cookies.
- Remove cookies to a wire rack to cool completely.
- Stand each cookie upright and sieve confectioners’ sugar over them for a snowy effect.
- For the Pistachio Buttercream: In an electric mixer, beat the butter and pistachio paste until combined.
- Add powdered sugar and beat on low speed until just combined.
- Add milk or cream a little at a time until the mixture thins slightly.
- Add sea salt and beat on high speed until fluffy and pale yellow-green.
- Cover the buttercream with a damp towel. Transfer to a piping bag fitted with a closed star tip.
- To Assemble: Pipe thick swirls of buttercream onto the flat side of one pinecone cookie.
- Sprinkle with ground pistachios. Top with a second pinecone cookie.
Notes
- Expect ginger-forward cookies with a 3D pinecone look and lightly salted pistachio buttercream.
- Practice is needed for the first successful cookie release from the mold.
- If cooking spray fails, try dusting the mold with unsweetened cocoa powder or cinnamon.
- Try not to overwork the dough; flatten it, do not knead it in your hand before molding to avoid tough cookies.
- Watch cookies while baking; lightly browned edges and fragrance mean they are done.
- Care for the wooden mold by washing gently under tap water, brushing out dough, drying thoroughly, and rubbing lightly with olive oil after each use.
- Prep Time: 45 minutes
- Cook Time: 12-16 minutes
- Category: Cookie/Dessert
- Method: Baking and Piping
- Cuisine: American
Nutrition
- Serving Size: 1 cookie sandwich
- Calories: Estimate needed
- Sugar: Estimate needed
- Sodium: Estimate needed
- Fat: Estimate needed
- Saturated Fat: Estimate needed
- Unsaturated Fat: Estimate needed
- Trans Fat: Estimate needed
- Carbohydrates: Estimate needed
- Fiber: Estimate needed
- Protein: Estimate needed
- Cholesterol: Estimate needed