Skip to content
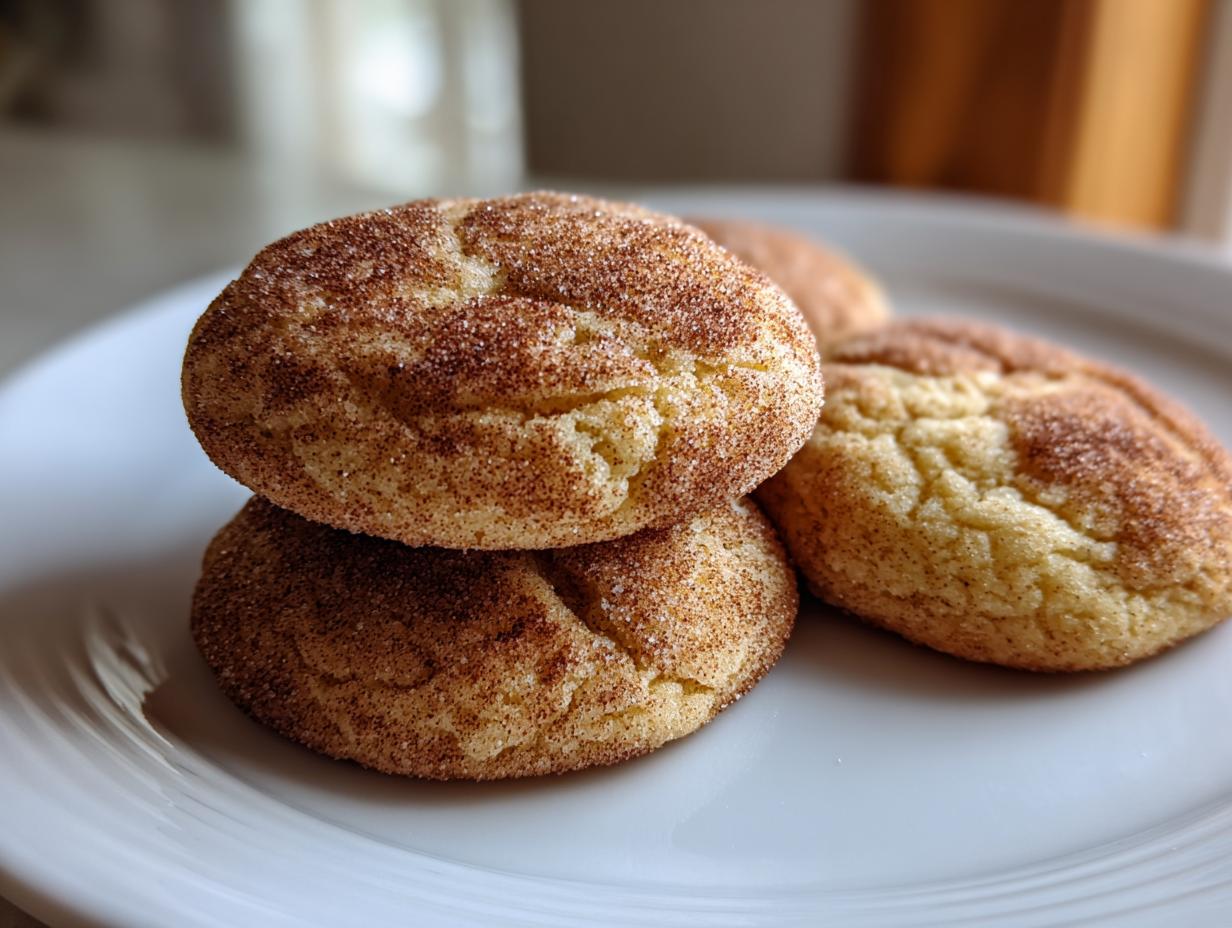
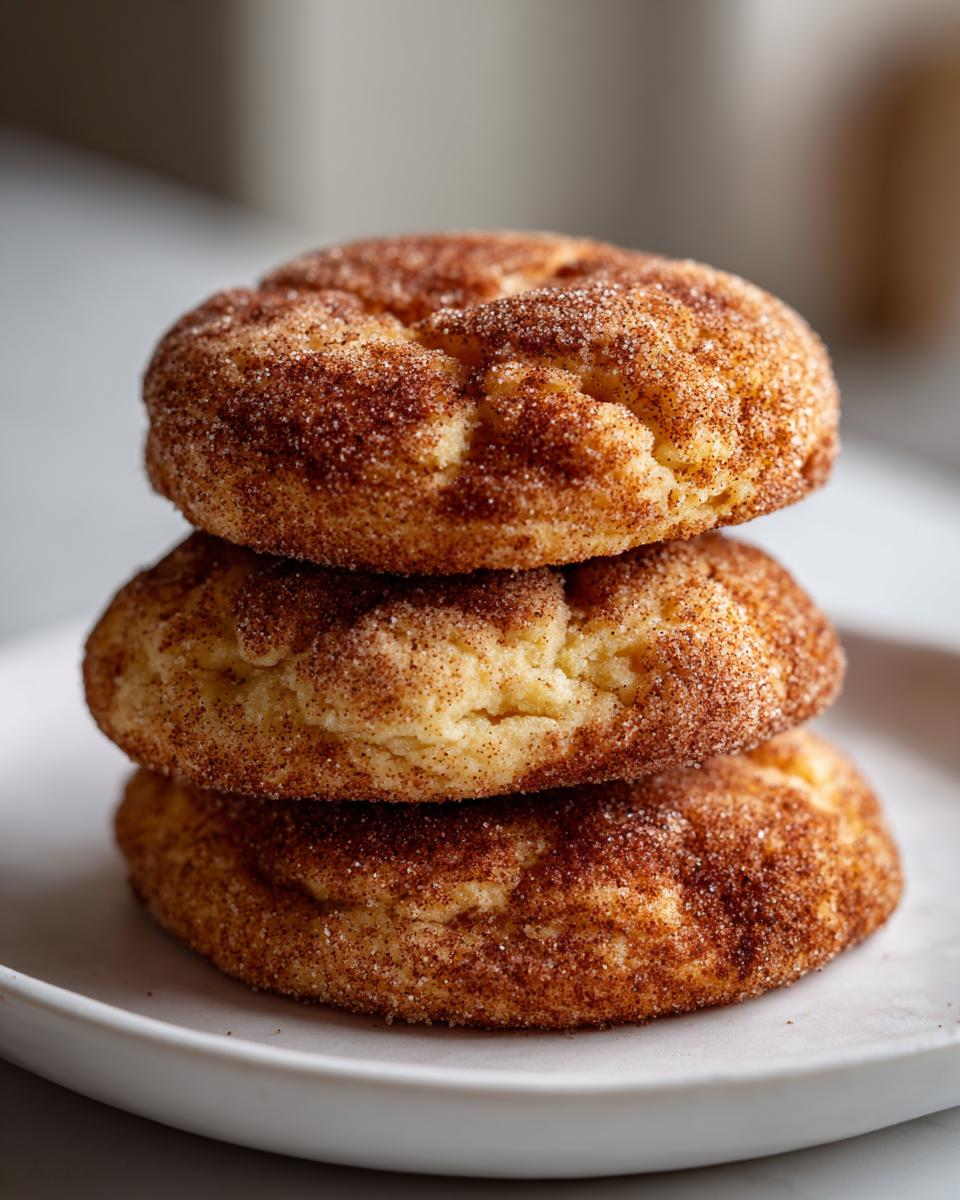
There are days when you just need that perfect, nostalgic cookie, and that’s why I’m sharing my recipe for the Simple Gluten-Free Snickerdoodle Cookies today! I’m Anna Kowalska, and here I share tried-and-true homemade recipes that you and your family will love. Everything I post, especially these easy snickerdoodles, is made with heart and flavor, proving that going gluten-free doesn’t mean sacrificing that soft, buttery, cinnamon-sugar cloud we all crave.
When my family first started navigating gluten sensitivities, I worried we’d lose out on our favorite holiday staples. But after a lot of testing, I nailed this version. It’s fast, it’s chewy, and honestly, you won’t even guess they are missing the gluten. These cookies are proof that simple baking magic is always possible!
Why You Will Love These Simple Gluten-Free Snickerdoodle Cookies
Forget complicated mixes or weird textures; these treats are everything a snickerdoodle should be. They are perfect for a quick afternoon bake or when you need a crowd-pleasing dessert fast. Seriously, they come together quicker than you can decide what movie to watch!
- Speedy Baking: Prep time is only about 15 minutes, so you can satisfy that craving almost instantly.
- Perfect Texture: They bake up wonderfully soft and chewy, never crumbly like some gluten-free versions can be.
- Classic Flavor: You get that huge burst of tangy cinnamon and sweet sugar in every single bite.
- Diet Friendly: Finally, a classic American cookie that fits beautifully into your gluten-free lifestyle!
Jump to:
Gathering What You Need for Simple Gluten-Free Snickerdoodle Cookies
Getting ready is half the battle, especially when baking gluten-free! If you set up your station correctly before you even turn on the oven, the whole process flows like a dream. We aren’t doing anything fancy here, but precision is key to getting that perfect soft texture we talked about.
Trust me, having everything measured and ready to go prevents that frantic search for a whisk when your butter is perfectly creamed and ready for the egg!
Essential Equipment for Perfect Simple Gluten-Free Snickerdoodle Cookies
You don’t need a commercial kitchen to make these beauties, but you do need a few reliable tools. Don’t skip the parchment paper—it saves so much cleanup time!
- Two medium-sized mixing bowls for separating your wet and dry ingredients.
- A decent electric mixer; hand mixers work great for this recipe, but stand mixers are fine too.
- Accurate measuring cups and spoons. Gluten-free baking is less forgiving than regular baking, so measure precisely!
- Two baking sheets, ready to be lined.
- A small bowl, just for rolling the dough in that gorgeous cinnamon mixture.
Ingredient Clarity for Simple Gluten-Free Snickerdoodle Cookies
The quality of your ingredients really shines through in a simple cookie like this. We only have a few components, so make sure they are happy!
First, that butter? It has to be truly at room temperature. I mean soft enough to press your finger into without resistance, but not melted or oily. If it’s too cold, you won’t cream it right, and the cookies will be dense. Oops!
Second, when measuring your gluten-free flour, please don’t just scoop it straight from the bag! You’ll pack in too much, and we’ll end up with dry, sad cookies. Spoon the flour gently into your measuring cup and then level it off with a knife. That small step makes a huge difference in getting that signature chewy result.
Step-by-Step Instructions for Simple Gluten-Free Snickerdoodle Cookies
Okay, now we get to the fun part! Since these easy snickerdoodles are so quick, make sure your oven is ready to go before you even start mixing. We want to capture all that beautiful air we’re whipping into the butter.
Preparing the Dry Components
Grab one of your mixing bowls—this is where we build the backbone of our cookie structure. We need to combine the gluten-free all-purpose flour, the baking powder, the salt, and the baking soda. Give this a really good whisking. I like to whisk it for about 30 seconds, making sure everything is evenly distributed. In gluten-free baking, you absolutely need your leaveners (baking soda and powder) mixed perfectly, or you might end up with a few pockets that rise weirdly. Set this bowl aside for now.
Creating the Creamy Base
Time for the electric mixer! Grab your second bowl. We are going to cream the room-temperature butter with ¾ cup of the sugar we set aside. Beat this on medium speed until it looks pale yellow and wonderfully fluffy. This takes about two full minutes, so don’t rush it! This step is crucial because we are physically forcing air into the fat, which is what gives the cookies their lift since we aren’t using a ton of baking powder. Once it looks light and airy, crack in your egg and mix until it’s just combined and smooth again. Scrape down the sides of the bowl just to be sure everything is incorporated.
Combining Dough and Shaping Your Simple Gluten-Free Snickerdoodle Cookies
Now we bring those two worlds together! Turn your mixer down to the lowest speed—and I mean low! Gradually add the dry flour mixture into the wet base. You want to add it in about three additions, mixing just until the flour streaks disappear. Seriously, stop mixing the second you don’t see any more dry pockets. Overmixing the gluten-free flour blend can make these cookies tough, which is the last thing we want.
Next, in a separate little bowl, mix up the remaining ¼ cup of sugar with your ground cinnamon. Take a cookie scoop or just use your hands to roll the dough into nice, even 1 1/2-inch balls. They should look like little pale dough orbs. Roll each ball thoroughly in the cinnamon sugar mixture until it’s completely coated. Place them about two inches apart on your parchment-lined baking sheets.
The Signature Cinnamon Sugar Coating and Baking
Preheat that oven to 350 degrees F (180 degrees C) while you’re rolling the dough balls. Once they are coated and sitting on the sheets, they are ready to bake! Pop them into your preheated oven for about 12 to 15 minutes. You are looking for the edges to just start turning a light, golden brown. They might still look a tiny bit soft in the center, and that is perfect!
This next part is important for texture: Let the cookies sit right there on the hot baking sheet for one full minute after they come out. This lets them firm up just enough so they don’t fall apart when you move them. After that minute, gently transfer them to a wire rack to cool completely. Enjoy that amazing cinnamon smell filling your kitchen!
Tips for Achieving Expert Simple Gluten-Free Snickerdoodle Cookies
Even with a simple recipe, sometimes things go a little sideways. Don’t panic if your first batch looks a bit flatter than mine did! Usually, the issue comes down to temperature or measuring errors, which are super common when baking gluten-free.
If your cookies are spreading too much in the oven, your butter was probably too warm, or maybe you skipped that one minute of cooling time on the pan. Next time, stick that dough in the fridge for just 10 minutes before rolling—it firms up the fat and helps them hold their shape beautifully. Also, don’t be shy with that cinnamon sugar coating; a thick layer helps insulate the cookie and keeps the center soft!
Ingredient Substitutions and Variations for Your Simple Gluten-Free Snickerdoodle Cookies
Because we are using a gluten-free all-purpose blend, I really urge you to stick with one that says it contains xanthan gum, or you’ll need to add a bit yourself. Gluten-free flours vary wildly, so if you use a single flour like almond or oat, the texture will change completely—they won’t spread right! Stick to the 1:1 blends, please.
If you need to swap the butter, you can use a good quality vegan butter stick, but you must ensure it behaves just like real butter when you cream it. If you use oil instead, you lose structure, and they will turn into flat puddles. For a fun twist, try adding ¼ teaspoon of ground cardamom to your cinnamon sugar mix. It gives the cookies a warm, almost floral background note that is just divine!
Serving Suggestions for Your Freshly Baked Simple Gluten-Free Snickerdoodle Cookies
Once these easy snickerdoodles have cooled completely, the real fun begins! These cookies are so wonderfully comforting, they pair well with almost anything cozy. They are fantastic straight out of the oven (after cooling, of course!), but they shine even brighter when matched with the right beverage.
My absolute favorite way to eat these gluten-free cookies is dunked into a tall, ice-cold glass of whole milk. The cold milk softens the cookie just a tiny bit more, and the sugar coating dissolves perfectly. If you’re having these after dinner or for an afternoon treat, a strong cup of black coffee or a creamy latte cuts through the sweetness beautifully.
For something special, try serving them warm alongside a scoop of vanilla bean ice cream. The contrast between the warm, spiced cookie and the cold, creamy ice cream is just heaven. Honestly, though, they are so flavorful on their own, sometimes I just grab one and eat it standing over the sink—don’t tell anyone!
Common Questions About Your Simple Gluten-Free Snickerdoodle Cookies
It’s natural to have questions when you are trying a new gluten-free recipe, especially when you want that classic chewy texture. I’ve gathered the most common things folks ask me about these easy snickerdoodles so you can bake with confidence!
How long do Simple Gluten-Free Snickerdoodle Cookies stay fresh?
Because we used room-temperature butter and measured the flour carefully, these gluten-free cookies stay quite soft! Store them in an airtight container at room temperature. They are usually at their absolute best on day one or two, but they should stay nicely soft for up to four days. If they start to feel a little firm after that, you can warm one up for about 10 seconds in the microwave to bring back that soft chewiness.
Can I make Simple Gluten-Free Snickerdoodle Cookies ahead of time?
Yes, you absolutely can! I often roll the dough balls, coat them in the cinnamon sugar, and place them on a parchment-lined baking sheet. Then, I pop the whole sheet into the freezer until the balls are solid. Once frozen, transfer them to a freezer bag. When you want cookies, just pull them out and bake them straight from frozen—you might just need to add 2 or 3 extra minutes to the baking time. Baked cookies freeze well too, just make sure they are completely cool first!
What is the best gluten-free flour blend for these easy snickerdoodles?
This is the million-dollar question for all gluten-free baking! For these snickerdoodles, you really want a commercial 1:1 gluten-free all-purpose blend that already contains xanthan gum. Brands like Bob’s Red Mill 1-to-1 or King Arthur Measure for Measure work wonderfully. If you use a blend that *doesn’t* have xanthan gum, you’ll need to add about ½ teaspoon per cup of flour used, or the cookies will just crumble apart on you. Avoid using only one type of flour, like just almond or just oat flour, as they don’t behave the same way as a balanced blend!
Storing and Reheating Your Simple Gluten-Free Snickerdoodle Cookies
Keeping these beauties fresh is easy, but you do need to be mindful of moisture—or the lack thereof! Since these are gluten-free cookies, they don’t have the same gluten structure to hold onto moisture for weeks, so we want to keep them sealed up tight when they aren’t being eaten.
I always recommend letting them cool completely to room temperature before storing them. Trying to put warm cookies into a container traps steam, and that steam turns into soggy bottoms, which ruins the lovely cinnamon sugar crust we worked so hard to create!
For the very best results, keep them in a container that doesn’t let a lot of air in. If you’re really worried about them drying out after day three, you can place a small slice of plain white bread in the container with the cookies. The cookies will steal the moisture from the bread, keeping themselves soft and chewy! It’s an old trick, but it works wonders for gluten-free treats. This technique is often used to maintain freshness in baked goods.
Here is a quick guide on how to handle your leftovers:
| Storage Method | Duration | Best For |
|---|---|---|
| Airtight Container (Room Temp) | Up to 4 Days | Daily snacking and keeping that soft texture. |
| Freezer (Airtight Bag) | Up to 3 Months | Making large batches ahead of time. |
| Reheating | 10-15 Seconds | Reviving the soft, fresh-from-the-oven feel. |
When you want to reheat them, I just pop one on a plate and microwave it for about 10 to 15 seconds. That little burst of heat softens the butter back up and makes them taste almost freshly baked again. Enjoy!
Enjoying Your Homemade Simple Gluten-Free Snickerdoodle Cookies
I truly hope these Simple Gluten-Free Snickerdoodle Cookies bring as much cozy comfort to your kitchen as they do to mine. They are such a straightforward treat, and I can’t wait to hear what you think! Did they turn out perfectly soft for you? Let me know how they tasted in the comments below, or tell me what you paired them with! If you are looking for other great cookie recipes, check out my classic chewy snickerdoodle cookies for comparison.
Print
5 Amazing Simple Gluten-Free Snickerdoodle Cookies
- Total Time: 30 minutes
- Yield: About 2 dozen cookies 1x
- Diet: Gluten Free
Description
These Simple Gluten-Free Snickerdoodle Cookies offer a classic, comforting treat made easy for your gluten-free lifestyle. You get that familiar soft, chewy cookie coated in sweet cinnamon sugar.
Ingredients
- 1 ⅓ cups gluten-free all-purpose flour
- 1 teaspoon baking powder
- ¼ teaspoon salt
- ¼ teaspoon baking soda
- ½ cup butter at room temperature
- 1 cup sugar, divided
- 1 egg
- 1 ½ teaspoons ground cinnamon
Instructions
- Preheat your oven to 350 degrees F (180 degrees C). Line 2 baking sheets with parchment paper.
- Combine flour, baking powder, salt, and baking soda in one bowl.
- Whisk butter and ¾ cup sugar with an electric mixer in a separate bowl until soft and creamy, about 2 minutes.
- Add the egg; whisk until well combined.
- Add the flour mixture gradually; whisk on low speed until a soft dough forms, about 2 minutes.
- Shape the dough into 1 1/2-inch balls.
- Combine the remaining ¼ cup sugar with cinnamon in another bowl.
- Roll the dough balls in the cinnamon mixture and place them on the prepared baking sheets.
- Bake in the preheated oven until the edges are golden, 12 to 15 minutes.
- Cool the cookies on the baking sheet for 1 minute before moving them to a wire rack to cool completely.
Notes
- Ensure your butter is truly at room temperature for proper creaming.
- Measure the gluten-free flour accurately; spoon it into the cup before leveling off.
- This recipe yields classic snickerdoodle flavor without the gluten.
- Prep Time: 15 minutes
- Cook Time: 15 minutes
- Category: Dessert
- Method: Baking
- Cuisine: American
Nutrition
- Serving Size: 1 cookie
- Calories: 95
- Sugar: 9g
- Sodium: 88mg
- Fat: 4g
- Saturated Fat: 3g
- Unsaturated Fat: 1g
- Trans Fat: 0g
- Carbohydrates: 14g
- Fiber: 1g
- Protein: 1g
- Cholesterol: 18mg