Skip to content
If you’re anything like me, the smell of a crackling campfire instantly brings back the best memories, especially that gooey mix of chocolate and marshmallow. Well, I’m Anna Kowalska, and here I share tried-and-true homemade recipes that you and your family will absolutely love. Everything I put up here is made with heart and flavor, because life is too short for bland food! You don’t need an open flame or sticky fingers to enjoy that classic taste anymore. Trust me, these S’mores Graham Bars are the answer to your campfire cravings, packed into one easy-to-handle square.
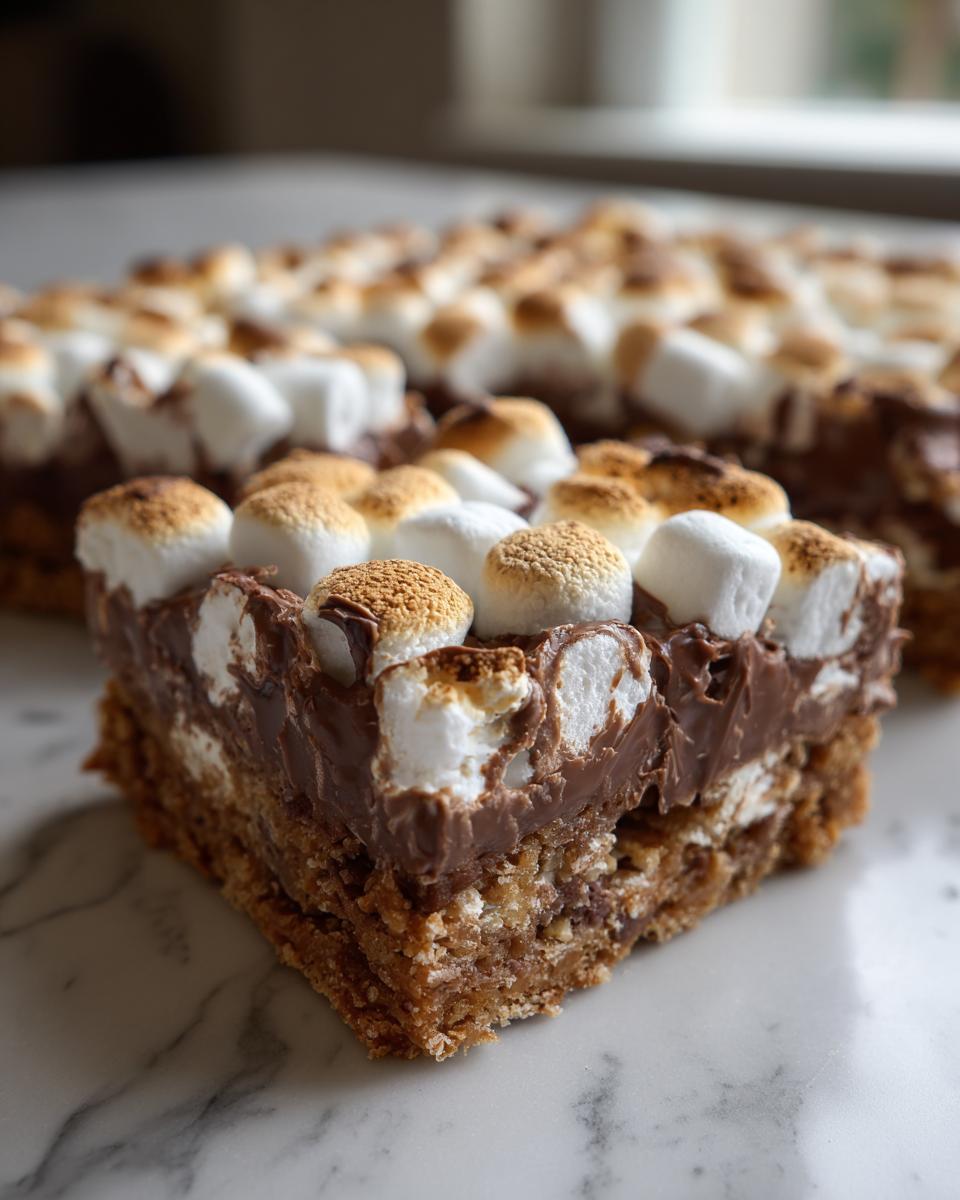
Forget complicated steps or hard-to-find ingredients. This recipe is pure comfort food made fast. We’re taking the best parts of a s’more—that buttery graham base, the melted chocolate, and the pillowy marshmallows—and baking them right into a pan. They come together in less than an hour total, which means you can satisfy that sweet craving tonight, not next weekend. They are simply the best way to bring that nostalgic flavor right into your kitchen.
Jump to:
Essential Ingredients for Perfect S’mores Graham Bars
Okay, listen up, because getting the right ingredients is half the battle won! These bars depend on a few key items to get that perfect contrast between crumbly base and gooey top. Precision matters here, especially with the butter, so grab your measuring cups and let’s get organized. Don’t try to sneak in regular marshmallows for the filling, either; the mini ones are crucial for even distribution!
I’ve listed everything below so you can see exactly what you need before you start mixing. Trust me, having everything ready to go makes the whole process feel like a breeze. You’ll see that we separate the ingredients for the base from the ones that make it gooey!
| Component | Amount | Preparation Note |
|---|---|---|
| All-Purpose Flour | 1 cup | Standard measure |
| Graham Cracker Crumbs | 1/2 cup | Pre-crushed or crushed fresh |
| Brown Sugar | 1/4 cup | Packed measurement |
| Salt | 1/4 teaspoon | Don’t skip this—it balances the sweet! |
| Unsalted Butter | 1/2 cup | Must be fully melted |
| Egg | 1 large | Room temperature is nice, but not essential here |
| Vanilla Extract | 1 teaspoon | Pure extract, always! |
| Mini Chocolate Chips | 1/2 cup | For mixing into the base |
| Mini Marshmallows | 1/2 cup | For mixing into the base |
| Chocolate Chips (Topping) | 1/4 cup | For melting and drizzling |
| Extra Mini Marshmallows | As needed | For the final top layer |
Base Ingredients for the Graham Layer
For the bottom layer, we need that classic buttery, slightly salty crunch. You’ll mix the flour, graham cracker crumbs, brown sugar, and salt first. The most important part here is the butter. It absolutely has to be fully melted. If it’s just soft, the base won’t bind correctly when you mix in the egg and vanilla. It needs that liquid fat to soak into the dry ingredients and form that perfect shortbread-like crust.
The Gooey Chocolate and Marshmallow Filling
Once the base is mixed, we fold in the magic! We use a half cup each of mini chocolate chips and mini marshmallows right into the batter before it hits the pan. These melt slightly during the initial bake, creating those wonderful pockets of melted chocolate and chewy marshmallow goodness inside the bar. It’s what takes this from a simple shortbread to a true s’more experience! If you enjoy other baked treats, you might also like my recipe for Peanut Butter Cup Cookies.
Gathering Your Equipment for S’mores Graham Bars
You don’t need a whole lot of fancy gadgets for these bars, which is part of why I love them so much! Before you even preheat the oven, make sure you have your essential tools ready. Having everything close by means you won’t panic when the batter comes together quickly.
First up, you absolutely need a 9×9 inch baking pan. This size is perfect for getting the right thickness. Then, you must line it with parchment paper—I always let the edges hang over a little bit so I can lift the whole block out later. That’s my secret to happy, clean removal!
You’ll need at least one good mixing bowl for combining the dry ingredients, and maybe a second one or a small cup for melting your topping chocolate later. A sturdy spatula is your best friend for folding everything gently and pressing the dough into the pan evenly. No whisk needed for the base; a wooden spoon or rubber spatula is actually better here! For more baking tips, check out this guide on baking tips for beginners.
Step-by-Step Instructions for Baking S’mores Graham Bars
Now that you have your ingredients laid out, let’s get baking! This process moves pretty fast once you start mixing, so be ready to work quickly, especially when incorporating the wet ingredients into the base. We want to keep things light and not overwork that dough.
Preparing the Pan and Mixing the Bar Base
First things first: get that oven warmed up! Preheat your oven to 350 degrees Fahrenheit, or 175 Celsius. While it’s heating, line that 9×9 pan with parchment paper. Remember to leave those little overhangs so you can easily pull the whole baked block out later—it saves so much cleanup, trust me.
In your mixing bowl, combine all your dry base ingredients: the flour, the graham cracker crumbs, the brown sugar, and the salt. Give that a quick whisk just to make sure everything is married together nicely. Next, pour in your melted butter, the egg, and the vanilla extract. Use a spatula and mix it until it’s just combined. Stop mixing the second you don’t see any more streaks of dry flour. Overmixing the base is how you get tough bars, and we want tender ones! If you are looking for other quick baked goods, consider trying my Zucchini Bread Recipe.
Incorporating Fillings and Baking the S’mores Graham Bars
This is where we turn the base into the real deal! Gently fold in that first half cup of mini chocolate chips and the half cup of mini marshmallows. You don’t want to crush them; just fold them in until they are evenly distributed throughout the batter. Then, press that mixture evenly into your prepared pan. Don’t press it down too hard or you’ll compress the air we just worked so hard to keep in there!
Bake these wonderful S’mores Graham Bars for exactly 25 minutes. You’re looking for the edges to be just lightly golden brown. If you see them looking too dark, pull them out right away. They will firm up more as they cool down, so don’t overbake them trying to get them rock hard in the oven.
Cooling and Applying the Final Chocolate Topping
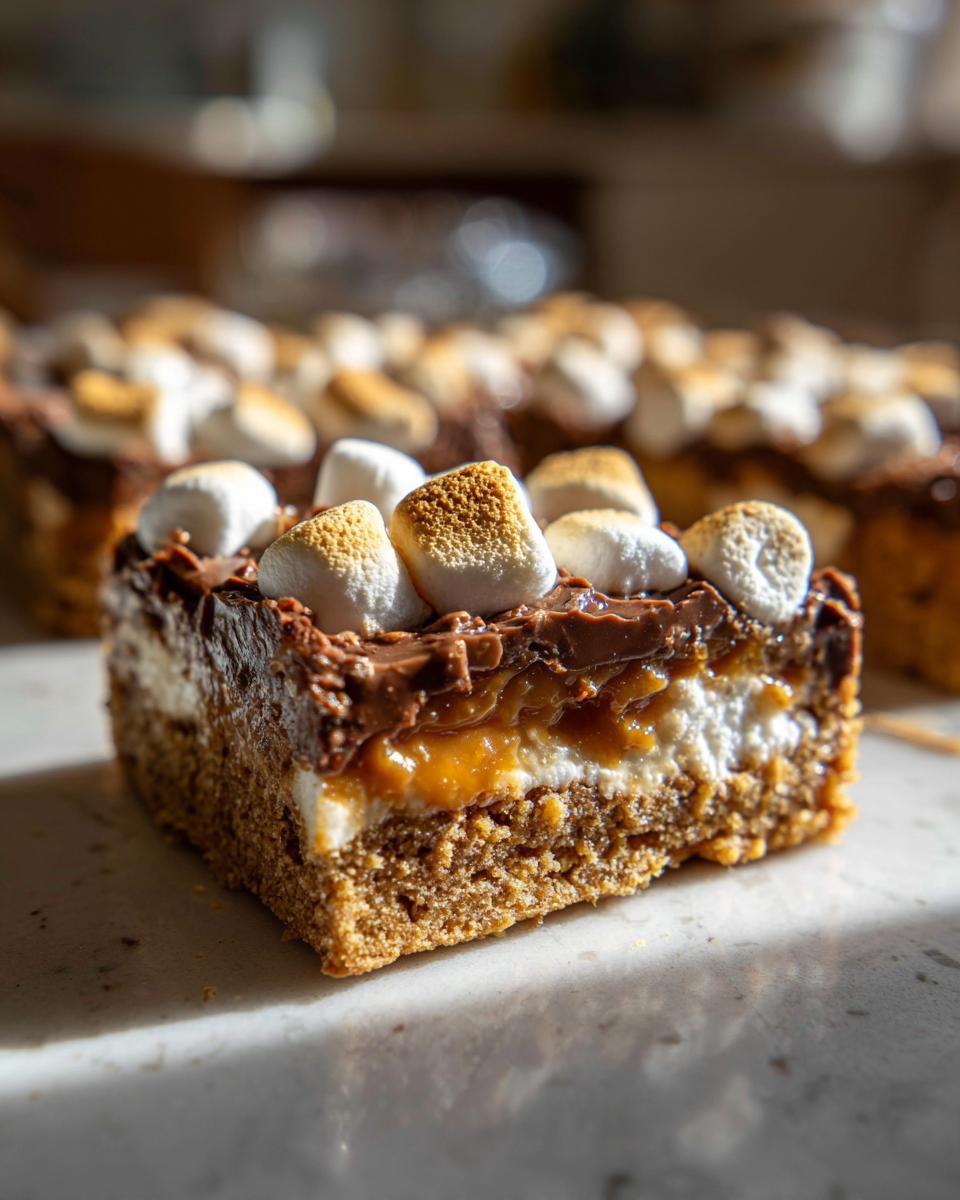
This next step is the hardest part: waiting! You absolutely must let the bars cool completely in the pan before you even think about topping them. If you pour the melted chocolate over warm bars, it just melts right through and soaks in, leaving you with a soggy mess instead of a nice drizzle. Once they are totally cool—and maybe even chilled slightly, which I mention later—you can melt that last quarter cup of chocolate chips. Drizzle it artfully over the top. Then, scatter those extra mini marshmallows on top for the final campfire look!
Secrets to Achieving Expert S’mores Graham Bars
Even though this recipe is super simple, there are a few little tricks I’ve picked up over the years that take these bars from good to absolutely legendary. It’s all about technique, especially when you’re dealing with melted chocolate and sticky marshmallows. Follow these tips, and you’ll be serving up bakery-worthy squares every single time!
The key is managing the sticky elements. If you rush the cooling process or try to cut them warm, you’ll end up with a gooey disaster that sticks to your knife. But if you’re patient, the payoff is huge! These little adjustments show I’ve really tested this recipe until it’s perfect for sharing with you. For more dessert inspiration, check out my Desserts section.
Tips for Clean Cutting and Perfect Texture
Once you’ve drizzled that final layer of melted chocolate on top, don’t serve them right away! This is my biggest tip for clean slices. Pop the whole pan into the refrigerator for at least 30 minutes, or even an hour if you have the patience. Chilling helps that chocolate topping set firm, and it solidifies the marshmallow layer just enough so that when you lift the whole block out using the parchment paper handles, you can slice through it cleanly with a sharp knife. You want squares, not chocolate smears!
Achieving the Authentic Toasted Marshmallow Finish
If you want that true, authentic campfire look—that beautifully browned, slightly charred marshmallow top—you need a kitchen torch. It’s totally optional, of course, but wow, does it make a difference! Just wait until you’ve added the extra mini marshmallows on top of the chocolate drizzle. Then, carefully use your culinary torch to quickly brown the tops. Keep the flame moving constantly so you don’t burn the marshmallow right off the bar. It gives the bars an amazing visual appeal and that hint of smoky flavor we all crave! If you are interested in kitchen tools, you can read more about culinary torches.
Storage and Reheating S’mores Graham Bars
These bars are fantastic the day they are made, but honestly? They taste even better the next day once everything has settled together. You want to keep them protected so that gooey factor stays just right. Since they have chocolate and butter, we need to treat them a little differently than a simple cookie.
The best way to store them is airtight. I usually leave them right in the parchment-lined pan if I have leftovers, but if you’ve already cut them, put them in a good container. If you plan on eating them over several days, keeping them cool is helpful.
Here’s a quick guide for keeping your S’mores Graham Bars tasting fresh:
| Action | Details |
|---|---|
| Short-Term Storage | Store airtight at room temperature for up to 3 days. Keep away from heat to prevent chocolate melting. |
| Long-Term Storage | Refrigerate in an airtight container for up to one week. |
| Reheating | These are best served at room temperature or slightly chilled. If you must warm them, microwave one bar for just 8-10 seconds to soften the chocolate slightly. |
Frequently Asked Questions About S’mores Graham Bars
I get so many questions about these bars because everyone wants that perfect campfire taste without the smoke! I’ve gathered the most common things people ask me when they try this recipe for the first time. Don’t worry if you need to make small swaps; I’ve got you covered.
These bars are so versatile, but remember, the original recipe is designed for that specific texture balance. If you change too much, you might lose that perfect gooey-to-crumbly ratio we worked so hard for! For more quick recipes, check out my Quick & Easy Recipes category.
Can I substitute the type of chocolate chips in these S’mores Graham Bars
You certainly can play around with the chocolate! I use semi-sweet mini chips in the base because they melt nicely without being too sweet, and I use milk chocolate for the drizzle on top to keep it classic. Feel free to swap the chips for dark chocolate if you prefer a richer flavor, or even use peanut butter chips for a fun twist! Just stick to the mini size so they distribute evenly throughout the batter.
How long do these S’mores Graham Bars stay fresh
If you store your finished S’mores Graham Bars in an airtight container, they stay pretty fresh for about three days at room temperature. If your kitchen is warm, or if you want them to last longer, pop them in the fridge. They hold up nicely in the refrigerator for up to a week. They are dense enough that they don’t dry out quickly, especially with those marshmallows in there!
Frequently Asked Questions About S’mores Graham Bars
I get so many questions about these bars because everyone wants that perfect campfire taste without the smoke! I’ve gathered the most common things people ask me when they try this recipe for the first time. Don’t worry if you need to make small swaps; I’ve got you covered.
These bars are so versatile, but remember, the original recipe is designed for that specific texture balance. If you change too much, you might lose that perfect gooey-to-crumbly ratio we worked so hard for!
Can I substitute the type of chocolate chips in these S’mores Graham Bars
You certainly can play around with the chocolate! I use semi-sweet mini chips in the base because they melt nicely without being too sweet, and I use milk chocolate for the drizzle on top to keep it classic. Feel free to swap the chips for dark chocolate if you prefer a richer flavor, or even use peanut butter chips for a fun twist! Just stick to the mini size so they distribute evenly throughout the batter.
How long do these S’mores Graham Bars stay fresh
If you store your finished S’mores Graham Bars in an airtight container, they stay pretty fresh for about three days at room temperature. If your kitchen is warm, or if you want them to last longer, pop them in the fridge. They hold up nicely in the refrigerator for up to a week. They are dense enough that they don’t dry out quickly, especially with those marshmallows in there!
Print
Amazing 25 Minute S’mores Graham Bars
- Total Time: 40 minutes
- Yield: 16 bars 1x
- Diet: Vegetarian
Description
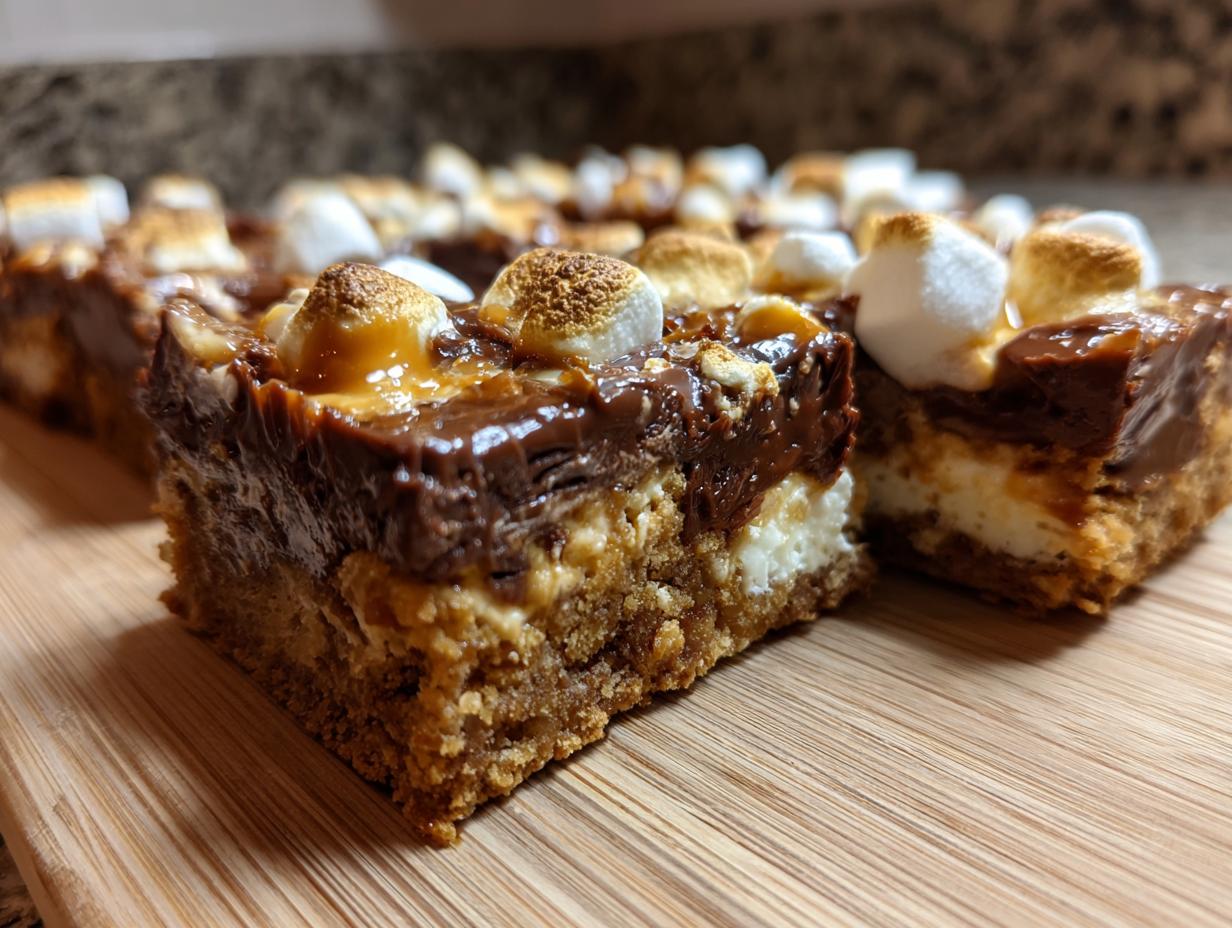
These S’mores Graham Bars deliver the classic campfire flavor in a simple, baked dessert bar. You get a buttery graham base topped with chocolate and marshmallows.
Ingredients
- 1 cup all-purpose flour
- 1/2 cup graham cracker crumbs
- 1/4 cup brown sugar
- 1/4 teaspoon salt
- 1/2 cup unsalted butter (melted)
- 1/2 cup mini chocolate chips
- 1/2 cup mini marshmallows
- 1 egg
- 1 teaspoon vanilla extract
- 1/4 cup chocolate chips (melted, for topping)
- Extra mini marshmallows (for topping)
Instructions
- Preheat your oven to 350°F (175°C). Line a 9×9 inch pan with parchment paper.
- In a bowl, mix the flour, graham cracker crumbs, brown sugar, and salt.
- Add the melted butter, egg, and vanilla extract to the dry ingredients. Mix until just combined.
- Gently fold in the 1/2 cup of mini chocolate chips and 1/2 cup of mini marshmallows.
- Spread the mixture evenly into the prepared 9×9 pan.
- Bake for 25 minutes, or until the edges are lightly browned.
- Let the bars cool completely in the pan.
- Drizzle the 1/4 cup of melted chocolate over the cooled bars.
- Top with extra mini marshmallows before serving.
Notes
- For cleaner cutting, chill the bars briefly after adding the chocolate topping.
- You can toast the top marshmallows with a kitchen torch for an authentic s’mores look.
- Ensure the butter is fully melted before mixing the base ingredients.
- Prep Time: 15 minutes
- Cook Time: 25 minutes
- Category: Dessert
- Method: Baking
- Cuisine: American
Nutrition
- Serving Size: 1 bar
- Calories: Approx. 180
- Sugar: Approx. 12g
- Sodium: Approx. 30mg
- Fat: Approx. 10g
- Saturated Fat: Approx. 6g
- Unsaturated Fat: Approx. 4g
- Trans Fat: 0g
- Carbohydrates: Approx. 18g
- Fiber: Approx. 0.5g
- Protein: Approx. 2g
- Cholesterol: Approx. 25mg