Skip to content
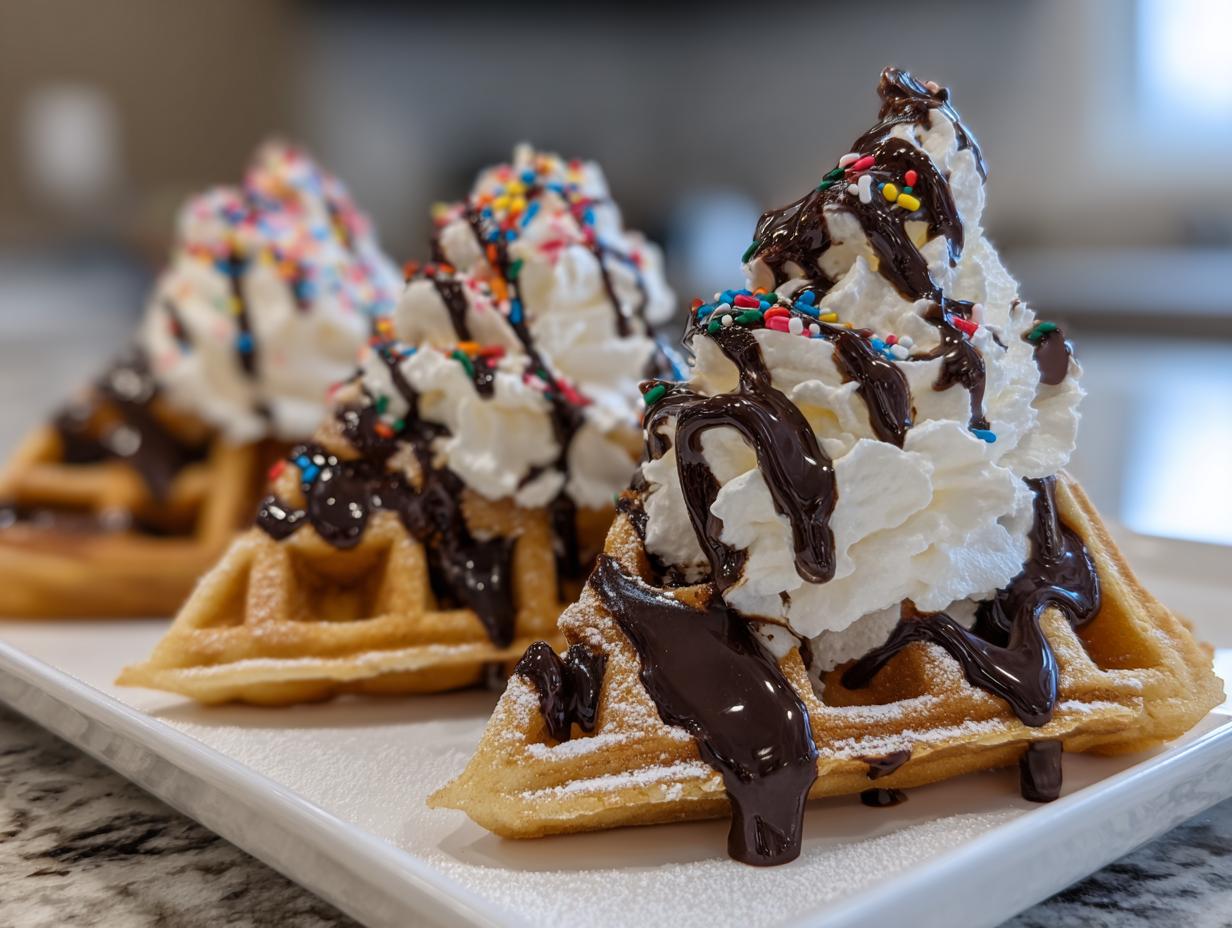
Witch Hat Waffles 2026! Oh my goodness, if you’re looking for a way to make Halloween breakfast feel truly magical—not just another sugary cereal morning—you have to try these. When the leaves start turning and the air gets crisp, my kitchen just demands something fun and spooky. I’m Anna Kowalska, and here I share tried-and-true homemade recipes that you and your family will absolutely love. For me, everything has to be made with heart and flavor, and that means skipping the store-bought stuff when we can make something this cute at home!
I started experimenting with fun shapes years ago when my nephew got obsessed with costumes but hated traditional pancakes. This led me down a rabbit hole of fun breakfast ideas, and I finally landed on the perfect dark chocolate base for these Witch Hat Waffles 2026. They look complicated, but trust me, they come together faster than you think, and the payoff in smiles is huge. We’re talking about rich, dark chocolate waffles shaped like little pointy hats. It’s just the right amount of festive chaos!
Jump to:
Why You’ll Love This Witch Hat Waffles 2026 Recipe
Honestly, who has time for complicated holiday baking before school and work? That’s why this recipe is my go-to when we want maximum festive impact with minimum fuss. These Witch Hat Waffles 2026 are a total crowd-pleaser. They hit all the right notes for a fun family morning!
- They are incredibly fast to whip up—seriously, under 30 minutes start to finish.
- The dark chocolate flavor is rich and satisfying, not overly sweet.
- Watching the kids decorate them is half the fun; they feel like little chefs!
- It’s a unique theme that instantly elevates any spooky spread.
Preparation and Cooking Overview
The best part about these? The timing is lightning fast. You’re looking at a quick Prep Time of just 10 minutes while your iron warms up. The actual cooking takes about 15 minutes total, meaning you can have a whole batch of spooky fun on the table in under half an hour! This recipe is perfectly scaled to Yield 4 generous servings, but trust me, you’ll want to double it if you have hungry monsters visiting.
Gather Your Ingredients for Witch Hat Waffles 2026
Before we get to the fun part—the shaping and decorating—we need a solid, dark chocolate waffle base. This batter is simple, relying on pantry staples, which means less stress shopping for me! The cocoa powder is what gives these Witch Hat Waffles 2026 their gorgeous, shadowy color. Don’t skimp on the quality of your cocoa; it really makes a difference in the final taste!
You’ll notice we mix the dry stuff completely separate from the wet stuff. That’s a non-negotiable step for me to guarantee a tender waffle rather than a flat, chewy one. Here’s what you need laid out on your counter:
| Component | Quantity |
|---|---|
| All-Purpose Flour | 1 cup |
| Cocoa Powder | 1/4 cup |
| Sugar | 1 tablespoon |
| Milk | 1 cup |
| Large Egg | 1 |
| Melted Butter | 2 tablespoons |
Essential Dry Components
Grab a big bowl and whisk together all your dry items until they are perfectly married. That means 1 cup of all-purpose flour, the 1/4 cup of cocoa powder, 1 tablespoon of sugar, 1 teaspoon of baking powder, 1/4 teaspoon of baking soda, and just a tiny pinch—1/4 teaspoon of salt. Whisking breaks up any lumps in that cocoa powder right away, which is key before the wet ingredients sneak in!
Wet Ingredients for Richness
In a smaller bowl, mix up the wet side of things. You’ll need 1 cup of milk, 1 large egg, 2 tablespoons of melted butter (make sure it’s cooled slightly so it doesn’t scramble the egg!), and 1 teaspoon of vanilla extract. Give that a good, quick stir so the yolk is fully incorporated.
Decorating Elements
These are the extras that turn a dark chocolate waffle into a recognizable witch hat! You need whipped cream (I use the kind straight from the can for that perfect pompom look), plenty of dark chocolate syrup for drizzling, and whatever sprinkles you have on hand. Save these until the waffles are cooked and cut, I promise it’s worth the wait!
Step-by-Step Instructions for Perfect Witch Hat Waffles 2026
Alright, now we put the plan into action! Getting the color and texture right for these Witch Hat Waffles 2026 comes down to two things: mixing gently and working quickly once they are cooked. Don’t stress about perfection in the mixing bowl; we’re aiming for rustic charm here!
Mixing the Batter
First things first, if you haven’t already, get that waffle iron preheating! You want it screaming hot when the batter is ready. Now, back to the bowls. Take that big bowl of dry ingredients we whisked—the flour, cocoa, and everything else—and make a little well in the center. Pour your combined wet ingredients right into that well. Now, grab a spatula, not a whisk! Gently fold everything together. I mean it, only stir until you no longer see streaks of dry flour. If you overmix, those chocolate waffles turn tough, and nobody wants a chewy witch hat. A few little lumps are totally fine!
Cooking the Chocolate Waffles
Once your iron is fully heated up—and I mean fully, check your indicator light!—you can start cooking. Pour the batter onto the center of the hot grids. I usually use just enough batter so that the waffle covers about 80% of the plate, as the batter expands. Cook these according to your waffle maker’s standard time. You are looking for a deep, dark brown color and a slightly crisp exterior when you lift the lid. If it sticks, your iron wasn’t hot enough, so wait longer next time!
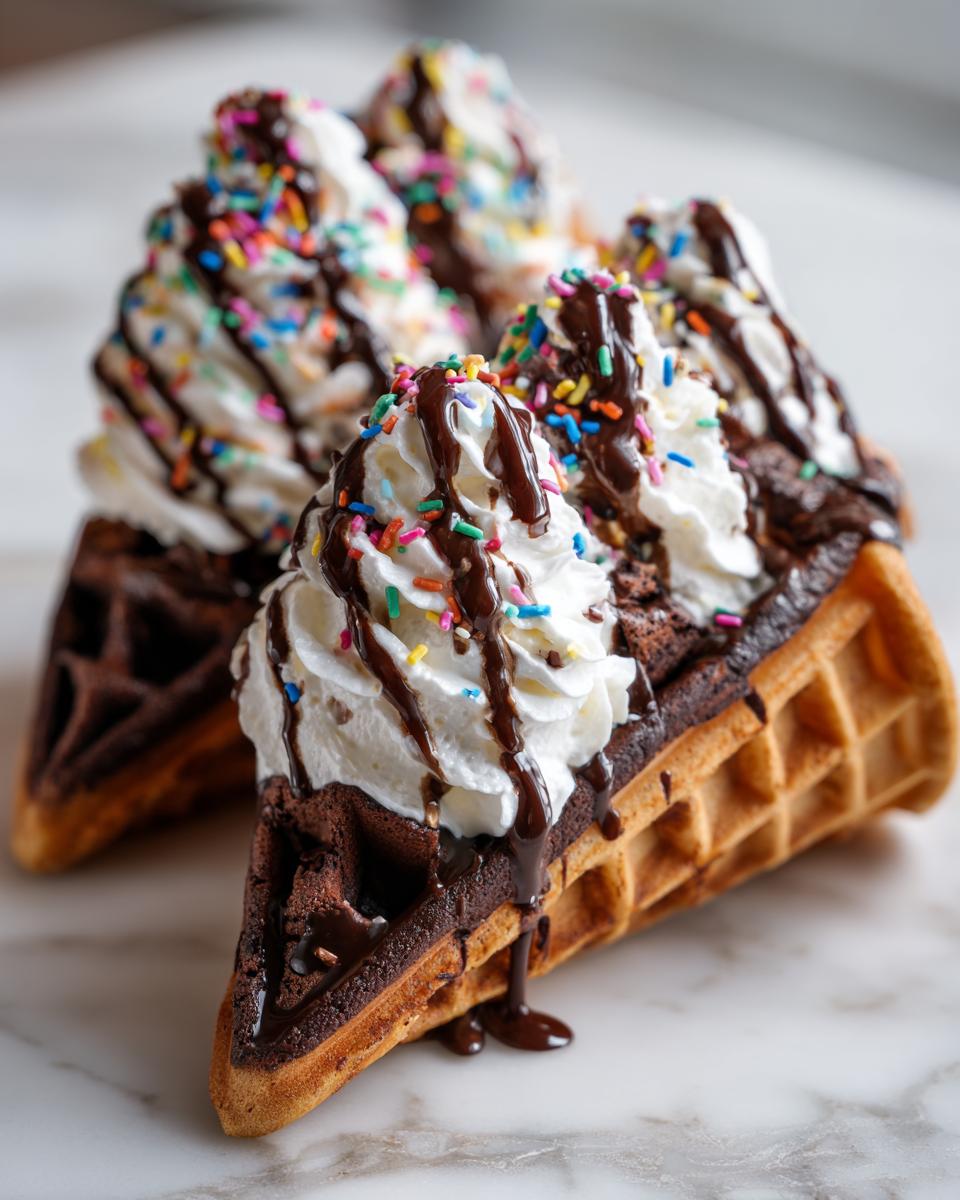
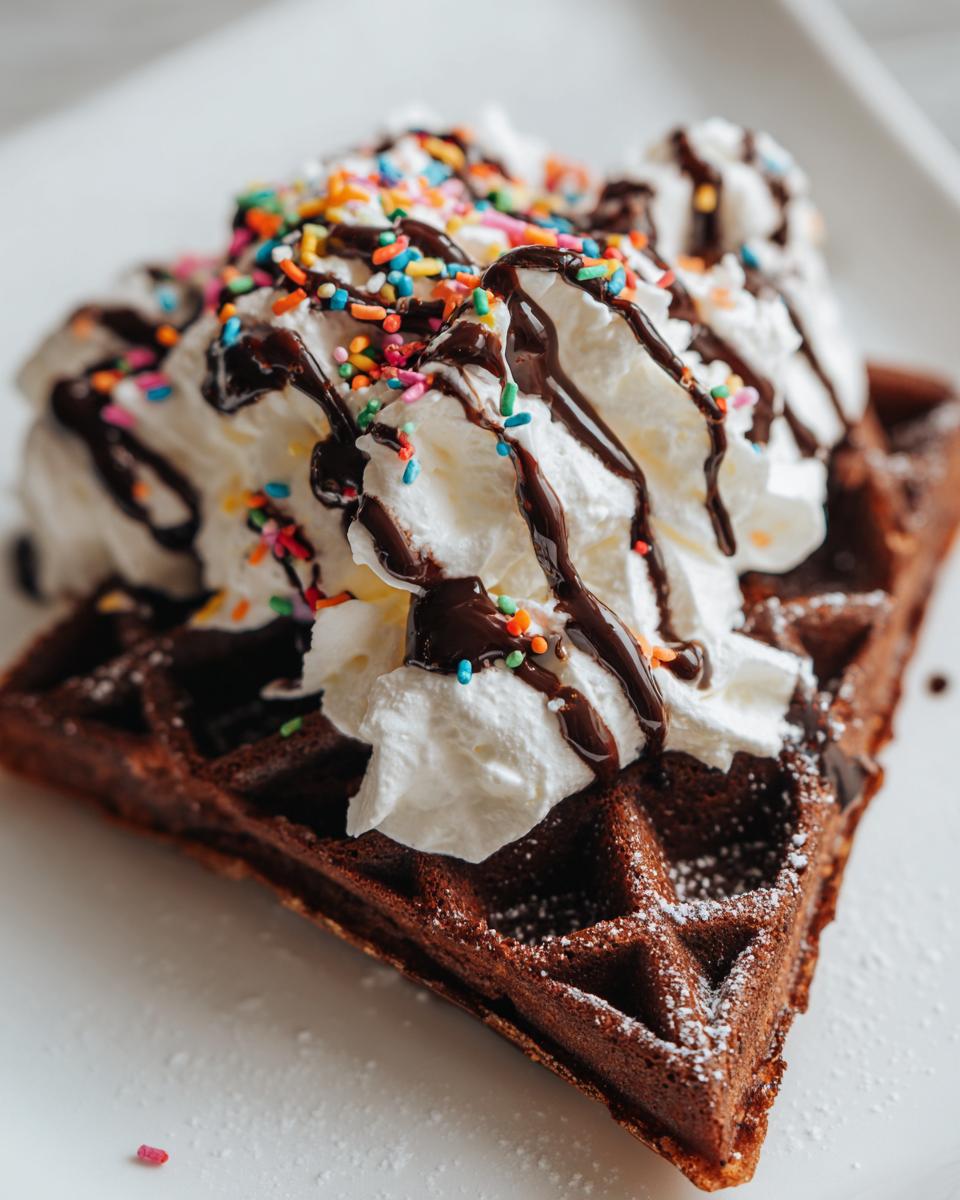
Shaping and Assembling the Witch Hats
This is where the magic happens! As soon as the waffle comes off the iron, place it on a cutting board. You need to cut it into triangles. If you made a round waffle, cut it into four equal wedges, like slicing a pizza. Take three of those wedges and arrange them on the plate so the points meet in the middle, forming the brim of the hat. Take the fourth wedge and stand it up right in the center to form the tall, pointy crown of the hat! It’s so satisfying to see it take shape.
Final Festive Decoration
Time to decorate! Take your whipped cream and create a nice thick band around the base where the crown meets the brim—that’s the hat band. Then, pipe a little dollop right on top of the pointy tip for the pompom. Drizzle generously with dark chocolate syrup over the whole thing. If you want extra sparkle, hit it with some fun Halloween sprinkles right away so they stick to the syrup. Serve these immediately while they are still warm and spooky!
Tips for Making Excellent Witch Hat Waffles 2026
Even though these are super simple, if you want them to go from good to absolutely show-stopping, there are a few little tricks I always use. These tips help keep the chocolate rich and the texture perfect, making your Witch Hat Waffles 2026 the highlight of the party. Pay attention to these small details, and you won’t have any sad, floppy hats!
Adjusting Chocolate Intensity
If you tasted the first batch and thought, “Wow, I wish this was darker,” don’t worry, it’s an easy fix! You can definitely increase the cocoa powder slightly next time—maybe add an extra teaspoon or two. Just remember that cocoa powder is a dry ingredient, so if you add too much, you might need to balance it out with just a splash more milk so the batter isn’t too thick. I love a deep, almost black waffle!
Ensuring Proper Waffle Texture
I can’t say this enough: the waffle iron must be hot. If you try to pour batter onto a lukewarm iron, the butter melts out before the structure sets, and you get a soft, oily waffle that falls apart when you try to cut it into a hat shape. Wait for that indicator light, or if your machine doesn’t have one, let it heat for a solid five minutes before the first pour. That blast of heat creates the crispy exterior we need!
Simple Cleanup Hack
Dealing with sticky, sugary chocolate batter cleanup is the absolute worst part of making fun foods. Here’s a little secret for minimal scrubbing: if you are worried about batter getting stuck in the crevices, you can carefully lay a piece of parchment paper cut to fit your waffle iron surface before pouring the batter in. It acts like a nonstick shield! Just be super careful when closing the lid so the paper doesn’t fold over and burn.
Frequently Asked Questions About Witch Hat Waffles 2026
I know you’re excited to get these spooky treats on the table, but sometimes questions pop up! I’ve gathered the most common ones I get about making these dark chocolate delights so you can nail the presentation on your first try. Don’t let little details stop you from serving up these awesome Witch Hat Waffles 2026!
Can I make the batter ahead of time?
You absolutely can mix the batter ahead of time, but you have to be careful with chocolate batters! I wouldn’t let it sit for more than an hour on the counter. If you need to make it way ahead, mix the dry ingredients and the wet ingredients separately, and keep them covered in the fridge. Mix them together right before cooking. If you mix it all together and refrigerate it overnight, the baking soda and powder might lose some oomph, and your waffles could come out a little flat.
What type of cocoa powder works best for dark color?
For that deep, mysterious, almost black color that really sells the witch hat look, I strongly recommend using Dutch-processed cocoa powder. It’s milder and has a darker hue right out of the box compared to natural cocoa powder. If you only have natural cocoa, you can add just a tiny pinch of baking soda to the dry ingredients—but be careful not to add too much, or you’ll taste it!
How do I keep the finished waffles warm?
Since you have to cook them in batches and then cut them before decorating, keeping them warm is essential so they don’t get soggy! Once a waffle is done, place it directly on a wire rack set over a baking sheet. Pop that sheet into an oven set to the lowest possible temperature, around 200 degrees Fahrenheit. They will stay perfectly crisp and warm while you finish the rest of the batch, ready for their hat-shaping assembly line!
Storing and Reheating Your Themed Treats
Even though these incredible chocolate treats usually disappear the second they come off the iron, sometimes you end up with leftovers, or maybe you want to prep ahead for a morning party! You definitely don’t want to store the decorated ones, though—that whipped cream gets sad fast. For the plain, cut waffle pieces, storage is a breeze. Keeping them fresh means your next batch of Witch Hat Waffles 2026 will taste almost as good as the first!
Here’s a quick guide for what to do with any extras you might have:
| Storage Method | Duration | Notes |
|---|---|---|
| Airtight Container (Counter) | Up to 1 day | |
| Airtight Container (Fridge) | Up to 4 days | |
| Freezer | Up to 2 months |
Proper Storage Techniques
If you have leftover plain waffles (remember, no syrup or cream yet!), let them cool completely on a wire rack first. Cooling prevents steam buildup, which causes sogginess. Once cool, stack them with a small piece of parchment paper between each one—this stops them from sticking together in a giant chocolate brick. Store them in a sturdy, airtight container. When you’re ready to eat them later, pop them right into the toaster or a 350-degree oven for about five minutes to crisp them back up before you cut and decorate them for your next round of spooky fun! If you are looking for other fun breakfast ideas, check out my recipe for banana oat cookies.
Share Your Witch Hat Waffles 2026 Creations
I just know your family is going to have a blast making these! Once you’ve assembled your spooky little creations, I’d absolutely love to see them. Did you go heavy on the sprinkles? Did your kids manage to keep their hats standing tall? Head down to the rating section and let me know how many stars you give these Witch Hat Waffles 2026, and please share a photo on social media! Tag me so I can see your amazing themed treats! If you are looking for something savory to balance out the sugar, perhaps try my cucumber everything bagel salad.
Print
Amazing Witch Hat Waffles 2026 in 4 steps
- Total Time: 25 minutes
- Yield: 4 servings 1x
- Diet: Vegetarian
Description
Witch Hat Waffles 2026. Create fun, spooky-themed waffles perfect for Halloween or a themed party. These dark chocolate waffles are shaped like witch hats and decorated for a festive treat.
Ingredients
- 1 cup all-purpose flour
- 1/4 cup cocoa powder
- 1 tbsp sugar
- 1 tsp baking powder
- 1/4 tsp baking soda
- 1/4 tsp salt
- 1 cup milk
- 1 egg
- 2 tbsp melted butter
- 1 tsp vanilla extract
- Whipped cream, dark chocolate syrup, and sprinkles for decorating
Instructions
- Preheat your waffle iron based on the maker’s directions.
- In a large bowl, whisk together the flour, cocoa powder, sugar, baking powder, baking soda, and salt.
- In a separate bowl, combine the milk, egg, melted butter, and vanilla extract.
- Pour the wet mixture into the dry ingredients. Stir until the ingredients just mix.
- Pour the batter into the hot waffle iron. Cook following the machine’s directions.
- When the waffles are done, cut them into triangles. Arrange these triangles on plates to look like witch hats.
- Decorate using whipped cream, dark chocolate syrup, and sprinkles.
- Serve right away.
Notes
- For a richer chocolate flavor, slightly increase the cocoa powder.
- Ensure the waffle iron is fully preheated for the best texture.
- You can use parchment paper under the decorated waffles for easy cleanup.
- Prep Time: 10 minutes
- Cook Time: 15 minutes
- Category: Dessert
- Method: Waffle Iron
- Cuisine: American
Nutrition
- Serving Size: 1 Waffle
- Calories: 280
- Sugar: 8g
- Sodium: 250mg
- Fat: 12g
- Saturated Fat: 6g
- Unsaturated Fat: 6g
- Trans Fat: 0g
- Carbohydrates: 38g
- Fiber: 3g
- Protein: 8g
- Cholesterol: 50mg