Skip to content
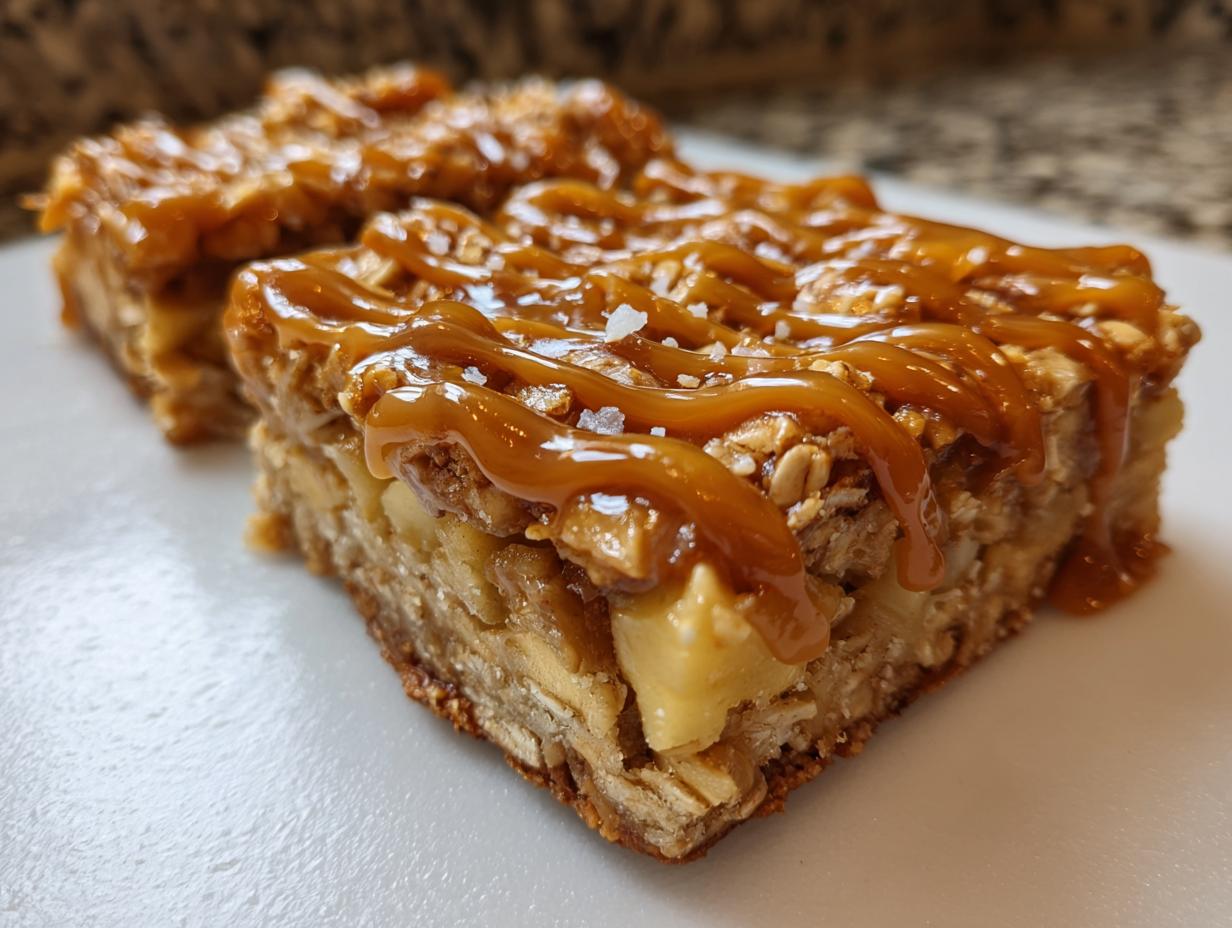
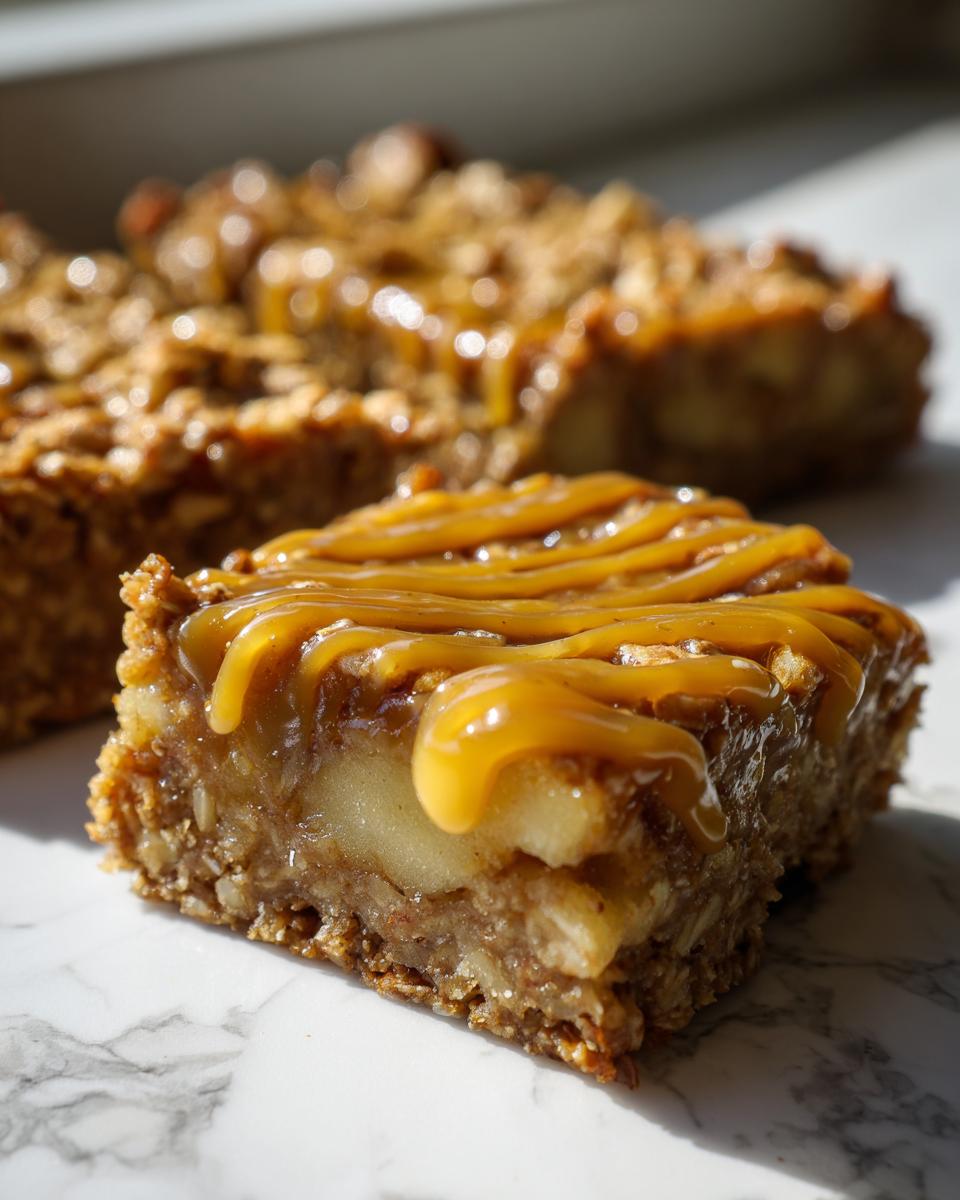
If you’re looking for that one perfect autumn bake that screams cozy evenings and holiday gatherings, you absolutely must try these Salted Caramel Apple Bars. Forget those thin, dry cookie bars you find everywhere else; these have a chewy, slightly oaty base packed with real apple chunks, and then we hit it with that glorious sweet-and-salty finish.
Hi there! I’m Anna Kowalska, and here I share tried-and-true homemade recipes that you and your family will love. Everything I put up on this blog is made with heart and flavor, and I promise, these apple bars are no exception to my rule of making everything taste incredible.
I remember the first time I tried to perfect this recipe—it was a chilly October afternoon, and I wanted something that tasted like biting into a fresh caramel apple but held together when you picked it up. After about three attempts (and a lot of sampling, of course!), I nailed the ratio of butter to oats for that perfect chewiness.
These Salted Caramel Apple Bars balance tartness, sweetness, and that beautiful hit of sea salt perfectly. They are surprisingly straightforward to put together, especially if you make the base the day before. Trust me, these bars are going to be your new go-to treat for potlucks and quiet Sunday afternoons alike.
Jump to:
Gathering What You Need for Perfect Salted Caramel Apple Bars
Before we even think about preheating the oven, we need to make sure our pantry is stocked properly. You can’t get that amazing texture and flavor in these Salted Caramel Apple Bars without starting with good quality stuff. I know it sounds simple, but paying attention to the details here really pays off when you take that first bite!
We’re keeping the ingredient list short, which is one of the reasons I love this recipe so much for busy weeknights. But that means every single item counts. Make sure your butter is fresh, and if you can find nice tart apples, grab those!
Essential Ingredients for Salted Caramel Apple Bars
Here is exactly what you’ll need. I’ve put everything into a table below so you can easily check off your list. Remember, the caramel sauce is drizzled on *after* baking, so make sure you have a good jar ready to go!
| Ingredient | Amount | Preparation Note |
|---|---|---|
| All-purpose flour | 1 cup | — |
| Rolled oats | 1/2 cup | — |
| Brown sugar | 1/2 cup | Packed |
| Salt | 1/4 teaspoon | For the base |
| Cinnamon | 1/2 teaspoon | — |
| Unsalted butter | 1/2 cup | Melted |
| Chopped apples | 1/2 cup | Chopped small |
| Egg | 1 | Large |
| Vanilla extract | 1 teaspoon | — |
| Caramel sauce | 1/4 cup | For drizzling |
| Sea salt | 1/4 teaspoon | For sprinkling on top |
| Chopped pecans | 1/4 cup | Optional |
Equipment Checklist for Baking Salted Caramel Apple Bars
Don’t let the simplicity fool you; having the right tools makes the process so much smoother. You’ll definitely need your standard mixing bowls—one for the dry stuff and one for combining everything else. A good whisk or a sturdy wooden spoon works perfectly for mixing the base.
The most important piece of equipment here is your 9×9 inch baking dish. Make sure you line it really well with parchment paper, leaving an overhang on two sides. This little trick saves you so much trouble when you go to lift those beautiful, chewy bars out later. Trust me on the parchment paper overhang!
Step-by-Step Instructions to Master Salted Caramel Apple Bars
Okay, this is where the magic happens! These bars bake up fast, which is why I love them for weeknight baking. Just follow these steps closely, and you’ll have the chewiest, most flavorful bars you’ve ever made. Remember, we’re aiming for golden edges, not burnt ones!
Preparing the Base Mixture for Your Salted Caramel Apple Bars
First things first: get that oven preheated to 350 degrees Fahrenheit, or 175 Celsius. And line that 9×9 pan! I mentioned the parchment overhang earlier—do that now so you don’t forget later.
In a medium bowl, we start with our dry ingredients. Whisk together the flour, oats, brown sugar, salt, and cinnamon. Get those dry bits mixed up well so the flavor is even throughout the base.
In a separate, smaller bowl, mix your wet ingredients: the melted butter, the single egg, and the vanilla extract. Pour this wet mixture right into your dry ingredients. Mix everything gently with a spatula until it’s just combined. Don’t overmix! We want it to stay crumbly, not tough.
Now for the apples! Gently fold in your chopped apples. They add all that wonderful moisture and flavor. Spread this entire mixture evenly into your prepared baking dish. Press it down lightly so it’s compact.
Baking and Cooling Your Salted Caramel Apple Bars Correctly
Time to bake! Slide that dish into the preheated oven. You’re looking for a bake time between 25 and 30 minutes. Keep an eye on the edges; they should look nicely golden brown when they are done.
This next part is the hardest, but you absolutely must do it: let the bars cool completely. I mean it—totally cool! If you try to drizzle that warm caramel over warm bars, it just melts everywhere, and you lose that beautiful clean line we want. Patience is key here.
If you are in a rush, pop the cooled pan into the fridge for about 20 minutes. That helps the base firm up perfectly before we move on to the best part.
The Final Touch: Applying the Salted Caramel Drizzle
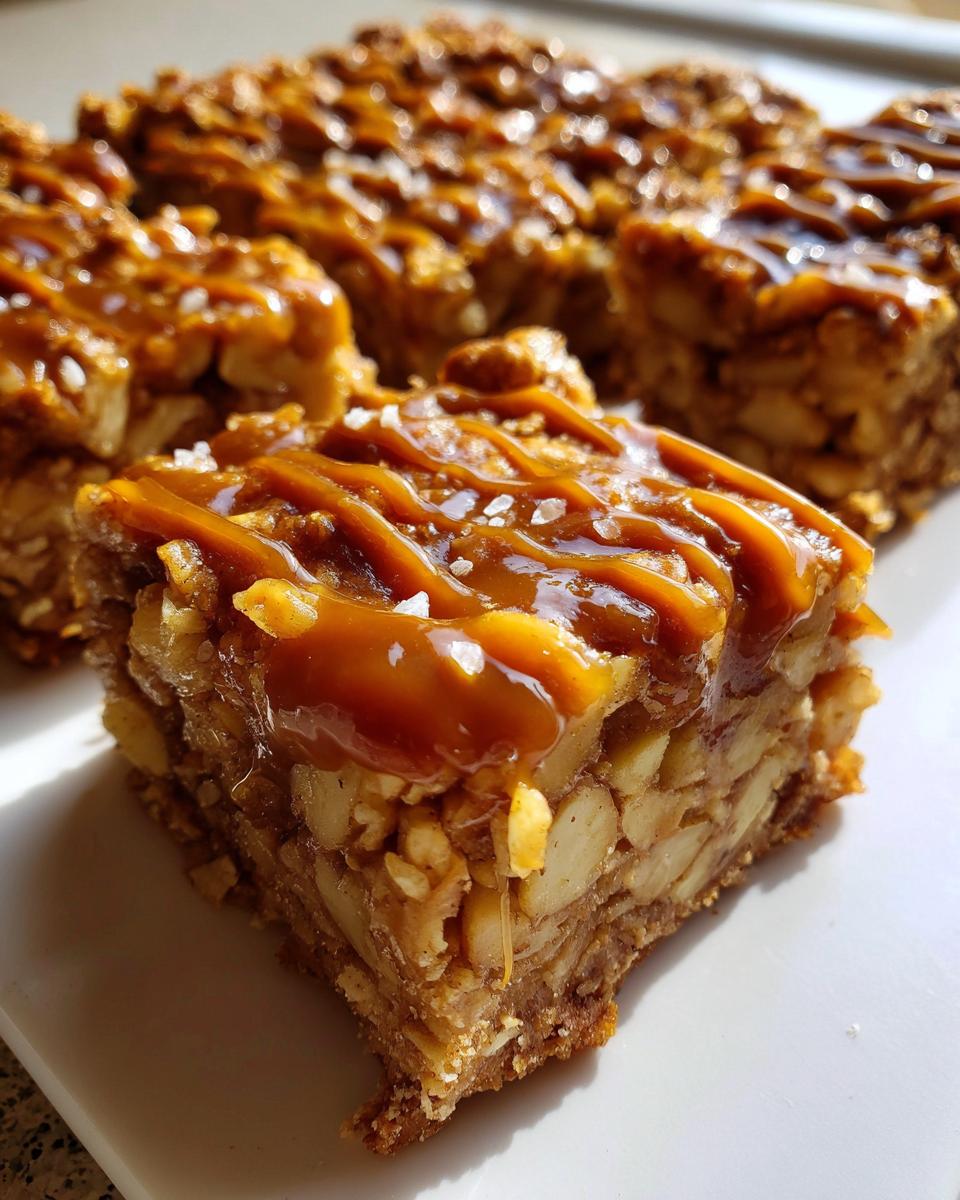
Once the base is completely cool and firm, it’s time for the star of the show. Take your 1/4 cup of caramel sauce and drizzle it artfully all over the top of the bars. Don’t worry if it looks messy; that’s part of the charm!
Immediately after the caramel, grab your sea salt and sprinkle it lightly over the top. This is what makes them “salted” caramel! If you decided to use pecans, sprinkle those on now too, pressing them gently into the sticky caramel so they stay put.
Now, you can lift the whole thing out of the pan using the parchment paper overhang. Cut them into 16 neat squares. Enjoy the gooey, salty perfection!
Why You Will Love These Salted Caramel Apple Bars
Honestly, once you try these, they’ll jump right to the top of your favorite dessert list, especially when the weather turns crisp. They tick every single box for a perfect autumn treat. I usually make a double batch because they disappear so fast!
- The texture is unbeatable: a chewy, slightly sturdy base that still melts in your mouth.
- It’s the perfect marriage of sweet baked apple and that sharp, salty caramel finish.
- Prep time is lightning fast, meaning you get maximum flavor for minimum effort.
- These travel beautifully, making them ideal for sharing at school events or neighborhood parties.
I always bake a batch right before a big football game. Everyone grabs one straight from the pan while watching the game, and they are sturdy enough to eat standing up—no forks required!
Tips for Achieving Expert-Level Salted Caramel Apple Bars
It’s one thing to follow a recipe, and another thing entirely to make it sing! Since these bars rely on texture—that perfect chewiness contrasting with the gooey topping—a few little tricks can elevate them from good to absolutely unforgettable. I learned these lessons through trial and error, so you don’t have to!
The biggest pitfall I see people run into is rushing the cooling time. If you try to cut into these while they are still warm, the base crumbles, and your caramel just becomes a sticky puddle. We want defined squares, remember? Let them cool completely—it’s non-negotiable for a clean slice!
Ingredient Substitutions for Salted Caramel Apple Bars
I always preach using the ingredients listed, especially when it comes to the structure of the base, but I know sometimes we need flexibility. Feel free to swap out the nuts if pecans aren’t your favorite. Walnuts work beautifully, or if someone has an allergy, just skip the pecans entirely. The bars are still fantastic without them!
However, I strongly advise against messing with the flour or the oats. The oats are what give us that signature chewiness that separates these from a standard shortbread bar. Also, please don’t try to swap the all-purpose flour for something like almond flour here; the structure just won’t hold up when you bake it.
For the apples, stick to firm, tart varieties like Granny Smith. They hold their shape better during baking and offer that necessary bright tang to cut through all the sweetness of the caramel. Soggy apples make for soggy bars, and we definitely don’t want that!
Frequently Asked Questions About Salted Caramel Apple Bars
I always get so many questions when I post a new recipe, and these Salted Caramel Apple Bars seem to generate a lot! Here are the things I hear most often about making this classic autumn dessert.
How far in advance can I make these Salted Caramel Apple Bars?
This is a great question, especially if you’re baking for a party! The base itself is actually better the next day because the flavors have time to really meld together. You can make the base layer and store it tightly covered at room temperature for up to two days before adding the caramel topping. If you add the caramel and salt, they are best eaten within 24 hours for the chewiest texture, though they keep fine for three days.
Can I use pre-made caramel sauce in this Salted Caramel Apple Bars recipe?
Absolutely, you can use store-bought sauce! Sometimes we just need a shortcut, and that’s totally fine here. Just make sure you grab a decent quality sauce—the thicker the better. Thin, watery sauces tend to soak right into the base instead of sitting nicely on top for that signature drizzle effect. You want a sauce that holds its shape a little bit when you drizzle it for the best-looking caramel bars.
What is the best type of apple to use for these Salted Caramel Apple Bars?
I can’t stress this enough: use a firm, tart apple. Granny Smith is my absolute favorite choice for this apple dessert. Why? Because softer apples, like McIntosh, tend to break down too much while baking, which can make your base wet instead of chewy. The tartness of a Granny Smith also cuts through the richness of the butter and the sweetness of the caramel perfectly. It’s all about that balance!
Storing and Keeping Your Salted Caramel Apple Bars Fresh
We all hope these Salted Caramel Apple Bars last longer than an hour, but let’s face it, they usually don’t! But if you do manage to save some for later, proper storage is key to keeping that base chewy and the topping intact. Storing them correctly ensures that when you grab one tomorrow, it tastes almost as good as fresh out of the oven.
The biggest enemy here is air, which dries everything out. You want an airtight container, plain and simple. Because these bars have that lovely caramel topping, we actually keep them at room temperature, not in the fridge, unless your kitchen is super hot!
Here is the simple breakdown for keeping your leftovers perfect:
| Storage Aspect | Guidance | Duration |
|---|---|---|
| Container Type | Airtight container or a baking dish with a tight-fitting lid | — |
| Temperature | Room Temperature (Cool, dry spot) | Best eaten within 3 days |
| Reheating Tip | If you want a soft caramel center, microwave a single bar for about 10 seconds | Optional |
I never really recommend freezing bars once the caramel is on, because the texture can change when they thaw. If you absolutely must freeze them, bake and cool the base layer first, cut them into squares, and freeze them *before* you add the topping. Then, just thaw them and add the caramel later!
Sharing Your Delicious Salted Caramel Apple Bars
That’s it! You’ve done it! You’ve created these incredible, cozy, perfectly balanced Salted Caramel Apple Bars. I truly hope the smell of cinnamon and melting caramel fills your house the way it does mine every time I make them.
Now, here’s my favorite part of running this little blog: hearing from you! Did you try them? Did you use pecans or skip them? Did you manage to let them cool completely before diving in (I rarely do!)?
Please, take a picture of your beautiful, gooey squares and share them with me on social media, or just drop a comment down below telling me what you thought. Knowing that these homemade treats are making it onto your family tables is the best reward. Happy baking, everyone!
Print
Amazing 16 Salted Caramel Apple Bars
- Total Time: 45 minutes
- Yield: 16 bars 1x
- Diet: Vegetarian
Description
Enjoy these Salted Caramel Apple Bars, a perfect autumn treat with a chewy base and a sweet, salty caramel finish. This recipe delivers rich apple flavor baked into satisfying bars.
Ingredients
- 1 cup all-purpose flour
- 1/2 cup rolled oats
- 1/2 cup brown sugar
- 1/4 teaspoon salt
- 1/2 teaspoon cinnamon
- 1/2 cup unsalted butter (melted)
- 1/2 cup chopped apples
- 1 egg
- 1 teaspoon vanilla extract
- 1/4 cup caramel sauce
- 1/4 teaspoon sea salt
- 1/4 cup chopped pecans (optional)
Instructions
- Preheat your oven to 350°F (175°C). Line a 9×9 inch baking dish.
- In a bowl, mix the flour, oats, brown sugar, salt, and cinnamon.
- Add the melted butter, egg, and vanilla extract to the dry ingredients. Mix until just combined.
- Gently fold in the chopped apples.
- Spread the mixture evenly into the prepared baking dish.
- Bake for 25 to 30 minutes, or until the edges are golden brown.
- Allow the bars to cool completely.
- Drizzle the caramel sauce over the cooled bars.
- Sprinkle with sea salt and optional chopped pecans before cutting into squares.
Notes
- Use firm, tart apples for the best texture.
- Ensure the bars are fully cooled before adding the caramel topping for a cleaner drizzle.
- Store leftovers in an airtight container at room temperature.
- Prep Time: 15 minutes
- Cook Time: 30 minutes
- Category: Dessert
- Method: Baking
- Cuisine: American
Nutrition
- Serving Size: 1 bar
- Calories: Approx. 180
- Sugar: Approx. 15g
- Sodium: Approx. 120mg
- Fat: Approx. 10g
- Saturated Fat: Approx. 6g
- Unsaturated Fat: Approx. 4g
- Trans Fat: 0g
- Carbohydrates: Approx. 20g
- Fiber: Approx. 1g
- Protein: Approx. 2g
- Cholesterol: Approx. 25mg