Skip to content
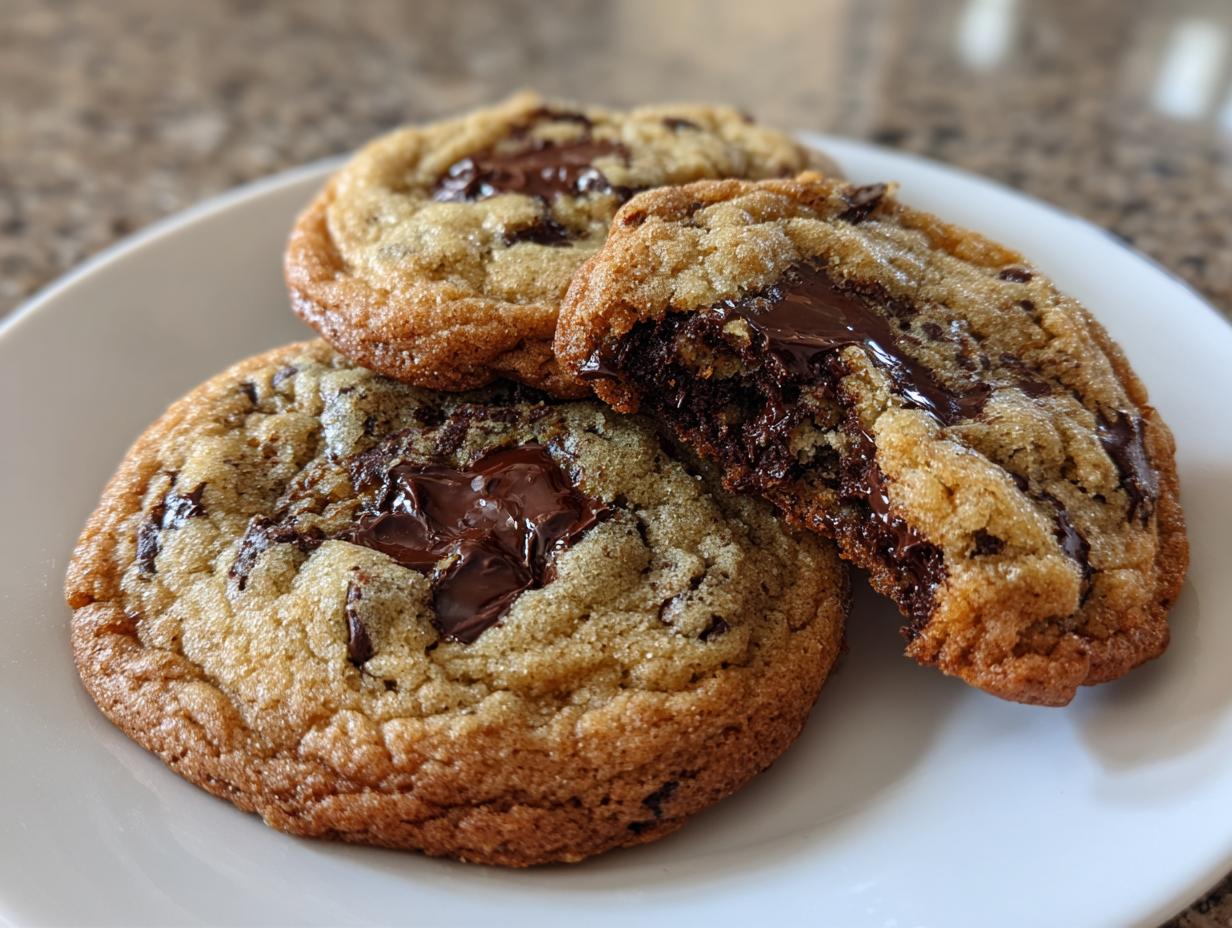
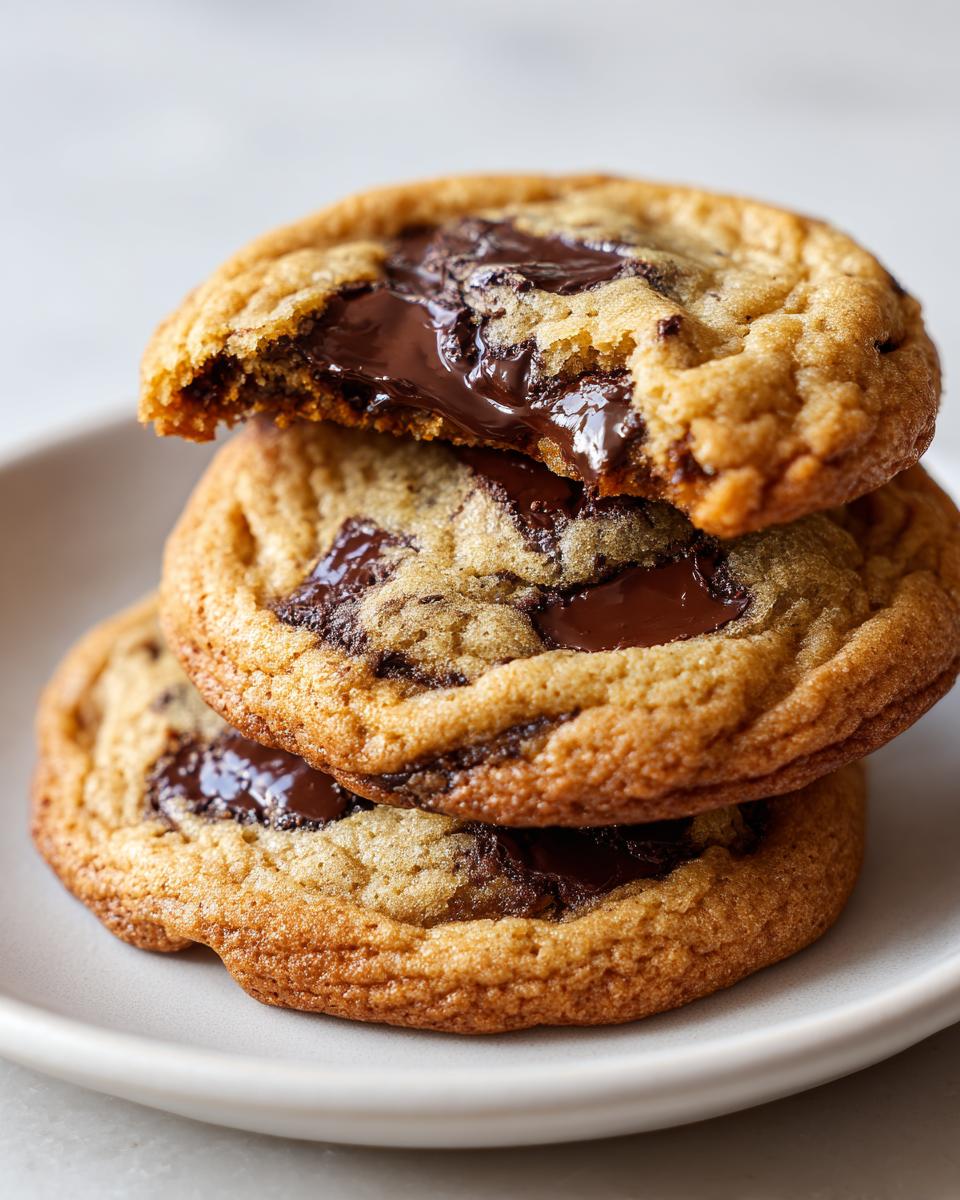
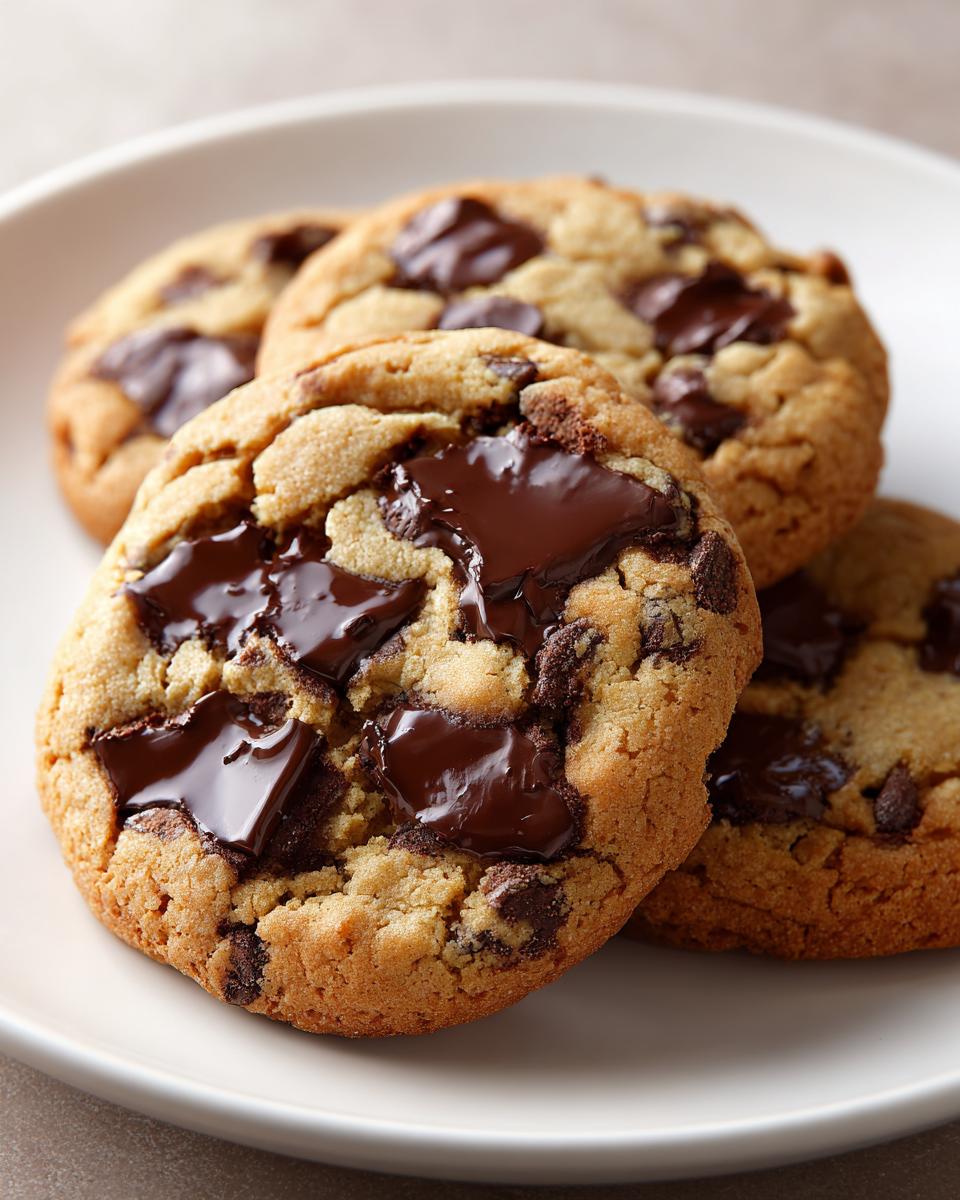
If you’ve been chasing that elusive cookie – the one with shatteringly crisp edges that melts into a soft, deeply flavorful center – then stop looking! I’m Anna Kowalska, and here I share tried-and-true homemade recipes that you and your family will absolutely love. Everything I bake is made with heart and flavor, and today, we are finally conquering The BEST Chocolate Chip Cookies. Forget flat, sad discs; these deliver perfection, every single time, thanks to a few little secrets I’ve learned over the years.
Why This Recipe Defines The BEST Chocolate Chip Cookies
What makes these cookies stand above the rest? It’s all in the details, honey. Most recipes rush the creaming process, but we take our time to whip that cold butter and sugar for a full four minutes. That aeration is key to getting the lift we need before the flour goes in! Also, notice the cornstarch in the dry mix? That’s my little trick. It’s what keeps the center incredibly tender and prevents them from spreading too thin, guaranteeing that signature chewy middle.
We also demand that cold butter be cubed before creaming. Using cold butter slows down the melting process slightly in the oven, giving the edges a chance to set up firmly while the center stays gooey. It’s a battle between texture, and these ratios are the perfect truce. Trust me, when you bite into this cookie, you’ll understand why I call them the absolute best.
Jump to:
Gathering What You Need for The BEST Chocolate Chip Cookies
Before we even think about turning on the oven, we need to make sure our station is set up. Getting all your ingredients measured out and prepared ahead of time makes the mixing process so much smoother. I always say, good baking starts with good mise en place! Let’s get everything ready for The BEST Chocolate Chip Cookies.
Essential Components for Perfect Cookie Dough
You’ll notice the butter needs to be cold and cubed, which is non-negotiable for this recipe’s structure. Also, measure your flour carefully! Too much flour and your cookies will be cakey, but we need just the right amount to balance the sugar.
- 1 cup Cold Butter (cut into cubes)
- 1 cup Brown Sugar
- 3/4 cup Sugar
- 2 large Eggs
- 2 teaspoons Vanilla
- 2 3/4 cups Flour (all-purpose or a mix of cake and all-purpose)
- 1 teaspoon Cornstarch
- 3/4 teaspoon Baking Soda
- 3/4 teaspoon Salt
- 2 to 2 1/2 cups Chocolate Chips (semi-sweet or mixed)
Necessary Tools for Making The BEST Chocolate Chip Cookies
You don’t need a million fancy gadgets, but a few things really help. You definitely need a sturdy stand mixer or a good hand mixer for creaming the butter properly. Grab your largest mixing bowl, too, because we create a lot of volume! Most importantly, grab parchment paper or a Silpat mat, and make sure your baking sheets are light-colored. Dark sheets bake the bottoms too fast, and we want even results for The BEST Chocolate Chip Cookies.
Step-by-Step Method to Achieve The BEST Chocolate Chip Cookies
Okay, here is where the magic happens! Don’t rush this process; the cookie gods reward patience here. First things first, get that oven preheated. I always tell people to set it to 400 degrees, but if you know your oven runs a little hot like mine does—always check—set it down to 385 degrees. That little adjustment makes a huge difference in preventing burnt bottoms!
Creaming Fats and Sugars for Texture
This is the most important step for texture, so put on some good music and commit! You need your cold butter cut into cubes, and into the bowl they go with both sugars. Now, you have to cream this mixture for a full four minutes. I mean it, set a timer! You are looking for the mixture to go from dense and grainy to light, pale yellow, and fluffy. This process whips air into the fat, which is what gives us that beautiful lift and prevents a rock-hard cookie. Don’t try to cheat this step; it’s the foundation for chewy cookies!
Incorporating Wet and Dry Ingredients
Once you have that fluffy base, it’s time for the wet additions. Add your two large eggs one at a time, mixing just until each one is incorporated, then add the vanilla. We’re just bringing those wet elements together now. Next, take your dry ingredients—the flour, cornstarch, baking soda, and salt—and give them a quick whisk in a separate bowl just to make sure everything is evenly distributed. Add this dry mix to the wet ingredients, and here is the second crucial rule: mix only until the flour streaks disappear. Overmixing develops gluten, and gluten means tough cookies, and we are aiming for soft and chewy!
The Chocolate Chip Fold and Dough Management
Now for the fun part! Fold in those beautiful chocolate chips—use two to two and a half cups, depending on how much chocolate you can handle in one bite. Once they are evenly distributed, you have a choice. If you can wait, wrap that dough tightly and stick it in the fridge for 24 hours. Chilling solidifies the fat, deepening the flavor and giving you those perfect, thick cookies. If you absolutely cannot wait, that’s okay! Scoop the dough right onto parchment-lined, light-colored sheets, but know they might spread just a tiny bit more.
Baking and Setting for The BEST Chocolate Chip Cookies
Bake those beauties for 8 to 11 minutes. You are looking for the edges to just turn a lovely light golden color. The centers should still look slightly underdone—that’s how you guarantee that soft center! When you pull them out, don’t touch them for at least five minutes. They need that time on the warm sheet to finish setting up properly. If you move them too soon, they will collapse. After five minutes, carefully transfer them to a cooling rack to finish cooling down. Honestly, they smell incredible at this stage!
Expert Tips for Guaranteeing The BEST Chocolate Chip Cookies
Even with the best recipe, sometimes the dough has other ideas! Don’t panic if things look a little off when you go to scoop. I’ve learned a few tricks over the years that make sure even a slightly wonky batch turns out delicious. These little pieces of advice are what separate a good cookie from one that makes people ask for the recipe!
Managing Dough Consistency and Temperature
If you decide to bake right away and your dough feels a little too crumbly to scoop, don’t add more liquid! Just use your hands to gently press the bits together into balls before placing them on the sheet. It works like a charm. Now, if you did chill the dough—and I hope you did—you can’t scoop it rock hard straight from the fridge. Let it sit on the counter for about 15 to 30 minutes. It needs to warm up just enough so it’s pliable, but not so much that the butter melts before it hits the oven.
Chocolate Selection Guidance
The chocolate is the star, right? While semi-sweet is the classic choice, feel free to mix it up! I personally love using a combination—maybe some Ghirardelli squares chopped up alongside some good quality semi-sweet chips. Guittard is fantastic if you can find it. If you’re feeling adventurous, using chopped chocolate bars instead of chips gives you those lovely pools of melted chocolate in the finished cookie. It’s all about what makes you happy! For more on the science behind chocolate quality, check out this resource on food science principles.
Storing and Reheating Your Homemade Cookies
These cookies are so good, you might actually have leftovers—though I wouldn’t count on it! The real trick is keeping that perfect texture intact. You want the edges crisp and the middle soft days later, and that requires the right storage environment. Don’t just leave them out on a plate uncovered, or you’ll wake up to hockey pucks!
Keeping The BEST Chocolate Chip Cookies Soft
Once the cookies are completely cool—and I mean totally cool, or they’ll steam up the container—store them in a truly airtight container. I usually layer them between sheets of parchment paper to keep them from sticking together. They should stay wonderfully soft for about four to five days at room temperature. If you want them to last longer, you can freeze them baked or unbaked! Baked cookies freeze beautifully for up to three months. If you freeze the dough balls, remember to let them temper slightly before baking, just like we discussed before. For tips on freezing dough, you might find this guide on freezing cookie dough helpful.
Questions Readers Ask About The BEST Chocolate Chip Cookies
I get so many messages about tweaks and substitutions once people start baking these homemade cookies! It’s wonderful that you’re experimenting, but remember, the specific ratios here are what lock in that perfect texture. Here are a few things that come up most often when folks try to make these chewy cookies their own.
Can I Substitute the Butter in The BEST Chocolate Chip Cookies?
This is a big one. Please, please stick to real butter! We need the fat content and the specific melting properties of butter to get those crisp edges and soft centers. Margarine or oil just won’t cream properly with the sugar, and you’ll end up with a flatter, greasier cookie that doesn’t have the right structure. If you must use a substitute for dietary reasons, I’d suggest a high-quality stick substitute, but I can’t guarantee the results will be as amazing as our original recipe.
How Long Can I Chill The BEST Chocolate Chip Cookies Dough?
If you chill the dough, you are aiming for flavor development, which happens best over 24 hours. That’s my sweet spot! You can safely chill this dough for up to 72 hours if you wrap it really well. After three days, the flavor starts to get a little stale, and the texture might change slightly. If you go past 72 hours, I recommend freezing it instead, which keeps it perfect for months! If you are looking for other great baking projects, check out my recipe for bakery-style chocolate chip cookies.
Estimated Nutritional Breakdown for The BEST Chocolate Chip Cookies
Now, I’m not a nutritionist, so please take these numbers with a grain of salt—or maybe a grain of sugar, ha! These estimates are based on using semi-sweet chips and yield estimates. For precise dietary tracking, you’d need to input your specific brand measurements, but this gives you a good general idea of what you’re enjoying!
| Nutrient | Estimate |
| Serving Size | 1 cookie |
| Calories | Estimate needed |
| Sugar | Estimate needed |
| Sodium | Estimate needed |
| Fat | Estimate needed |
| Saturated Fat | Estimate needed |
| Unsaturated Fat | Estimate needed |
| Trans Fat | Estimate needed |
| Carbohydrates | Estimate needed |
| Fiber | Estimate needed |
| Protein | Estimate needed |
| Cholesterol | Estimate needed |
Share Your Experience Baking The BEST Chocolate Chip Cookies
Now that you have the secrets to achieving those perfect crisp edges and chewy centers, I’m dying to know how they turned out! Did you chill the dough? Which chocolate did you use? Please leave a star rating right here on the recipe card and tell me all about your batch. Hearing from you really helps build this little cooking community we have!
Print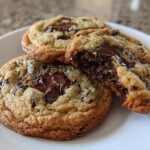
Amazing 4 Secrets for The BEST Chocolate Chip Cookies
- Total Time: 11 hours 15 minutes (includes 24-hour chill time)
- Yield: About 2 dozen cookies 1x
- Diet: Vegetarian
Description
The BEST Chocolate Chip Cookies deliver a perfect bite every time. Follow these simple steps for cookies with slightly crisp edges and a soft, chewy center.
Ingredients
- 1 cup Cold Butter (cut into cubes)
- 1 cup Brown Sugar
- 3/4 cup Sugar
- 2 large Eggs
- 2 teaspoons Vanilla
- 2 3/4 cups Flour (all-purpose or a mix of cake and all-purpose)
- 1 teaspoon Cornstarch
- 3/4 teaspoon Baking Soda
- 3/4 teaspoon Salt
- 2 to 2 1/2 cups Chocolate Chips (semi-sweet or mixed)
Instructions
- Preheat your oven to 400 degrees. If you suspect your oven runs hot, set it to 385 degrees.
- In a large mixing bowl, cream the butter, brown sugar, and sugar for 4 minutes until the mixture becomes light and fluffy.
- Add the eggs and vanilla. Mix for 1 minute more.
- Stir in the flour, cornstarch, baking soda, and salt. Mix only until these dry ingredients combine. Fold in the chocolate chips.
- If time allows, wrap the dough tightly and chill for 24 hours. If baking immediately, scoop dough onto baking sheets lined with parchment paper or a Silpat. Use light-colored baking sheets to prevent quick browning.
- Bake for 8-11 minutes until the edges turn a light golden color. Remove from the oven and let the cookies set for 5 minutes on the sheet before transferring them.
Notes
- If you chill the dough, wrap it tightly to prevent air exposure.
- Allow chilled dough to sit out for 15-30 minutes to reach room temperature before scooping.
- Press crumbly dough together by hand to form balls.
- Semi-sweet chocolate is popular, but milk chocolate works well. Personal favorites include Guittard, Ghirardelli, or chopped Trader Joe’s chocolate bars.
- Prep Time: 15 minutes
- Cook Time: 11 minutes
- Category: Dessert
- Method: Baking
- Cuisine: American
Nutrition
- Serving Size: 1 cookie
- Calories: Estimate needed
- Sugar: Estimate needed
- Sodium: Estimate needed
- Fat: Estimate needed
- Saturated Fat: Estimate needed
- Unsaturated Fat: Estimate needed
- Trans Fat: Estimate needed
- Carbohydrates: Estimate needed
- Fiber: Estimate needed
- Protein: Estimate needed
- Cholesterol: Estimate needed